^ Hero status! I didn't think we'd be able to do another list for those that missed this round.
Brilliant!
Brilliant!
Yes. There is always many in a list for whom the timing just didn't work out right or for personal reasons can't purchase at that time. Anyone who didn't purchase will keep their position for next time, with people who did purchase removed from the list.
Last edited:

Both models of Iron Pre are now sold out. I'm stopping the email sending process, and when the next batch is produced those who missed out will be first in line.
Awesome... thanks

Please, keep in mind those who wanted to buy the balanced version and could only buy the SE.Yes. There is always many in a list for whom the timing just didn't work out right or for personal reasons can't purchase at that time. Anyone who didn't purchase will keep their position for next time, with people who did purchase removed from the list.
I´m still very interested in the balanced version that I could not buy.
Thanks!
Please, keep in mind those who wanted to buy the balanced version and could only buy the SE.
I´m still very interested in the balanced version that I could not buy.
Thanks!
Same as you, I signed for balanced but can only buy SE.
I read that production was based on interest list so I bought all parts for Balanced before receiving the invitation letter....but probably many changed mind at time to order the kit
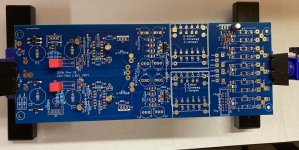
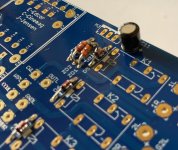
A little progress today. For all the old project scroungers, 500mW resistors and 1W Zeners are too big & you might get made fun of.
when ordering small MF resistors, always look at size, not power
0207 is magic number
zeners - 250mW or 500mW - pins will go through pads no matter; if fatter ones, just arrange their height
bummer is that some manufacturers are making skinnier 500mW (same a 250mW) while others are making fatter ones
anyhow, no biggie, as you did show on pics
Couldn't help but giggle at your tag line as I read this.A little progress today. For all the old project scroungers, 500mW resistors and 1W Zeners are too big & you might get made fun of.

worth mentioning again:
(ZM shouting) IGNORE snubber components R*, C*, C**; my mistake in arrangement, proper is double that ( one cell per secondary leg)
already taken care off for future batch pf pcbs
don't fret, in this case snubber is gilding the lily
(ZM shouting) IGNORE snubber components R*, C*, C**; my mistake in arrangement, proper is double that ( one cell per secondary leg)
already taken care off for future batch pf pcbs
don't fret, in this case snubber is gilding the lily
and yes
foretelling that we'll see more and more of those assembled in near future, if you're happy - consider sending Pa nice bottle of Red
other Greedy Boyz (involved in getting project to masses) will get breadcrumbs

(ZM Omnipsychic)
foretelling that we'll see more and more of those assembled in near future, if you're happy - consider sending Pa nice bottle of Red
other Greedy Boyz (involved in getting project to masses) will get breadcrumbs
(ZM Omnipsychic)
I'll modify the BoM in post #1 to reflect Do Not Stuff for those components.worth mentioning again:
(ZM shouting) IGNORE snubber components R*, C*, C**; my mistake in arrangement, proper is double that ( one cell per secondary leg)
already taken care off for future batch pf pcbs
don't fret, in this case snubber is gilding the lily
you can add Note regarding bottle of Red
Much confusion for meager mind, was going to ask. 😕 But Zen came to rescue.I'll modify the BoM in post #1 to reflect Do Not Stuff for those components.
ZM rant mode On:
boy, how I hate liking and appreciation fcbk drek
extremely distracting for Geezer as Moi, used to direct communication with ppl
:ZM rant mode Off
disclaimer - not expecting nor asking for change; it is what it is
boy, how I hate liking and appreciation fcbk drek
extremely distracting for Geezer as Moi, used to direct communication with ppl
:ZM rant mode Off
disclaimer - not expecting nor asking for change; it is what it is
To simplify, having used one, it will work, but you may hear mild snaps when changing selector positions.Use the make before break!You all know I have no shame when it comes to admitting when I truly haven't the foggiest of ideas around a topic, but I will try...
Someone asked me why the switch for input selection should be a make before break and wanted a bit of an explanation in terms. I have no idea at all if I got it right... maybe someone could check my work, please. I don't want anyone to go down the wrong path.
-------------------------
Make... and Break... what does each word mean?
Make => Make the new connection. Close the open circuit
Break => Break the old connection. Open the closed circuit
You can make before break. Make the new connection WHILE for a moment the old connection is not broken yet.
OR
You can break before make. You break open the old connection before creating the new one.
In this case, we want to avoid the situation that would be kind of like unplugging and plugging in a new input w/o turning off the power each time you change inputs. You can get nasty pops. We want the circuit to feel like it always has an input plugged in even when we switch to the new input. That is not technically perfect, but it is meant to provide the 'feel' for what we're trying to accomplish.
You would never unplug your input from input 1 and plug it back in to input 2 with your pre-amp on... this avoids doing that when we switch between inputs.
Here is a nice video I found that I think does a better job that I can of explaining the switch.
https://www.google.com/search?q=mak...&ie=UTF-8#kpvalbx=_S7hvZPaRPOyKptQP5piSkAk_36
Bubba
- Home
- Amplifiers
- Pass Labs
- Iron Pre Essentials Kits For The DIYA Store - Register Your Interest