..Actualy if I understood correctly Gianluca, the 1mm steel back pannel is more solid /stiffer than the 3mm aluminium version. Due perhaps to some kind of reinforcements in the angles..
@ ClaudeG and Diyers
SE Vfet kit back pannel is made with 3mm thick aluminium ?
Looks pretty nice BTW 🙂
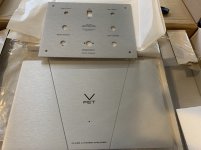
Test fit. I couldn’t resist. Bananas for scale / size reference. I can definitely see building this with the chassis apart then doing final assembly with all boards in place. It’s a tight fit for my clumsy hands. The all silver look is really nice - this is a sexy chassis! Well done!
Attachments

#26 arrived here this morning. Very nice looking!
Thanks again to all. This is the first lottery that I've won since the draft lottery in 1969.
Thanks again to all. This is the first lottery that I've won since the draft lottery in 1969.
Test fit. I couldn’t resist. Bananas for scale / size reference. I can definitely see building this with the chassis apart then doing final assembly with all boards in place. It’s a tight fit for my clumsy hands. The all silver look is really nice - this is a sexy chassis! Well done!
Can you share what is the internal dimensions of the chassis?
...This is the first lottery that I've won since the draft lottery in 1969.
I'm glad you lived to tell the tale!!!
I usually avoid LED's unless they are used for a V ref.
But, in this case (sorry, pun not intended) I can't help but feel that the V FET logo should be milled all the way through the face plate and illuminated red from the back via a diffuser; that would look really cool 😎
The standard panel LED would not be required unless used as a speaker protection indicator.
I'm glad you lived to tell the tale!!!
Almost didn't survive lottery night! I'm usually pretty good about drinking, but I believe I was over-served (by quite a bit) on that occasion. 😉
Biggest advantage of external SMPS “brick” is that it has been safety certified and approved by almost every possible organization. CE, UL, CSA, FCC, etc...
The amp itself is inherently safe from electrical-mains shock hazard. It allows a product development cycle to save a lot of $ in CE/UL certification fees.
.
I have a SMPS 24V for the ACA, not meanwell, and there is . . . static on the line (60 or even 110V), so there is some capacitor from the line to the chassis.
Like with bad mains transformers with static capacitance to the house.
Ughhh. I will have to open it to get a decoupling cap out. Now I cannot safely connect it to the system. Badly, in the shed I see no problem, just when I have the cable in my hand and the other on a chassis in the room

Once connected it is silent.
Almost didn't survive lottery night! I'm usually pretty good about drinking, but I believe I was over-served (by quite a bit) on that occasion. 😉
Haha! I almost didn't survive lottery night due to over indulging while celebrating having a number in the 300s. 😀
Very nice case!
You are making those who did not win in the lottery really jealous! 😀😀
I am looking forward to see more pics!
You are making those who did not win in the lottery really jealous! 😀😀
I am looking forward to see more pics!
I have a SMPS 24V for the ACA, not meanwell, and there is . . . static on the line (60 or even 110V), so there is some capacitor from the line to the chassis.
Like with bad mains transformers with static capacitance to the house.
Ughhh. I will have to open it to get a decoupling cap out. Now I cannot safely connect it to the system. Badly, in the shed I see no problem, just when I have the cable in my hand and the other on a chassis in the room
Once connected it is silent.
A 22nF film cap from analog ground to protective earth or chassis ground in parallel with a 10ohm resisor or large NTC is not a bad idea as part of a ground loop breaker.
I am not sure what you mean that the psu has the mains line connected to the chassis with a cap? More than noisy, sounds semi-lethal...
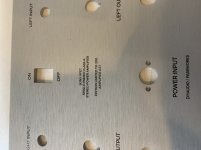
I find the aluminum back panels are much much easier to drill for any holes. And esp. If you are making a hole for an IEC power socket or XLRs
I find the aluminum back panels are much much easier to drill for any holes. And esp. If you are making a hole for an IEC power socket or XLRs
Spoken like a true practitioner sir!
Much easier to drill indeed! And I'll be converting mine to IEC socket with internal SMPS module, I think. Maybe even twin SMPS for a dual-mono power setup.
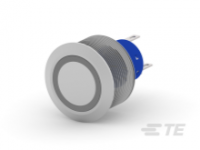
A front panel switch is a must-have for me... will have to come up with something that doesn't disrupt the beautiful front panel design. I'm thinking one of those round illuminated-ring Bulgin power buttons, placed right where the small original LED hole is. I've got one left over from another project.
A front panel switch is a must-have for me... will have to come up with something that doesn't disrupt the beautiful front panel design. I'm thinking one of those round illuminated-ring Bulgin power buttons, placed right where the small original LED hole is. I've got one left over from another project.
Attachments
Last edited:
Yeah, I will build the AMP "as sent", but the front panel switch is something important that I am missing from the design. I don't keep the AMP on all day. Putting a 'switch' to whatever is powering the external brick is not ideal.
Still, I don't think I have the strength to try and drill that really thick front panel.
Still, I don't think I have the strength to try and drill that really thick front panel.
- Home
- Amplifiers
- Pass Labs
- DIY Sony VFET pt 1