--Yes, I live in Foz do Iguaçu, near Puerto Iguazú and Ciudad del Este. Argentina is 5 minutes from my house, and Paraguay some 10 minutes...
--I configured the amp for 60W/ch, but this tube supports more power if needed in another conditions. Since I never saturate this amp even with Telarc classical recordings, I'm thinking to reduce/lower the +B or change the output trafo for one with higher impedance for more class A power (and less max power), since TQWT project have plenty sensitivity. Or... maybe not, since this amp is with a so good sound that makes me not want to touch it for now ..
I've been to Ciudad del Este years ago and visited Foz de Iguazu also .....
My wife wanted to go shopping and I wanted to shoot the falls, eventually did both half ....
I have to return.....
I think it's best to leave your amplifier as it is and go for 300 B, I think to do that when I finish my DTQWTII.
If you have not visited the Itaipu DAM, it is an interesting place to visit if you've have time on a journey; even working here for almost five years the size of this place still impresses me...
On amplifiers, among many small projects in parallel, I have a SE with 300B (driver tube is an rare hi-gm E810F choke-loaded), which I use during low volume. I like the SE sound for low SPL use, and the TQWT SPL with 6+6W is at high side in my opinion.
On amplifiers, among many small projects in parallel, I have a SE with 300B (driver tube is an rare hi-gm E810F choke-loaded), which I use during low volume. I like the SE sound for low SPL use, and the TQWT SPL with 6+6W is at high side in my opinion.
If you have not visited the Itaipu DAM, it is an interesting place to visit if you've have time on a journey; even working here for almost five years the size of this place still impresses me...
On amplifiers, among many small projects in parallel, I have a SE with 300B (driver tube is an rare hi-gm E810F choke-loaded), which I use during low volume. I like the SE sound for low SPL use, and the TQWT SPL with 6+6W is at high side in my opinion.
The Itaupú dam will be a must next time you go there. I saw a documentary film showing where the fish take the shortcut through the elevator ..... wow, that ecological technology, I like that.
This way is very hard to get components, I would make an amplifier with interstage transformer coupling.
I've seen some of what you want to do here:
Audio Asylum Thread Printer
Upload photos of another small step boxes, cutting easy, but playing the guide rail with the saw, so every step is a new challenge. But I think that is what gives it a special flavor, a good result without spending money on tools that I will not use.
Regards friend !
Rolando
Attachments
-
 encolado moldura superior 004.jpg236 KB · Views: 600
 -
 encolado moldura superior 006.jpg246.7 KB · Views: 577
 -
 encolado moldura superior 020.jpg288.3 KB · Views: 568
 -
 encolado moldura superior 032.jpg334.1 KB · Views: 562
 -
 encolado moldura superior 041.jpg329 KB · Views: 553
 -
 encolado moldura superior 047.jpg260.7 KB · Views: 139
 -
 encolado moldura superior 049.jpg329.3 KB · Views: 148
Thanks for your suggestions.
I suspect you suggest a planer so as to trim cut pieces a a hair to fit perfectly?
Since I have a small table saw. cutting big pieces on it will prove difficult. As an alternative I am thinking of cutting them with a circular saw with a guide clamped to the wood. However from past experience cuts are sometimes not exactly 90 degree edges. Any suggestions.
I echo your thoughts about auto paintwork having restored and painted two cars myself.
Nash
I worked construction years ago and I know a few tricks. If you have a table saw but you need to cut a large piece first, that's easy, use the circular saw to cut the pieces into smaller more manageable parts. Rip a 4x8 sheet in half and then cut the smaller pieces. Cut the boards larger and use the table saw fence to trim the pieces to get them nice and straight.
The planer is good for exactly what you said. No matter how close my cuts are, they still seem to fit together needing finishing. I have a number of sanders that I use, but a planer with a sharp blade is ideal. (If you could cut everything with a CNC machine you wouldn't need to finish them.)
So, again if you use the circular saw, just cut the pieces larger and use the table saw to get them straight. (90 degrees).
You have created a thread of your building here? It would be good to see him!
😉
I haven't but here's the link to the page Troel's put up of my build.
Nomex-164-Dana
I worked construction years ago and I know a few tricks. If you have a table saw but you need to cut a large piece first, that's easy, use the circular saw to cut the pieces into smaller more manageable parts. Rip a 4x8 sheet in half and then cut the smaller pieces. Cut the boards larger and use the table saw fence to trim the pieces to get them nice and straight.
The planer is good for exactly what you said. No matter how close my cuts are, they still seem to fit together needing finishing. I have a number of sanders that I use, but a planer with a sharp blade is ideal. (If you could cut everything with a CNC machine you wouldn't need to finish them.)
So, again if you use the circular saw, just cut the pieces larger and use the table saw to get them straight. (90 degrees).
These are good tips that would come in useful for anyone. Thanks.
Nash
These are good tips that would come in useful for anyone. Thanks.
Nash
Thanks for the nice words...One thing that I do also, instead of using wood filler I use "Glaze" for filler screw holes and such. Here's a cheap brand that would work really well. 3M Bondo Professional Finishing Glaze
This is a 2 component product that dries fast and is easy to sand.
Attachments

Hi
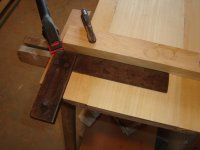
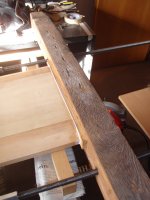
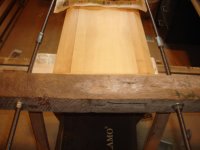
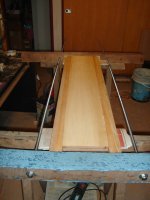
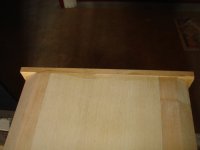
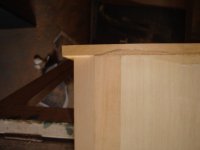
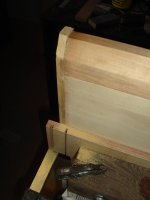
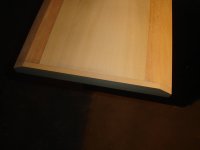
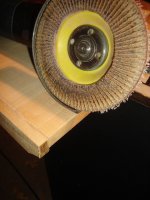
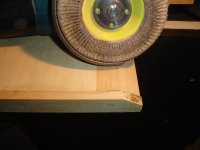
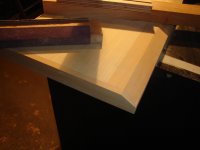
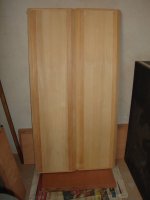
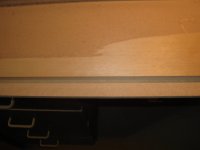
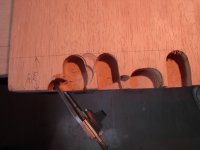
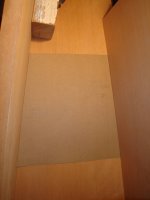
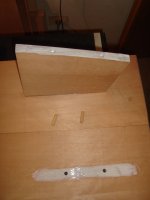
I cut the top trim.
The next step will give the final finish, hand brush wood and lots of sand.
It is much easier to use putty as did Clausen, but I prefer a natural wood finish, and bafle paint black. I really want to be as close as possible to TQWTII who built Troels, only I will add removable protection grids.
Attachments

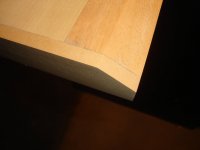
" ..........The next step will give the final finish, hand brush wood and lots of sand.............."
Attachments
Hi
I cut the top trim.
The next step will give the final finish, hand brush wood and lots of sand.
It is much easier to use putty as did Clausen, but I prefer a natural wood finish, and bafle paint black. I really want to be as close as possible to TQWTII who built Troels, only I will add removable protection grids.
Yeah, you can only do what I did if you are painting them or putting a veneer over the fill work. 😉
Nice so far!
Yeah, you can only do what I did if you are painting them or putting a veneer over the fill work. 😉
Nice so far!
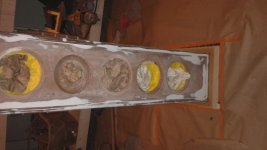
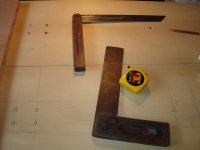
You have also done a good job. Congratulations! Everyone has their skills, I worked hard wood when he was young (I have 65 years of age), and the office is not lost. Some vintage tools you can see I have since that time ...😉
Regards friend !
Attachments
-
 Encolado rear panel 004.jpg220.4 KB · Views: 631
 -
 Encolando listones con tarugos guía 042.jpg384.3 KB · Views: 608
 -
 Falsa escuadra 001.jpg288.3 KB · Views: 600
 -
 Moldura superior, lijado 010.jpg230.1 KB · Views: 573
 -
 Moldura superior, lijado 012.jpg371.2 KB · Views: 561
 -
 Moldura superior, lijado 021.jpg288.5 KB · Views: 198
 -
 Moldura superior, lijado 028.jpg203.9 KB · Views: 168


hey those vintage tools are awesome....a lot of tools they make now are semi-disposable...they won't be around, or if they are of any use, in 5 years!
hey those vintage tools are awesome....a lot of tools they make now are semi-disposable...they won't be around, or if they are of any use, in 5 years!
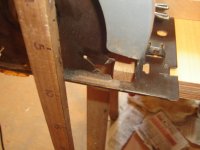
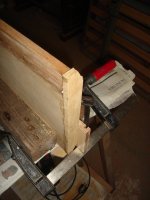
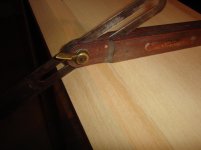
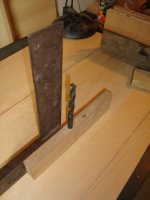
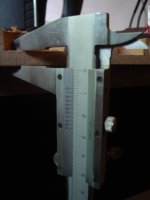
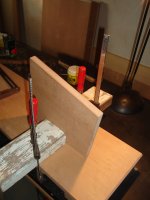
You're right, in my case, I bought this and to no avail, not even new...😡
I bought this crap. When I wanted to use, was not 90 degrees, besides being built with plastic and aluminum of the worst quality ...
No doubt that in China things are done better, but does the business who buys goods garbage - very low price - and then sell it as dearly as possible ....

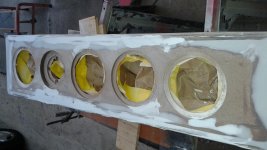
I've finally finished front panels ... 🙂
Attachments

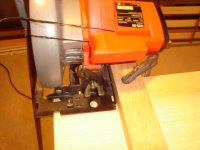
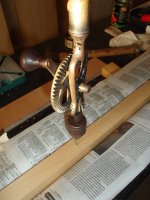
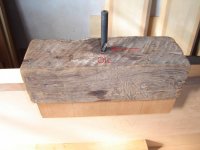
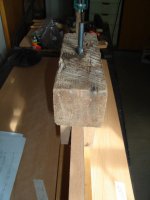
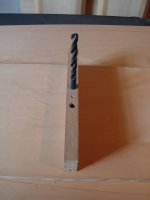
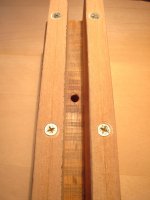
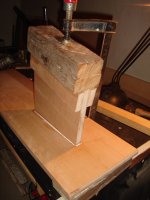
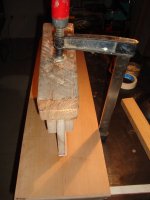
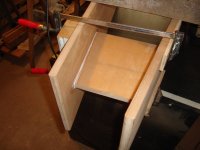
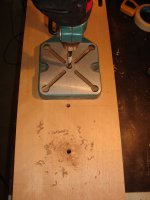
I built an accessory for placing wooden dowels ninety degrees.
I applied some heavy oil to drill wood not wear. (The used in the engine of the car is good)
The dowels to adjust all before gluing, preventing slippage parts due to the viscosity of the synthetic glue.
It also gives you extra strength to the union. 🙂
Greetings to the community DIY 😉
I applied some heavy oil to drill wood not wear. (The used in the engine of the car is good)
The dowels to adjust all before gluing, preventing slippage parts due to the viscosity of the synthetic glue.
It also gives you extra strength to the union. 🙂
Greetings to the community DIY 😉
Attachments
-
 Accdesorio 90 grados para tarugos 039.jpg258 KB · Views: 115
 -
 Accdesorio 90 grados para tarugos 043.jpg306.1 KB · Views: 114
 -
 Accdesorio 90 grados para tarugos 049.jpg260.6 KB · Views: 120
 -
 Accdesorio 90 grados para tarugos 029.jpg241 KB · Views: 117
 -
 Accdesorio 90 grados para tarugos 024.jpg179 KB · Views: 127
 -
 Accdesorio 90 grados para tarugos 004.jpg270.1 KB · Views: 124
 -
 Accdesorio 90 grados para tarugos 034.jpg279.7 KB · Views: 180
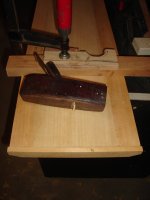
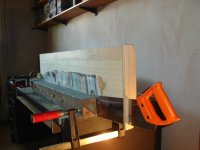
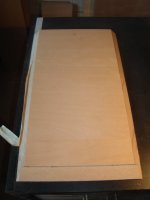
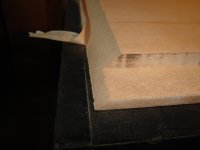
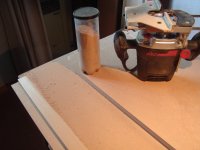
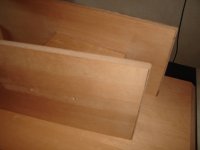
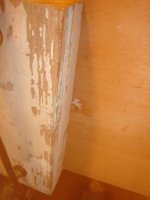
Reworked the side and top panels on their backs to stuff the rear panel of 30 mm.🙂
Tips:
The sawdust is very suitable for mixing with synthetic glue and repair imperfections, the same tone of the wood is achieved.
Try ever before in one piece to rule until the desired correct dimensions.😉
Tips:
The sawdust is very suitable for mixing with synthetic glue and repair imperfections, the same tone of the wood is achieved.
Try ever before in one piece to rule until the desired correct dimensions.😉
Attachments
-
 Rebaje para el panel posterior 009.jpg163.6 KB · Views: 119
 -
 Rebaje para el panel posterior 002.jpg233 KB · Views: 132
 -
 Rebaje para el panel posterior 039.jpg375.9 KB · Views: 125
 -
 Rebaje para el panel posterior 037.jpg203.4 KB · Views: 131
 -
 Rebaje para el panel posterior 031.jpg287.3 KB · Views: 140
 -
 Rebaje para el panel posterior 029.jpg164.4 KB · Views: 108
 -
 Rebaje para el panel posterior 020.jpg210.5 KB · Views: 112
 -
 Rebaje para el panel posterior 003.jpg282.3 KB · Views: 119
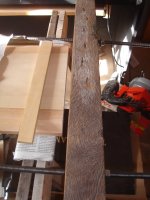
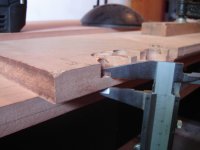
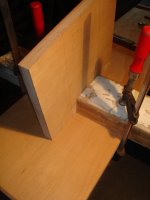
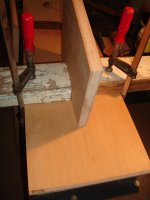
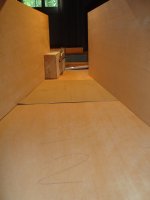
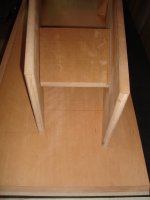
Start now with the placement of internal baffles which form the main speaker. Troels says that "a difference of 1-2 mm will not affect the final result" ..
Well, then you should try to work with an accuracy of 0 mm, and in practice this is impossible with methods of manual work, we will be "saved"
In the following photos, I used dowels for gluing of this piece, which is what gives the exact angle of the horn can not see. (it has passed me by).
I promise to upload somewhere next installment, when making the second cabinet ...
Comments and criticisms are welcome ! 😉
Attachments
-
 Encolado deflectores con tarugos 020.jpg317.5 KB · Views: 112
 -
 Encolado deflectores con tarugos 013.jpg300.7 KB · Views: 105
 -
 Encolado deflectores con tarugos 012.jpg271.7 KB · Views: 85
 -
 Encolado deflectores con tarugos 010.jpg229.8 KB · Views: 87
 -
 Encolado deflectores con tarugos 009.jpg299 KB · Views: 95
 -
 Encolado deflectores con tarugos 008.jpg276.1 KB · Views: 102
 -
 Encolado deflectores con tarugos 007.jpg316.4 KB · Views: 98
 -
 Encolado deflectores con tarugos 006.jpg177.7 KB · Views: 91
 -
 Encolado deflectores con tarugos 003.jpg207.6 KB · Views: 111
I built an accessory for placing wooden dowels ninety degrees.
I applied some heavy oil to drill wood not wear. (The used in the engine of the car is good)
The dowels to adjust all before gluing, preventing slippage parts due to the viscosity of the synthetic glue.
It also gives you extra strength to the union. 🙂
Greetings to the community DIY 😉
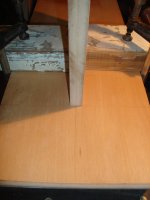
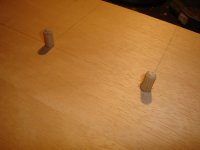
I like your dowel jig and I can understand how you make the dowel holes along the edge of the board. But how do you make the corresponding hole on the front face of the other board so that it lines up perfectly?
Keep up the good work!
Nash
I like your dowel jig and I can understand how you make the dowel holes along the edge of the board. But how do you make the corresponding hole on the front face of the other board so that it lines up perfectly?
Nash
Hi Nash ! 🙂
That is a very good question !
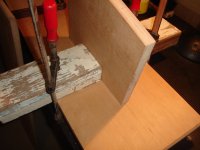
In these pictures you can see that it is easier if the dowel can pass through the two plates to be joined.
But ... and if we do not pre-plating finish spoiling the plate?
The option we have is to work previously marked with very fine pencil strokes, and with greater accuracy to give us our sight ...
We should note that the plates can be curved, why not use them to mark vertically, but always horizontal, that side is always right by cutting industrial saw.
If the holes "female" are in their right place, the "macho" look dowel place and straighten the panel even if it was curved.
We distribute anchors at reasonable distances according to the total length, not exaggerate the amount.
For example, if we have one meter long, 4 dowells are sufficient. If the panel is flat, with three it can also be more than enough.
In the next work I'll upload multiple photos to see them properly.
Sorry I can not be clearer, my English is basic and helped by the translator. 😀
Attachments
-
 Encolado deflectores con tarugos 052.jpg269.2 KB · Views: 96
 -
 Encolado deflectores con tarugos 046.jpg297.8 KB · Views: 108
 -
 Encolado deflectores con tarugos 045.jpg312.8 KB · Views: 99
 -
 Encolado deflectores con tarugos 041.jpg204.3 KB · Views: 90
 -
 Encolado deflectores con tarugos 019.jpg165.9 KB · Views: 101
 -
 Encolado deflectores con tarugos 017.jpg233 KB · Views: 102
 -
 Encolado deflectores con tarugos 012.jpg298.3 KB · Views: 105
 -
 Encolado deflectores con tarugos 001.jpg309.1 KB · Views: 110
 -
 Encolado deflectores con tarugos 056.jpg267.8 KB · Views: 97
- Home
- Loudspeakers
- Multi-Way
- DTQWTII from Argentina