Andrej,
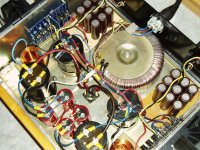
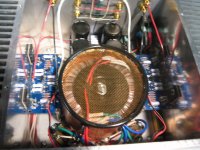
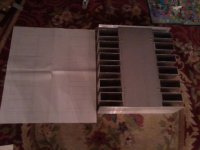
How did you arrange the transistors and how many watts per device are the heatsinks dissipating?
Chris
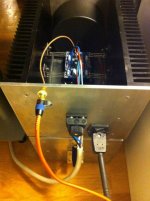
U=56v, I=2a, P=112w. T= 60gr.C
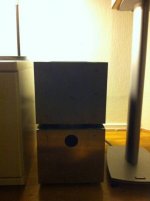
This week i finally finished my First Watt Chassis, currently equipped with a Aleph-J. Sound is great. Playing direct from a Logitech Duet.
The boards for the F5 and F4 are almost finnished and will be completed very soon offcourse! haha.
Stay tuned for Battery supplied FirstWatt. Lithium powerrrrrr
big brother under the FW is a Aleph 5
The boards for the F5 and F4 are almost finnished and will be completed very soon offcourse! haha.
Stay tuned for Battery supplied FirstWatt. Lithium powerrrrrr
big brother under the FW is a Aleph 5
Attachments
Last edited:

Pass F5, nicknamed "Baby Bad-***", width is 15" total, depth interior 10", height 6" (without feet and faceplate).
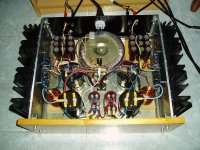
Very nice build. What type od bridge rectifiers are those ?
My new BA-3, set up as a preamp gain stage
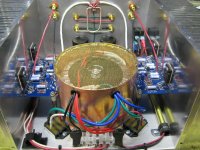
Gain stage and power supply. There's absolutely no hum or noise.
Styling is derivative of my F4: actually this is just a really quick way to build enclosures (and pretty cheap). Aluminium angle from Ace Hardware, plywood and redwood cheeks from Home Despot.
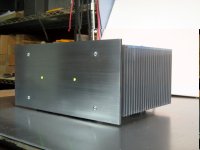
The LEDs are a bit bright, but at least that's easy to fix. They stay on for a minute or so after I unplug.
Sneaking up on the gain stage. It connects to a passive front end that does switching and gain control: I may integrate them one day...
Power supply uses a transformer rated at 50VA. Capacitors are 35V which is sailing a bit close to the wind (voltage under load is about 32V).
...Partially built, at Burning Amp.
Loving the music!
An externally hosted image should be here but it was not working when we last tested it.
Gain stage and power supply. There's absolutely no hum or noise.
An externally hosted image should be here but it was not working when we last tested it.
Styling is derivative of my F4: actually this is just a really quick way to build enclosures (and pretty cheap). Aluminium angle from Ace Hardware, plywood and redwood cheeks from Home Despot.
An externally hosted image should be here but it was not working when we last tested it.
The LEDs are a bit bright, but at least that's easy to fix. They stay on for a minute or so after I unplug.
An externally hosted image should be here but it was not working when we last tested it.
Sneaking up on the gain stage. It connects to a passive front end that does switching and gain control: I may integrate them one day...
An externally hosted image should be here but it was not working when we last tested it.
Power supply uses a transformer rated at 50VA. Capacitors are 35V which is sailing a bit close to the wind (voltage under load is about 32V).
An externally hosted image should be here but it was not working when we last tested it.
...Partially built, at Burning Amp.
Loving the music!
Tim -
At burning amp you mentioned that the plan was to have a modular Burning Amp, where you could swap out front-ends and output stages. Is that still the plan, and have you made any other progress towards that goal? I think it's a wonderful idea.
At burning amp you mentioned that the plan was to have a modular Burning Amp, where you could swap out front-ends and output stages. Is that still the plan, and have you made any other progress towards that goal? I think it's a wonderful idea.
Tim -
At burning amp you mentioned that the plan was to have a modular Burning Amp, where you could swap out front-ends and output stages. Is that still the plan, and have you made any other progress towards that goal? I think it's a wonderful idea.
Two different aspects to that:
Firstly, I think the Burning Amps are intended to be "composed" into different configurations: that's why there are two front ends (balanced and unbalanced), bias boards, and two back ends (BA-1 and BA-2). So the intent is that anyone can pick the configuration that makes the most sense to them, and build it. Because the board mounting points are standardized, it should be easy to re-use chassis and heatsink.
Secondly, my goal is to gradually enhance my system, preferably without throwing things away. So I have a single stereo F4, fed by BA-3, fed by a passive control unit (First Sound). Ultimately, I'm thinking of building another F4 so I can bi-amp, and replacing the First Sound with an Arduino-based volume and relay-based selector module. My long-term goal is a completely home-built, state-of-the-wallet hifi system. I already have speakers, some cables, pre and power amp. I'm keen to build a computer-based playback device, and if I can get time enough, to learn machining and make a turntable and arm.
These are of course long-term plans. I also have to get two kids through college and avoid foreclosure 😱.
To that end, I should really be selling the gear I'm replacing: a Music Reference RM-9 and an Audio Research LS-3.
tim
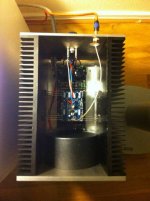
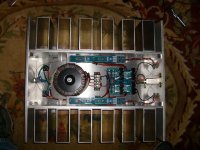
F5 in BA style chassis
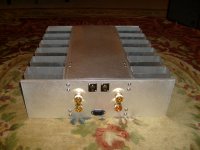
Just started playing music today! This is my first amp for driving speakers, (all headphone amps prior to this) and it was a holy cow! 😱 moment when I first heard it.... Thanks Nelson!!! Also,,, many thanks to the community for all their contributions, you all have been a great help....
Sean
Just started playing music today! This is my first amp for driving speakers, (all headphone amps prior to this) and it was a holy cow! 😱 moment when I first heard it.... Thanks Nelson!!! Also,,, many thanks to the community for all their contributions, you all have been a great help....
Sean
Attachments
Just started playing music today! This is my first amp for driving speakers, (all headphone amps prior to this) and it was a holy cow! 😱 moment when I first heard it.... Thanks Nelson!!! Also,,, many thanks to the community for all their contributions, you all have been a great help....
Sean
Really well done.
Can you elaborate on the case construction? Supplier, tools you used vs what you had done by a shop, and cost?
Really well done.
Can you elaborate on the case construction? Supplier, tools you used vs what you had done by a shop, and cost?
Thanks NYCOne...
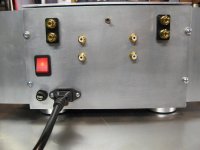
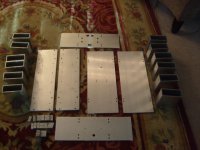
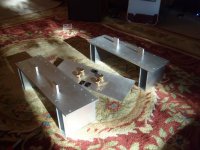
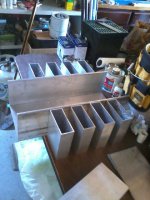
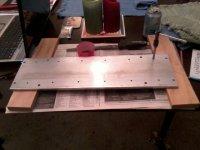
The sides, face plate and rear plt,, are 3/8 x6 flat bar, top and bottom covers 1/4 x8 flat bar,, rec tubes are 2x5x.125 thk. corner blocks (hold it all together) .625 square bar.. All 60-- series extruded alum... the 8 wide flatbar came from metal by the inch.com,,, all the rest came from online metals.. cost about 225.00 (just the metal) Screws, taps drill bits and other little bits came from the local hardware store...
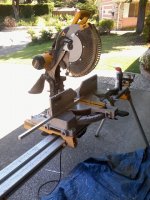
All cuts were made using a dewalt chopsaw, using a fine finish blade (lotso teeth) light pressure and copious amounts of WD-40. the saw does a pretty good job but the cut edges need filing to look good.. I got pretty good at filing🙂
All the holes were done on a small drill press and tapped by hand.. I also got good at tapping

I did all the work myself😀
hope that helps
sean
Attachments
Just started playing music today! This is my first amp for driving speakers, (all headphone amps prior to this) and it was a holy cow! 😱 moment when I first heard it.... Thanks Nelson!!! Also,,, many thanks to the community for all their contributions, you all have been a great help....
Sean
Sean, very gooood work! I like it very much.
Best Regards,
Andrzej Sochon
about 225.00 (just the metal)
Wowza, big spender.
Nice & clean job, matey. (love the pcb holders)
Nice work, Dionsio! Can you comment on the heat dissipation? If your design handles the standard heat dissipation, future builders could save the cost of extruded heatsinks.
FWIW, I use one of these Amana non-ferrous blades for aluminum. The triple chip and negative hook angle leave a mirror fine edge.
FWIW, I use one of these Amana non-ferrous blades for aluminum. The triple chip and negative hook angle leave a mirror fine edge.
- Home
- Amplifiers
- Pass Labs
- Pictures of your diy Pass amplifier