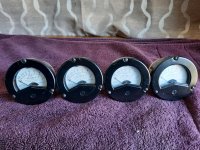
I have been restoring vintage amplifiers from consoles and 8-track players, and turning them into stand-alone components. These old chassis don't have headphone outputs. I have no intention of modifying them to install this output, but I do want the ability to listen to them post-restoration and evaluate more accurately the sound quality with headphones. I can hear more detail that way, and in general the differences in sound quality between amplifiers can be subtle.
I ran across a great design from Rod Elliott's ESP website,
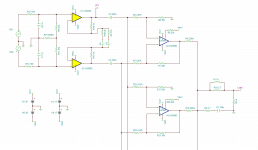
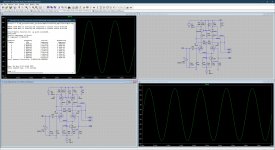
project 100, "Headphone Adapters for Power Amplifiers" that provides a simple design that safely reduces the output power to a safe level. The schematic below (for version 1) is accompanied by a table of optimal values of R1 and R3 for the nominal output power rating of the amplifier, to provide a headphone output limited to 5Vrms and a 120Ω output impedance. He also offers a version 2 with a ~2Ω output impedance, but it requires much higher wattage (10-40W) resistors which are more expensive and require more cooling consideration. (If you want to debate about whether 120Ω output impedance should be used with modern headphones, I'll put my opinion on this at the bottom to minimize distraction here)
The adapter circuit provides a light loading to the amplifier of several hundred ohms, which most if not all amplifiers will tolerate well (yes, even most reasonably tuned tube amps). The voltage divider reduces the output amplitude, and R3 tunes the output impedance. Note that this adapter can only be used with ground referenced outputs (most are), and absolutely not with BTL (Bridge Tied Load) amplifiers as the negative side of Left and Right are shorted together at the headphone socket. Actual output volume of the headphones driven by this circuit depends upon their impedance. My favorite phones are 32Ω and 50Ω and this circuit provides adequate volume for these, which are considered harder to drive adequately.
I eliminated the DPDT switch, as my assembly was to be used as a temporary test adapter, connected instead of the speakers. The accompanying table on Rod's page provides values for 10W to 250W power amplifiers, with the recommendation to use the values for a higher wattage amp if you want less output to your phones and vice versa. He gives power ratings for R1, but not R2=120Ω. I would recommend a 1W at least for that. R3 can be rather small, I used 1/2W for that.
Most of the amplifiers I rebuild are 25W per channel or less, but I used the value for 40W (R1=330Ω, R3=33Ω) as I really don't need much power.
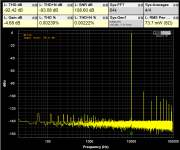
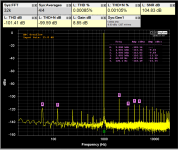
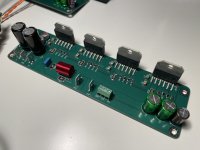
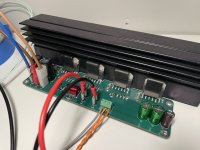
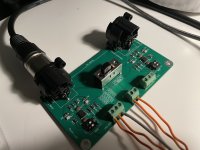
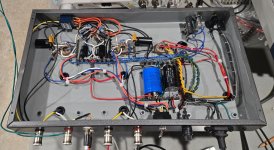
I tacked together a temporary test version to make sure I was happy with the output level across several amplifiers. For high wattage amplifiers, you simply use it with the volume at lower levels. Given I selected values for a 40W output, I found that with a 12W and even a flea power 4W amp I was still able to achieve robust volume out of my 32Ω phones, but had to turn the volume nearly all the way up. Given that I was tempted to drop down to the 20W values, but I may want to use this with 50W and 100W amps and still have some volume control, so I think this is a good tradeoff.
OK - My take on the hotly debated 120Ω source impedance for headphones question. Most consumer amplifiers typically have just a series resistor between the output and the headphone jack. I have seen anywhere from 100Ω to 500Ω, typically higher resistances for higher output wattage. This was a cheap and dirty way to limit the available power so you were less likely blow up your phones, heard less noise, and could listen at some reasonable low output for a low volume setting. Since headphone impedances are all over the place, standardizing on 120Ω was the best one-size-fits-all compromise. I think this is where the 120Ω standard came from (to ensure basic compatibility) more than some exacting audiophile concern about driver damping factor. Obviously voltage amplitude is lost across the 120Ω, so to use it you have to drive a higher voltage amplitude out of the headphone amp. This is very difficult for todays portable low voltage battery powered headphone outputs, most of which are very low power output op-amp drivers. There is not enough output power to worry about limiting damage, so modern equipment skips the 120Ω output impedance and typically has very low (single digit Ω) output impedance. However, whether headphone manufacturers have actually changed their designs to work "optimally" with this is questionable. Unless they are high end headphones that explicitly state the optimal impedance, it probably was not even a consideration.
Obviously, you will have a lower damping factor for 120Ω, resulting in a fatter, less controlled or warmer/softer bass. For ~0Ω output with a higher damping factor, you should have tighter, more controlled, accurate bass. This is obviously more important for speakers, which have much higher moving mass and momentum than a headphone diaphram. Whether the different damping factor will be audible, and which sounds better to you with your particular headphones, however, will require experimentation. Personally, I have found very little difference at least to my ears between the two impedances.