High Output Subs that play 20Hz to ≥200Hz

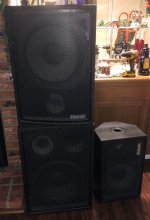
Hi yall, I'm hoping to create a space to talk about subwoofers that reach higher than typically expected, all the while covering down 20hz/30hz without sacrificing the accuracy of its upper passband. Sealed enclosures with multiple large woofers, and high xmax are a good choice. Having pairs of these types of subs only makes things better and being that we are traveling into the realm of localization by playing so high, these types of subs are to be apart of the mains, either by proximity or appendage.

Sealed enclosures as described above make short work of the task... I'd consider something like a large sealed cab, dual 18" with >14mm xmax the status quo. Where it gets interesting is transmission line and bass reflex. Vented Designs need to be a lot more particular. Damping is needed but maybe not in every design. A front loaded horn like the known HT tuba which is an bandpass design where the front horn is entered in offset, may do well thanks to the near 0 CSA at the beginning of the line. Of course it comes with its own sets of pros and cons, the line length creates delay, for example.

I will post some designs that fit the category, and I hope that you guys have some designs that you like as well. There are details that help optimize these types of subs, lets chop it up at our leisure
1713077866685.png

Bracing VS Damping

Throughout my career I have amassed a significant amount of knowledge on the subject of Statics. How this strength relates to frequency, however, I lack knowledge. I can run all the tensile sims in the world (and I do this weekly) but I don't have software to simulate resonances. I know it exists, but my question at the center of this thread is not about that software.

My questions is thus:

What is the difference between bracing and damping?

I see these terms intermingled when it comes to entering the dark realm of enclosure bracing. I see it said so many time that you can "brace a cabinet" or you can "brace it in order to dampen" it. These two things seem at odds with one another. At least to a standard manufacturing engineer such as myself. I understand both concepts, I just haven't even had a project where dampening of a structure was required to prevent cracking.

In this instance, we wouldn't be preventing cracking. We would be preventing a resonance. At least, that is my current understanding.

This leads to the second question:

What makes a brace act as a dampener as well as a brace?

My current understanding leads me to believe that a brace which could take a load but also flex would be best. Consider a solid board with a force axial to its length. A force entering into this board would simply transfer all of the load to its end.
Now lets consider a board with a bunch of holes in it. If we transfer a force into this board, yes, the force will go out the other end, however, some of it will be lost in flexion of the areas around the holes.

Is this correct or am I off by a lot here?

If we take multiple boards and cut various holes in them, stagger them, and intertwine them then we should be able to dampen and brace the cabinet all at once. Different size holes, different sizes of spaces between the boards, etc. This should spread out the loads, pressures, flexion caused by the forces from the drivers themselves.

While we are at it. Choose A or B here. I think B is probably better. A splits the enclosure in to 4 large pairs of sides where B splits it into many more differencing sizes. Choice B also makes it easier to make dimensionally on the table saw since the braces, top, and bottom are all the same width.

Option A
1748823917707.png


Option B
1748823953361.png
  • Like
Reactions: Bigun and MalVeauX

hello!

well, I somehow misplaced my old diyaudio account so I had to create this new one.

I had a few audio projects in the past, like a digital mixer in a quad amp: https://photos.app.goo.gl/L8txqSKrcZFV2BbR8 and the power source redesign in a stereo tube amp: https://photos.app.goo.gl/SxAB8hwyef6rpiTH7
and now I came back to the forum since I'd like to mod my guitar amp by changing it's power stage.

Noise on switchable series/parallel effects loop

I've been going down the rabbit hole to make a small board that enables using a guitar effect pedal either in series or parallel. I put together a prototype on a solderless breadboard, but the damn thing was so flimsy I got bad connections at every step.

Screenshot 2025-06-08 at 15.40.58.png


Now, I've made a PCB prototype of the schematic above which largely works, but with a few issues:

1. when applying power, the "series" setting (which is just a bypass of the board) becomes significantly noisy compared to its unpowered state.
2. the "parallel" setting seems to have less overall volume and subjectively seems to lose some bass (though it's a bit difficult to gauge with certainty, volume drop affecting perception a bit)

For the first problem, I'm thinking that the issues lies in my switching scheme which leaves U1A's non-inverting input connected to Vref and its output still connected to the pedal input. I should probably use a 4PDT switch and not only route the input signal to the pedal input or through U1A, but also route the pedal input from the switch itself or U1A output. I'm thinking this kind of arrangement would completely take the opamp out of the equation when going using a series setup.

For the volume drop, I don't have any solid working theories. Maybe the RV1 + R15/R16/R17 arrangement is wrong. I took my inspiration from Rod Elliott's active mixing circuit (see Fig 4), but maybe I got it wrong.

Any thoughts on both issues would be much appreciated.

CAT5/6 as a budget high performance speaker cable option

I've been looking at various DIY speaker cable options for frequencies above 100 hz. Generally, I don't place alot of weight on the influence of speaker wire out of obvious reasons and always felt that anything more exotic than basic 14 - 16 awg stranded copper wire was wasted money for less than 150 W of total power through 10 ft or so.

A few months ago, I started dabbling with CAT5E network wire using several variations of interleaving the separate strands. I've actually noticed some subtle differences above 200 hz. I initially felt this may stem from the variations in capacitance and inductance.

Other theories behind possible audible differences may be that each strand being separately insulated may help reduce the effects of inconsistent ininterconnectivity among the separate strands of copper, especially if corrosion is present

Has anyone else tried some of this, either with CAT5/6 or other types of multi conductor wire? I know this tends to be a controversial topic, but I've consistently heard very small improvements with this method, so I thought I'd mention it.

Most network cables have individual 23 - 24 awg solid copper strands. That will get you the equivalent of 17 - 18 awg when combining the strands of one cable to form 2 conductors. That would/should be enough for most shorter runs and average power levels.

Extending low-end response of a closed enclosure speaker

My speakers with dual 10” woofers in closed boxes floor-standing style are measured bass response can reach down to “28Hz at -3dB” and “18Hz at -10dB”. Box resonance is 36Hz. Gross volume is 125 litres and net volume is 94 litres.

From this information, is it sufficient to find Qtc of the boxes? If so, how much it is? And if the target is to lift the 28Hz up from -3dB to 0dB, without any aids of electronic methods, what should be done to the cabinet volume, increase or decrease, and stuffing?

IIRC, in theory, enlarging box would extend bass response—to the lower frequency—but trading off with lower SPL there, while reducing box volume does the opposite—rising bass level up but cutting some deep bass out. Is it correct and still valid for this case?

1749210807281.png

Electronics noob eager to learn asking for help on a Fender Stage Lead amp that I think has grounding problems

Hi Guys,


I picked up a guitar from a local second hand website a week ago. The guy gave me a free amp that doens't work to play with. I like tech and am into IT, but electronics is somewhat new to me. The amp I got is a Fender Stage Lead. I love the looks, I love the sound (it works sometimes, ill get to that and why)

Login to view embedded media
After a lot of measuring and resoldering one faulty connector on channel 1 I am at the point where i have to ask for some advice since I dont know if this decision will fry me or not.

When I place the PCB board on a piece of something that is non conductive, everything about the amp works. Channel 1, channel 2, gain, reverb, everything. However, when I actually screw the board into the main metal chassis, it works occasionally and I have to wiggle the potentiometers around to get it to work. One note: when it is not connected to the chassis at all. Sometimes the amp stops working. In that case, when I plug my JBL speaker with cable into preamp out i hear a pop, and it starts working again.

Here's the thing. The metal chassis frame has a ground cable coming from it. What I THINK is happening is that there are 3 cases.

1. Nothing is grounded via the metal chassis, and thus, the circuit seems to work.

2. All the potentiometers are connected to the chassis and are all grounded. Thus, the circuit works.

3. Somewhere in the middle, some potentiometers are grounded and some are not. Resulting in circuit not working?

Between the potentiometer and metal chassis there are so called "star washers". Im making sure the screws on the other side are real real tight, hoping for contact. But to no avail. I screw the board into the chassis, sometimes it works, sometimes it doesn't. Sometimes for 10 minutes, sometimes it doenst work anymore at all.

I made sure to test them screwed in by measuring with continuity on my multimeter whether the potentiometers have continuity with the chassis, they all do. Even then, the signal doesnt work sometimes and sometimes it does.

My thoughts:

Either, solder a wire from every potentiometer to a connector. And connect the other side of the connector to the common ground in the chassis as you can see in one of the photos.

Option two: add rubber washers between all the potentiometers instead of the star washers. But will this fry me? Is it required for the potentiometers to be grounded? I added a picture of everything i think could be usefull. The potentiometers, the star washers, the electrical circuit so you can see the ground, the common ground. I hope someone can help me, i'd love to get this thing playing agian.

Attachments

  • IMG_20250602_203929.jpg
    IMG_20250602_203929.jpg
    301.2 KB · Views: 106
  • IMG_20250602_203945.jpg
    IMG_20250602_203945.jpg
    303.6 KB · Views: 101
  • IMG_20250602_203951.jpg
    IMG_20250602_203951.jpg
    288.9 KB · Views: 102
  • IMG_20250602_204003.jpg
    IMG_20250602_204003.jpg
    187.9 KB · Views: 101
  • IMG_20250602_204009.jpg
    IMG_20250602_204009.jpg
    320.6 KB · Views: 111
  • IMG_20250602_204045.jpg
    IMG_20250602_204045.jpg
    859.2 KB · Views: 113
  • IMG_20250602_205548.jpg
    IMG_20250602_205548.jpg
    419.2 KB · Views: 109
  • IMG_20250602_205554.jpg
    IMG_20250602_205554.jpg
    329.3 KB · Views: 102
  • IMG_20250603_202257.jpg
    IMG_20250603_202257.jpg
    452.1 KB · Views: 110
  • IMG_20250603_202300.jpg
    IMG_20250603_202300.jpg
    344.4 KB · Views: 104

Sample rate converter with AKM DAC/ADC.

I have listed my Behringer Ultramatch Pro 2496 on ebay https://www.ebay.co.uk/itm/286562655522

The onboard AKM dac is pleasant and it was used to connect to my LG tv's optical output and also to resample my CD's coax output to 24bit/96k.

It's in full working order except for one channel of the led display which reads high even though the output is normal.

£125 + £5 UK tracked postage.

Attachments

Beyer Dynamic conversion

More than likely this has been discussed somewhere. I ran into Custom Cans while looking for a way to make the cable on my Beyer Dynamic DT770 pro phones detachable. Of course, this led to more options for fine tuning the cups of the cans as well. I do not regret it so far, but am not done with the initial wiring. Beyer Dynamic uses a certain wiring for the drivers and well, Custom Cables uses yet another. I don't see a problem since Beyer Dynamic has the back of the drivers coded for + and -. It is just the difference between the two methods makes one start to guess what goes where. I am almost done and shown here is the original wiring from the factory.
I should add that the first photo is of the left driver and of course the next photo is of the right driver. Beyer Dynamic cable attaches to the left side only. I am starting to really prefer this wiring arrangement.

Attachments

  • P1010001 - Copy (2).JPG
    P1010001 - Copy (2).JPG
    370.6 KB · Views: 98
  • P1010002.JPG
    P1010002.JPG
    305.9 KB · Views: 95
  • Like
Reactions: mbrennwa

Anyone use these new Dayton drivers?

I recently started a project for some slightly upscale extended range "subs" for my son's studio, originally having chosen the JBL 2268HPL in a large vented cab. We needed some extended range up into the 200 hz area with low THD and this JBL looked good. Unfortunately it looks like it won't go that low using an unassisted vented tuning, originally trying to get down into the very low 30s to upper 20s hz cutoff without greatly exceeding xmax. So now we had to regroup and look for a 15 or dual 12S with good midbass, sensitivity, low distortion and minimal time domain issues.

These new Dayton woofers look promising, although having a lower Qts. Their other specs look great. I'm weary of their build quality and distortion figures up into the lower 100s hz area. Has any had experience with these drivers?

Attachments

  • Screenshot_20240813-072204_PDF Reader PRO.jpg
    Screenshot_20240813-072204_PDF Reader PRO.jpg
    365.5 KB · Views: 512
  • Screenshot_20240813-072110_PDF Reader PRO.jpg
    Screenshot_20240813-072110_PDF Reader PRO.jpg
    364.4 KB · Views: 510

MTB Manifold - Help Interpreting Impedance Measurements

Hi Folks,

I knocked together a quick proof of concept manifold design subwoofer yesterday and would like some help understanding the measured impedance curve.

Woofer is a JBL 2217 and the cross section of the box looks like this

5C653C0D-EBFB-4F5A-BCC4-CB552F39E4CD.jpeg
Here is the impedance measurement vs the Hornresp simulation


53E188C7-6553-488F-88FE-762CC20EF583.jpeg


I am yet to measure the frequency response, but the lack of height in the measured impedance peaks has me scratching my head and has me wondering if I missed something in construction. The peaks and troughs are encouragingly closely aligned, however.

Is this the sign of a leaking box? A badly braced box? The driver does have a very, very slight rub between the voicecoil and magnet (one that is not obvious unless playing a 10hz wave at high volume of moving the speaker by hand at the right angle) could it be a result of this?

I understand that impedance curves can be very valuable in analysing a DIY speaker, but I will confess to having very little knowledge regarding how to read one.

Any pointers would be appreciated. I haven't been able to find much in the way of explaining this topic when googling.

For Sale Holco H2-H4-H8

I have several thousand of these old non magnetic Holco resistors.

I originally bought them because I wanted some specific values.

I’m just testing the audience. Is there an interest in me listing those surplus to me? The price will be $1/pcs, min 50 assorted or one type, plain non-registered envelope. $5 in fixed shipping cost.

Of course if someone wants a substantial amount, reduced price and registered shipping will be made available.

Thanks for looking.

R

Attachments

  • IMG_9167.jpeg
    IMG_9167.jpeg
    815.5 KB · Views: 291
  • Like
Reactions: petoluk

Help fixing an old amp: PSU hum

I need guidance from experienced colleagues:

After a number of years I have decided to go back to the hobby and try to fix an old issue: I build my first tube 2A3 SET amp 13 years ago, due to inexprerience, I copied a circuit which probably had some error. As a result, I ended up with audible hum which was mainly due to PSU originated 2Vpp 100Hz ripple. The original PSU design was calling for a GZ37 with a 2uF input cap, 8H chocke and 47uF cap, with a 300VCT PT and was expected to deliver 322V B+ and aprox 100mA to 2A3 power stage and 6SL7 SRPP. I used a 5U4G instead of the GZ37, and with the original design I ended up having around 280V B+ and 2Vpp ripple. I upgraded the second cap to 100uF which helped to reduce hum to some extent. At the time, with the help of some of you and by using the Duncan PSUII simulatorI understood that my PSU needed improvement; definitely the input cap is too small. The problem is that modifying the input cap to a value that would take the PSU ripple to an acceptable level (200mVpp?), B+ goes higher than needed. I do have an additional 3H spare choke available, and a few 47uF&10uF caps, I was planning at the time to add a second LC stage to the filter with this choke but the choke is not easy to tuck into the chassis at this point, and I observed some damped transient damped oscillations in the simulations which are a cause of concern (are they?). I would apreciate some guidance from experienced folks on which route to take. Second question to the forum, the amp has been sitting unused for the last 6 years or so, should I be worried about the big 100uF cap condition?. I am attaching the schematics I started from for reference; I used 5U4G instead of GZ37 and upgraded the second cap to 100uF. Thanks a lot.

Attachments

  • 2A3amp.jpg
    2A3amp.jpg
    37.3 KB · Views: 67
  • 2A3PSU.jpg
    2A3PSU.jpg
    42.6 KB · Views: 66

Schade Common Gate (SCG) Preamp

Dec 2024 Update

New JFET-based SCG version is the latest. PCB, schematic and BOM here. Here's a stereo PCB. Use updated, resistor based buffer as shown here.

Power supply for the new version here.

______________
Lot of updates have happened. Version 2.0 PCB has been made and group buy completed. All PCBs sold, but if you want one, PM me.

Latest schematic and build docs
Test PCB Image
Power up procedure
Distortion measurements
Gain calculations
Part I Upgrade to original design
_____________________
Original Post

Introducing the Schade Common Gate (SCG) Preamp. Signal comes in at the bottom source follower (unity voltage gain) and is then amplified by the Schade-enabled top MOSFET operated in a common gate configuration. This gets around the problem of low impedance on the gate of the Schade device.

IMG_5522.JPG

Note: the schematics and information presented here is for personal and DIY use only and NOT for commercial use. Any other use needs my permission.

Inspiration came from George (tubelab) and Smoking-Amp, who were exploring the source-follower to common gate configuration for tube pentodes. I made a comment here that you could do this with MOSFETs too. Wrenchone and others have explored the Schade idea and Papa himself posted that really elegant Schade-enabled amplifier where the feedback connection is on the primary of the transformer to get around the problem of input impedance. I really like simplicity and elegance this circuit provides.

Here’s some of the pros of this approach:

  • Gain device operates in triode mode.
  • Low parts count.
  • No unobtanium transistors or tubes.
  • Low cost.
  • No cap on the input.
  • High input impedance and low output impedance (though I haven’t measured this yet).
  • Preserves the phase: the source follow and common gate stages both preserve phase.
I built the resistor-loaded circuit and also a CCS loaded one (next post). It sounds excellent. It has the negative phase H2 (blue goes down when red goes up and blue goes down when red goes down), which really brings out the magic. Over the past couple of weeks, I’ve compared it to my other preamps, the 801a and the LuminAria, and it is comparable in sound.

Here are some measurements of the resistor-loaded version. I haven’t played with the load line much, but raising the load from 500R to 1k does improve things. The CCS version has almost no distortion. Subjectively though, I prefer the resistor-loaded version, it has much more of that 3D and “live” sound of LuminAria.

The build is a rats nest right now. Used the existing LuminAria setup with the Salas shunt reg. Hope to put it in its own box.

SCG_FR.jpg


SCG_Rload_Distortion_1.3VrmsOut.jpg


H2_Phase.JPG


IMG_5519.JPG
  • Like
Reactions: Samuel Jayaraj

Greetings from Toronto, Canada

Hi everyone,

I'm relatively new to Linux and DSP, but eager to get a camilladsp box going. I started going down the DSP rabbit hole after falling in love with Dirac live, but migrating everything to Linux I am cut off from that sweet sweet sound. Longer term plans, once I figure this stuff out and get some budget, are to build my own 4-way hi-fi speakers and use an active DSP crossover with what I learn.

I love great sound and my favourite thing in the world is my music system and collection. A lovely 2.0 system downstairs (Buckey NC500x amp, Energy C9s, Roon on a few RPi4 endpoints and a backup Technics SL1700 for listening to Jazz in my underpants on weekend mornings with my coffee. oversharing 😉 Also a home theater 5.1. Modest budgets but high performance are my area of interest.

I also love chasing great sounding music. Talented artists across all genres, but especially great mixes and masters of them.

Looking forward to learning from everyone here.

For Sale Dayton paper cone woofers | measurement mic | Peerless tweeters

1 - Dayton audio 6.5 inch designer series woofer. paper cone
quantity = 3. two are tested and like new. one is new.
https://www.parts-express.com/Dayton-Audio-DS175-8-6-1-2-Designer-Series-Woofer-295-428?quantity=1

2 - Dayton measurement mic with calibration gragh. new
https://www.parts-express.com/Dayto...1Qb6g07lZP4sLsTooJmKa1ABDgWreSYcaAtHpEALw_wcB

3 - pair of peerless tweeters NEW
https://www.parts-express.com/Peerl...50U221j7tfuh5fhWG-HswPDSEVg4XRFAaAo4GEALw_wcB

all together $122 paypal friends and family shipped conus
weight is almost 25 pounds for the whole thing

For Sale Audio by VanAlstine ABX comparator box

Hi all,
A near pristine ABX comparator box. 240V.

From the manual:
"The ABX Comparator Switch allows seamless switching between two sources, two power amps, and three
sets of speakers. Some of its features are:
• Precise volume level matching, in 0.1 dB increments.
• Infrared remote control.
• Blind test mode.
• Line level subwoofer support with built in selectable subwoofer filter.
• Programmable power up state and persistent volume settings
• Works with single ended or bridged amplifiers (ABX boxes displaying a date later than 06-05-14)"

This comparator's start up displayed date is 09-18-15, thus a later model and suitable for bridged amp designs. Bought from Jan Didden on here, he got it pirectly from Frank Van Alstine. Startup sequence below - apologies for the blurry display, a phone camera attribute, it's a crisp and clean display.
IMG_20250608_190033.jpg
IMG_20250608_185917.jpg
IMG_20250608_185830.jpg

Review:
IMG_20250608_185745.jpg
IMG_20250608_185558.jpg


Review: https://www.dagogo.com/audio-by-van-alstine-abx-comparator-review-part-3-new-twists-conclusion/

All working as it should, with remote, original box (not original padding), and ready to use. Link to the manual is attached with the snaps.
£200 plus shipping please.

Attachments

Hi from Vermont

Hey everyone - I'm Dave and I'm coming at you from Vermont. I've been a long time follower of the site, and now that I'm taking on more DIY projects I wanted to start to get more involved in some of the conversations. Long time audio enthusiast and over the past few years have realized that I get a lot more enjoyment from building gear than buying it - the fun to me is in the process as much as the end result. Looking forward to uncovering more new projects!

1541 Tube DAC

This is Vlad's kit. First image is what he provisioned to me, essentially complete without chassis, wiring between boards, input/output hardware, power inlet/fuse holder.

1541 chip, non-oversampling, 6N2P-EV NOS tubes, nice caps.

Second image is kit housed in larger Galaxy chassis supplied by DIY store.

Fired right up, sounds superior to the low end Project e DAC as expected. A really good value and step up. I run an old high end Sony CDP into a Monarchy anti-jitter box, haven't tried streaming contemporary sources.

Vlad dac guts.jpg

VLAD DAC.jpg

AB100 Class AB Power Amplifier

AB100 Amplifier - Micro Article by Nelson Pass

Since villagers armed with pitchforks and torches have begun camping
out my front door demanding a Class AB power amplifier, and

Whereas, I am inclined to demonstrate my goodwill in this manner and
do in fact have a 13 year old piece laying around unpublished,

I Hereby Present the AB100 Class AB Bipolar power amplifier.

Salient Specifications:

Rails: +/-50V or so

Gain: 36 dB (this was the request of the people who commissioned
this but did not want to pay for it)

Bandwidth: 5 Hz to 100 KHz (-3 dB)

Damping Factor: about 500

Maximum power: 100 Watts 8 ohms, 200 Watts 4 ohms

Slew Rate: 30 V/uS

Bias Current: about 0.08 A per channel

Following are several graphics. (Unfortunately I scanned them in the
distant past, so the quality is not up to my usual standards)

Let It Not Be Said: That I never did anything for you....

😎

Attachments

  • AB100 001.gif
    AB100 001.gif
    101 KB · Views: 23,626
  • AB100 THD 8.gif
    AB100 THD 8.gif
    58.7 KB · Views: 21,401
  • AB100 THD 4.gif
    AB100 THD 4.gif
    59 KB · Views: 16,635
  • AB100 THD FREQ.gif
    AB100 THD FREQ.gif
    58.5 KB · Views: 20,179

  • Poll Poll
DIY TDA1541A PCB "D3"

Would you like a through hole version of the D3?

  • Yes

    Votes: 12 52.2%
  • Maybe, depends on the performance

    Votes: 11 47.8%

Hi Guys,

I've started to design a new PCB for the TDA1541A to make space for the 14 decoupling caps that are needed for a 50Hz DEM.

This idea came about from ECdesigns in this post here: 50Hz DEM

This version is based on my previous design, click here to have a read.

Links:

PCB Order Form

Distinction-1541 V3 "D3"
D3 BOM
D3 Schematics
Photo of populated D3 pcb
D3 layer stackup

If you're interested in the I2S to SIM PCB V1 or V2 click here.

Thick Film Hybrid (not monolithic) Integrated Circuit Amplifier - Overview

Sanyo's STK series knows everyone - there were and are still a number of other types and brands, that are not as well known:

1) BC SVI3505A (BC Power Module - no exact informations)

2) Kenwood TA2030/TA2031
Eugen Gurskij Elektronik - ICs
Kenwood TA100WA
Audioklinik: Die Meisterwerkstatt für HiFi Klassiker ob Transistor oder Röhre in Düsseldorf.
Kenwood Hybridendstufen - und es gibt sie doch

3) Matsushita/Panasonic STK8040 (Technics new class A)
http://i14.ebayimg.com/01/i/07/4d/58/db_2.JPG
http://www.maxdat.eu/_data/Random/STK8040.jpg
audio-technics.fm.interia.pl/technika/amptech.htm
Amp model - hybrid model
Matsushita/Panasonic "RSN 36S5 A" "RSN 36S5 B" (Technics)
eBay Österreich: RSN36S5B RSN36S5 B Amplifier IC NEU (Artikel 130368471680 endet 19.06.10 13:13:41 MESZ)
data sheet information for RSN36S5A from www.ecadata.de

Attachments

  • Kenwood TA2030-2040JPG.JPG
    Kenwood TA2030-2040JPG.JPG
    12 KB · Views: 2,035
  • Kenwood TA2031.jpg
    Kenwood TA2031.jpg
    143.5 KB · Views: 2,099
  • kenwood_ta-100wa open.jpg
    kenwood_ta-100wa open.jpg
    136.9 KB · Views: 2,117
  • Kenwood TA100-200 W-WA six pack.jpg
    Kenwood TA100-200 W-WA six pack.jpg
    887.5 KB · Views: 2,275
  • Kenwood TA100WA.jpg
    Kenwood TA100WA.jpg
    104.5 KB · Views: 1,934
  • Sanyo STK850 Technics newClassA.jpg
    Sanyo STK850 Technics newClassA.jpg
    6 KB · Views: 769
  • Technics Hybrid RSN36S5B.jpg
    Technics Hybrid RSN36S5B.jpg
    131.8 KB · Views: 679

I built a barely portable Bluetooth boombox / mini PA speaker

An old friend mentioned that she was thinking of buying a large boombox to be used as a small PA and speaker for presentation duties in parties and festivals. Another friend who works in the pro sound was in the situation and we told her that we could build her a better speaker than the JBL Partybox she was thinking, just for the price of the parts.
Specs that were given:
-Battery powered
-Bluetooth and analog line in for dj mixers etc.
-Has to fit in the trunk of a small car
-Max 25kg
This will be the 3rd speaker that I've built, challenge accepted!

The 95% finished speaker, grills are temporarily attached because I didn't get all the parts when I ordered the smaller grills due to my mistake.
1000014597.jpg

2x 8" Sica 8 D 1,5 CS full range speakers in ~10l closed compartments
B&C Speakers 10CL51 10" woofer in ~32l ported enclosure, calculated tuning frequency of 65Hz
JAB4 amplifier, 30W for the tops, 60W for the bass.
307Wh battery with selectable 12-24V

Due to weight constraints the enclosure is made from 9mm baltic birch plywood, front baffle and back of the bass enclosure has 2 layers. Supports are mostly from 20mm thick plywood strips, a lot of them have half lap style cut outs and/or grooves routed to the walls/parts to make it as sturdy as possible.

When you see the router as a spanking robot, you can't unsee it.
1000013754.jpg

Front baffle miters and 2nd layer that fits inside the outer walls for more glue surface and stiffening.
1000013987.jpg

On the left side, top and bottom of the enclosure, there are grooves for the closed compartment walls to slide into. Tight fit, had to hammer them in gently after a few rounds of fine tuning.
1000014133.jpg

Better view of the routed groove and support structure for the ports being glued.

1000014132.jpg

support grooves/rabets for the ports, which also work as carrying handles
1000014166.jpg

Top view of the port connection structure
1000014167.jpg

Better view of the layout
1000014162.jpg

Had to use some screws during glue up to line the parts exactly.
1000014382.jpg

The main glue up required some creativity to get the whole thing warm enough for the glue to dry, my basement workshop is pretty cold.

1000014245.jpg

First testing before finishing touches. Banana for scale.
1000014276.jpg

Battery and amplifier slot. I managed to measure this wrong, not twice but three times. Had to carve more room with a Dremel to get enough depth and make everything fit. The door has a piano hinge and magnets, which I don't have photos, the door closes with a satisfying click.
1000014364.jpg
1000014507.jpg

Rounding the port/handles before painting.
1000014355.jpg

The bottom has 20mm plywood glued for extra support for 35mm pole adapter
1000014488.jpg

I made potentiometer hats for the amp from red oak and merbau
1000014563.jpg

After painting and lacquer just before attaching the elements.
1000014577 (1).jpg


She is very happy about the speaker.
IMG-20250503-WA0001.jpg

Some minor flaws here and there but I'm mostly happy how this turned out. This doesn't sound like an off the shelf bluetooth boombox, this sounds and feels like a small PA top. I didn't do any measurements (yet) but from the feedback I got from my group of friends who participated on the first outdoor pressure test, everyone was surprised how punchy, physical and fat but not bloated the speaker sounds. The group has combined experience of 200+ years of party organizing, djing and pro audio and aren't afraid to point out any flaws. Needs some taming on 500-3000Hz range, a bit shouty before any eq with just digital crossover. The bass enclosure tuning is very close to the VituixCAD simulated/ calculated ~65Hz. When I tried this in my acoustically treated listening room and put it in a spot that wakes a 63-65Hz room mode, my attic hatch in the ceiling started to rattle with the bass. Can't turn the amplifier to half volume or something starts to rattle.

One guy who has a lot more experience on building speakers was suspicious when I told him it is made mostly from 9mm plywood and weights just shy of 25kg, I asked him to knock around the enclosure and he just started to laugh and kept knocking, it is surprisingly stiff and only slightly vibrates when playing as loud as the amp can handle.

Pardon for "scrolling arthritis" due to the amount of photos.

Angelfire phone preamp - no bass

Hello everyone

I've built a Angelfire phono amp (the second one) but it has no bass output. The cartridge is a Shure M44-7. It is a passive preamp with a phono stage. The other two inputs works great. The phono input has ample gain and no hum but it is very very bright sounding and lacks all bass output.
IMG_6281.jpg


I've checked that all the components are correct, and they seem to be.
IMG_6284.jpg


IMG_6285.jpg


IMG_6286.jpg


Any guesses? The tubes are JJ ecc83S

Best regards

NAD 310 - need some info

Hey guys,
i just need some basic info on my NAD 310 integrated amplifier, which by the way serves me well, since i began very interested in it`s circuit topology.. i know that it`s a hybrid (NMOSFET w bipolar) design but i cant` really understand how it operaters in this particular model.. is it like a class AB or something else.. so if anyone here could give me some info about this "strange" transistor implementation, i would be very happy.. 😎

Here`s the schematics picture..
http://img526.imageshack.us/img526/9905/nad310schxb3.jpg

Cheers,
Filip

NAD 310, some informs needed, Reviews, listening tests, opinions are welcome

I have the diy interest in this amplifier, as i could listen to it but i could not buy it.

It is famous, and people are asking enormous price for it.

Reason why i will construct it.

I will be happy to listen opinions about ...good and bad opinions, to push me to do it, or to push me to give up.

Any informs, from the ones that already had listened the unit are welcome.

Anatech opinions, SY, and all forum guys are valuable opinions.... as the ones that had listened can say more about it.

Sorry guys, but i love single ended circuits, i feel them great.

Opinions that are based only in schematics are not really needed.

Here is a schematic that remember the NAD 310..... as the factory schematic is copyrigth protected...this is a fake one, a modified copy i found in the internet.hehe

regards,

Carlos

Attachments

  • almost the nad 310.jpg
    almost the nad 310.jpg
    61.5 KB · Views: 317

[repair] Replacing TIP-33c in a Montarbo 164 guitar amplifier

Hi,

I have an old amplifier from somewhere in the 1980s, a Montarbo model 164.
It used to work fine as a bass guitar amplifier years ago. Then it got moved from one house to the next and sat on the attic for many years. The attic is insulated, so although there will be some temperature variations, it will never be freezing cold nor scorching hot.

The amplifier powers up, but produces no sound.
I found the circuit diagram in a huge document of Montarbo circuit diagrams on archive.org [1], the correct diagram attached for your convenience.

I was able to identify that the NPN output transistor T4 is short-circuited. I measured it out-of-circuit and it is short across all three pin combinations: base-emitter, base-collector, emitter-collector. This transistor is of type TIP 33c, which is no longer produced. Its PNP complement T3 (which measures fine) is TIP 34c.

The power rail was still correct (+42V, -42V and +15V, -15V). I also measured the diodes, the T1 and T2 transistors (in-circuit) and a number of capacitors and resistors, although not exhaustively. There are no visual problem signs like burn marks or similar.

My questions are:

1. With which transistor should I replace the TIP 33c?

2. Should the complement TIP 34c also be replaced, if so with what?

3. Is it reasonable to expect the faulty T4 to be broken due to age? Or do you have a suggestion of what to check in this circuit that could explain T4 to go short-circuit?

4. There is one potentiometer on the output circuit, between pins 6 and 7 (both marked 'bias') of the LM391 IC (marked 'x2'). The LM391 datasheet says "Adjust to set bias current in the output stage." . The manual annotation on the circuit diagram indicates the bias current (Courant Repos, in French) is 6mA, which more or less corresponds to the official indication on the first page of the full pdf [1], which specifies 5.5mA for this circuit.
Am I correct that I should measure the voltage drop across one of the 0.18 ohm resistors, then tune the potentiometer until I read a voltage of about 1mV (0.18 ohm x 5.5 mA) ? (or measure across both 0.18 ohm resistors and tune to 2mV).

5. Finally, is there anything to do with respect to maintaining 0V on the speaker terminal, or will this automatically be the case once the bias current is set correctly?

Thanks a lot for your advice!

Patrick


[1] https://archive.org/details/montarbo-service-1970-2000/mode/1up (page 70)

Attachments

The ABEC thread... (translated)

This is a German to English translation of @Gaga guide to ABEC from diy-hifi-forum in the EU

Also be sure to read this after-the-fact: https://www.diyaudio.com/community/threads/abec-experts-help.315353/

"Hello,

as the title suggests and there is obviously interest - the 'How-To Thread' about ABEC .

In the first attempt, 3eepoint (3D-CAD), Fabian, nailhead and Nils kindly contributed their know-how or agreed to do so during the course of the thread. We'll definitely need their input as soon as things get a little more complex... I won't be able to do this alone.

As I already said, I can now handle AkAbak to some extent and am now working on ABEC in order to be able to carry out somewhat more complex simulations in the future.

There is a free version of ABEC that is fully functional, but only cannot save the solving results. So anyone can get started easily and for free. Jörg Panzer even offers a ' student license' for ABEC for non-commercial use .

The plan is initially to simulate a simple BR box based on a demo file supplied with ABAC (the SP38 script). There is also a PDF document for simulating the SP38 BR box on the Randteam homepage under Studies . The aim is to learn the basic structure and basic functions of ABEC using a simple example. Your own model will be based on the small test BR box used in the Pc0 thread , so that the ABEC simulation results can be compared with both measurements and simulations from other programs. Of course, ABEC is not needed to simulate a BR speaker. But the possibility of importing housings drawn in 3D CAD programs into ABEC offers great possibilities for simulating horns, waveguides, etc.... What can be done with ABEC is also nice in Nils' thread ' Waste product with Quasikoax ' or in DIY Auido Forum ( Synergy Horn Thread ). Now let's go, round 2... Nevertheless, you should have the help file at hand for the first steps, which can also be downloaded individually. Greetings, Christopher

Attachments

  • 23293.png
    23293.png
    6.9 KB · Views: 162

NAD310 Repair

Hi Everyone,

I have picked up a faulty NAD310, ive traced the fault to the output stage, a failed BUK555-60B. This device seems to be obsolete and other than used or possibly new counterfeit devices, im looking for a modern alternative device.

Has anyone had to repair/replace one of these before? if so, what did you use?

I am considering trying an IRL540N, but other than a similar power rating and similar Vgs theyre not a perfect match and i dont want to turn this amp into a big Oscillator, or damage anything else in the process of trying to repair it.

Thanks in advance, any thoughts welcomed 🙂

Taylor

The Orphéus Project...

Hello everyone,

With this thread, I would like to introduce and share with the community the Orphéus audio project...

It's a fairly ambitious project in both form and content, and it includes many unique features that I would be happy to detail further.

The main objective is to create a complete audio reproduction system using tubes and valves, and incidentally, to inspire members and/or music lovers with a "do-it-yourself" mindset and a minimum of experience in electricity and/or electronics.

The roots, as well as the various configurations adopted in this project, as well as its implementation, stem from a specific design philosophy and adopt certain principles based on convictions and experience.

The Orphéus system is composed of two devices. The first, which is also the heart of the system, is a transformer-based SE preamplifier, also known as a WOT (With Output Transformer) preamplifier.

Its main hardware features are:

  • 3 x RCA line inputs switchable via a rotary switch and micro relays
  • 2 x RCA phono inputs, switchable MM/MC via Hashimoto HM-3 step-ups
  • 2 x split RCA line outputs + switchable XLR (balanced)
  • SE line stage with a 6n6p/ecc99 + Monolith Magnetic's SL-01/20 transformers
  • Tube phono stage (2 x ecc83 + 1 x ecc82)
  • Switchable dedicated headphone output
  • Motorized TKD potentiometer
  • Dual mono VU meter with modulation display
  • Panel meter for bias control

Below is an illustration of the device in progress...

przoam22.jpg


I think you've all guessed by now that the second device is, of course, the Orpheus power amplifier...

The latter uses a pair of 300B directly heated triodes in a single-end configuration with an inter-stage transformer. The power supply uses a valve with a timer and Pi RLC filtering per channel.

The standard driver tube, like the preamplifier, is a 6n6p/ecc99 dual triode. A specific board was developed for the latter. It is paired with a pair of IT-01/25 inter-stage transformers.

A second driver board with an identical footprint was developed. It uses a tube with beautiful precision mechanics, the D3a. Its Mû is almost 3 times higher than the 6n6p/ecc99, and can therefore, on its own, make any 300B triode swing beautifully.

In this regard, two specific driver cards are of course necessary.

ampli_22.jpg


The amplifier also includes a Panel Meter to display the effective bias voltage of each power triode.

I also integrated a volume potentiometer with a bypass to make the amplifier independent if necessary.

Here are the main points of the Orpheus Project.

To be continued...

Greetings, Tony
  • Like
Reactions: DATIR and ng5921

Slew rate myths floating around the internet

Lately, I've been seeing a lot of discussions about slew rate in various media, and frankly, it pisses me off...
A guy says "the old model of this amplifier had a 90v/μs slew rate, the new model has reduced it to 45.. so the amplifier is slower than the old one"...
If you are using your amplifier as an FM transmitter, this can be considered an argument.. Of course, if your transmitter/amp is not transmitting square waves... Bu no, it is still not a logical argument.
Let's do a little math; if an amplifier can handle a rising edge of 45v on the μs scale, it means it can output a signal of at least 500khz at a peak level of 45v. If we reduce the signal to 20khz, the peak value will be 1125v....
Hypothetically, let's say your amplifier is "extremely slow" and only has a slew rate of 5v/μs. + You are listening to heavy metal at extremely high volume, for example 500w rms power (whatever kind of ears you have) and there is such a transition in the song that the signal comes out from 0 to 500w with a 20khz transition.. Can your amplifier respond to this? 500w@8r is ~ 63.5v rms. Even if your amplifier has a weak slew rate of 5v/μs, it reaches this value in about 18μs. This is about 60khz. And if you calculate a rising and a falling edge, we divide this into two and reach a square wave bandwidth of 30khz.
And don't forget that your dear extremely high end speaker will convert this signal to the sine with great pleasure.
So it is meaningless... Even if your amplifier's slew rate is 3v/μs, it is still meaningless.
I would like to draw your attention to the values we used as reference: You are listening to 500w and the dynamics of the music increases with a 20khz, i.e. 50μs, transition from 0 to 500w. I leave it to you to comment on what kind of audiophile (or human) can listen in this way.

Tube pre amp (kit) for the amp camp amp

Hi.

I'm looking to build a valve pre amp to go with my bridged amp camp amps.

I'd heard the Bottlehead Quickie was a nice match but it's also discontinued and my skills for a scratch build are non existent.

I can build stuff given instructions but that's it.

So can anyone reccomended a kit?

Or is there a parts list and instructions for the Quickie that I've missed. Can't see anything after a Google search.

All suggestions appreciated.

Rik

Letting Go of Parts and DIY Amps

I recently moved into a larger storage unit and ended up uncovering a mountain of analog amp parts—probably eight large boxes in total. I’ve been exclusively using Hypex modules for the past five years, but before that, I spent a lot of time building Class A amps from the PASS forums, and later on, experimenting with various VFET designs. I brought a few of those heavy builds home to give them another listen. Maybe I’m just used to the sound now, but to my ears, the Hypex stuff sounds better than my sloppy DIY amp and more importantly, it's more convenient.

So now I’m wondering if it’s finally time to part ways with all those analog parts. I'm not looking to start a Class A vs. Class D debate—this is more about what people do when they go through a major shift in thinking. Like when people transitioned from vinyl to CDs, or moved from solid-state to tubes. With commercial gear, it’s easy enough to sell it off. But leftover parts and DIY projects are another story. They’re a pain to sell, and it feels wrong to just throw them out. Things like large heat sinks, caps, and transformers take up a lot of space, they’re heavy, and they’re not exactly easy to move.

It’s mostly me thinking out loud here, but I’d be interested to hear how others have handled this. Did you hold onto things in case you changed your mind? Or was it better to just let go?

Pre-equalizer for 78RPM records

Hi guys

I have an existing phono pre that I do not want to change or modify. So I did a search for pre-equalizer circuits for 78RPM records, something that would sit between the LP player and the phono stage and provide equalisation to modify the standard RIAA for 78RPM playback. The only circuits I found were add-ons to modify existing circuits (like the ESP circuit). I do not want to modify my existing phono stage, so I was hoping that someone could help me with a pre-equalizer circuit with unity gain that can do the needed additional equalisation, and then be plugged into my existing phono stage.

Thanks beforehand,
Deon

Edit:
PS. I was thinking about this. A post phono preamp equalizer could also be useful. So the EQ would be between the phono pre output and the linestage input, doing the needed EQ at line-level levels rather than the low levels direct from the cartridge. This design should be easier. I would appreciate any and all suggestions.

PPS. I hope be can come up with designs for both. The pre-phono stage circuit for people who have a pre-amp with a good built-in phono stage, and the post-phono stage circuit for those who have a separate phono stage. The circuit for the post-phono stage version could start with a reverse-RIAA circuit, then do the needed EQ after. I am not aiming for ultra audiophile sound here, just a good, usable circuit. For those requiring ultra premium sound there are units available at multi-$1k prices. I am not in that league. Thanks again to all that can contribute. Deon

Attachments

  • Screenshot_20250607_220156_Chrome.jpg
    Screenshot_20250607_220156_Chrome.jpg
    226.6 KB · Views: 77
  • Like
Reactions: olsond3

Is this solution acceptable?

I'm looking to modify my beloved Braun LS200 speakers. In fact, they're nice speakers but I'm curious to know. The LS200 are 3-way system with 4 drivers including 2 twin woofers. I've played with them by unplugging other drivers and listen to a single driver. I found that the woofers not only play bass but also midrange. I, then, tried using graphic equalizer and discovered that eliminating midrange from the woofers satisfied me. I tried tweaking passive crossovers many times to suit the setting on EQ, but, none of them archived the target.

However, I have the last method. I found the schematic of B&W Matrix 3 series 2 which are 2.5-way system. It sparked an idea. Attached is the low-pass filter circuit of the B&W.

BW Matrix 3 S2.png


Regarding L2 (8 mH) on the B&W's schematic, I think to add a large inductor to one of the LS200's woofers, red circle in the picture.

LS200 mod.png


The objective is to limit the midrange from one woofer. On the other hand, my LS200 would be converted to 3.5-way system. Anyway, I have 5.6, 6.6 and 8.2 mH inductors in my hand. I'm thinking to try them all. But, I'm not sure whether it will create any problems. Please advice if there're problems occur; such as too low impedance, distortion created, or low-pass filter modification needed, etc. If there're any, then, I will stop this project. But if it's fine, I will go on.

Remote volume control and input selection suggestions or experience with Chinese kits?

Hi
I’m after a cheap remote volume control and source selection for a D class amp project.
I was going to buy one of the cheap motorised ALPS kits on AE along with a passive relay switcher.
Here:
https://www.aliexpress.com/item/1005001837845089.html
&
https://www.aliexpress.com/item/32908768362.html
Both of these have been around for a long time.
I can’t however find any reviews and the relay / standby power board isn’t listed any longer. There’s also allot of other offerings ranging from motorised pots to integrated volume, source etc…

Does anyone have experience with any of the cheap solutions often on Aliexpress etc or care to share your experience?

Thank you

NAD 3225PE A general query

I was at a garage sale today looking at vinyl and the vendor mentioned he had an old amp if I was interested. I said I was and he pulled this old NAD out and said I could have it for $20-.
Got it home and plugged in but while it works it seems a little dull and doesn't seem to be pushing out anywhere near its rated 85 watts.
Electronics is my weak spot so I don't know what to look for and the only test equipment I own is a multimetre. Worth keeping and getting it worked on or is it just another piece of gear on the shelf in the shed?
If I do open the case what should I be looking for?

Sunvalley SV-S1616D [300B]

Sunvalley SV-S1616D [300B] point to point 300B amp + Hashimoto H-20-3.5U ----> available NOW....

Price $1,975 KIT
Assembled with 4 VCAP ODAM X 4 $2,575.00

TUBE SET OPTIONS
300B:
COSSOR/LINLAI Black Plate $225
COSSOR/LINLAI WE300B $550
WESTERN ELECTRIC 300B $1475

Driver tubes
ECC81/12AT7 X 1

CV4024/12AT7 Brimar $80
CV4024/12AT7 Mullard, $80
Valvo ECC81 $80
ECC81/12AT7 Telefunken $145

ECC82/12AU7 X 2
6067/12AU7 Brimar $80 X 2
12AU7 Brimar $80 X 2
12AU7 Valvo $80 x 2
ECC82 Telefunken $275 X 2

Coupling Caps
0.1 X 2
0.22 X 2
VCAP ODAM $225
AUDIO Note Copper $275
WBT 805 Silver Solder 42G $45


This kit allows you to select between 300B or KT88/120/150/170 tube set.
KT conversion KIT $245.00

The voltage amplification section, power amplification section, and filament DC rectifier section (300B specifications only) are sub-chassis (units only). DIYER being able to make each unit individually.

Also, this kit is quipped with a US 8-pin specification "diode module" (solid state rectifier). You can use rectifier tube (5AR4) instead.

It is also a big feature of this amplifier that you can enjoy solid state rectifier or tube rectifier.


(recommended option)
Coupling Cap V-CAP CuTF or ODAM
0.1uF (2 pcs required)
0.22uF (2 pcs required)

(Specification changes after production)
This kit can be changed to another vacuum tube specification (example: 300B → KT88) . The contents and prices of the necessary parts are described in the assembly manual.

(About sound quality tendency) The sound quality
of 300B in SV-S1616D is an image of "delicate and abundant". Please enjoy the unique charm of 300B.


(Assembly difficulty)
★★★ ☆☆

Tube Set
12AT7 X 1, 12AU7 X 2 + 300B X 2
Option : 5AR4

OPTION

1646326355590.png


KT150

Please stay tuned
Youtube - SV1617D
Sunvalley「SV-S1616D EL34」Assembly Video - YouTube
SV-S1616D can configure as 300B, EL34, and KT120
I will offer 300B as the basic model. I300B ---> KT88 conversion is available.

UPGrdae Options
VCAP CuTF /ODAM 0.1 X 2 , 0.22 X 2
Hashimoto H-20-3.5U OPT
Login to view embedded media Western Electric WE300B


Another amazing amp from Sunvalley


300B configuration


Pentode tube (KT150/120/88/EL34/6L6GC configuration


  • Like
Reactions: zettelsm

For Sale Lot of Different RCAs

I’m cleaning out my cables and selling any that I don’t use for some extra money.

DIY cables:
  • 1M Mogami 2792 with Vampire connectors - SOLD
  • 1M Mogami 2792 with Vampire connectors - $30 shipped
  • 1M Mogami 2792 with Amazon gold plated connectors - SOLD
  • 2M Mogami 2552 with Amazon gold plated connectors - SOLD
  • 2M Mogami 2549 (Blue) with Nakamichi connectors - $35

Other cables:
  • 10 foot Cambridge Audio 300 series - SOLD
  • 1M Voodoo Stradivarius Cremona Edition - $200

I can also make any custom length cables that are RCA or XLR. I have some Belden 8412 and more Mogami wire.

Shipping from Houston.

Attachments

  • IMG_7146.jpeg
    IMG_7146.jpeg
    1.7 MB · Views: 92

Pi 4 to I2SoverUSB_FIO to ProtoDAC 1387 X8

(this is a duplicate post to one I made last night over on the MoOde Audio site ProtoDAC thread. Positing here was a suggestion from there)

I received my JLS I2SoverUSB_FIO card this week and am looking to use one of my ProtoDACs as a standalone USB input dac. Most of the installation seems very simple with good instructions.

http://www.jlsounds.com/uploads/I2SoverUSB_FIO.pdf

I need to select a configuration for four jumpers to match the needs of the ProtoDAC, and the list of choices does not explicitly match what I have learned about the most basic MoOde player I2S description (basic 'HifiBerry' passive dac without masterclock). The basic I2S configuration (J3-J6 open) and the TDA1541 in I2S mode in 32-bit frame (J3 open, J4 closed, J5-J6 open) look to be the best bets. These two are from the .pdf cited above.

I'm likely being too cautious, so I thought I'd ask before just trying them. Help Most Welcome

Thanks,

Skip

TDA1387x8 8-channel NOS DAC/DSP build log

After finishing my 4-ways and using them for several months with a 8 channel DAC/DSP based on 4 cheap $2.00 PCM5102A boards, I decided to venture into electronics design for the first time and try to build a decent 8 channel DAC/DSP.

My system is all active, so crossover duty is performed by a Raspberry Pi 5 running CamillaDSP. The key concepts of this new DAC/DSP are:
  • Modular design: Each major part has its own PCB. This increases repairability and upgradability, especially important for a first timer.
  • The Raspberry Pi must not be on all the time. I've encountered corrupt file systems more than once on power losses, so I decided to add a controller circuit that will turn on/off the pi. I decided to go with an Arduino Nano for this.
  • The Raspberry and the MCU circuit will be powered by a 5V 5A SMPS of good quality. A 5A linear PSU would be too expensive and/or complex for this project.
  • A linear PSU with active noise cancellation will power the DAC boards, (both digital and analog parts), the galvanic isolator output side and 12V trigger out.
  • To avoid noise from the Raspberry into the DAC (through I2S lines), a 6 channel galvanic isolator circuit will be part of the I2S signal path.
  • There are 4 DAC boards. Each is basically a set of 8 TDA1387 in parallel (like the ones as used in ProtoDAC) with an active I/V stage using 2 NE5534 and a relay based muting circuit.
Major components of this project:
  • A IEC socket with a switch, fuse and a CLC EMI filter
  • A meanwell RS-25-5 SMPS (5V 5A)
  • A 220VAC -> 12V-0-12VDC toroidal transformer (custom made from a local supplier)
  • A Linear PSU with 3 rails (+5/+12/-12), each rail with a de-noizator active noise cancelling circuit, all on a single PCB
  • A Raspberry Pi 5 running CamillaDSP and other support softwares
  • An Arduino based system control board, on its own PCB
  • A Raspberry Pi shield with a galvanic isolator for the I2S signal and a serial connection to the system control board
  • Four TDA1387x8 stereo DAC boards, each on their own PCB
  • Several minor components, like a two color LED power button, shielded cables, connectors, etc.
I am not aiming for ultra high end. I just want a decent NOS multichannel DAC with DSP capabilities, all in a single box.

In the next posts I'll describe each of the circuits, providing Kicad schematics and pictures of the populated boards. Here are the boards as they came from JLCPCB. Black one is the linear PSU, blue is the control circuit, green the isolator shield and the white ones the 4 DACs. Their build quality is amazing!

1744757155856.png
  • Like
Reactions: Monstercore

3-transistor regulator - compensation capacitor conundrum

Here's a bit of a puzzler.

This is the voltage regulator for the main +14V in a Kenwood KT-80 tuner:
kt-80-regstock2-4b.png

Note compensation capacitor C87 (560p) below Q10.

This is the same in a 1-2 year newer KT-900. Almost identical topology and values, basically the same part types - 2SC945 or similar for the small transistors and 2SD330 for the big series transistor. (Current draw could be at least 50% higher though, and the 68 mA shown is decidedly not accurate, as are a number of things on this schematic. For one, R154 is actually a 5.6k, and voltage is 13.5 V and change.)
kt900-regstock-4b.png

Note how C96 is now a .01 = 10n, as confirmed by the parts list.

This is the only model with this regulator topology that's taking such a drastic approach to compensation. No other model using it uses anything nearly as big (KT-615, 815, 80, 1000: 560p; KT-1100: 2200p or 0p). Feedback resistors and hence voltages tend to be of very similar values: 5k6/6k2, 4k7/5k1, 5k6/6k8, 4k7/3k9, 4k7/4k7.

Question of the day: Why would they have done this?

Most things are connected to this main rail via RC filtering usually using 100 ohms. The only thing with a lowish-impedance connection is the frontend, which sits after series silicon diode D5 alongside the IF strip and has LC filtering in the form of 1 µH and 100µF || 10n || 1n. (A bit of 10.7 MHz IF might be getting onto the rail via 100 ohm Wide bandwidth switch resistor R9, but I can't imagine it would be that much at this fairly early stage and preceded by a 10n to ground, plus I already swapped the poorly dimensioned R9 for a 470 ohm. The optimum value would be 560-750 ohms according to sim, but I only had 470R and 1k on hand.)

The PCB layout is quite different between KT-80 and KT-900, mind you.

I intend to port over my feedforward mod from the KT-80 (which incidentally works a treat for DC regulation)...
kt80regmod.png

....and was wondering whether some attention to compensation may be warranted and how to check for potential abnormalities. (Have fancy multimeter and old 10 MHz analog scope.)

Jean Hiraga Super Class A 30w Build

Hi All

So after a great deal of thought and advice i decided it's time to build this wonderful Amplifier.

This will be my first build and i will be learning as i go along, i am hoping many of you on here will be able to help and guide me.

I have read most of the threads on different websites to get me started, but as you can imagine i still have some queries especially with concerns for the power supply and output transistors.


I've ordered this kit from Jims Audio:

Hiraga super 30W class A w/ current source + kubota reg partial assembled kit ! | eBay

This one being with the Kubota regulator.


These are my heatsinks from a military plane cockpit console.


I realise i need more and i will be machining some add on designed heatsinks to these, i will be also be making and designing my own custom enclosure.


Where i am stuck now is the output transistors and the PSU.


to be on the safe side i ordered these from Jims Audio to just test them.

On Semi MJL4281A MJL4302A matched quad 2%

https://www.onsemi.com/pub/Collateral/MJL4281A-D.PDF

Whats other builders experience on output transistors? Any suggestions?

So far my research has shown these to be popular.

1. Exicon 10N20 10P20 Audio Mosfet TO3P TO247 ECX10P20R ECX10N20R

EXICON - Lateral MOSFET | Profusion


2. Sanken 2SA922/2SA1216

https://www.digikey.com/product-detail/en/sanken/2SA1216/2SA1216-ND/3661801


3. Sanken 2sc3264/2sa1295

2SC3264 ALLEGRO SANKEN, Bipolar (BJT) Single Transistor, NPN, 230 V, 60 MHz, 200 W, 17 A, 50 hFE | Farnell element14


4. MJL0281/MJL3281


Interested if people have used any of these and the results they got.


Now here is where i have a dilemma, its the power supply. I don't even know where to start.


Whats the thoughts on SMPS? is it possible? Anyone here done it with a class A? Would it work?

I've seen so many different designs: Please see pics below.


Check this video out

https://www.youtube.com/watch?v=2OYE7zFONtU

i mean look those bank of capacitors?


Lets start with the Transformer, i can either use Torodial or EI.
I was thinking two separate transformers 400va each rail voltage of 24-0-24?
Thoughts on this?

Then i thought i could use a power rectifier board: one for each channel

Douk Audio 6*10000UF/50V Hi-Fi Amplifier Power Supply Board with Speaker Protect | eBay

Power rectifier board 6x NOVER Auido 10000uf 50V power supply PSU for amplifier | eBay


Would i still need some hefty capacitors before these?


im guessing i need a soft start delay aswell?


Class A Power Amplifier Soft Start Delay Temperature Protection Board 220V 30A


Or would i just go traditional PSU? A hefty transformer 1.2f capacitors and some heavy duty rectifiers?


I don't want to suffer from noise or interference, i do want the amplifier to sound sweet with good mids and bass.

Thats the only thing confusing me at the moment, is what Power supply should be.

So any advice you may have please throw it my way!

Hey from Tennessee

I began playing guitar at a young age, which led me to the vagaries of how to get loud. I've been through Acoustic (Blue Stripe), Music Man(s), Fender SS, Peavey Bandits, Quilter Microblocks; BUT...the next door neighbors had Marantz Hi Fi gear circa 1974, and that was further trouble. I'm not a tech, (although I have replaced filter caps on a Peavey Nashville 400; and wired around faulty or aged out thermocouplers on either an ADS or Avid speaker), but it would be helpful to learn a little more about repair(s)

Hello everyone

For as long as I can remember, I have been connecting amplifiers and speakers together as a hobby.
And now that I am studying electrical engineering, I would like to explore what goes into making a good amplifier/speaker system.
My current project might be a bit ambitious to start with, but I really enjoy spending time on it. It involves a CSR BT module and a tpa3250 in combination with some batteries and an usb PD charge to make the PCB for a wireless BT speaker.
I hope we can help each other further explore the DIY audio world on this forum!

12AU7 Driver stage with CCS Load

Hey yall,

I'm working on my first amplifier design, seeking assistance with my latest project - a 12AU7 driven, 6N6P white-cathode follower OTL amplifier. I've built 3 amps, but this is my first attempt at designing from scratch.

I wanted to use CCS loads on the driver tube and on the WCF power tubes.

After some reading, I've decided on the following specifications for the CCS loaded 12AU7:
  • 4mA CCS
  • Plate voltage of 150V
  • Vgk of -6v
  • Cathode resistor 1.5k
  • Peak to peak swing of 80V to 215V
  • B+ of 275V (assuming 20v-60v drop across CCS) to ensure adequate headroom without falling out of regulation

Here is my attempt at a loadline:
IMG_7766.jpg


Note that I decided to limit my grid voltage below -2V, because I was reading in Blencowe's Designing High-Fidelity Tube Preamps that we can encounter grid current at -1Vish on the grid.


This driver stage is driving a 6N6P white-cathode follower, and from what I can tell has more than enough peak to peak output voltage swing to drive the WCF.


My questions:
  1. how do you specify the B+? I just assumed since my maximum plate voltage is 215V, roughly 275V B+ would be adequate to ensure at least 60V across the CCS at all times.
  2. Am I missing something here in terms of my loadline analysis?

Sorry this is very basic, still got a lot to learn! 🙂

For Sale Los Angeles only: three complete different Radian coaxial speakers

Hello,

I bought these Radian speakers locally as I was interested in the 8" coaxial as a center channel in my home theater/music setup, but (joke's on me!) the smallest one was a 12", not an 8". So I have, in Los Angeles only because they're all big and heavy, in ascending order of size, all prices firm:

Radian RPX-112P
coaxial 12" monitor (as in cabinet with angles, not rectangular)
PDF specs: http://www.kozystudio.com/audio/pdf/rpx-112p_b.pdf
$207

Radian RPX-115P
15" coaxial monitor (trapezoidal cabinet))
http://www.kozystudio.com/audio/pdf/rpx-115p_b.pdf
$241

Radian RPX-815, can't find information on it anywhere but it is an incredible 3 way speaker
8" coaxial driver
15" woofer
enormous port, at least 6", possibly 8"
rectangular cabinet; it's not a monitor but a main stage speaker, and a very competent one.
$287


Cheers,
Tal

Attachments

  • radian trio.jpg
    radian trio.jpg
    456.6 KB · Views: 40

ZOTL LTSpice Model

I am intrigued enough by the Berning ZOTL amp to actually try and build one. But before I do a working LTSpice model to understand the design was an necessity for me. So I created a model that matches his patent. I am sure there is many stuff left out of the patent that is important but discovering those in a simulation beats finding out on the bench. So this first attempt is an idealized model, switches instead of FETs, idealized transformers, but a real tube model (6NJ6 screen driven). So being totally new to ZOTL and screen drive this may be an interesting journey. The model does work (I think).

Next steps is to optimize ideal model then bit by bit put in real components....

1746648636353.png


1746648666511.png


1746648742751.png

low noise Pre-Amp / DAC power supply MJE15034 TL072 Regulator based on STUDER 900

For anyone buying one of the above kits from ebay / Hongkong /audiophonics (where I bought for 45€) the following problems and solutions may be interesting:

- Problem: I need +/- 12V dc from the supply, however when the jumper was soldered to the middle M position I hit the end of the potentiometer at 12.6V. Solution: also connect the H position together with the M position (both 33kOhm and 14 kOhm resistors are in parallel then - this is safe because the low L position reseistor would be even smaller at 3.3kOhm). In that way, the adjustment range goes below 12V 🙂

-Problem: I did not read the description properly and ordered a -12/0/+12 transformer. However this supply board needs two primary coils not a center tapped coil. Solution: Luckily my transformer had two coils that were connected, and digging into the connectors where the two coils where connected, I could separate them 🙂

PS: here is the exact description of the item on ebay:
MJE15034 TL072 Regulator Power Supply Kits based on STUDER900 for Pre AMP DAC
on audiophonics:
Linear Dual Power Supply board MJE15034G Low Noise 5V à 24V 2A
my transformer, which is not the correct choise but could be fixed:
Transformer R-CORE 30VA 12-0-12V + 1x9V

8 used 10,000uF capacitors

Link to Mouser page: https://www.mouser.com/ProductDetail/KEMET/PEH200MD5100MB2?qs=oAgV09qeUCuUXNBAwPxQXA==
These have been in constant use for about 10 years in my Honeybadger until I replaced the whole power supply. notice that I cut the mounting posts off the bottoms.
I'll include the connectors to use them as power supply smoothing caps.
DSC_0012.JPG
DSC_0011.JPG


$100 via PayPal for all 8, shipped to CONUS.

WTB Looking for a pair of Lowther PM6a Low-Ken cabinets by planet10

I am looking for a completed pair of Dave's Low-Ken cabinets for the 15-ohm silver voice coil Lowther PM6a as detailed here. Prefer to find someone in the midwest USA within reasonable driving distance of western Illinois. Have contacted a remote speaker maker about this in the past, but shipping alone was going to run $500-1000 which seemed outrageous.

I am fine with financing a build, as it is unlikely that someone has a pair of these cabinets sitting around unused given how niche of a design they are. I don't trust any local cabinet makers to build speakers since i have had poor luck with contracting work of all kinds in my town and would prefer someone who has experience building speakers.

Choke sizing in PSU vs physical space

I've read here and there "get the most henrys you can fit in your chassis" when it comes to chokes. Lets say I want an LCRCLC filter, and I want the supply to be relatively stiff to around 300mA. I find a 16H 300mA choke that fits mechanically for L1, and great, I can also fit another 16H 300mA choke for L2. Why on earth would I buy a 5H or 9H 300mA choke when these 16H guys fit just fine? The Duncan PSU model shows significantly less ripple with 16H chokes. Am I missing something when it comes to compromising choke henrys against chassis restrictions? The larger chokes also don't need as large capacitors. I asked AI to compute an ideal reactance capacitor size for an LC filter at 120hZ with 16H choke, it came back with a nice 110uF, nice that is DC link territory size wise film caps. With a 5H choke it computed a capacitor size much larger which puts me into using electrolytics, which I am holding on the non-compromising side. Everything is a compromise at some point even against the mechanicals of the chassis. Should I buy these 16H chokes, or go back to the drawing board?

For Sale Pair of 12” SBAcoustics SB34NRXL75-8

Hello.
For sale a pair of 12" SBAcoustics SB34NRXL75-8. Another hidden Gem from Sbacoustics with an Incredible value for the money.-
They can be crossed up to 500Hz..

Some reviews and measurements here.

https://www.diyaudio.com/community/...rxl75-8-vs-sb29nrx75-6-vs-sb29nrx75-8.402671/

They are New. Holders for a project that I won’t build, this is your chance to get the at a very good discounted price.
Will be shipped in proper custom made boxes.

Bargain price: Asking 380€ + PP fees + Shipping at cost for the pair (around 25€ within EU)
Retail value is 309€ each right now


Irreverent ... SE and Balanced preamps, presentation

As title sez - one name, two preamps.

Irreverent SE, logically, being for single ended signal arrangement, so 5 RCA inputs, and one RCA output; I'm usually mounting doubled RCA outputs, wired simply in parallel.

Irreverent (no suffix), balanced signal configuration, any number of 5 inputs can be arranged as (permanently) SE/RCA, balanced output can be wired to one or two (parallel) XLRs, or one XLR and (parallel) RCA

Irreverent is nothing else than unnecessary complicated Fancy Iron Pre, having all the bells and whistles on board (big one), with integral 128 steps resistive attenuator, governed with little Arduino Gizmo and there is shiny TFT and heavy remote.

Dazzling, Shiny and Overwhelming characteristics speech: Fully dual mono (custom made 20VA Donut for audio circuitry is having separate secondaries for channels; custom made 10VA Donut feeding all things Logic and switching), ultragigamega shunt regs, OhYeah! Toshiba For Audio JFets serving in buffers, precious Fujitsu relays for everything what's switched, volume attenuation constant Rin 24K, 128 steps of 0.56db each, ranging from -71.7 to 0db, and then (whadasurprize) autoformer (Cinemag or Jensen or Edcor repeaters) gain, settable to either +6 or +12db, yadayada.......

Button on front, fiddle left-right to set volume, push for incremental cycle through inputs 1 to 5.

I'll present files for SE only, balanced is more or less same with appropriate subcircuits doubled (buffers, attenuator)

TDA7292 Output DC Offset

Hey all,

I made a TDA7292 amplifier circuit by the book. Used star grounding separated out from the PCB. I have used the same PSU setup to test LM3886 and it worked perfectly fine.

When playing music whenever a deep bass note comes the amp output locks to -10 to -15Vdc. I noticed a pop and the sound would start to clip. Then I noticed my speaker driver heating up which has never happened before. I then measure the current and voltage and realized there's a DC offset at the output. I checked the input as much as I could but cant find any way a DC input could happen.

Here are the deets:
+/- 24Vdc from two SMPS connected in series with reverse diodes (the same setup worked for LM3886)
Designed for 16ohm load, tested at 8ohms too - the issue persists
Used some input RC filtering to cap lower and upper frequencies
Signal and Power grounds are connected outside of the PCB
The issue does not occur at very low overall volumes
Ive checked all the ground connections, all seem okay. The audio cable seems to be fine too.
Ive soldered 3 different boards with IC's purchased from Digikey and a local source (probably a copy) all have the same issue. I suspect something in my design is wrong but cant figure it out.

Attachments

  • TDA7292 - Assembled.jpeg
    TDA7292 - Assembled.jpeg
    171.9 KB · Views: 98
  • TDA7292 - pcb back.jpeg
    TDA7292 - pcb back.jpeg
    125.4 KB · Views: 84
  • TDA7292 - pcb front.jpeg
    TDA7292 - pcb front.jpeg
    202.6 KB · Views: 79
  • TDA7292 - Power.jpeg
    TDA7292 - Power.jpeg
    178.4 KB · Views: 94
  • TDA7292 Schematic.jpeg
    TDA7292 Schematic.jpeg
    92.3 KB · Views: 95
Projects by fanatics, for fanatics
Get answers and advice for everyone wanting to learn the art of audio.
Join the Community
508,228
Members
7,908,899
Messages

Filter

Forum Statistics

Threads
407,208
Messages
7,908,899
Members
508,228
Latest member
Jurij951