For Sale Various Brands 6SN7GT and GTB Pairs and Single tubes

ALL SOLD

Let me know which line items you are interested in and I can get a shipping quote for you. More complete testing data on most tubes is on a sticker on the tube box. These tubes come in generic white boxes with the testing data on the box. Please try to include the tube numbers in the line item when emailing me.
These are all nice basic tubes, sounded good in PP amp front ends or preamplifier applications. None are very microphonic.

I can get you more complete data or pictures if you need it.

I will remove tubes from the list once sold.

6SN7 VARIANTS

Tested on:

eTracer new gm is 2600, 80% is 2080, 70% is 1820

TV2-C/U minimum is 59

results are for triode 1 / triode 2

6SN7 GTA PAIRS $25/pair $15/pair

1) SOLD

2) GE Side Getter Short bottle #1104,1101 2504/2392 2488/2651 88-90/59 96-92/59

3) SOLD

4) SOLD

6SN7 GTB PAIRS $25/pair $15/pair

1) SOLD

2) SOLD

3) SOLD

4) RCA Bottom D Getter #1079,1021 2572/2584 2622/2671

5) SOLD

6) SOLD

7) RCA Bottom Getter #1023,1022 2935/2274 2256/2289 86-109/59 82-83/59

8) SOLD

9) RCA Side Getter #1078,1077 2132/2051 2417/2420

10) SOLD

SINGLE TUBES $5/EACH

1) SOLD

2) SOLD

3) SOLD

4) SOLD

5) Mech #1080 Bottom D getter 85-85/59


IMG_0940.JPGIMG_0941.JPGIMG_0942.JPGIMG_0943.JPGIMG_0944.JPG

RSS390HF-4 15" ref HF Sub 4 Ohm build

I acquired 4 of these drivers a few years ago. I am planning to build 1 subwoofer for 2 channel fed by a commercial amp. Later down the road I plan on building a second and incorporate it into a 2 channel/ HT setup. Since I already have 4 drivers, I was thinking of 2 drivers in an isobaric set up in a sealed box to reduce the size of the enclosure. The only negatives I can think of are cost and a more complex build. I bought the drivers years ago (used) so cost is not a consideration and my woodworking skills are good enough that the box construction would not be difficult.

Can anybody think of other reasons Isobaric is not a good choice and which Isobaric configuration is favored?

Thanks

Clarke

B&W Matrix 804 crossover Cap needs some help!!

Hi, I just purchased B&W Matrix 804 on eBay,, Despite almost 30 years old vintage speaker, it is still in good shape but want to replace the crossover if possible just the capacitor,, There are 2 crossover boards one for lower frequency and the one for higher frequency. The capacitor for lower frequency is Bennic bipola 7mfd at 70 watts,,, Only thing I can find on the web is 6.8 mfd at 100 watts,,,from Bennic. Is there any better alternative? For the high frequency board there are 2 caps from Bennic but they are seems like poly film caps. My understanding is that poly caps usually do not go bad unless it has been abused or do I also need to replace 2 poly caps as well? New to the hifi world and really need your opinion on the subject. Thanks

Is this an unusual impedance curve for a 15" ?

Hi all, i have an OEM 15" driver.....so no T/S parameters.....and am in the process of learning how to measure T/S.
I want to try the driver in sealed and ported boxes....for sub duty up to say no higher than 120-150Hz...and of course as low in freq as possible.
Once i measure T/S, I'll take it to Hornresp....

In the meantime, i've done an impedance sweep...free air, pointing up, sitting on the floor.
I've never seen such flattish impedance curve on a low end driver; have always seen a much sharper peak at fs.

Can someone tell me just from impedance, what to expect from this driver? How probably to best use it?
thx Mark

15 inch driver impedance on floor.JPG

For Sale Complete miro PCM56P-J DAC, also boards and chips

<all gone as of Jan 2024, thank you.>

As part of my miro DAC experiments I bought the last Burr-Brown marked PCM56P-J from Rochester and had a few boards made. They sound very nice indeed, but I have too many.

  • Complete and tested DAC board: all new parts including PCM56P-J, Wima and Elna Silmic caps, Vishay resistors. No op amps supplied, choose your own adventure. $100 + $10 postage in the US, $20 rest of world
  • 3 pairs of PCM56P-J chips available
    • 2 chips + board $35 (one set left) (have 2 sets)
    • 2 chips alone $30
    • Same postage as above, they're too thick to go as an envelope. Buy as much as you want for one shipping charge.

Attachments

  • pcm56boardfront.jpeg
    pcm56boardfront.jpeg
    434.7 KB · Views: 375
  • pcm56boardback.jpeg
    pcm56boardback.jpeg
    263.8 KB · Views: 301
  • pcm56kits.jpeg
    pcm56kits.jpeg
    496.2 KB · Views: 328

For Sale Ferrotec Ferrofluid, 500mL, APG W05

SOLD -- SOLD -- SOLD -- SOLD
Still digging stuff out of storage This ferrofluid is left over from a patent I was working on quite some time ago. I had two of these, but haven't come across the opened one yet. I recall it being well over $1000 for both bottles direct from Ferrotec. Will sell this unopened one for $99 plus actual shipping from Carlsbad, CA 92010.

20220411_165121c.jpg


Cheers, -Casey

Free TQWP 120cm high

Hi

I have these 2 tqwp cabinets to give away (there is only one on the pics to give you an idea)
I believe they are 22x35x120cm and I think I followed DHTRob plans:
DHTRob - Tapered Quarter Wave Tube (TQWT) loudspeakers
I used 18mm MDF.
One speaker has some water damage on top (see pics, soap bubble gun...). Nothing that cannot be sanded and repainted.

They were meant for Philips ad9710 full rangers (9.5'') Unfortunately one of the drivers I bought was defective and finally the project has been forgotten.

I have been playing with the idea of experimenting with them but I am too busy for that.
Also my Troels Gravesens's Vifa C17 d'appo is doing great and are not too shabby in the efficiency department.

The cabinets are for collection only.
I am in London (1-2mins from a major highway so easy to get to).
If you can bring some other diy stuff to swap that would be nice, but if you don't you can have them anyway. But please make sure you will use them!


I can add one ad9710 - not alnico (and what is left of the other one) for a small fee.
If you feel like like just experimenting with full rangers in a tqwp I have some other vintage 8'' philips drivers for a small fee or to swap. 8'' drivers will need an extra baffle with the correct size opening for the driver.

Attachments

  • _DSC2472.jpg
    _DSC2472.jpg
    662.8 KB · Views: 311
  • _DSC2473.jpg
    _DSC2473.jpg
    223.4 KB · Views: 269
  • _DSC2474.jpg
    _DSC2474.jpg
    189.3 KB · Views: 260
  • _DSC2475.jpg
    _DSC2475.jpg
    389 KB · Views: 247
  • _DSC2476.jpg
    _DSC2476.jpg
    195.1 KB · Views: 242

What's Your Favourite "Proven Design"?

Hi
Even though I've designed and built many speakers over the years (several 2 way sets; HT systems; Infinite baffle subs; folded horn bins), I haven't really done anything in 20 years, so I want to take the easy way out, and buy a pair of DIY Proven Design speaker kits - ideally with flat-pack cabinets..
I've sold off most of my previous designs, so all I'm after now is a stereo set of speakers for our living room casual istening (RnB, Blues, Rock, Clasical).
Budget is $300-800 US.

I've been trying to buy a set of Swan 3.1A DIY kits, but after trying all the various available emails, etc. I've so far had no luck.
So I'm now thinking of a pair of Paul Carmody's Overnight sensations.

But I'm throwing this into the forum to see if there is something else out there I should be looking at?
The two things I would prefer included in the kit would be flat-pack cabinets and circuit boards for the Xovers (if the crossovers are fairly complex).
Also a great sound stage would be high on the list.

Any ideas?🙄

AC problems in friend's house

So, a friend told me today of his weekend experience. Apparently the renters in the bottom part of the house blew the dryer breaker. When the landlord came over to check, he noticed there were more breakers that had popped. So he reset them all, and again when the dryer started, not long after, its breaker popped again. Shortly after this, as I understand, my friend noticed a burning smell in his part of the house, upstairs, and soon discovered that the power bar where he had his smart TV hooked up to burned! I saw the picture, there was a black streak on the wall where it's mounted (the power bar) and a big, 1 inch hole in the back of it. His guess was that the MOV or whatever protection device did its job, but seriously, the thing could have practically caught on fire...

Does anyone have an idea if this is a surge of some kind? There was no lightning or bad weather when this happened...

For Sale Scanspeak, B&C, Peerless and Dayton

(2) Peerless Exclusive 8" 830884. New in the box. $120 SOLD

(2) (4) Dayton ES180TiA. New in the box, one was removed for measurements in a project that did not move forward. Awesome motor and low distortion. $350 $200

(2) Peerless Nomex 5.5" 832873. Lightly used. $100

(2) Dayton AMT2-4. New in the box. $110

(2) B&C 8NDL51-8. Used for measurements but never used in a speaker. $200 SOLD

(1) Scanspeak 2104/7120 3/4" Revelator tweeter. New, only used for measurements. $125

All prices include shipping. Paypal only. CONUS only.

For Sale Tokin SITs (2SK180, 2SK182ES)

Edit: Disregard this post, I'm going to hold on to these SITs a little while longer -- in case that build-bug bites again. 😅

Sorry about that.

Might anyone be interested in a pair of either 2SK180 or pair of 2SK182ES?

I've recently acquired THF-51S for my next amp build and so I don't think I'll likely end up getting around to using these.

Both were acquired from Mr..Tomo Watanabe, and both are a matched pair. Unused, NOS.

Would be willing to discount when purchasing both pairs together.

Shoot me a DM if interested.


PXL_20220922_044014563.MP.jpg
PXL_20220926_045321070.MP.jpg

I would like to build a DAC without any transistors, just tubes and basic parts - Is such a design feasible?

I had the idea to make a "tube DAC", simply as an exercise to see if it could be done. I've seen a few designs that seem to achieve this. I also saw somewhere that R2R DACs can be implemented entirely with resistors, not requiring any active components? I'm making this thread to clarify my assumptions and what possibilities there actually are. Practicality and distortion are not specifically priorities here; while I may not proceed to build an impractical, high-distortion design, I am interested in knowing it exists.

Focal JM Lab Chorus LCR700 crossover upgrade suggestions

Hi all,

Recently bought a used Chorus LCR700 (built in 2001, I believe). The low frequencies are muddy and lack dynamics, mids sound shouty and nasally, and the highs are smeared and lacking detail. Please provide specific component replacement recommendations for the crossover. I aim to keep to this project under $100. Thanks!

Attachments

  • 3B3763D9-FC24-4CE9-BB4F-83B04B7516E0.jpeg
    3B3763D9-FC24-4CE9-BB4F-83B04B7516E0.jpeg
    323.7 KB · Views: 379
  • 108EB7CF-B0CA-4C33-8573-B847D9516C50.jpeg
    108EB7CF-B0CA-4C33-8573-B847D9516C50.jpeg
    238.4 KB · Views: 245
  • F60509A7-443B-4690-8FFD-79F45FDDA708.jpeg
    F60509A7-443B-4690-8FFD-79F45FDDA708.jpeg
    382.3 KB · Views: 292

  • Locked
Tektronix 2225 50Mhz (now sold)

SOLD

I've cleaning up my shop and getting rid of some redundant equipment, so this very nice scope is moving on.

Tektronix 2225 50 Mhz Oscilloscope and P6103 50Mhz 10x probes

Classic analog oscilloscope in excellent physical condition and good electrical operating condition. They don't make them like this anymore. Both channels work as do both probes.

For now, I'm limiting this to the SF Bay area since I don't want to deal with shipping something of this size. I will be attending Burning Amp in SF the weekend of October 15/16 and could bring it there. I'm located ~40 minutes south of SF on the peninsula. I'm looking for $175 but open to reasonable offers. I'd like to see this go to a good home.

https://download.tek.com/manual/tek_2225_op_and_opt.pdf
https://download.tek.com/manual/071615600web.pdf

2225 1.JPEG2225 2.JPEG2225 3.JPEG2225 4.JPEG2225 5.JPEG2225 6.JPEG

NCO based LED strobe light

Many turntables are equipped with a strobe light. The platter has marks that are illuminated by a pulsed light source. If the rotation speed is exactly such that the marks move exactly their step size in a time equal to the flash period, then the marks will appear to be stationary. This property is used to check disk rotation speed. Often the strobe lamp is powered by mains voltage, so mains frequency error will result in speed error. It is desirable to stabilize the frequency of the stroboscope with quartz.

When powered from the mains, the strobe lamp flashes 100 (50 Hz region) or 120 (60 Hz region) flashes per second. To obtain an accurate speed of 45 RPM or 78 RPM, it is impossible to find an acceptable integer number of marks. Therefore, these speeds are set approximately.

For the 50 Hz region:
Nominal speed: 33 1/3 RPM, real speed: 33 1/3 RPM, number of marks: 180
Nominal speed: 45 RPM, real speed: 45.113 RPM, number of marks: 133
Nominal speed: 78 RPM, real speed: 77.922 RPM, number of marks: 77

For the 60 Hz region:
Nominal speed: 33 1/3 RPM, real Speed: 33 1/3 RPM, number of marks: 216
Nominal speed: 45 RPM, real speed: 45.000 RPM, number of marks: 160
Nominal speed: 78 RPM, real speed: 78.261 RPM, number of marks: 92

To get an accurate value for any speed, it must be possible to fine-tune the flash rate of the strobe in small steps. All 3 sets of marks are not always applied to the platter. Sometimes there is only one set, then to check different speeds, you need to change the strobe frequency. All this requires some flexibility from the stroboscope.

The stroboscope is based on one of the smallest microcontrollers ATtiny12L. To generate the flash frequency of the LEDs, a software-implemented NCO (Numeric Controlled Oscillator) is used, which is usually one of the components of a direct digital synthesizer (DDS). This provides a frequency step of about 0.001 Hz, which allows any quartz to obtain any output frequency within this accuracy. This is an advantage of NCO over a simple divisor.

The stroboscope has the ability to generate 4 different frequencies, which are selected using the SEL0 and SEL1 inputs. Each of these frequencies is specified in the source text as a constant and can be any. The constants for the frequency code are calculated automatically. As the initial data, you must enter the desired speed with an accuracy of 0.001 rpm and the number of platter marks. For example, 50 Hz turntables typically have 180 marks for 33 1/3 RPM and 133 marks for 45 RPM. Based on this data, frequency codes are calculated at the compilation stage. For a speed of 33 1/3 RPM and a number of marks of 180, the LED frequency will be set to 100 Hz. And for a speed of 45 RPM and a number of marks of 133, the frequency will be set to 99.750 Hz, which will give a speed of exactly 45.000 RPM. The speed of 78 RPM can be checked on any set of marks, 180 will be set to 234 Hz, and 133 marks to 172.9 Hz.

#define FREQ_1 FREQ(33333, 180) ;preset 1
#define FREQ_2 FREQ(45000, 133) ;preset 2
#define FREQ_3 FREQ(78000, 180) ;preset 3
#define FREQ_4 FREQ(78000, 133) ;preset 4

In order for the marks to be sharp, the duration of the flashes must be short. The duty cycle of the LED flashes should be 4 ... 16, shorter flashes give a clearer picture of the stroboscopic marks. In the final version of the firmware, the duty cycle is set to 16.

There is another problem - the stroboscope can become a source of interference. A pulsed current flows through the stroboscope LEDs, and if the stroboscope power wires are long and close to the signal wires, interference may occur. Another possible cause of noise is that the LED supply current can create a pulsed voltage drop on the ground wire. For this reason, some turntables have the ability to turn off the strobe. To eliminate the problem of interference, it is desirable to localize the pulsed currents within the stroboscope board, and make the current consumption of the board as a whole constant. To obtain a constant current consumption, a current source is used, implemented on transistors VT1 and VT2. This current source charges the capacitors C6, C7, C8, from which the LEDs VD1 ... VD3 are powered. If the voltage on the capacitors exceeds a certain threshold (about 4 V), the parallel regulator U3 (TL431) turns on, ensuring a constant consumption even without working LEDs. The simulation graph shows that with a total LED pulse current of about 60 mA, the total consumption is about 16 mA, and it is constant.

The stroboscope board can be powered by an external voltage of 5 V. For versatility, a U1 stabilizer is installed on the board. As a result, any voltage within the range of 7 ... 20 V can be used for power supply. If there is a voltage of 5 V, the U1 stabilizer can be excluded.

The stroboscope printed circuit board is single-sided, 30 mm x 40 mm in size. In order not to drill any holes at all, all parts are soldered in the manner of SMD. Electrolytic capacitors are soldered with shortened and slightly bent leads to the pads. The programming pins are soldered as follows: first, the plastic moves up, the pins are soldered to the pads, then the plastic moves down again.

The convenience of this stroboscope design was confirmed during the repair of the Bang & Olufsen Beogram 2000 turntable. He has only one strobe scale, which contains 180 marks. There is no built-in strobe light. For a speed of 33 1/3 RPM, you can use, for example, a neon lamp powered by a mains frequency of 50 Hz. But how to check the speed of 45 RPM? With this strobe, it's simple - you can add the output frequency FREQ (45000, 180), which will give 135 Hz. The marks on the Beogram platter are very high quality, so it was possible to check how the duty cycle of the LED pulses affects the sharpness of the edges of the mark image. With a duty cycle of 4, the marks are quite blurry. With a duty cycle of 8, it gets better, with a duty cycle of 16, the image is close to ideal, a further increase in the duty cycle is not required. This duty cycle is set in the final version of the stroboscope firmware.

The stroboscope can be built into the turntable or made as an external device. In the second case, you can use, for example, a phone charger as a power source.

Attachments

  • strobe_sch.gif
    strobe_sch.gif
    22.2 KB · Views: 159
  • strobe_pcb.gif
    strobe_pcb.gif
    59.4 KB · Views: 146
  • strobe_pcb.jpg
    strobe_pcb.jpg
    92.3 KB · Views: 120
  • strobe_i.gif
    strobe_i.gif
    10.5 KB · Views: 127
  • aes_speed.gif
    aes_speed.gif
    52.1 KB · Views: 134
  • strobe_bang.jpg
    strobe_bang.jpg
    25 KB · Views: 156
  • strobe_pcb.zip
    strobe_pcb.zip
    115.3 KB · Views: 81
  • strobe_source.zip
    strobe_source.zip
    5.7 KB · Views: 93
  • Like
Reactions: alighiszem

Reworked my piezo preamp design; failed

So, I had a previous thread here wherein I used an instrumentation amplifier with mixed results, to act as a preamp for a balanced piezo pickup. It was determined that I had unnecessarily used low-value caps in a HPF on the input, and also I was using an inst amp IC that didn't have jfet inputs, which contributed to noise.

I decided to try again, this time using an instrumentation amp built from opamps instead of a single IC. I feel like my component selection was really good, and I checked and triple checked my schematic. But, I soldered everything together with a new board today, and got nothing but hum. I checked all my connections and all are solid.

Went back to my schematic, and found one flaw! I connected the wrong leg of the difference amplifier part of the inst amp, to ground. If you look at the schematic below, R-I7 and R-I8 connections are switched from where they should be. This makes the + leg of IC-I2.2 biased to the input signal, and the - leg biased to ground, instead of vice versa.

My questions:
1) Would this error alone cause buzzing and no audio to pass through (except buzz)?
2) Are any other huge errors present here that I'm missing? I've looked at this so many times, but I feel like I'm missing something else.

I appreciate everyone's patience, this is only my second venture into something built from scratch (not using others' schematics).
Schematic_The PiezoBuddy_2022-09-26.png

DAC PCM5102 module pinout

I'm looking at fitting one of these to a Cyrus DAD3 player which can be upgraded with a factory plug in QDAC module. It appears the pins to the QDAC match I2S and I have identified most of them on the PCM5102 module, photo below, but don't know what VIN is for.

In addition the QDAC has a pins labelled /ATTEN, TYPE and DOEN that does not appear to be supported on tis module - any idea what these are for?

And has anyone done something similar?

What I have so far is:

Pin Description QDAC pin
--- -------------------------- ----------------
SCK system clock X CLOCK
BCK bit clock BIT CK
DIN data input DATA
LCK data word WORD SEL

GND 0V
VIN ?

FLT filter select TYPE?
DEMP de-emphasis D_EMPH
XSMT soft mute /MUTE
FMT audio format TYPE?

A3V3 3.3 V supply

AGND analog ground
OUTR right channel output

AGND analog ground
OUTL left channel output

Attachments

  • PCM5102 DAC Decoder.jpg
    PCM5102 DAC Decoder.jpg
    33 KB · Views: 435

PGA2310 based preamp finished

After 3 month I've finished my PGA2310 based preamp. Some technical data :

Digital part :
- PIC 16F628 running at 4MHz for volume and mute control and driving LCD display
- PIC 12F675 running at 1MHz for input selector
- 16x2 LCD with backlite
- PGA 2310

Analog part is based on the schematic from

This page . The only difference is that I used OPA2134 for input and output buffer.

Here is the front view

Attachments

  • pga2310 01.jpg
    pga2310 01.jpg
    72.2 KB · Views: 3,060

Keystone, Th18 or more tham15s?

Hi, consulting the forum for some wisdom

Summer is over and time to upgrade the12vbattery sound system, searching some guidance on what is the best route forward

Currently using 3x tham15s, parallelled on a classD amp, doing only dj-gigs, and it sounds downright amazing after some proper tuning.
But I cant shake the sensation that I would appreciate more low end, and I am prepared to go 18", but I would like to discuss another option as well.

I am hounted by the thought: "If I just could find a way to squeeze 5hz more down low (+psychoacoustic bass enhancement algorithm) , MAYBE I would be satisfied with 3 more thams to fullfill my childish dream of 2x3 vertical stacks, instead of replacing the whole rig".

Did anyone try a 45hz bass boost with a steep HPF to sqeeze some extra low end on the tham15s? Or should I just accept that a 15"TH is not a 18" before I brake anything?

Would some barn doors on a vertical 3x stack boost low end, or just raise db of the entire bassband?

So I have been looking around for other options, and I am considering the Keystone and the Th18. From what I have been able to find, there are some reports that the keystone is a little more sensitive than the th18, wich is an important factor when limited amp power. Any other cab designs that should be mentioned?

I am a little concerned about going 18" in regards to amp power. Anyone got info about the powerfactor needed for 10hz more in low end with same amount of speakers at same volume?


Questions summarized:

1. Thoughts on a 45hz bass boost with a steep HPF to sqeeze some extra low end on the tham15s?
2. Would some barn doors on vertical 3x stack boost low end, or just raising entire passband?
3. Other TH-cab designs would be suitable?
4. Additional powerfactor required for 18" - 40hz and up in relation to thams15s 50hz and up?

Appreciate all inputs

Sincerly,
kris

NAD C325BB Power fault

Hi, I've had my NAD C325BBB around ten years. Pressed front panel ON/OFF last week, amber light doesn't go green. I've downloaded the service manual. Found out there is no +37VDC at CB53 (the power out 7-pin connector on the power board). However, on taking out the power board, all the solder on the +37V pin has melted, giving no volts to the main board. So I'm gathering there was a fair bit of current being drawn by something on the main board. I'm unable to find any short-circuit on the main board at the +37V in points, ie jcn R41/R45 and at R427. Has anyone had this sort of fault on these NADs?? Also reading another post of a NAD C320 he talks about notorious capacitors!! Can anyone enlighten me about them, please?? Many thanks for any help.

Internet router and pulsing from speakers

Would someone please help me with diagnosing a problem with internet router interference. I have an Xfinity internet router connected via coaxial cable to the wall and a turntable, preamp, amp, and speakers adjacent to the router. When the router boots up and goes online, the speakers output a low frequency pulsing sound. It is only when the router fully goes online and connects that the pulsation emanates, not before then when the standby light is flashing.

I have no other place to connect the router a good distance from the analog setup and vice versa. I tried unplugging the coaxial cable and the ethernet cable but this has no effect on the pulse emanating from the speakers. Unplugging the router of course solves the problem. At first I thought there was a fan inside the router causing the pulsation but there is no fan; and this sound is similar to what you might hear from some sort of fan interference.

Bob Cordell C70 KT-88 Vacuum Tube Stereo Amplifier

Is anyone familiar with Bob Cordell's C70 KT-88 amp design? (link: https://linearaudio.net/sites/linearaudio.net/files/v2 bc.pdf)

I've been in to tube guitar/bass amps for while, but looking to build a HiFi amp.

I like the KT-88, although could also run it singled ended and still get enough power. I'd look to add some solid state input switching and volume control.

Any feedback on the above design, or suggestions for alternates that I could look into would be appreciated.

Cheers

DATS V3 attn John M

I have recently updated my iMac (M1 chip, SSD) and run Parallels Desktop for work, and all sorts of Window 11 software, including VituixCad, all good, and iMac runs both Op Systems simultaneously. So, I ordered the DATS V3 system.

While the software loads properly, it does not recognize the box connection (nor keyboard inputs) even though I have set input and output to its (USB via lightning bolt converter) USB Audio Codec connection, per the directions. Parallels states its because the software has not been upgraded to ARM architecture?

Ed P, over at Midwest Audio Club suggested I contact you on this forum.

Is there something I can set / do differently to get the measuring box to communicate through the connection?

If not, can the DATS V3 measuring box work with REW which runs directly on my iMac’s operating system?

Thanks in advance.
Andy

Class D Amplifier Waveform

Excuse me everyone , im kind a getting confused and my head is turning around also dillema about my single rail class d amplifier waveform output, is this good waveform or the worst amplification and/or just the weird audio amplifier i've made so i really hoping the suggestion and a bit help,
here is the waveform picture,also be able to see the detail waveform in pdf

Some info about this amplifier : fullbridge , supply source at 64V single rail , 4Ohm Load , input signal injected at 500hz , sawtooth signal something around 450Khz


Untitled 1.png

Also If anyone who interesting to saw the schematic (might be none😄) i will drop it in this post

Attachments

How to construct a cube louver (Acoustat)

Could someone give me some insight into how Acoustat types are constructed. I believe I understand most of it.
what I'm mostly confused on is.
Do you make one side of a cube louver by applying the wires to the louver, apply the spacers to the cube louver, then glue the stretched membrane to the spacers, repeat for the back side cube louver.
I thought the Acoustat was somewhat dis-assembleable? If so, this would be permanent.
Is there a better way?
Thanks
Paul

Technics Receiver SA-424 - Tuner doesn't do it anymore

Hello,
I do have a receiver make Technics SA-424. It was stored in the dry basement for many years. As it is today raining cats and dogs, I grabbed the "forgotten" receiver and cassette deck RS-M260, hooked them up to the power line and speakers. However, I had to realize that the tuner did not function at all. The receiver has a buildt in analog and digital metering to show the frequency selected. Both did not work. Except the analog meter (to show the field strenght) at least lit up, nothing else. The ability to select the preset channels and to tune is completely lost. All the LED diodes did not light up. The LCD scale to show the channel frequency selected was dead, too.
However, the amplifier works very well in conjuction with the cassette deck. Pretty good sound.
To tell you I'm lost at the moment. Beforehand opening the receiver, I would like to spread the information into the forum. May be anybody has an idea how to remedy the problem. I hope, that there is an easy solution to remedy the problem reported, e.g. a microfuse to be replaced etc.
Thanks for a qualified answer.

Input and switch boards for Soekris DAM1021 DAC - normundss

SOLD!


Hi,

Due to a request i remembered that i still have spare parts for this project, these pcbs and some new / unused part ... some not more available at DigiKey / Mouseror or EOL.

IMG_6177.JPG

PCBs:
  • DAM1021 input board V2.3
  • DAM1021 front panael - switch board V2.3
  • RPi connector V2.2

IMG_6185.JPG

Parts (like Toslink & SPDIF connector, MOSFet, heat sink, digital transformer, Norlin switch, ...):
around 40€

IMG_6186D.JPG IMG_6188.JPG IMG_6189.JPG IMG_6190.JPG

SOLD!


Cost: 50€
Shipping germany (without islands): 6€ (trackable & insured)
Shipping: 20€ world wide (not trackable & not insured)
Shipping: 25€ world wide (trackable & insured)

Hypex Ncore NC502MP 2x350W modules bridgeable @ 1200W + cables

Hi amigos,


I am selling my NC502MP Module + Cable Set. (2x350W / 8R or 1200W / 8R bridged).

Free Shipment to Europe only.


It is like new.

Well known module, excellent perf. great for any DIY projects

See Measurements @ ASR

470€ shipped for free + I offer cables set


SPEC :


Hypex NCore NC502MP twin Channel Module

PSU SMPS integradted 1200W

Nord Switchable RCA-XLR input board

Auto sensing 100-240V mains input operation

0.5W standby operation

1.5KW Main PSU

47K Ohms Input Impedance, low output impedance

THD 0.0018%

S/N Ratio 116dB

26dB Voltage Gain

1X1200W 8 ohms bridged

2 x 350W 8 Ohms

2 x 500W 4 Ohms

2 x 450W 2 Ohms

Fully loaded flat frequency response


92% efficient

diy binaural mic electret volume matching

im building a binaural mic with my son.
Parts are mainly 3d printed ears and acoustic dividers an usb soundcard with stereo mic inputs and two cheap electret lavalier mics (electret capsules).
For a first test i resoldered the two microphone cables to a stereo jack and tested them with the usb soundcard. They work well, only problem is an about 9db volume difference between them.
I dont want to replace them with higher quality electrets in the first tests so what would be the best option to match them? can i use an l-pad on the louder one? or is there a trick to have higher gains on the lower volume one?
Recommened resistor values?

im asking because im not sure what happens when i add like an l-pad and that of course changes the support voltage too
.

First Watt F5 clone initial adjustment problem

10:04 AM 9/21/2022
Hello,
This is a question about the F5 First Watt clone. We built one from parts purchased from DIY. I say "we" built it because a professional colleague is building it for me. It works, but it isn't matching the published voltage on the measurement to adjust bias.
On the first startup we blew the P channel MOSFET (Q4) on one channel because we did not understand the adjustment procedure. I purchased a new kit of MOSFETS and the BJT limiter transistors (Q5, Q6) from DIYAUDIO. We replaced both MOSFETS and the limiter transistors on the blown channel and tried again.

The P channel MOSFET I received in the replacement parts kit is not the same as the original and I questioned that and was assured it was an upgrade. The original was the IRFP 9240 and the upgrade is the IRFP 9141. We did not change the working channel MOSFETs and left the IRFP 9240 in the working channel. This was to keep a spare MOSFET if needed. Why would we need a spare? Smile.

We don't have a variac and used the old trick of houshold light bulbs in series with the AC input to keep things from getting out of hand too quickly. After verifying things were OK, we removed the series light bulbs. Both channels work and have very low DC offset voltage in addition to the ability to play audio.

But, the two channels are very different from each other and also very different from the published bias. The DC supply is +- 23 and is based on the DIY PSU board and published schematic in the DIY build guide. We did not have the PSU board at first and used caps clamped to the chassis floor and a bridge bolted to the front panel.

We can't get the bias past a tenth of the published value of .59 on either channel; we are running at about .059 on both channels. Attached is a table of the values we have. After our first experience of blowing the MOSFET, we watched the voltage drop across the .47 source resistors(R7, R8) as a safety check of power dissipation.

In channel 1 the drop across the source resistors is about 0.700 volts as in the table. In channel 2 the drop across the source resistors is about 0.13 volts. Both channels, as noted above have the same balanced drops across R9 and R11. Channel 1 is running about the right heat to the touch and channel 2 is barely warm to the touch which would be the case with the low drop we see across the source resistors.

We believe that the input JFETS are OK based on voltage measurements and the ability to play audio seems to confirm this. The same input level of audio produces the same output level, as measured by ear, in both channels. P3 was adjusted to the middle mechanically before startup and adjusted for equal drop across R3 and R4.

I am going to ask my colleague, Michael, to describe what happens when he attempts to raise the bias using P1 and P2.

…… Both the channels will only balance at about 0.52 to 0.58 volts. When an attempt is made to go to a high balance point the amount of imbalance stabilizes at about 0.125 volts. At this point adjusting either P1 or P2 drives both voltages in the same direction maintaining the 0.125 volt imbalance. When the higher of the balance voltages reaches the 0.59 volt range the drop across the source resistors gets near or above 1.25 volts which drives the source resistors to 3 watts.……

Thanks for any suggestions. It strikes me that the .7 current across the source resistor is about rith, but why is the bias so low? Attached is table of measured voltages.

Attachments

CFH11CX2 Amp

There was an amp I worked years ago called the CFH7. More info on that thread here. It was basically a VSSA current feedback front end married to the Class AB hexFET output stage of the FH9. After some mods and testing by other members, most notably, Thimios who identified some oscillations and how to fix them, we went on to make higher output device counts on this amp. We ended up at 2 output pairs (4), 2 drivers, a Vbe multiplier temperature compensation (1), and the input pair (2) for 9 actives. A member added a cap multiplier for each rail to clean up the front end rails which is technically 2 more. The name remained at CFH9 but had a CX designation for the cap multiplier. Technically it’s a CFH11CX2. The naming follows Apex Audio’s convention: C for current feedback amp, F for FET output stage, H for hexFET (vs laterals), 11 for number of actives, we added CX, for cap multiplier, I added the 2 for second generation. A big thanks to the others who provided help, discussions, inspiration, and assistance in testing and layouts: Shaan, Gaborbela, Thimios, Apex Audio, Mjona, MG2016, Ashok, Thiago, Saddevil,… it really was a community project.

It’s a very simple amp:
CDBC00BC-2A91-486C-A731-044C10F88726.jpeg


But the predicted performance is quite amazing - here is 1W info 8ohms, essentially no distortion (THD is 0.000023% - that’s 0.2ppm - in reality it won’t achieve that due to imperfect models or parts but we get the idea that it can be very transparent given such a low parts count):
543D8C88-9632-4B18-9F6B-EC9D1CA9E2D2.jpeg


Here is a bit more power 50Vpp into 8ohms:
61B0E028-A8F0-4A94-B671-47079A5175E2.jpeg


A nice layout was made by Thiago and that has recently been verified to work by fazildiken:
cfh9cx-jpg.998976


Fazildiken’s build:
img_90823-jpg.1059338


This was my CFH9 with MG2016’s layout being tested:
579418d1478858023-cfh7-amp-cfh9-amp-heatsink-mounted-05.jpg


Square wave test:
579582d1478932655-cfh7-amp-cfh9-1khz-square-wave-o-scope.png


I even had it running as stereo on a plank amp:
579913d1479076957-cfh7-amp-cfh9-39v-cap-mult-stereo-vert.jpg


I am thinking of taking this as a starting point and doing a few more mods to it and maybe a new layout one of these days. No rush on this project but just getting it out there and to start thinking about it.

PSU chassis – grounding, earthing & shielding questions

Hi,

I am building a dedicated power supply chassis for my preamps. I want to have a box with 3 independent power supplies for L & R channel plus volume control (Muses from Academy Audio).

My system:
  • Miro’s DAC based on AD 1862, common ground for L & R channel
  • Preamps (BA3 & Wayne's 2018 Linestage), dedicated grounds for L & R
  • 2x Aleph J monoblocks
Power supply for preamps:
  • 2x Salas shunt regulator for L & R channel +-24V
  • 1x Mark’s VDRN (not populated yet) for Academy Audio VCU Muses 72320 volume control +-15V

Questions to preamp PSU:
  • All PSU will be connected via dedicated CL-130 (50 Ohm). I have those available. Is 50 Ohm ok or better to use 10 Ohm resistor 2W (also o?
  • Earthing from power chassis to the preamp chassis. I can use one of the wires for that. It is 0.5mm2 = 20 AWG copper. Sufficient?
  • Shielding. The cable has mesh shield – picture. I can connect the shielding to metal plugs on both sides. This will form another earthing connection between Preamp chassis and the PSU chassis. Is that a right way of doing that?
  • I do not connect left and right channel grounds at any point expect the Muses volume control. I assume this is the best option as per Academy Audio Manual: “The VCU board features separate connections for the Left (Com_L) and Right (Com_R) analog grounds. These grounds are connected on the board to minimize cross talk. It is recommended to use isolated ground audio connectors to ensure the lowest cross talk and noise pick-up.”

Few pictures attached.

Thanks

Attachments

  • 1.jpg
    1.jpg
    715.6 KB · Views: 149
  • 2.jpg
    2.jpg
    339.6 KB · Views: 138
  • 3.jpg
    3.jpg
    583.8 KB · Views: 139
  • 4.jpg
    4.jpg
    602.6 KB · Views: 130
  • 5.jpg
    5.jpg
    218.1 KB · Views: 139

Hafler P1000 physically vibrates and hums... new filter caps?

Hello Everyone,
Today, I pulled out and powered up an old Hafler P1000 amplifier that I had stored in a closet for many years. When I powered it up I immediately noticed a faint humming noise. This noise is coming from the actual amplifier assembly. I can feel the chassis vibrate.

The audio signal is clean, meaning that there is no obvious or audible ground loop hum in the speakers.

It occurs to me that it may be good to replace the power supply filter caps,

Is that too simplistic of a response?

Can you share any insights or advice?

Thank you.

a dead Musical Fidelity A100

Hi, I have a musical fidelity A100 which runs like a wok. To my regret, I happened to forget to turn it off last night, and when I was back from work tonight it was as hot as a volcano.

I quickly turned it off and scrubbed it with semi-wet cloth to cool it down.

After an hour or so, the amp was powered up for check. Power was ok, but no sound. I'm sure it's not the thermal fuse, as the thermal fuse failure doesn't turn it on at all.

Any idea is appreciated. Thanks,

Thinking of adding a subwoofer, looking for hands-on experience.

I'm kind of leaning towards adding a subwoofer to give it a slight boost up to say ~60hz, music is the priority though I use the stereo when I watch films as well.
I've modeled a lot of different subwoofers in WinISD to see what looks good on paper, but that doesn't tell me much more so I figured I would ask if someone has some hands-on experience with any of them, maybe one I should avoid (or possibly another one that you might suggest).
Now as always, price is a big concern, size of the box could easily become one (with one sub I need to be able on position it right), and it does need to have a reasonable sensitivity as I'm not going to add a massive amplifier (leaning towards Dayton SPA300-D).

SB Acoustic SB34SWNRX-75-6 (looks great vented, at the upper end of price)
https://sbacoustics.com/product/12in-sb34swnrx-s75-6-norex/

Dayton Audio DCS305-4 (models about the same as the SB, price is better)
https://www.daytonaudio.com/product/39/dcs305-4-12-classic-subwoofer-4-ohm

Earthquake Tremor-X 124 (in closed enclosure it's close to the two above, might lose a little bellow 30Hz, on sale right now in Europe so it cost about the same as the Dayton)
https://www.earthquakesound.com/ind.../car-products/car-subwoofers/item/tremor-x124

Earthquake Tremor-X 154 (in closed enclosure it still need a bit of box volume, but does produce another 4dB or so over the others)
https://www.earthquakesound.com/ind.../car-products/car-subwoofers/item/tremor-x154

Simple High Performance DC Coupled Class A HPA with sub PPM THD

Edit April 5, 2019: Beautiful example of this amp in finished case by Avtech23 on post 425.
747613d1554435767-simple-performance-dc-coupled-class-hpa-sub-ppm-thd-sherpafinished1_dxofpr-jpg


747614d1554435767-simple-performance-dc-coupled-class-hpa-sub-ppm-thd-sherpafinished2_dxofpr-jpg


*****

This is a simple DC-coupled high performance SE Class A headphone amplifier design by member TimS who has approved this GB. The design uses four cascoded BF862 JFETs on the input stage. They provide compensation for DC drift and the amp has stable DC offset of less than 5mV. The design has a dynamic CCS, reminiscent of an Aleph to provide good efficiency and low distortion from two P-channel MOSFETs in the output stage. Simulations show very low THD in the sub 1 part per million (PPM) range for 5vpp into 55ohms for a 400mA bias current. At this bias, the heat output is about 14w per channel and allows it to be used as fleawatt speaker amp and able to drive 8ohm speakers to 1.5w with 0.004% THD. Increasing the main source/drain resistors to 2.7ohms sets the bias current at about 115mA and this has very good performance. I built a hand etched prototype and measurements and listening shows a very powerful, dynamic, and clean sounding amplifier. The GB boards will be high quality 1.6mm thick with 1oz copper and ENIG gold finish with blue solder mask.

Here is LTSpice schematic and DC setpoints for simulation:
685372d1528348988-simple-performance-dc-coupled-class-hpa-sub-ppm-thd-tims-simuation-schematic-v3-png


Predicted FFT for 5vpp into 55ohms with 400mA bias:
685377d1528349430-simple-performance-dc-coupled-class-hpa-sub-ppm-thd-tims-simuation-400ma-5vpp-42ohms-fft-png

Here is hand etched prototype:
685071d1528188075-simple-performing-headphone-amp-img_1820-jpg


Measured FFT for 115mA bias 1vpp into 42ohms - note that elevated H2 distortion peak is probably a component choice of the lwo cost prototype (cheap steel leads on resistor, etc). I am quite sure that a proper amp using a real PCB and all high quality resistors and MOSFETs will be superior:
685361d1528330028-simple-performing-headphone-amp-tims-simple-hpa-1-0vpp-42ohms-fft-png


Measured 1kHz sine wave at 17.6vpp for 115mA bias and +/-15v rails for almost 1wrms into 42ohm load
685358d1528329940-simple-performing-headphone-amp-tims-prototype-test-1khz-sine-clip-jpg


10kHz 2.5vpp square wave - nearly perfect performance with no overshoot, or ringing:
685359d1528329940-simple-performing-headphone-amp-tims-prototype-test-10khz-sq-wave-jpg


This is the schematic for production PCB:
685373d1528348988-simple-performance-dc-coupled-class-hpa-sub-ppm-thd-timss-final-schematic-prod-png


Here is the layout by JPS64:
684977d1528123994-simple-performing-headphone-amp-5b1e1d98-a607-4bd7-bf35-7935a0f78e8d-jpg


Here is 3d render of PCB with components (bottom side):
684975d1528123994-simple-performing-headphone-amp-c96ec7c8-2f08-47ac-9ea1-90d82ccd56d6-jpeg


3d render of PCB with components (top side):
684976d1528123994-simple-performing-headphone-amp-fbedc091-3dcd-42a5-8ec0-2aafb59eb563-jpeg


How does it sound? Very dynamic, transparent, open with deep deep bass. It is DC coupled in and out so there is no capacitor to color the sound. The distortion is very low and you have to be careful not to play your headphones too loud if you are used to judging loudness by distortion. It's a great little amp that is easy to build with relatively low cost parts, yet is very high performing. Compare the predicted distortion levels with amps using 5x as many transistors. The nice feature about this amp is the rather high output power it is capable of and a rather high gain close to 20dB that allows one to drive an inefficient set of planar magnetic headphones to loud+ levels with very low distortion.

If there is interest, please add your name to GB interest list. Cost will be about $28/set and shipping will be $5 in US, $10 in Canada, $15 everywhere else.

Update July 3, 2018;

The FFT of the wall mains powered 12v to the on-board ultra low noise DC-DC dual rail PSU has noise characteristics resembling a battery. Note total absence of 60Hz/120Hz/180Hz/240Hz mains peaks and how low the "grass" of the noise floor is:
688827d1529986528-simple-performance-dc-coupled-class-hpa-sub-ppm-thd-tims-hps-dc-dc-psu-142ma-1-02vpp-47r-fft-2-png


Here is the final design for production, and it is an 8 panel board that contains:

  • input and source switch board (only preamplifier version)
  • crossfeed board (with defeat Xfeed ON/OFF switch)
  • headphone jack output board (6.35mm stere TRS output jack)
  • volume potentiometer board (with the possibility of three different types of pots)
  • PSU (includes CLC, DC-DC dual rail step up, cap Mx, CRCRC filter to produce battery-like rails from simple 12v wall-wart)
  • CLC filter board (in case you want to use your own PSU)
  • ON/OFF switch board
  • amplifier board

The above boards can be mixed and matched and connected for either an HPA or a preamp following this diagram:
689951d1530589553-simple-performance-dc-coupled-class-hpa-sub-ppm-thd-simple-hpa-block-diagram-png


Schematics and other data here:
Simple High Performance DC Coupled Class A HPA with sub PPM THD - Page 10 - diyAudio

Top side:
689952d1530589553-simple-performance-dc-coupled-class-hpa-sub-ppm-thd-shpa-pba-top-2-jpg


Other side:
689953d1530589553-simple-performance-dc-coupled-class-hpa-sub-ppm-thd-shpa-pba-bot-2-jpg


Mounted in a popular all CNC'd $36 Aliexpress case as a HPA, it looks like this:
689422d1530307921-simple-performance-dc-coupled-class-hpa-sub-ppm-thd-hpa_front_2-png


Here is rear view of HPA:
689423d1530307921-simple-performance-dc-coupled-class-hpa-sub-ppm-thd-hpa_rear_closed_2-png


As a preamp with your own machined panels, it looks like this:
689375d1530286481-simple-performance-dc-coupled-class-hpa-sub-ppm-thd-tims-preamp_open-jpg


Rear view of preamp:
689374d1530286481-simple-performance-dc-coupled-class-hpa-sub-ppm-thd-tims-preamp_rear-png


Edit July 21, 2018: final schematics and stuffing guide here:

Simple High Performance DC Coupled Class A HPA with sub PPM THD - Page 10 - diyAudio

Update Aug. 4, 2018: Schematic Update! Please use this schematic for the PSU as the original has a few typos.

Update Aug. 5, 2018: Silkscreen on PSU PCB has error: Diode V241 has cathode and anode flipped.. Mount diode with Anode towards Drain of P channel MOSFET on cap Mx.

Update Aug. 27, 2018: verification build of GB boards completed. Amp sounds superb and measures very well. Here is FFT for 1vpp into 51ohms - very similar to earlier measurement but much lower distortion.
699591d1535270403-simple-performance-dc-coupled-class-hpa-sub-ppm-thd-shpa-gb-build-01-jpg


699790d1535317831-simple-performance-dc-coupled-class-hpa-sub-ppm-thd-shpa-gb-verif-build-fft-1-03vpp-51ohms-png


Update Sept 2, 2018: BOM from verification build can be found here.
Simple High Performance DC Coupled Class A HPA with sub PPM THD - Page 24 - diyAudio

Attachments

  • TimS-Simuation-Schematic-v3.png
    TimS-Simuation-Schematic-v3.png
    53.4 KB · Views: 6,646
  • TimsS-Final-Schematic-for-Prod.png
    TimsS-Final-Schematic-for-Prod.png
    97.4 KB · Views: 7,295
  • TimS-Simuation-400mA-5vpp-42ohms-FFT.png
    TimS-Simuation-400mA-5vpp-42ohms-FFT.png
    9.4 KB · Views: 5,613

Stand Mount 3 Way + Dual Subwoofers (making this a 4 way in reality) Active Project Questions

Project Overview:
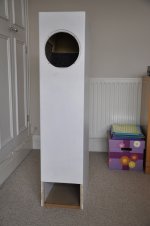
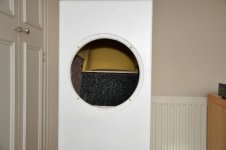
1. The project will be for a 'modular' (I will explain this below) 3 way plus subwoofer configuration in a 0.56 cubic foot Dayton/Denovo cabinet.
2. The cabinet will share the 7" or 8" woofer and whatever midrange is selected.
3. The cabinet's interior is limited to a 7" cutout but given that the actual driver will be mounted in the baffle and that it tapers toward the magnet I can probably get up to 7 1/4 inch cutouts in this cabinet by using a dremel to lightly remove small 1/8" areas from the MDF of the interior walls on each side (maximum) without violating the integrity of the cabinet.
4. I am going for a 'sealed' configuration for easy integration with the 2 x subwoofers.
5. The speaker will be 100% active and audiolense XO automatically time aligns to minimum phase or linear phase depending on your choice so from a crossover perspective all I have to feed audiolense are a few things as shown below. Audiolense will automatically flatten the response using psychoacoustic algorithms to whatever curve you've drawn up for the overall speaker response peaks and such are automatically handled. Dips however are a concern as I prefer only to cut not boost so big dips likely will reduce overall speaker sensitivity.
a. The crossover point between each driver.
b. The 'octave width' of the crossover point. I can make digital slopes that are EXTREMELY steep, I've successfully used 0.5 octaves for the crossover point width before.
c. A target response config/room curve i.e. whatever I draw, the harman curve, B&K curve, toole curve, etc.
d. The 'correction' profile i.e. if I want per driver time alignment, phase type, number of taps per correction file, etc.
6. Each driver will have it's own dedicated amp channel of 80wpc capable of 4 or 8 ohm loads so likely 4 is preferred in all cases to get the additional sensitivity out of the driver.
7. The room is my office and is maybe 10' x 16'. I sit at one end of the narrow range of the rectangle.
8. The speakers will be stand mounted 4-6' out from me on either side.
9. I listen at moderate levels, ideally I would like to target output levels of 89-94db with very low distortion or strain on the drivers, I don't really care about MAX SPL, what is more pertinent is that I be able to listen in that 89-94db range with no audible strain/distortion.
10. I would like to spend under or around $100 per midrange or midbass driver. If there are compelling reasons to spend more I will entertain them for sure.
11. I like 'detailed' in a driver versus 'analytical' i.e. I want a lot of detail but not to subjectively enter analytical territory where any music that isn't perfectly recorded sounds granular/grainy.
12. I listen to all types of music. This will be 100% for music not HT.
13. Given that my office is an audio laboratory I don't care - at all - about driver appearance or WAF. These drivers can be as ugly as we want.


Alternately:
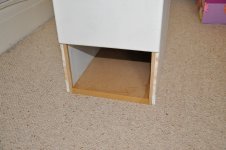
I could make a dedicated cabinet for the 8" woofer that stands on it's own and then 'stack' the other modules for the midrange and tweeter on top of it if we encounter cabinet volume limitations that are compelling. I would use a piece of ISO rubber (Bridgestone ISO pond liner) between each 'module' for isolation.


Details:
1. Subwoofers are dual M&K MX70B's. They are about -4db at 20hz and are +1-2db once you hit 30hz or so.
2. Active crossovers will be implemented using Audiolense Convolver and Audiolense XO.
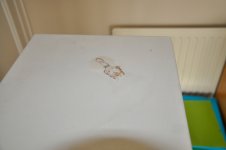
3. By modular I mean this. 1. My cabinet has around 6 pairs of front baffles of the same size that have been pre-cut that I can swap in and out using 6 x machine screws that go into threaded inserts in the actual cabinet. This lets me swap speaker configurations at any time and then simply select the convolution file that matches to that 'speaker'.
4. On the baffle I intend to have a cutout for the 8" bass driver and above it the cutout for the midrange driver. The tweeter/waveguide will sit on top of the speaker. I have a ton of little precut stand alone baffles on L brackets that I set on top of this stand mount making it 'modular' in the tweeter section as well.
5. I usually cross both M&K subs at around 80-120hz (I know I'm getting a little directional if go over 80hz) depending on the configuration of the drivers currently in the box/swappable baffles.


Questions:
1. The speakers will be angled facing me on each side. Does this mean that since I'm always on access that beaming of driver is less of a variable or no variable as far as driver selection goes?
2. Should I build sub-enclosures for the midrange inside the box or is it fine if the midwoofer/midbass driver share the same air volume in the sealed enclosure? This will likely be a variable on if I share the cabinet or go fully modular with separate enclosures.
3. Driver selection....bring it! I'm open to all manner of suggestions, the ones I have suggested were just based on research.
4. Crossover points, again, bring it! I'm open to suggestions.

Driver Selection Options:
Woofer/midbass
1. Dayton RS225-4
a. I'm assuming I'd go 4 ohms go squeeze as much out as I can unless there is a compelling reason not to.
b. Do I go for aluminum or paper?
c. Perennial recommendation regarding low distortion and high value in many threads.
1664211924822.png

d. Looks like I can get flat response from just short of 100hz (which is fine) until maybe 1500-1600khz at which I'll need to hand off to the midrange. I am far more likely to do this at around 500hz or so.
e. Dayton RS225p-4a frequency response below. Not sure which one is preferable, would love to hear advice:

1664212043430.png


2. Dayton PA-200.
a. High output pro woofer.
b. Efficient and nice looking performance graphs for this application see below:
1664211415807.png


3. Peerless by Tymphany 830869 8" Nomex Cone HDS Woofer - Cutout too large at near 7.5 inches.
4. FaitalPRO 8FE200 8" Professional Midbass 8 Ohm and/or FaitalPRO 8FE300 8" Professional Midbass 8 Ohm
- Maybe an option but Sealed 43 is slightly over 100 hz which isn't optimal. Given that it's efficient I could probably flatten the entire frequency to compensate for it and still not have significantly lost efficiency.
5. Peerless SLS 830667, 8" - Frequently recommended option, the Dayton seems better based on graphs/specs as far as I can tell.
6. SB Acoustics SB20PFCR30-4 8" Paper Cone Woofer- 4 ohm-Looks really good for a really low price but who knows how it sounds/distortion specs.
7. Classic P21WO20 8" Woofer Poly Cone, looks like a remake of the scan-speak by Madisound.
8. SB Acoustics SB23NRXS45-4, 8" Woofer
9. Scan-Speak Discovery, 22W/4534G00, 8" Midwoofer, 4 ohm

Midrange/Full Range:

1. I already have the venerable Tymphany TC9FD18-08 and Tectonic TEBM65C20F-8 3-1/2" BMR Full-Range Speaker 8 Ohm
2. Dayton Audio RS100-4 4" Reference Full-Range Driver 4 Ohm and Dayton Audio RS100P-4 4" Reference Paper Woofer 4 Ohm - Well loved and commonly used.
3. Dynavox LY401F 4" Full-Range Driver: Fascinated by this driver.
4. Faitalpro FE32: Not sure why I'd pick the Neo but it's in here in case I'm missing something.
5. Faitalpro FE35 This seems like a stellar candidate, might be near the top of my draft pick list. I'm not quite sure how to mount this to avoid issues/diffraction.
6. Tymphany NE149-04 seems popular but inefficient to a degree but not prohibitively so.
7. Tang Band W4-1337SDF 4" Titanium Full Range Speaker
8. Tang Band W5-2143 5" Paper Cone Full Range Driver 8 Ohm
9. Tang Band W5-1611SAF 5" Full Range Speaker
10. Tang Band W4-2142 4" Paper Cone Full Range Driver 8 Ohm
10. Peerless By Tymphany NE123W-08 4" Full Range Woofer Speaker again seems popular but inefficient.
11. Dayton Audio RS52FN-8 2" Reference Fabric Dome Midrange 8 Ohm/Dayton Audio RS52AN-8 2" Reference Aluminum Dome Midrange - Lots of discussion regarding these.

12. Visaton B 80 3.3" Full-Range Driver 8 Ohm

13. SB Acoustics SB12MNRX2-25-04

14. SB15MFC30

15. SB15CAC
16. BMS 5S117 $137
17. Scanspeak Discovery 10F/4424G, 4" Midrange 4 ohm
18. Lots of recommendations for Morel MDM55 dome.
19. Beyma 3FR30
20. b&c 3.5NDF26
21. Scanspeak 15M/4624G Discovery, 5.5" Midrange


Crossover Points:​

1. Woofer to midbass/woofer anywhere from 80-120hz, lower is better.
2. Midbass to midrange around 500hz to avoid having a crossover point in the critical lower end range unless I'm off target on this.
3. Midrange to tweeter -> Given that this is a modular design the ability to crossover higher is better to maximize my choice of tweeters and reduce the strain upon them. This is all TBD. Probably the most demanding tweeter that I own as far as needing to be crossed over high is a pair of cheap Foster E100T10's whose response is below. I don't HAVE to design around these, it would just be nice to have them as an option:
1664211087533.png

Attachments

  • 1664210783920.png
    1664210783920.png
    62.7 KB · Views: 82
  • 1664211569257.png
    1664211569257.png
    205.4 KB · Views: 88
  • 1664215283730.png
    1664215283730.png
    106.2 KB · Views: 74

Litz wire for headphone/IEM cable

Seeing much use of Litz wire in higher-end IEM cables and third-party cables. E.g., "silver 22 AWG" Lttz, etc.
For example:
https://www.aliexpress.com/item/2255800651290793.html
Not sure what the above is comprised of? The description says: Bold high-purity oxygen-free copper silver plated earphone upgrade cable, single core 63 cores * 4 strands, outer diameter 4.5-5.0
Anyone have experience with IEM cables?

Sumo Andromeda predriver advice

Hi all,
Please, I need some advice on this amplifier, because after ten years of SET, I needed an amp capable of driving speakers at 2 ohms, after trying it, it is his job without problem, as the sound is pretty good, I wanted to restore it, as some components are not original.
This is where I need your skills, whether it's worth changing the Predriver, are the transistors Q3, Q4, Q5, Q6 on the diagram.
On my amp they are MPSA05, MPSA55K, they seem to be matched (small paint strokes).
I wanted to put the sa818y, sc1628y, they are expensive, but I can get them,
bandwidth is not the same, is that it can change the sound?, is that it is a mistake to try to change them?
Transistors for power on the left channel, there are ARC4700C, 4800B, for the right, MJ15024, mj15025.
There are some small differences sound between the two, is it better to put the same motorola, or the ST2121, ST5949?
I also have a question for Mr.llwhtt, please, is it I could get the procedure to adjust this amp?
Thank you,
Best Regards.
Stefano

Attachments

  • 2950203294_cf13a3426d_o.jpg
    2950203294_cf13a3426d_o.jpg
    569.4 KB · Views: 729

TPA 3116 and a cheap valve preamp

Hi folks, a few months back I got a VERY cheap TPA 3118 board to play with. It's surprising decent sounding considering the board cost less than I can buy the chip for...
Anyway it's actually quite good with acoustic and classical music but not so good with rock etc. It's a bit bright/forward and can get tiring after a while.

So yesterday I ordered a through hole version of a TPA 3116 from eBay. It appears to be a Juan Jing board from what I can see but has no name in the listing https://www.ebay.co.uk/itm/325329965300

Anyway I keep coming across posts about using these with a tube preamp but as I'm on a very low budget now I ruled it out. Then I found this listing...
https://www.ebay.co.uk/itm/403782119412 could a valve preamp possibly be any good at that price?

It's going to be a few weeks until the 3116 board turns up so I have time to look around. I could probably fit both boards inside the one vented enclosure I already have.....

Then I looked on AliExpress and found this board...
https://www.aliexpress.com/item/33006452629.html

According to the listing "Playable sex is very high" ....🤣 how can a chap refuse......

Anyway back in the real universe, what do you guys think? Is either of these likely to be half decent? Can anyone suggest a similarly cheap but reasonable alternative? I'm obviously not looking for high end sq but I do need low noise. My speakers are Rega R3 mini floor standers which are decent but bright sounding. I can't afford to change them so I need an amp that's quite close to valve/tube in performance but with tighter bass.

Thanks for looking. D

WTB: Sanken STD03 (or suitable replacement)

I have a pair of Avi Audio ADM9T active speakers… one of them recently started buzzing as soon as it gets power. I strongly suspect the PNP output transistor is the cause, but I can't find any US-based distributors who still sell these transistors (Sanken has them marked obsolete). Does anyone know where I can get ahold of them besides eBay/AliExpress (not sure I'm ready to trust them for potentially used ICs). Ideally, I'd like to buy two or three pairs of STD03P/N transistors.

want to optimize my bass guitar cab

Guys, I think I already know the general answer but I wanted to check and make sure I'm in the ballpark.

I have a 2x10 sealed bass guitar cabinet I want to port.
The drivers are meant to be in a ported cab.
I have all sorts of calculators for figuring out the size and length and I have all the speaker parameters and I think I'm ready to go but I do have one question.

The two woofers are essentially in separate cabinets with a solid piece of wood splitting the cab in two .... there is a small opening between the two sides where the jack plate is ... but only about a 2x1 cutout.
Ports will have to go on the back
The easiest thing to do would be to simply use two ports, one for each side.

So my question is when calculating the port size/length do I just treat each side as a separate cab or do I figure it out based on the entire cab volume?
And if it needs to be the entire cab then how do I plug in values for two drivers?

I'm probably overthinking this and imagine I should just treat each driver as being in its own enclosure since they basically are.
But before I cut holes in my cab I wanted to run it by the experts.

Good midrange drivers that can do a wide frequency range

I’m a big fan of fullrange drivers because they have no crossover in the region where the ear is the most sensitive. But I’m also aware of the disadvantages of fullrange systems so I want to try to design a 3 way speaker that avoids a crossover in that region but still got a good dispertion and no resonances in the passband. In my experience the passband where the ear is the most sensitive to that is between 400Hz and 3.5kHz.

Tweeter and woofer is no issue to find, but it’s hard to find a midband driver that does that band clean and with a good dispertion, so I’m looking for your advice. Dome mids were my first thought, but most don’t do that full region, they can’t get low enough. Cone drivers mostly don’t do it clean to 3.5 a 4Khz as they start to beam or resonate. So my question is, do you know drivers that can do that, and that are reasonable priced. I know smaller Mark Audio drivers can do that, so that may be an option, but I’m looking for a project without those (as I already have a few in my home).

System I had in mind is about 88dB efficient with a 1” tweeter and one or two 8” woofers. For mid I think the best would be a 3 to 5” cone mid or a 2-3” dome mid. Crossovers are not decided yet (i do that after i have the drivers and cabinets), but it’s a big chance I do it passive (as I like those more). It’s a long term project (I got quiet a few others in the pipeline), but as I’m very slow in my developments of designs, it does not harm to start already with that.

So what mid drivers do you suggest for this project?

My last DIY Hurrah…..an Open Baffle/Dipole hybrid array

…..or maybe?……the MT section isn’t firm yet but the dipole bass has been designed and 8 woofers are on the way. I’ll be using these
https://www.parts-express.com/GRS-12PR-4-12-Paper-Cone-Rubber-Surround-Subwoofer-4-Ohm-292-820

Two 72” tall towers with 4 drivers in each in an H frame alignment unless someone offers up an improvement using a U frame.….I’m not sure there’s a viable argument either way though since these won’t be asked to do much above 100hz. I can’t find a viable argument for or against drivers mounted opposing either…..from a visual perspective, I’d rather not look at magnets unless someone can make a case?

I’m 55 now and the plan is this will be my silver system…….it needs to take me to where and when my hearing loss no longer justifies high end performance is you know what I mean. The space they’ll be in is where they’ll stay permanently……I doubt I’ll be able to take them with me to the old age home when the time comes! Lol. We’ve got 36” behind and to the side walls available and 10ft between them so enough room for them to breathe in a dipole situation.

Power will be handled by two class D amps mono with DSP. The woofers have enough linear excursion to get the job done and the combine efficiency should suffice. Total Q isn’t bad at .43 and if I understand it, the dipole alignment will increase total Q as well.

Once built before final finish work, I’ll tweak these along with my current diy MTMs which are sealed boxes before moving on to the hybrid array MT section……for now more of a proof of concept that dipole bass is the ultimate for music. For HT use, the 18” servo sub that lives as a DIY end table will remain for the lowest octave.….I get an F3 of around 20 with it now and an F10 of around 15 with room gain.

Once woofers arrive and have been tested for consistency, I’ll post an update and rough drawings of the enclosures. Plinths will be 3” thick layered MDF since I already have so many scraps of the stuff. Cabinet will likely be BB with Walnut veneer and rubber piping grills sans Sonus Faber design….love that look!

Ive also given some consideration to an Aluminum extrusion truss design with wood accents where the extruded truss would offer the structural component with the wood used for the baffle. If anyone has a thought, I’d love to hear your ideas. End of the day if you consider he cost of BB plywood, premium veneer, materials and time……I think we’re still in apples to apples territory.

Thanks for reading…..this is gonna be a long journey for us to take together.
  • Like
Reactions: geraldfryjr

Measuring Bass, and measurements in general

I've been building speakers for quite some time now, and to this day I've never come up with a reliable way to measure anything below ~300 Hz (anything below that is a hot mess, more a reflection of the room than the speaker itself). Things I've tried...

*Putting the mic in the port- this is what some recommend, but my findings are that the f3 is generally way too high using this method. So either the theoretical cabinet design software is wrong, or this method is not an accurate reflection of reality.

*Near field- take the NF measurement, then splice that into the actual measurement around 300 Hz. This seems to be the best method, though not entirely accurate if I'm using a woofer crossed at 300 Hz.

And I don't believe it's just me, a little later I'll post with 2 different measurements once I get screenshots of them, taken by 2 different magazines of the same PSB Imagine T2 speaker, and those 2 measurements are vastly different. I'll be honest, most of my speakers are done by ear below 300 Hz because I don't trust the measurements (aside from impedance). If you guys are willing to share, how do you get the most reliable measurement below 300 Hz?

Tubes for Croft Epoch Elite?

I got an old Croft Epoch Elite, but all tubes are removed. I looked at pictures in the internet, but there are many variants of the Elite out there, but not mine. What I can say is, that mine has the socket for the smaller valves (e.g. ECC82). I know that the phonopart works with 3 ECC83. What reamins in question are the two tubes (A and B) of the line level preamp part as shown on the picture (I drew this from my circuit). I cannot find a similar preamp circuit in www.

Anyone got an idea, what tubes A and B could be?

Attachments

  • Croft Epoch Elite - preamp part.jpg
    Croft Epoch Elite - preamp part.jpg
    61.3 KB · Views: 186

Brain gymnastics to construct around 120V and up adjustable power supply.

I am facing a problem that seems difficult to solve.
I have built a couple of lower voltage adjustable power supplies (0-30V and 0-50V in various variations), but I need now a higher voltage and adjustable current limiting power supply.

I have transformer with an 6 equivalent secondary voltage windings which are all with 4 wires parallel, diameter 2mm, all of these 6 windings provide equivalent 19Vac, with a power of about 2.5kVA (big toroidal transformer), so the transformer also allows a fairly large current.
The plan is to use it in the March 1990 issue of Radio Electronics https://archive.org/details/radio_electronics_1990-03 on pages 31 to 34 and page 69 in a "modification" of this power supply described by Reinhard Metz.

But since my transformer can provide significantly higher secondary voltage, I have given up on idea of using the LM317HVK high-voltage stabilizer.

Because I have an LR8N3-G adjustable voltage stabilizer that I would like to use because it technically meets the voltage requirements, - if it can be used?
(datasheet: https://ww1.microchip.com/downloads/en/DeviceDoc/20005399B.pdf )

Also I have 24 PNP-bipolar power transistors 2SA1962, 230V/15A to stabilize current, (datasheet: https://toshiba.semicon-storage.com...et_en_20131101.pdf?did=20429&prodName=2SA1962 )

There is a suitable 6 rack unit case which rear wall is almost entirely huge heatsink, the total area of the heatsink is about 25.000cm2 (close to 4000 sq.in) so it shouldn't be a problem to exchange lot of heat, generated during the stabilization in the worst case in linear mode?

Provided that I use power transformer step switching (for this there is a step switch with power relays, (picture of transformer secondary tap switching circuit board drawing is attached), unfortunately I do not have a tap-switching circuit diagram to provide, because it is drawn by hand on paper, but its working principle is quite simple - the output voltage from output of the power stabilizer controls tap switching relays as needed, switching them on and off in series, at least the 1st secondary winding of the transformer is always switched on and when the output voltage is increased above the value set by the zener regulator, the next winding is switched in series and so on, as the voltage decreases, it is switched off in the same way and excessive secondary windings, it allows to reduce the maximum losses during linear stabilization.

This part has been tested and works, but the power supply stabilizer (described also here: http://www.a-and-t-labs.com/K2_Lab_Power_Supply/ ) itself, which deals voltage and current regulation, gives me a headache. Since the maximum input voltages I use are about 3 times higher than those given in the referenced circuit, this would require changing circuitry - unfortunately, I'm a hobbyist and not strong in theory, so I'm in trouble and can't move forward with it.

The D3, D4 stabilitrons (from this circuit here: http://www.a-and-t-labs.com/K2_Lab_Power_Supply/powersupply_ckt_layout.pdf ) that track supply voltage of IC2 LF357 obviously need to be replaced, but have I confused myself or do I not understand starting point - on the basis of which I determine their stabilization voltages? Also R6, R7, R8 - I couldn't find an explanation of these elements in the article.
I have a power supply built according to this circuit and it has proven itself over about a decade of use without any errors. So I have taken this circuit (for some reason?) as an possible solution.

I don't object if the experts think that this is not a very good solution, but would someone please guide me in my questions, which I am having trouble with.
Or if someone can offer me a better solution, say 0...10 (not exactly strictly needed "0" but say also from 10Vdc is good) to 120VDC adjustable, current limiting PSU (however, I don't want to acquire exotic parts, it is also 100% important that I can use the existing power transformer and as a current stabilizer it would be best also if I can use existing PNP bipolar transistors - otherwise I am open to other options for such a power supply I could perhaps do it with less brain gymnastics).

I have looked in some service manuals of older, higher voltage regulated laboratory power supplies (for example by HP) but they are all based on primary side SCR circuitry and quite different in stabilization stage - could someone shed some light on me, why the use of an SCR preregulator is so preferred? Is it possible that my 6-stage switching method I designed is not a good solution? I don't need extremely high reliability compared to a well-known manufacturer's device, I just need a stabilized, current-limiting power supply with a relatively large adjustment range and higher current, also which I can built at home at the end of my knee, even with the hobbyist's limited resources (to ~200 euros+all existing components) in mind.

In existing parts:
1. Power transformer: 2.5kVA with 6 equal, 19V sec. windings, each consists 4 wires in parallel, 2mm diameter - so, good current capacity
2. I also have a 27000uF/200V capacitor bank as a power filter.
3. 100A bridge rectifier (4 stud mountable 1200V diodes with hardware),
all the necessary passive components for use in the referenced schematic ( http://www.a-and-t-labs.com/K2_Lab_Power_Supply/powersupply_ckt_layout.pdf )

additional:
*digital panel amps (for input AC and output DC) and voltmeters,
*power transformer inrush soft start circuitry,
*probably ~90% or more of the referenced schematic elements.

Once again, I note that I have built the referred 0-50V and about 0-10A output current capability power supply 100% independently (since making of printed circuit board+100% build by only my hands), but to obtain a higher voltage, I feel that my theoretical knowledge leaves me in trouble, so I am asking for helpful guidance from the experts here.
I apologize if my request for help is stupid, I also apologize for the typos. I don't write english in my native.
Thanks for any help!

Attachments

  • transformer tap switch.jpg
    transformer tap switch.jpg
    200.9 KB · Views: 139

Circuit with good specs as a starting point

Found this circuit in an old Philips publication. It was intended as an amplifier stage for an audio oscillator but it looks like it could be used as the basis of a reasonably good audio amplifier. Cascoded long tailed pair input stage with current source in the cathode circuit. Second stage has an unused anode just begging to be used as a push pull source. Distortion figures look pretty good.

Attachments

  • Like
Reactions: astouffer

Denon POA-2400 Trouble shooting and Parts.

I cant find a good repair shop and "I am thinking of trying to fix" my 2 amps that are starting to crackle and pop even with no load on them.
I am ok/good at repairing simple electronics, real good at soldering, measuring with instructional Guidant's.

POA-2400 2ch
POA-6600a monoblock

On the 6600a I first was thinking it was CAPs going. So I did a lookup for replacements and couldn't find exact replacements for the big 10,000uf ones but I found some close / hopefully better replacements, So I think..
Here is the Info for others-hope it helps..
Original was Nippon chemi-con: 90volt 10,000uf 85deg temp, tolerance? Rated ripple (Arms) ? 50.8x82.55mm or 2inchx3.25inch.
New Cap Nichicon Grade TYPE-2: 100volt 10,000uf 85deg temp, Tolerance: 20% Rated ripple (Arms) = 6.90 50 × 100mm or 1.95x3.9inch Part # LKG2A103MKZ

But then I wondered could it be the IC or other chips but upon looking them up I cant find those exact ones or equal replacements.
Toshiba TLB521-1-BL / Optically Coupled Isolators, I can find TLB521-GB and other variances but the BL seems to have special ELECTRICAL CHARACTERISTICS 200min%-600max% and I cant find it anywhere.
Mitsubishi M5238P / DUAL LOW NOISE JFET INPUT OPERATIONAL AMPLIFIERS 8 PIN DIP, I can find it but not sure if they are legit suppliers.
Mitsubishi M5238P or NJM-082DT/BD JRC or NJM-2068DA JRC, I haven't tried to lookup yet
Hitachi HD14001BP / Quadruple 2 Input NOR GATE, I haven't tried to lookup yet..


  • If you think I really need a scope to do this and if you know of a inexpensive one, please suggest. just for amp repair.
  • Any idea's a good source to find chips with exact same spec. without hrs/days of searching? no eBay or Alibaba ect..
  • Any idea's how to find exact problem. I have multimeters but don't have an oscilloscope.

Thanks!
Projects by fanatics, for fanatics
Get answers and advice for everyone wanting to learn the art of audio.
Join the Community
507,840
Members
7,890,293
Messages

Filter

Forum Statistics

Threads
406,351
Messages
7,890,293
Members
507,840
Latest member
temp91899