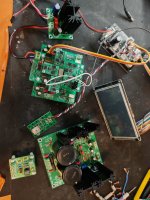
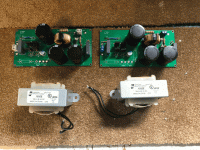
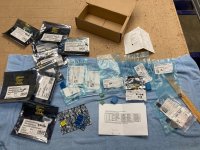
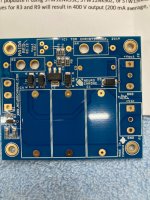
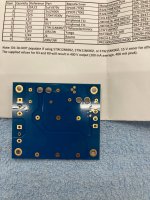
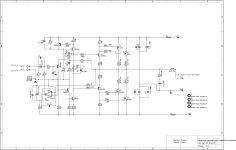
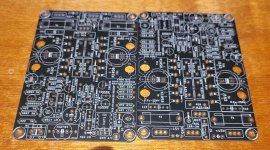
For Sale Twisted Pear Buffalo III-SE-Pro 9028 + Hifiduino, Mercury I/V, Placid HD BP + extras

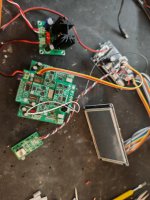
For sale is the following almost finished easy project to build a super nice DAC:
-Twisted Pear Buffalo III-SE-Pro 9028 DAC with all the good regulators (new price $459, http://www.twistedpearaudio.com/digital/buffalosep.aspx)
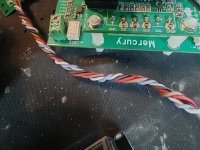
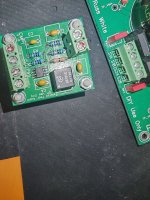
-Mercury I/V stage (new price $169, http://www.twistedpearaudio.com/linestages/mercury.aspx)
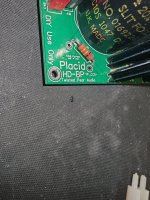
-Placid HD BP Power supply for Mercury (new price $95, http://www.twistedpearaudio.com/power/placidbp.aspx)
-Arduino DUE (New price ~$50) with Hifiduino TFT Pro v1.09 software programmed (https://www.dimdim.gr/arduino/tft-hifiduino-pro-project/)
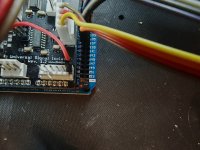
-DimDim Universal signal isolator (https://www.dimdim.gr/arduino/universal-signal-isolator-shield-for-the-arduino-due/)
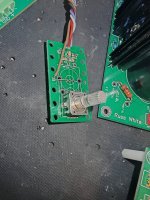
-Rotary Encoder board + encoder (with led) to control power on/off, menu, volume
-Nice 4.3" Color TFT screen
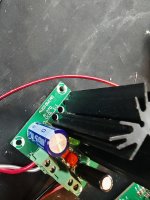
-Audiowind A-270 regulator to provide power to the Buffalo Board
-Twisted Pear CMP1 S/PDIF level converter kit
New price of the parts is ~$1000

I'm selling the complete package for 330 EUR firm + shipping. I'm shipping from Finland, Europe.

What is still needed to finalize this:
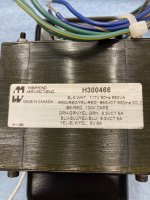
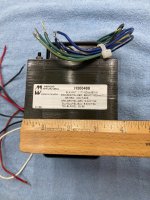
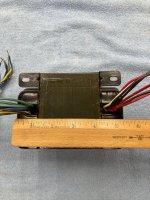
-Transformer to feed Placid HD BP Power supply
-Transformer + rectifier or another power supply to feed A-270 regulator board
-Enclosure
-Connectors, etc. small parts
-Wiring
+ whatever options you want to have, like amanero or similar (not mandatory)

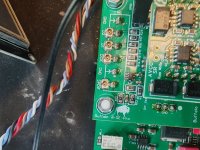
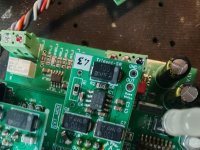
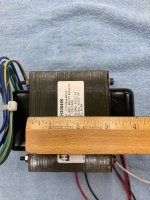
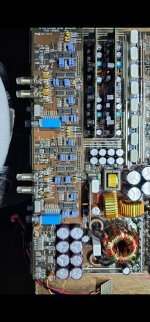
See attached photos and the linked video of the action: https://photos.app.goo.gl/uJM3o9JnfWE8aFxM8

BR, Sami

Attachments

  • IMG_20241123_133727.jpg
    IMG_20241123_133727.jpg
    341.2 KB · Views: 91
  • IMG_20241123_134156.jpg
    IMG_20241123_134156.jpg
    559.1 KB · Views: 76
  • IMG_20241123_134223.jpg
    IMG_20241123_134223.jpg
    473.5 KB · Views: 71
  • IMG_20241123_134233.jpg
    IMG_20241123_134233.jpg
    422.5 KB · Views: 71
  • IMG_20241123_134245.jpg
    IMG_20241123_134245.jpg
    518.5 KB · Views: 70
  • IMG_20241123_134252.jpg
    IMG_20241123_134252.jpg
    705 KB · Views: 71
  • IMG_20241123_134302.jpg
    IMG_20241123_134302.jpg
    696.3 KB · Views: 77
  • IMG_20241123_134314.jpg
    IMG_20241123_134314.jpg
    594.4 KB · Views: 65
  • IMG_20241123_134321.jpg
    IMG_20241123_134321.jpg
    378 KB · Views: 63
  • IMG_20241123_134334.jpg
    IMG_20241123_134334.jpg
    489.8 KB · Views: 66
  • Screenshot 2024-11-23 at 14.05.39.png
    Screenshot 2024-11-23 at 14.05.39.png
    2.6 MB · Views: 83

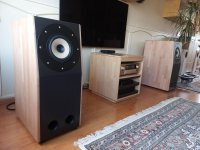
Ikea Kallax MEH (Unity/Synergy) speaker

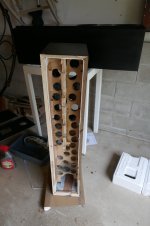
While slowly working on my other MEH projects, I just noticed the Ikea Kallax in front of myself and I just thought it would be cool to fit in a synergy horn there. The internal dimension of the kallax cell are 330 x 330 x 380 mm, so the speaker must fit into this volume including wires in the back. This is nothing new, it has been done before, e.g. this one by aragorus https://www.diyaudio.com/community/...-6-5-coax-in-a-reflex-box.353906/post-6190455 would most probably fit the shelf.

Coaxial is the obvious option, but I would like to try if I can fit in the GRS PT 6816 planar tweeter in there...

And if necessary, I can add a bass unit to a shelf cell below. Not that I would necessarily use the speakers inside the shelves, but it is a quite handy size and a bit of a challenge🙂
  • Like
Reactions: unaHm

Can I Connect Two Transformers Together?

Folks:

Please forgive what may well be a very dumb question, but I do need some advice. I am planning a Noval Aikido preamp project and have a power supply question. I have two Hammond transformers on hand -- a 369JX (50VA, 500V C.T. @ 69 ma and 6.3V C.T. @ 2.5A) and a 166L6 (12.6VA, 6.3V C.T. @ 2.0A). I understand the Aikido needs more heater current than the 369JX alone can supply. Can the 6.3VAC secondaries on both transformers be connected together at the power supply? I have attached a copy of the power supply circuit; the power supply board itself can be found at https://www.ebay.com/itm/144817864498

Regards,
Scott

Attachments

  • s-l1600.png
    s-l1600.png
    158.1 KB · Views: 233

Full bridge SMPS with IR2110 + IGBT

Hi
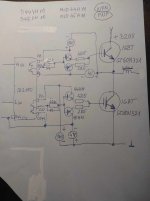
I built a full bridge SMPS with IR2110 + boostrap capacitor + old mosfets as recommended, which works fine, but I would like to replace the old mosfets with GT60N321 IGBTs, add a totem array, remove the boostrap and add an isolated power supply of +14VDC and -4VDC to get rid of the Miller effect.

Simply replacing the old mosfets with IGBTs also works, but according to the oscilloscope I see that it would be a good idea to add a totem array and adjust the power supply for the output side of the IR2110. For the power supply of the upper and lower sides, they will use isolated converters designed for driving IGBTs with outputs of +14VDC and -4VDC.Is it possible to keep the IR2110 driver and connect the IGBT and totem array using isolated converters in this way ?
I will adjust the Deadtime only after the circuit with isolated converters and IGBTs works.
Thank you, samponek

Attachments

  • IR2110 + IGBT + isolated converters.jpg
    IR2110 + IGBT + isolated converters.jpg
    105.4 KB · Views: 178

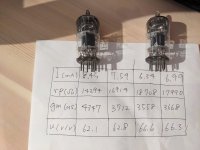
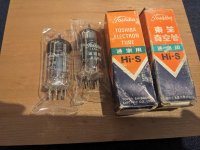
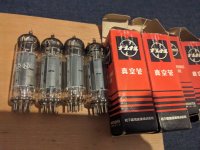
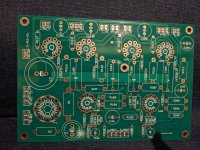
For Sale Tubelab SSP PCB and some tubes

I have blank tubelab spp PCB and some tubes to sell.
PCB - sold

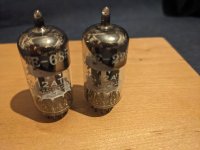
Used Matsushita 12AT7 measured pair 14usd

Nos Toshiba 12AT7 pair 20usd
(Hi-s version - selected items)
Used Matsushita 6BQ5 measured two matched pairs 55usd

+PayPal fee 4% or frieds family option
+ Shipping 15 usd with tracking number

Attachments

  • PXL_20241119_145317903.MP.jpg
    PXL_20241119_145317903.MP.jpg
    395.5 KB · Views: 74
  • PXL_20241119_151132650.MP.jpg
    PXL_20241119_151132650.MP.jpg
    336 KB · Views: 53
  • PXL_20241119_145505815.jpg
    PXL_20241119_145505815.jpg
    495.9 KB · Views: 62
  • PXL_20241119_145923493.MP.jpg
    PXL_20241119_145923493.MP.jpg
    452.9 KB · Views: 61
  • PXL_20241119_151522998.jpg
    PXL_20241119_151522998.jpg
    281 KB · Views: 74
  • PXL_20241119_150027007.jpg
    PXL_20241119_150027007.jpg
    663.8 KB · Views: 71

Welcome new member from the Netherlands

Hi, as new member I would like to share my repairs and lessons learnt as well as learn from other members.

After and during the COVID period working from my home disk I missed my audio gear from the eighties for a proper music experience. As such I started to acquire new stereo equipment form the 70s/ early 80s around built quality went done.

As some of these equipment required repair or restoration I started the hobby of repairing equipment, solid state as well as tube gear.

Regards, Werner

Pioneer SX450

Has anyone had experience with the power / speaker switch on Pioneer SX450 receiver? The switch has these positions: Power Off, Speakers A, Off, Speakers B, Speakers A+B. Starting the amp through my dim bulb from Off to A, the light stays bright and a hum is heard through the speakers. If I turn the knob to the next Off position then back to A, the bulb dims and it works fine. The receiver sounds fine. I suspect there may be an issue with the switch, but it's a very fiddly thing to pull out so wondered if there are any other thoughts about this out there.
Regards John L.

MeanWell SDR-960-48 optimization for PBTL 3255 setup

https://www.meanwell-web.com/content/files/pdfs/productPdfs/MW/SDR-960/SDR-960-Spec.pdf

Hello!

May I ask for help to optimize a MW SDR-960-48 SMPS here?
I chose this power supply to feed six TPA3255 in PBTL configuration for a cheap trick 2x3 way active setup.
Powerwise the SMPS should be more than sufficient, so no problem there.

Even though, the SDR-960 is of good reliant quality and miles ahead of most noname SMPSs, some may claim that the ripple could be better (it's <1%), not sure if this is a real problem at all or a theoretical paranoia phenomen.

However, before making the layout for the amp case, I wonder what kind of optimization could be worth to implement.

1. Additional EMI filter on the 230 AC side?
2. Additional buffer with 63V / 10-20.000 uF caps at the supply 48V side and or additional filters?
3. Any other thoughts how you would optimize it? Or just go and relax?

Thanks for your time and input in advance! 🙂

A new beer thread

Rather than open an old thread and necropost I'm starting another.
Without wanting to be morbid I'm not getting any younger [ mores the pity] and I am writing a new will and pre-planning my funeral.
As part of that I am chasing a recipe for a very strong dark beer to drink on the day.
I'm not of a religious persuasion and if asked I always tell folk I'm a pagan and believe in the dark artz.
Anybody got any good recipes for a bitter-sweet stout of as strong a strength as possible?
Something like Theakstons Old Peculier but sweeter and stronger approaching 12% or better, a "**** & Raisin Ale" perhaps?
  • Like
Reactions: Stanislav

Varying Cathode Bias voltage question

Hi all,

Just a quick question regarding cathode bias voltage and, in particular, stability.

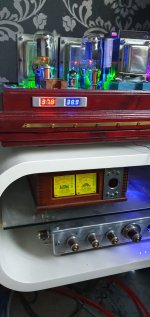
After catastrophic failure caused by an overused output tube (runaway cathode voltage). I rebuilt the amp and installed meters to indicate what the cathode bias voltage was on the KT66's (as pictured).

Generally, they do vary slightly (albeit always 1v apart) but occasionally, the left channel (blue) will skip very quickly between 38v - 39.5v. It sort of cycles from 38v then jumps quickly to 39.5v then back down, then back up. This happens over a few minutes and all the time the right channel (red readout) is stable. After a few minutes, it becomes stable too.

Happened today shortly after switch on, yesterday after about 2hrs use.

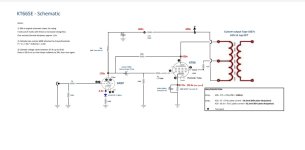
Schematic attached.

Attachments

  • 20240625_202437.jpg
    20240625_202437.jpg
    280.5 KB · Views: 256
  • Screenshot_20240201_102617_Microsoft 365 (Office).jpg
    Screenshot_20240201_102617_Microsoft 365 (Office).jpg
    76.1 KB · Views: 248

For Sale Bartola LT Filament Supply

Selling 1x pair of LT DC filament supplies, designed by Ale Moglia
More info here: https://www.bartola.co.uk/valves/for-sale/dht-lt-supply-pcb/

Including 2 populated and working/tested boards, with common mode chokes installed and 2x pair (4 total, only 2 pictured) of hammond 159ZE 28mH/3A inductors

125€/pair, ex worldwide shipping

Attachments

  • tempImagelggVNJ.gif
    tempImagelggVNJ.gif
    1.6 MB · Views: 132

SEAS Odin MkIII A Dream Comes True - 2007 after 15 years back in my living room

Yesterday I sold succesfully the overhauled Basis '95 - 2023 to a happy new owner in Helmond.

https://www.diyaudio.com/community/threads/re-built-vifa-basis-95-2023.395894/page-9#post-7490956

At the moment I'm playing again (after 15 years, {bought back} for a fraction) with my old self made Odin's MkIII built in 2007 (sold in 2008) 😍.
First project ever built good DIY speaker.
Very nice!

The story:
The new owner from 2008 contacted me about 2 months ago and told me that he wants to sell my speakers after 15 years listening music with pleasure.
He asked me some advice for a good description for his advertisement text on the internet.
But I was thinking....... this is unique......I like to have them back in my house / listening room....... full of good memmories with this speaker!
We make a deal and now they are back here in my living room again and still playing as good as in 2007.😍😍

Attachments

  • IMG_20231026_085814.jpg
    IMG_20231026_085814.jpg
    308.8 KB · Views: 330
  • IMG_20231026_085947.jpg
    IMG_20231026_085947.jpg
    387.6 KB · Views: 334

Fixing the internal pieces of the Frugel-Horn

Has anyone routed a rebate into the insides of the side panels as per (I think) the flat packs. ?
I'm building from scratch and could just glue them in place, but thought about trying this.
I only have basic diy tools and can do one side easy enough probably, but what would be the easiest way to mirror it perfectly on the other side?
Short of a lot of measuring and marking, is there an easier way?
Thanks..
Rik

BRZHiFi 5V 1A "Audiophile Grade" Portable Linear Power Supply Review

I bought one of these devices from Aliexpress. Technically, the use case isn't audio - it's radio - but I thought you might be interested in this quick review.

My main goal was to find a decent power supply with the following requirements:
  • 5V @ 1A (and I need 0.9A of that)
  • Low switching noise (so either not a switcher, or very low noise)
  • Under 100mV ripple (which probably isn't low noise by audio standards)
It turned up. Superficially, it works. 5V comes out, no fire.

2024-03-02 18_02_58-WhatsApp Image 2024-03-02 at 5.27.40 PM.jpeg ‎- Photos.png


Internally, it's made up of a 2*110V to 2*7.5V transformer. The two primaries are wired in series for 220VAC operation, but typically my mains voltage is around 245VAC here. The switch is single pole. There is no dedicated fuse, although the transformer appears to have a thermal cut-out. There is no connection to earth, despite being metal cased.

That goes into a full wave rectifier and 3300uF and 100nF capacitors. After that, an LM317T regulator, with 2*1000uF, 2*220uF and 100nF capacitors.

2024-03-02 17_33_59-WhatsApp — Mozilla Firefox.png


Output regulation is acceptable up to around 0.7A. There's quite a difference in behavior between when it is first turned on ("Cold") and after it has been loaded for a while ("Warm").

9454f4b1-7aca-4541-89a4-38fb48429ac4.png


Ripple is relatively well controlled at lower currents but gets pretty wild later. At 0.7A it is around 5mV. By 0.8A it is 235mV. At 1A it is 660mV - although from time to time, when warm, it gets worse.

When connected to a USB device drawing 0.9A with a switcher inside it, you get a horrible interaction, with the voltage dropping and the current increasing. It ends up oscillating.

As expected, on the spectrum, the 100Hz is the fundamental with several harmonics.

1709465657703.png


It also gets warm enough to emit that warm plastic smell...

1709465790807.jpeg


All in all, I would not recommend this device.

For Sale Solid Cherry Wood Bookshelf Cabinets

I had these cabines ready for a new project but I really have no time to build anything right now, so, I will put for sale if there is any interest.
They a Sonys Faber Electa Amator stye anf fuly built in solid Cherry wood. Fully new.
THe cabinets were made for Swans HiVi M1 kit but can be easily modified to your project.

External dimensions (cm) 21 width x 33 height x 26 depth. Wood thickness 22mm. 11.2 internal liters.
The current holes for drivers are:
Tweeter 120mm diameter (90x75mm cut off originally for the HiVi RT1C-A Tweeter)
Woofer 115mm depth. Ready for 5" surface mounted midwoofer. (Hivi F5)


Asking 250€ for the cabinets. Shipping to EU will be 20 to 25€.
Will be sent in their original packaging


https://ibb.co/GnHgVFW][/url]

https://ibb.co/1RN8MSK][/url]

https://ibb.co/Vm54SK0][/url]

https://ibb.co/x5yzMPY][/url]

https://ibb.co/nmV1NZY][/url]

https://ibb.co/1b51gRP][/url]

https://ibb.co/PG8qwf8][/url]

https://ibb.co/T1rkxTz][/url]

https://ibb.co/phMtFmw][/url]

https://ibb.co/TvnZndt][/url]

https://ibb.co/jTymDxd][/url]
https://ibb.co/rFXjVZG][/url]

Switching power supply blinking start-up for tube heaters

I am using a few 12V switching power supplies for heaters of my DIY tube amps. Because the heater resistance is too low, some of them will not start. Two of them blink for 10 - 30 seconds then run normally. I assume the blinking is due to current limiting of the supply. My question is whether start-up blinking will cause premature failure of the supplies or hurt the tube heaters?

GainWire line/phone non GNFB preamp

This is a line/headphones preamplifier with no global NFB used, but still with very low distortion.
First stage is input gain stage with variable gaain
Secon stage is a buffer.

Here is description of first/gain stage.
It started as GainWire CFA preamplifier, and I decided to redesign it in to a non global NFB preamp.
The gain is set to 4 times at the rheostat P1 value of 10k and it's calculated as P1/R19.
It uses a current conveyor as a gain block.
SNR does not change with the gain, so it is the same for low as it is for high gain, as the input signal is never attenuated, signal noise ration stay the same for all gains.

Gerbers are here: https://www.diyaudio.com/community/...ne-non-gnfb-preamp.395695/page-3#post-7733838

Attachments

  • pojacanje ulaznog dijela.jpg
    pojacanje ulaznog dijela.jpg
    229.7 KB · Views: 1,545

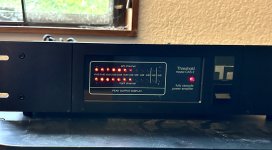
Threshold CAS-2, Blast from the past

I recently had the good fortune to find a used Threshold CAS-2 at one of my local high-end audio stores. It has been a pleasure to listen to and learn about the history of one of the earliest Threshold designs from the late 70s.

The unit was well cared for by its previous owner(s). If anything, it may have been in clean storage for a few years. Initial power up resulted in a significant amount of mechanical 120Hz hum from the internal power transformers. This subsided a little over the next couple hours as I let the amp come up to temperature. There was also a small amount of 120Hz hum present from the speakers, but this component was not noticeable at my listening position. Initial listening was good, with a noticeable amount of brightness to the tonal balance. The brightness mellowed out slightly over the next few hours of powered operation.
I switched to a Transparent power cable for the next day's listening. This power cable is an earlier 1.5 meter model that has three lumps of filter network along its length. I have used it in the past with amplifiers that had sensitive power transformers. The Transparent cable did its job once again, and both the mechanical hum and audio hum were noticeable reduced. Listening to the amp with this configuration proved to be a lot of fun. In many ways the CAS-2 reminds me of my old olive era Naim NAP250, in the best of ways. The CAS-2 is lively and engaging, with a distinct sense of Pace, Rhythm and Timing, as Naim aficionados like to say.
Over the next two days of listening sessions I found the amp to sound better integrated over the whole frequency spectrum. The imaging solidified as well, and there started to be a better sence of the distinct harmonics of acoustic and simple electric instruments. The bass developed good extension and definition, sometimes calling more attention to itself than I am used to on a few recordings, though this feature also mellowed slightly over time. The amp definitely sounds its best when it is left on for a few hours, so I started leaving it on all the time. The case gets just slightly warm after a full day. This is not a Class A design, but a moderate high bias class A/B. It appears to be an excellent match with my newer Vandersteen 3A Signatures, with plenty of power available for good control. The dynamic presentation seems to be better with the CAS-2 than with my DIY M2x. I have enjoyed revisiting a number of my favorite recordings to hear them with a better set of dynamics.
The CAS-2 also compares very favorably with my DIY F6. The F6 has been something of a test bed lately, as I was experimenting with some alternate Mosfets in the output stage. The sonic comparison with the CAS-2 led me to re-think some aspects of my F6 modifications, and I intend to try some new ideas to help the F6 provide some of the same rhythmic enjoyment that the older amp seems to provide with ease.

Attachments

  • CAS2_front.JPG
    CAS2_front.JPG
    261.6 KB · Views: 303
  • Like
Reactions: Mikerodrig27

New Monoblocks

This design is a refinement of one I designed and built about 15 years ago. In most respects the front end is not that unusual, being a derivative of a Krell front end. The most unusual feature is the use of separate feedback loops for the voltage gain and output stages. If there is interest I can post additional details and a circuit description.

The electronics have been designed and simulated, and the PCBs will shortly be arriving. I'll be posting some photos of the mechanicals: no acceptable chassis was available, so I had to fabricate one from scratch.

Jeff

Attachments

Oracle Turntable Rebuild

After over 43 years my Oracle turntable was in need of a refurbishing. The Papst motor was getting noisy and I was unable to fix the problem. A replacement motor was unavailable, so the next step was to replace the motor and motor controller. This entailed some electrical design and quite a bit of mechanical design and machining. The first attempt utilized a Maxon DC motor with an optical encoder feedback loop. Speed stability was fine, but the motor noise was unacceptable. Mitigation efforts were only partially successful.

The second approach used a DC brushless motor and a Maxon controller. Some motor cogging noise remained, but the addition of sound deadening polymer (Sorbathane) eliminated that noise. The controller speed is set by a DC voltage, so the auxilliary electronics are limited to generating the DC levels corresponsing to 33.3 and 45 RPM and producing a 60 Hz strobe signal to an LED. The latter makes it easy to calibrate the TT with a strobe disk.

Jeff

Attachments

  • Like
Reactions: alighiszem

Just In From Indiana

New member here, 58 yrs old. Also a musician of many years with plenty of stage experience. Always been into all things electronics since middle school. In fact, in high school a friend and I cut a guitar cable in half and he took one walkie talkie apart and I did the same to the other. He unsoldered the microphone and soldered the cable in it's place. I unsoldered the speaker on mine and soldered in my half of the cable. When we put them back together he taped the microphone button on and plugged it into his guitar. We then plugged the other cable/talkie into his amp and put it speaker facing out his bedroom window. He walked all around the neighborhood blasting his guitar to all the neighbors. We had a huge laugh when the local truckers CBs came through the amp and so did the neighbors. 😆😆Nobody could quite understand how we created a wireless guitar system back in the mid 80's but it worked! Sorta. I like to learn anything I can so here I am in the DIY Audio Group.

Acoustic center - Horn + CD - construction technique for horn out front?

I've got a 8" woofer and a CD + horn. I've used DSP with delay to time align drivers before, and liked the result. So for this passive build I thought I'd try to get the acoustic centers aligned physically.

So to investigate what that would require, I set up some boards between 2 tables so I could hang my woofer and then my tweeter at the same vertical location, facing up. I set up a mic above, pointed down and didn't move it between measurements. Then I measured with REW with a timing reference channel, and that told me the distance (acoustically) to each driver. Then I just gotta make my baffle so that I can line 'em up...

Looking at the woofer and CD+horn I thought it would be pretty close. The measurements suggest otherwise... =\ I've got the Tymph AULA02014 8" woofer and the Celestion CDX1-1446 on a JBL / Selenium HM17-25. I have a thread for those drivers here: https://www.diyaudio.com/community/threads/tymphany-aula02014-0006-pe-buyout.416365/ but this discussion is to focus on baffle structure ideas.

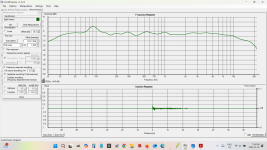
REW thinks the tweeter is 70 mm behind the woofer. To line them up I need to bring the tweeter forward rather than back, and by a fair 2.8 inches! Now, I've seen the dual chassis type of horn build, where there's a box with a big woofer in it, and then the big multi-cell horn leans over the front of the box, and that achieves a horn-forward type of build. I kind of had a more visually discreet aesthetic in mind. The HM15-25 isn't a huge monster, I had imagined mounting it in the box / on the baffle. XO is expected to be ~ 2 kHz I was hoping to keep C2C distance from becoming enormous, but also don't want to put a big diffraction object right near the woofer.

Has anyone made / seen an elegant horn mouth fwd of woofer type build? I'm looking for ideas.

- A

WTB some NOS transistors

Hi,

Looking to buy the following NOS genuine transistors, matched if possible:

2SA1986-O, PNP, 230V, 15A - Qty 30
2SC3558-O/R, NPN, 230V, 15A - Qty 30
2SC3478-K/U, NPN - Qty 10+
2SA1376-K/U, PNP - Qty 10+
2SC2705-Y, NPN - 10+
2SA1145-Y, PNP, 150V, 50ma - Qty 10+
2SC3790-E/F, NPN - Qty 5+
2SA1480-E/F, PNP, 300V, 100ma - Qty 5+
2SC4685, NPN - Qty 5+
2SA1507-S/T, PNP - Qty 10+
2SC3902-S/T, NPN - Qty 10+
2SK330-Y (1.2-3ma IDSS) - Qty 5+

Please let me know by PM

Thanks
Do

Hypex Ncore NC500MP Failure

Hello,

I've bought one year ago two hypex NC500MP modules, and mount them in two differents enclosures, and run without problem.
After power shutdown in my house, the two cards are burned !?!
In one of the board , the main fuse have burn , and the seconde one, the capacitor C44 have explode, but the main fuse is ok...
No burning traces on board or componants ...
1659358510468.png

1659358631523.png


My pre-amplifier, DAC, Computer are Ok.
Do you had this experience with Hypex amplifier board ?


Thank you,Best regards

Scrapbox 45 in 4 weeks!

Well, I gone and done it! in Austria when you have a child, you get four weeks off as a father to stay home and help out.

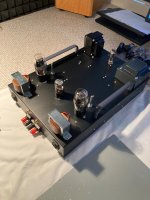
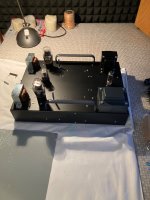
Since our new son came into the world at the beginning of November, I’ve had some time off, and decided to finally throw together a 45 amp, without all the bells and whistles that I normally would use. There’s no Coleman regulators, no fancy, expensive output transformers, no solid state help.

It’s relatively simple, AC heating, a 6SL7, and only parts that I had in the junk box. I think it turned out great, I’m really impressed, I had never actually tried AC heating in all my years of building….

I was going for that 1950s industrial look.😎🤞🏻

Attachments

  • IMG_1036.jpeg
    IMG_1036.jpeg
    750.9 KB · Views: 147
  • IMG_1038.jpeg
    IMG_1038.jpeg
    752 KB · Views: 150
  • IMG_1035.jpeg
    IMG_1035.jpeg
    811.6 KB · Views: 127
  • IMG_1037.jpeg
    IMG_1037.jpeg
    758.3 KB · Views: 148

Which differences between Mark Levinson's "JC-1" and "JC-1DC"

Both versions are for operating without mains power supply - just two secondary D-cells are in use.
What is the difference ?

BTW - the mains supply version uses the additional term "AC"
The difference is the year of release - the suffix "DC" means a newer series (release 1976) than the older series without that suffix (release already 1974) go to
ハイファイ堂メールマガジン
Who know the difference between the gain stage circuits of this both versions ?

The schematic of the JC-1DC (potted version), which I have create some years ago, you will find in post #8 below.
Maybe there is also a schematic of the JC-1 anywhere. Simplified schematic you will find in post #32 so as some hints concerning the question from headline.
The last both pictures in post #12 are from a device in not worked condition at left channel - unfortunately also in a potted version. The replace of electrolytic capacitors by new ones don't provide the wanted success.

Why is Faital Pro 6RS140 so well regarded given it's distortion measurements?

Looking for a ~5.5" mid and I see the Faital Pro 6RS140 being spoken highly of. For example, Troels uses it in his Loudspeaker center and raves about it. My problem with this (and other Faital drivers that have been measured) is that it has some fairly high distortion. In this case there appears to be a giant peak at ~1300 Hz as shown in Dickason's review linked below. I realize most of this is 2nd order harmonic (up to 4%), but the 3rd order also clears 1% in this range, which from my understanding should be clearly audible. Is the problem that other drivers are not better here? (Wondering about the SB Acoustics SB15CRC30-4, where the IMD has been measured but I can't find harmonic distortion tests) Or is it that the strong 2nd order harmonics are inoffensive enough and mask the 3rd order for most listeners?

https://audioxpress.com/article/test-bench-faital-pro-6rs140-midwoofer-midrange

So shockingly good! $50 only! Grab it now! Sig180-4 ...

Hello , cheer up Dayton Audio for this DIY gem :

https://cdn.xingosoftware.com/audioxpress/images/fetch/dpr_2.25,w_300,h_394,c_fit/https://audioxpress.com/assets/upload/images/1/20240228205005_20240228180745-VC-Cover202403--March1.jpg

Measurements by Vance Dickason are way better than expected , the Sig180-4 show no weaknesses!

Am I dreaming ... or some good soul alien must have beamed me into wonderland 🙂

But wait until the Sig120-4 will be klippelized , I guess some other designers will burst into tears seeing the meas' results!

Future is golden! (in our little DIY universe)
  • Like
Reactions: analogkid455

Alternative to DE250 on RCF H100

At the moment I'm using a B&C DE250 on an RCF H100 horn from 3,5kHz on up on my open baffle setup.
I also have some Air Motion Transformers and some Dipole planars I frequently put on them.

Out of the three options the B&C RCF combo has by far the best dynamics which also improves the bass of the system quite a bit (yes, no typo)
However, the other two options sound more natural, they have better top-end resolution and have a different presentation which is a bit more relaxed. It is not that the The B&C RCF combo sound aggressive or too forward, it's more the lack of top-end resolution that makes most of the difference. Since this is already a four-way system I don't want tot turn it into a five-way system by adding another super-tweeter. Besides, in my experience with super-tweeters in the past is that they add something nice but have a trade-off in image stability.

The option I'm currently looking at is to either try the Faital Pro STH-100 with the Faital PRO HF10AK or HF108R or go for a better dipole tweeter like a Mundorf AMT, both math the off-axis response of my wideband midrange pretty good.
I have tried the big ESS AMT's but the magnet structure forms a pretty bad-sounding waveguide and I have never been able to integrate them into the system properly.

Has anyone compared the B&C DE250 in either RCF-H100 or Faital STH-100 to the Faital HF10AK or HF108R? Both Faital drivers might have a better top-end resolution in theory but I would like an opinion from first hand. I have read the HF10AK is supposed to have more "air" but I wonder if this is really more resolution or just the rising frequency response. Frequency response shaping is also easy enough on the DE250 but that does not improve its resolution. I'm not much interested in the response towards the lower end since I cross them at 3,5kHz and won't go any lower anyway. Most of the discussions about compression drivers seem to be about how comfortably low they can go, I'm more interested in how comfortably high they can go.


Anyone?

Jean Hiraga MC circuit

I am interested to built a circuit i notice at http://webook.fset.de/20091999PHCHO/audio/prepre.htm
inside the author recommended to use the transistor recomended to him by toshiba
the transistor is TBC559
is this transistor similar to bc559 made by philips/motorola
i am wondering as tbc559 can't be sourced from where i am staying(M'sia)
any other transistor type that can be used ?
An externally hosted image should be here but it was not working when we last tested it.

MIRO PCM1704 DAC Complete and Tested

Sold

Have two sets of Miro PCM1704 DAC boards for sale.
I will only get either board sold, and I will keep the one not sold.
Please read the condition of the board stated below, and note the individual price.

What you need to provide :
1. You will need to give it PSU with rails +/-5V (Analog) and +/-5V (Digital).
2. i2s source (Amanero Combo384 USB-i2s, JLSounds i2soverUSB are some examples) is needed to feed it in order to play music.
3. Two pieces of single op amps or whatever IV stages you have.
4. Chassis, wires, connectors etc

Board fully populated with good quality caps eg. Elna Tonerex, Nichicon KZ, Vishay mkp and Kemet mkp film caps, Panasonic acrylic caps, Samsung ceramic caps. all the signal resistors are low noise non-magnetic resistors with copper leads, good quality Nextron IC gold plated contacts sockets. Packed with high quality components. As seen in the pictures, both boards have different types/brands of components. Both boards also have u.fl connectors installed in case you would use them.

Payment by PAYPAL FF please.
I have sent 50+ packages to US, EU and a couple to Asia. All receive the packages in good condition.

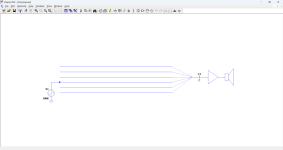
Using electronic crossover as a bass booster

I’ve been experimenting connecting the outputs of Nakamichi EC-200 electronic crossover in different way by tying low and high frequencies outputs together via Y-cables. The objective is to use it as a bass boosting that is splitting low and high frequencies apart for allowing level adjustments independently and merging them again before sending it to a single amplifier, see attached. The unit was inserted at tape minitor loop of the preamplifier section of the integrated amplifier. Normally, the high frequency level will be left at fully clockwise (maximum position). And the low frequency level will be used alternately from min to max positions for adjusting bass level. After experimenting, I found an issue that the signal cancelled (output decreased) against each other when the low level knob was set at fully clockwise (max) and fully anti-clockwise (min). But it summed at around mid-rotation. I’d like to ask if there’s a potential to modify the unit to completely perform as desired description earlier.

Attachments

  • IMG_0184.jpeg
    IMG_0184.jpeg
    227.4 KB · Views: 78
  • IMG_0185.jpeg
    IMG_0185.jpeg
    58.2 KB · Views: 80

Audio Aero Capitole II not so special edition!

Audio Aero Capitole Special Edition - Bought back from the dead!!!

I purchased this player in a terrible condition. Someone had decided to "upgrade" the player and pretty much destroyed it!

IMG_4044.jpeg

IMG_4045.jpeg


The Mundorf supreme silver oil caps had been changed to basic film MKPs and the board was completely destroyed around the tube mounts.

IMG_4046.jpeg


Fortunately I was able to clean up a bit and there was enough of the PCB left to recover from the mess left behind!
I have some sub boards on the way to properly tidy up the valve area of the PCB.

For noe I had to fashion the tube legs to replicate the connectivity

Still not as I would like it to be but its functioning...... I'll get there 🙂

IMG_4070.jpeg


IMG_4073.jpeg


Result is its now running and fully functioning as a CDP, DAC and preamp albeit its not as pretty on the inside as it once was.
There's still some work to do, as I have designed new sub PCB's for the tubes to mount to and the caps will revert to Mundorf Silver oil! More than happy to have saved this one!!!!

IMG_4111.jpeg

IMG_4110.jpeg


IMG_4115.jpeg


IMG_4119.jpeg


IMG_4121.jpg


IMG_4122.jpg


IMG_4060.jpeg


IMG_4058.jpeg

Neurochrome 21st Century Regulator and extra parts

Sold.

Complete Neurochrome 21st century regulator kit from a few years ago, never assembled -- did come with surface mount devices preinstalled however.

Comes with extra parts from an even earlier build I did of this board back when you could get a bare board and solder in your own surface mount devices. (I bought extras at the time.)

Attachments

  • regulator (1).JPG
    regulator (1).JPG
    764.9 KB · Views: 62
  • regulator (2).JPG
    regulator (2).JPG
    421.7 KB · Views: 64
  • regulator (3).JPG
    regulator (3).JPG
    453.2 KB · Views: 62

EL84SE with local NFB?

Hi, mainly for curiosity i would like to learn on an EL84SE amp with local NFB.

Imagine a standard EL84SE, pentode mode, kathode bias. NFB is usually being appplied from the 8 or 16 Ohms tap of the OT to the cathode of the stage in front of the EL84.
And what if the application needs a volume pot ore some kind of tonestack just in front of the EL84?
Which means that there is no NFB of this kind possible in a meaningful way - it would depend on the position of the vol pot.

So - applying NFB directly to, say, the cathode of the EL84? Which would, of course require that the cathode condensor of the EL84 be omitted.
That would lead to
a) current NFB due to the missing cathode condensor
b) NFB including also the transformer.

has someone also done this? How would, for example, the stability of the bias point be affected?

Here is Tracy, the trenchant cable-tracer

A cable tracer, also known as a wire tracer or tone generator and probe, is a tool used to identify and trace wires or cables within a network or electrical system. It's particularly useful for pinpointing the location of specific wires, troubleshooting issues, and ensuring proper connections.
Depending on the purpose, you can trace the exact path followed by the conductor, or just locate its destination (end point), or both.
Two main principles are usable: electrostatic or magnetic. Each has a specific domain of application, and in addition, a hybrid, electromagnetic mode is also possible. It is rarely encountered commercially, but Tracy includes it, and it has the ability to solve normally intractable problems.

How It Works:​

  1. Components:
    • Transmitter (Tone Generator): This part is connected to the wire or cable you want to trace. It sends a signal (often an audible tone) down the wire.
    • Receiver (Probe): This handheld device detects the signal emitted by the transmitter. When it gets close to the wire carrying the signal, it produces an audible or visual indication.
  2. Operation:
    • Connecting the Transmitter: Attach the transmitter to the wire or cable using clips or a specific connector.
    • Activating the Transmitter: Turn on the transmitter to start sending the signal.
    • Using the Receiver: Move the receiver along the path where you suspect the wire is located. The closer you get to the wire, the stronger the signal or tone you will hear.
Here is a drawing summarizing this type of operation:

1731599896592.png

For cheap instruments, the generator is just an audio device generating an easily recognizable musical jingle, rich in high frequencies.

For a more accurate pinpointing, a differential operation is preferable:

1731600775471.png


The single-ended electrostatic mode is very cheap and has a wide detection area (too wide!), and the differential mode is very restrictive (too restrictive!).
They are useful though.

This is the 100KHz transmitter:
1731601278956.png


And here is the (kludgy!) receiver:
1731601419979.png

Attachments

  • 1731599859814.png
    1731599859814.png
    57.4 KB · Views: 47
  • 1731600736273.png
    1731600736273.png
    58.6 KB · Views: 46
  • Like
Reactions: AllenB and stv

Integrated Amp (Yamaha) - Diagnose (Power Amp) by Separating Pre and Power Sections

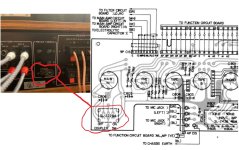
One step I haven't yet tried, in my attempts to further diagnose a one-channel in-op issue on a late '70's Yamaha CA-600 integrated amp, is to use a separate pre-amp and source and test ONLY the Yammy's power amp section. Has anyone attempted that on a Yamaha integrated amp of this vintage?

There's a "Coupler Switch" (see attached) for separating pre-amp and power sections on the rear panel. I've successully used it to de-couple pre and power sections and verified the symptom in not in the pre-amp section. (I.e., when a separete power amp was used in place of the Yamaha's power amp section no symptom was present.) I simply want to, as stated above, use a separate pre-amp and source and test ONLY the Yammy's power amp section. Yet I'm reluctant to attempt that without knowing if anything adverse might occur that's unrelated to whatever may be wrong with it.

If anyone has done this on a 1973-ish to 1976-ish CA- series of Yamaha Integrated Amp, let me know.

Attachments

  • Coupler Switch.jpg
    Coupler Switch.jpg
    314.7 KB · Views: 39

PCB manufacturing

This topic has probably been discussed to death, but Search isn't returning anything useful.

I'm looking at getting a small board made, 2 layer, no bigger than a postage stamp, and low quantity, maybe 10 of., and no urgency.

What/where is the cheapest way/place to do it? Getting it done in UK is preferable but as in a cheapskate, don't mind getting it in China, depending on the cost.

My Dynaco ST 35

I've searched threads here on the forum but can't find any answers to what my problems are and I lives in Sweden and main voltage is 230V.

Now it is that I finally got my ST-35 up and running, but not without problems, even though this is the third ST 35 and a number of ST 70s behind me, it hums steadily at 50 Hz (I would think) but without finding the reason. I has also built couple others tube and ss amplifier and pre amps.

I have tried all possible troubleshooting, also checked online for something similar and as usual there are different variants of solutions.

When I got home (flea find) with the amplifier, I disassembled it for repair and found an error that the previous owner had made when they built it, the error is that one of the cables to one 115V winding that is connected to the 240V version was pinched under mains transformer there was also a burn mark in the chassis, I then tested the mains transformer and it was correct with all the correct voltages and current.

This I have done, the power supply is handled by an EFB by D.Gillespie new home-etched pc13 circuit board all resistors are original or replaced till others from Allen-Bradley. The tubes are original 7247 and new Russian EL84

But when I start it there is a hum that gets louder when the tubes warmes up, when I remove 7247 it is quiet I have gone through the wiring diagram a number of times but I think it looks right no cold solder I have been detected nothing. All tubes are glowing so that's not the fault (I think) maybe the 7247 are the fault. I have non tube tester but a friend have but he lives i a other part of Sweden.

From my search online there could be two faults but one involves other transformers with 4-8 ohm tap but mine are original and it was feedback the other talked about, that 7247 were broken now I don't know if they are broken I have none opportunity to try right now but I'm wondering if the pinched cable might have caused them to be broken. The hum or oscillates on both channels, possibly a little more on one channel.

I hope someone has a good idea how I should go about it, because right now I'm just have no clue about the problem.

Cheers Anders

Mactone MH-300b schematic or photo

Hi
A friend of mine has asked me to fix his Mactone MH-300B.
Problem is it has been at a very unprofessional repair shop that has cut all the resistors and capacitors out and they are now in a plastic bag.
It is a PushPull 300B with 4x300B 2x12bh7 1XECC82 so it is probably a very common topology with fixed bias, but it would be easier for me , if I had the original schematic.
I do not have the amp in house yet, but if the schematic is impossible to get hands on, I will post the measured values of all the resistors and capacitors, and then hope we can agree on how the amp should be ..

Giant leap for phonograph

I am really really happy that I pursued trying to improve my record playing experience. I initially bought and built a VSPS board. When I installed it into my switching preamp, I was not very impressed, as there was the same amount of hum/noise as my el-cheapo phono board from Ali Express.

So recently I decided I would put the VSPS board in its own chassis. I debated, but ultimately decided to include the PS inside the 6x10x2 inch chassis to match my switching pre, and 6LU8 tube amp.

Well, initially when I plugged it in and turned up the volume there was still hum. I tried bringing a piece of shielding between the transformer and the preamp board, and it didn't do anything to reduce the noise/hum. BUT, what did happen was that during handling, the hum disappeared! I then checked the turntable ground and I could get the hum to cut out by moving it a bit. I pulled the ground cable and checked the 1/8" mono phone plug I was using as to what was going on. Turns out I connected the TT ground to the chassis instead of the preamp board ground. Changed the connection and vois la no more hum, even at max volume (with no signal).

Well that made me happy. But what else made me happy is that I replayed a great recording of Beethoven's 5th and my sox were blown off! the bass was really very detailed and powerful, and the dynamics were also impressive.

So, my experience is that this VSPS board (thanks Richard) is excellent. My TT is an old Technics belt drive. I had recently upgraded to a modest LP gear cartridge with elliptical stylus, but my initial impression (with the same record) was Meh. So anyway, I am very excited to have elevated my LP lstenng experience.

Roger

Mooly's MMAMFM Monoblocks - A build log

G'day Guys.

I hereby start my build log for my implementation of Mooly's My Mosfet Amplifier Made For Music.
https://www.diyaudio.com/community/threads/my-mosfet-amplifier-designed-for-music.119151/

Here's the schematic for reference:
sch_2.2.1_rec2.png

I will be implementing this amp design as monoblocks for a couple of reasons:
1) I think their cooler than stereo amps.
2) mono construction, better blah blah blah.
3) My racking situation is much better suited to my power amps being monos.
4) I like making extra power supplies etc.

I am building my chassis from scratch:
1) I have the tools, sheet metal is cheap.
2) Ali express cases tend to not be my style and shipping is horrendous to NZ.
3) I like making things for the sake of making things myself.
4) I can get exactly what I want instead of being constrained by somebody else's engineering/design choices.

Boards have arrived fresh off of the printing press at JLCpcb.
20240219_212944.jpg
Mmmm Shiny!

I've started populating the pcbs however today I will start the story with a peak at the current state of the chassis.
20240219_172139.jpg

On the weekends I tend to do noisy stuff like cutting metal when I get a chance around husband/dad duties.
On weeknights I tend to work on the electronics side around exercise and husband requirements.

At my current rate of work, I would hope to have them powered up for testing in a couple of months.

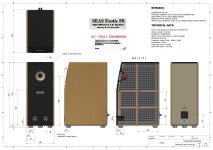
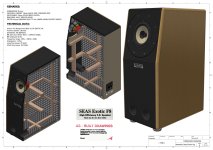
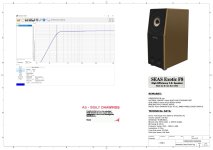
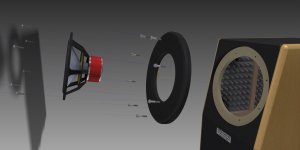
I love my SEAS Exotics

Yesterday evening I connected my lovely Exotic's again to my Accuphase and listening to them 😍😍😎.

What a wonderfull driver placed into 160 liters 😍😍😎.
Very very smooth and very deep and perfectly controlled.
This is going very very nice.

Description:
Ready B.R. speakers equipped with the very expensive and beautiful full range 8 inch drivers from SEAS with a beautiful flat curve and an impressive superior depth.
This goes very nicely, deep and low with ease.

Drivers with certificate and subsequent serial numbers.
REMARKS:

MATERIAL CABINET 18mm BLACK AND STANDARD MDF.
SIDE PANELS 19mm SOLID BEECH WOOD.
BRACINGS 44x27 SPRUCE WOOD.
PRITEX 42mm DAMPING GLUE TO ALL INNER PANELS EXCEPT BAFFLE.

TECHNICAL DATA:

Driver: Full Range from SEAS type X1-04 EXOTIC F8.
Volume cabinet: 160 liter.
Sensitivity: 96 dB/W(m).
BR port (2x) 70mm diam. x 109mm length.
BR tuning @ 30 Hz.
Frequency range: 29Hz - 20kHz (-3dB). (edit)
Impedance: 4 Ohm.
Long time power 35 Watt.
Short time power 100 Watt.

Two tone cabinets.
Sleek and solidly built.
Transparent satin finish.

------------------------------

Built 2023
M. den Boer
Brielle
The Netherlands.

------------------------------

Attachments

  • 1.JPG
    1.JPG
    103.2 KB · Views: 394
  • 2.JPG
    2.JPG
    106.2 KB · Views: 361
  • Assembly Seas Exotic big_page-0001.jpg
    Assembly Seas Exotic big_page-0001.jpg
    308.5 KB · Views: 420
  • Assembly Seas Exotic big_page-0002.jpg
    Assembly Seas Exotic big_page-0002.jpg
    338.2 KB · Views: 408
  • Assembly Seas Exotic big_page-0003.jpg
    Assembly Seas Exotic big_page-0003.jpg
    234.6 KB · Views: 388
  • Assembly Seas Exotic big_page-0004.jpg
    Assembly Seas Exotic big_page-0004.jpg
    262.6 KB · Views: 372
  • Assembly seas X1-04 EXOTIC F8.jpg
    Assembly seas X1-04 EXOTIC F8.jpg
    128.9 KB · Views: 431
  • IMG_20230226_141409.jpg
    IMG_20230226_141409.jpg
    459.7 KB · Views: 407
  • IMG_20230324_134655.jpg
    IMG_20230324_134655.jpg
    341.6 KB · Views: 422
  • IMG_20230324_134719.jpg
    IMG_20230324_134719.jpg
    279.5 KB · Views: 392
  • IMG_20230324_134733.jpg
    IMG_20230324_134733.jpg
    523.7 KB · Views: 390
  • IMG_20230324_134739.jpg
    IMG_20230324_134739.jpg
    528 KB · Views: 375
  • IMG_20230324_134832.jpg
    IMG_20230324_134832.jpg
    410.7 KB · Views: 356
  • Opstelling Exotic big.jpg
    Opstelling Exotic big.jpg
    280.5 KB · Views: 349
  • Opstelling Exotic big2.jpg
    Opstelling Exotic big2.jpg
    270 KB · Views: 406
  • X1-04_Exotic-F8_Datasheet_page-0001.jpg
    X1-04_Exotic-F8_Datasheet_page-0001.jpg
    371.3 KB · Views: 395

RF Anode /plate parasitic choke for 12AX7 ECC83 input stage

I don't know if placebo effect or not, but my amplifier sounds better if I insert a parallel LR filter in the anode path, just before the usual plate resistor.

This is called RF anode choke or "parasitic choke". Usually I read in radio schematics anything above 1mH should work to purge possible RF noise, with the knee out of the audio band but before MF band.

I put 15K res // 1.5mH inductor, but it was a quite random choice.

What do you think? And which values are ok?

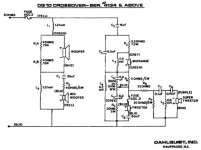
Help with Crossover bypass caps!

Hello everyone & I have a pair of Dahlquist DQ 10’s, been listening to them for over 40 years. I updated the crossovers and would like now to try bypassing caps C1 and C2 with Duelund cu 0.01 bypass caps. What I’m unsure of, need help with, is orientation. Here is how the caps are described:

The outer lead out, closest to the edge of the capacitor, is connected to the outer foil and as such should be connected to the lowest impedance path to ground, generally the signal output.

And, here’s the crossover schematic. If you can advise me, I’d appreciate it and thanks in advance!

Attachments

  • Dahlquist DQ-10 Crossover Schematic 4134 2.jpeg
    Dahlquist DQ-10 Crossover Schematic 4134 2.jpeg
    44.5 KB · Views: 129

JL Audio 300/4 turn on without remote

Hi friends, I am looking for help to repair a JL Audio 300/4 rev 1 amplifier. The first failure is that it turns on without connecting the remote cable. The second failure is that the output fets heat up and the current consumption increases rapidly. The remote does work. When you activate it, the green LED turns on. I will try to find out if I have a faulty IC. I suspect it is a u600. I don't know if it controls the power control. Regards.

Attachments

  • Screenshot_20241120_212525_Gallery.jpg
    Screenshot_20241120_212525_Gallery.jpg
    445.6 KB · Views: 87

What to build if you have a SEAS Thor loudspeaker and Nextel drivers instead of magnesium drivers

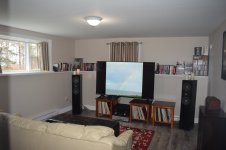
Hi I built the small thor speakers, the mag drivers corroded replaced them with nextel drivers and finally built new cabinets. Just wanted to share the experience in case anyone is in the same boat. Had a ton of help over the years from this site and learned a lot. Overall I am very happy with the results. The speaker sound great the imaging and tone are very very good. The original small thors were maybe slightly better but by not much if at all. I have usable bass to 30hz. Thought about getting a sub but I am happy with the bass.

We are downsizing and sold my wood shop so these will be my last speaker build and well worth the effort.

Using Hornresp ( incredible) came up with a high WAF cabinet the cabinet is 44 x 8.5 x 12" . 3/4" birch ply with extra 3/4" mdf front Used scottmoose and Daves holey braces cut out from the small thors, they have the madisound thor upgraded crossovers with R2 R3 and C4 removed.

in room listening postion fr
holey brace
finished in room

I want the thank everyone who helped me over the years I know without a doubt that I was a frustrating PITA to a few of you but thank you for being patient. This hobby was fantastic and complex and interesting. I think it took me 12 years to build the final cabinets because I enjoyed the time I spent learning on this site so thank you all.

Ben

Attachments

  • listening position fr.png
    listening position fr.png
    391.4 KB · Views: 95
  • P1030542.JPG
    P1030542.JPG
    319.2 KB · Views: 89
  • DSC_0020.JPG
    DSC_0020.JPG
    315.9 KB · Views: 93
  • Like
Reactions: GM

Speaker damping trials on sealed cabinet mission 720

So I have been thinking about the best way to damping my mission 720 speakers. These are a sealed enclosure 3way speaker. The tweeter is a closed back soft dome and the mid has it's own enclosure. On reading many threads and what I could find relating damping I tried the following.
1st was original damping which was 2 rolled up pollyfill material.
This killed the sound, over damping.

Shaded Array - Twelve 3” Full Range drivers with 35Hz-25KHz & high output

I was always fascinated with “How much juice can you squeeze out of a full range driver?”

In this design with twelve Fountek FE85 3.5” full range units, I managed to squeeze a lot of juice from small drivers, without a traditional crossover. This design achieves High-Definition transparency, deep imaging, excellent impulse and step response, flat phase response. The system comfortably handles 250 watts and plays very loud without distortion.

This design has unique feature: All 12 full range drivers receive 100% signal below 100Hz, sharing the load equally. With DSP EQ they have plenty of bass.

Above 100Hz they shift into Shaded Array mode. Above 500Hz the Constant Directivity radiation pattern is fully in force. This means spooky-good imaging all throughout the room.

shaded12_speakers.jpg


Lots of slam even with wide dynamic range percussion recordings.

Totally coherent sound as these full range drivers cover 9 octaves.

Extremely transparent, as the FE85s have very thin light aluminum cones and a light, airy signature sound.

shaded_array_1+.jpg


shaded_array_building_setup.JPG


I designed these based on Don Keele’s work, which is patented. I obtained Don's permission to build the design, and met him in person at the 2017 Parts Express competition where I showed them off.

A shaded array is a curved line array where each driver receives a unique signal level according to a Bessel function. This eliminates most of the lobing and comb filter effects of a line array. (Conventional line arrays are notorious for comb filtering effects. You have to use lots of tiny drivers in order to eliminate them.)

In auditoriums, shaded arrays ensure all seats get equal SPLs no matter how far from the speaker. In a home system, a shaded array with the hottest drivers near the floor results in equal SPLs whether you’re right next to the speaker or all the way across the room.

shaded_array_full_range_LF_HF.png


When I invite people over to listen, I ask them to get up and walk around. They’re astonished that the sound level and image doesn’t change no matter where they are in the room. When I host listening parties with a dozen people, every seat in the house is great.


You can stand right next to one speaker and hear the other speaker clearly across the room with a nice stereo image.

The graph below is from Don Keel’s website, it shows even distribution across all frequencies for a shaded array with the hottest drivers in the center. In my design, the floor is the centerline through the middle, with floor reflections simulating the lower half of the array.

don_keele_shaded_array_heat_map.png

Imagine a black dotted line running right across the middle of each heat map above. That dotted line is the floor of the room.

Put your couch on top of that floor and now you can visualize how the sound is distributed throughout the room from the Shaded CBT Array.

cbtimage1_spherical_don_keele.jpg


This means the hottest drivers are the ones at the bottom, with the signal tapering off as you move up to the top of the array.

This design has an extra twist that I’ve never seen anywhere else, which is: All 12 full range drivers receive 100% signal strength below 100Hz, so they share the load equally.

I’ve mounted them in a DSP assisted bass reflex box. At the tuning frequency all drivers are working equally hard. But above 100Hz they progressively shift into Shaded Array mode and above 500Hz the Constant Directivity radiation pattern is fully in force.

This is the actual measured signal at the terminals of each driver:

shaded12_zoom+.png


As you can see, at the tuning frequency of 43Hz, each driver shares exactly the same signal level, but around 100Hz the signals start to diverge, and at 10KHz driver #1 at the bottom gets 14dB more signal than driver #12 at the top.

The irregularities around 100Hz are due to varying resonant frequencies and impedance curves of each individual driver. This is a trivial issue in application. The Fountek driver has the following specs: FS 125Hz (in my measurements it was more like 110Hz), Qt 0.52, VAS 0.85 liter.

One thing that separates the men from the boys in speaker design is radiation pattern. I like "CBT Constant Beamwidth Transducer" Shaded Arrays because their distribution pattern of sound throughout the room creates superb imaging in every seat of the house. If you stand up and walk right up to one speaker, the apparent source of the sound recedes to somewhere a few feet behind the speaker. You can hear the left and right equally well anywhere you stand or sit.

Measurements

This is the system response in my room, average of 18 positions, mostly near the listening spot, with the EQ that sounds right after much tweaking:

shaded12_18_positions_avg.png

As you can see they deliver 35Hz-25KHZ. Of course at listener position in a real room, you want about 10dB more bass and that's exactly the case here.

Phase response is essentially flat above 80Hz:

shaded12_24positions_phase.png

Most speakers butcher Impulse Response. Not these:

shaded_12_impulse_after4800.png


Schematic:

This design requires an elaborate filtering network to provide each individual driver with the exactly correct drive signal according to Keel's Shaded Array methodology. Each driver has a Zobel network (6ohms + 13uF) which flattens the impedance and makes behavior more managable.

The wiring consists of three parallel sections of four drivers wired in series. Each driver starting with driver #4 and above also has an RC network which directs extra high frequency energy towards the bottom drivers and less HF energy to the top drivers.

shaded array vituixcad schematic and drive signals.png


As you can see, drivers 1, 2 and 3 get 3dB extra signal above 1KHz, and drivers 10, 11 and 12 get 10-15dB less signal above 1KHz, with the intermediate drivers getting exactly proportional signals. I am very proud of the above family of curves.

shaded12_minidsp_eq_1jul2017+.png


I used a MiniDSP 2x4HD to EQ these speakers flat. Above is the correction curve, which is absolutely necessary because without EQ the 3.5” drivers start rolling off below 150Hz.

The total system has roughly the same output capability of a quality 10” woofer in a bass reflex enclosure. The DSP boosts the signal the the 43Hz reflex tuning frequency and rolls off quickly below that, adding 6-10dB additional headroom at low frequencies. This is a critical aspect of the design, as a 6-10dB gain in LF dynamic range is not trivial.

I discuss this DSP technique in my AudioXpress article “The DSP Assisted Reflex.”

Port & Tuning Details

I used a flared 3” Precision Port from Parts Express. It is about 12” long and it tunes the 30 liter / 1.2 cubic foot box to 43Hz. The system cuts off sharply below 35Hz via DSP. These twelve drivers in a super-low-tuned reflex enclosure and DSP can collectively generate a lot of output, very similar strategy to the Bose 901 (which is an ingenious engineering design as I discuss in an AudioXpress sidebar, regardless of what opinions many audiophiles have about the execution.)

High Sensitivity

The midband SPL of these speakers is about 96dB. They have 14dB of boost at 43Hz and a similar amount of boost above 5KHz. Effectively they operate on average like a system with ~91dB sensitivity. Pretty efficient overall. The high efficiency adds to the slam and dynamic range.

These sound great and play quite loud with small low power tube amps.

Impedance

shaded_array_measured_impedance.png


They are easy for any amp to drive. You can see in this graph the port tuning frequency of 43Hz and the impedance is around 10 ohms at low frequencies and 4 ohms at high frequencies. These speakers are easy to drive.

Driver Choice
shaded_array_fountekFE85.JPG


The Fountek FE85 is an excellent full range driver. It has a 3/4” voice coil and very light cone assembly of less than 2 grams. It has a fabric surround which ideally matches the acoustic impedance of the aluminum cone and very smooth response. It has very good high frequency resolution, as good as many dome tweeters.

Individually they handle about 10 watts RMS, so with 12 units per channel and equal power distribution at low frequencies, this system has no problem putting out 110dB+ SPLs in a real room.

Fortunately the FE85 is still available. Plus many great alternative choices are available from Dayton, Tang Band, FaitalPro and many others. As long as you choose an 8 ohm unit, you won’t need to change any of the Shaded Array filter network values. However your DSP EQ will change and anyone with a DSP and a microphone can easily pull that off.

There is no need for FIR (Finite Impulse Response) filters as everything is very well behaved and there are no phase errors that you can’t correct with standard IIR (Infinite Impulse Response) DSP filters.

Cabinet details

The cabinets are 46” high, 7” wide and 14.75” deep. These are the sketches I gave to my carpenter Joseph Budka, who milled these on a CNC machine:

shaded_array_7822.JPG


shaded_array_5311.JPG


The drawing below shows the coordinates of each facing surface on the side panel that touches the front panel pieces, along with the angles of each facing surface.
shaded_array_6807.JPG


shaded_array_half_built.JPG


How do they sound?

The stereo image is deep. The apparent sound source is about 2-3 feet behind the speakers, just as Don Keele’s Constant Beamwidth Transducer model predicts.

I’ve built LOTS of different designs, you can search my screen name on this forum to find more. These are one of the better systems I’ve made, successfully squeezing a great deal of performance out of 3.5” full range speakers.

Resolution is high definition and extremely detailed. The aluminum cones have a slight edge and if your amp is harsh or sounds grainy, that will come through.

“Shaking the house” and full range drivers don’t usually go together in the same sentence, but these deliver. They have a LOT more dynamic range than 99% of full range designs. The DSP Assisted Reflex means that even with songs like “Russia on Ice” by Porcupine Tree, which has a loud 34Hz pant leg flapping synthesizer late in the track, these have no problem shaking the house.

If I were to build these again, I would consider a more expensive high end driver with underhung voice coil. I would be tempted to choose a paper cone instead of aluminum, as the metal cones have a slight edge that can come off hard at times. The Dayton PS95 is a very good choice.

I would also consider an even larger array, using 16 or 18 drivers instead of 12.

VituixCad and MiniDSP 2x4HD files are attached in Zip files.

shaded_array_parts_express.JPG

I wrapped them 360 degrees with black grille cloth with an oak wood cap on the top. I used very dark wood stain that makes it almost black.

I took these to the Parts Express 2017 speaker design competition where I got a lot of questions from curious designers. (Coincidentally, the speaker that won the competition was a much more sophisticated 2-way Shaded Array design.)

I think shaded arrays are underrated and I encourage y'all to try a design for yourself!
Attachments

Dayton Audio RSS315HF-4 Vented Enclosure - Critique?

I've just finished modelling and drawing up a vented enclosure for the Dayton Audio RSS315HF-4 12" Subwoofer.

Can anyone give me a critique on the design or see if I've made any errors?

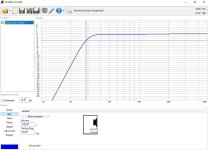
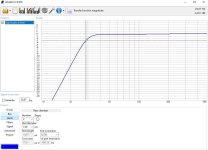
I've modelled it as an 80L vented enclosure, tuned to 24.35 Hz with a 200w input signal. The amp is a 500w BASH plate amp. I'll set the HPF to 20 Hz.
I've read in some forum that the driver displacement is 3.8 L but no idea if this is correct.

Any input would be greatly appreciated.

Parameters as follows:

Impedance 4 ohms
Fs 24.2 Hz
Re 3.1 ohms
Le 0.96 mH
Qms 2.83
Qes 0.45
Qts 0.39
Vas 84.1 liters
Cms 0.23 mm/N
BL 13.99 Tm
Mms 188g
Xmax 14.3 mm
Sd 514.7 cm²
Vd 736.0 cm³


1000022943.jpg
1000022928.jpg
1000022926.jpg
1000022925.jpg
  • Like
Reactions: stv

D4K5 DIY Class D Amplifier 2000W ( Gerber Files) - working PCB or fake ?

Hello Friends


D4K5 Class D amplifier (about 2000W 4 Ohm)

Fake or working PCB and working circuit ?

Does someebody here build this D4K5 class D amplifier ?


I have download from elcircuit.com schematic, Gerber Files, Youtube Video

High Power Class-D Amplifier D4K5 - Electronic Circuit


This amp design have 3 Mosfets and should work from +/- 30 to 100 V Rail

in Youtube Video everything look fine but some people writing in Blog PCB dont work, you will waste money
Projects by fanatics, for fanatics
Get answers and advice for everyone wanting to learn the art of audio.
Join the Community
507,772
Members
7,887,934
Messages

Filter

Forum Statistics

Threads
406,206
Messages
7,887,934
Members
507,772
Latest member
Hypertone