Thanks for all the great compliments.
12B4A:
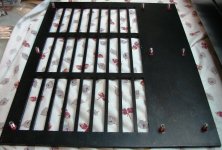
The cloth covering was applied with an adhesive I bought for copper veneer for another project.I looks like white Elmers glue,but seems a whole lot stronger.A wood veneer roller with heavy pressure worked the cloth into the adhesive nicely.
The two front grilles are aluminum,cut with a water jet.
Making brand new,shiny pieces of aluminum look ancient took aggressive dremel tool action and a hot bath in muratic acid.
The volume controls are cast iron handles from old water valves.Making these literally,valve amplifiers.
12B4A:
The cloth covering was applied with an adhesive I bought for copper veneer for another project.I looks like white Elmers glue,but seems a whole lot stronger.A wood veneer roller with heavy pressure worked the cloth into the adhesive nicely.
The two front grilles are aluminum,cut with a water jet.
Making brand new,shiny pieces of aluminum look ancient took aggressive dremel tool action and a hot bath in muratic acid.
The volume controls are cast iron handles from old water valves.Making these literally,valve amplifiers.
Thanks mhouston
I do have some regrets building with tubes so rare.I have minimal spares and prices are way too high for me,so I am considering modifying to accept 801a,10y,or EM20 for future repalcements.Unless someone here has some RS242s or RS241s laying around they would like to get rid of well below Epay prices?
schematic can be found here.http://www.diyaudio.com/forums/tube...g-constructive-criticism-my-first-design.html
A few changes have been made since,but the schematic at the end is very close.If there is interest,bump the thread,I will comment on the updates.
They aren't that cheap or available either..801a,10y,or EM20
Thanks mhouston
I do have some regrets building with tubes so rare.I have minimal spares and prices are way too high for me,so I am considering modifying to accept 801a,10y,or EM20 for future repalcements.Unless someone here has some RS242s or RS241s laying around they would like to get rid of well below Epay prices?
schematic can be found here.http://www.diyaudio.com/forums/tube...g-constructive-criticism-my-first-design.html
A few changes have been made since,but the schematic at the end is very close.If there is interest,bump the thread,I will comment on the updates.
Most tubes have a good life in the thousands of hours. Even if you have only one spare pair you may get many years of play before you have to do something drastic. I built a 6N7 preamp and just ensured I have one spare pair around.
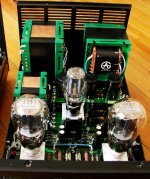
![Picture 010[1].jpg](/community/data/attachments/300/300474-444f3770a8eacdc07b26b6074d2c2bc3.jpg)
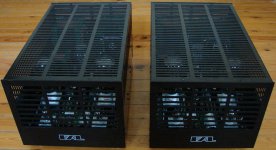
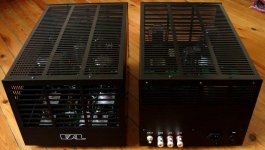
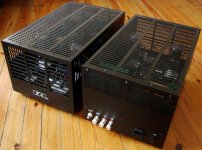
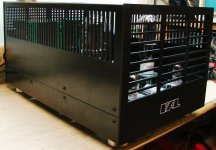
SET monoblocks.
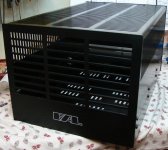
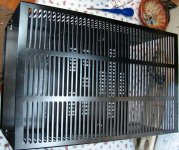
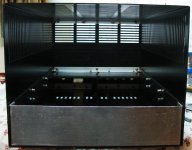
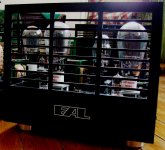
A pair of super duper monoblocks into full covered aluminum chassis for safety reasons (kids in home). Very difficult construction because the restricted outer dimensions: 46cm depth X 23cm height X 29cm width. Chassis are designed to offer clear visibility of internal parts, for that reason the enormous ventilation holes especially in front panel. Single ended, no feedback and of course class A operation. Sincerely, the best sound i have ever heard! Low order harmonics are growing up gradually in a nice way and in accordance with the output power offering thus a nice sound coloration. Output tubes are a paralleled matched pair of TJ Full Music 300B with solid carbon plates so can be driven up to 20-21 Watt RMS without fear which means that amplifier is compatible with speakers even of 86-87dB SPL sensitivity. Input tube is a EF86 pentode which is buffered from output tubes thru a 5687 dual triode connected as cathode follower.
A pair of super duper monoblocks into full covered aluminum chassis for safety reasons (kids in home). Very difficult construction because the restricted outer dimensions: 46cm depth X 23cm height X 29cm width. Chassis are designed to offer clear visibility of internal parts, for that reason the enormous ventilation holes especially in front panel. Single ended, no feedback and of course class A operation. Sincerely, the best sound i have ever heard! Low order harmonics are growing up gradually in a nice way and in accordance with the output power offering thus a nice sound coloration. Output tubes are a paralleled matched pair of TJ Full Music 300B with solid carbon plates so can be driven up to 20-21 Watt RMS without fear which means that amplifier is compatible with speakers even of 86-87dB SPL sensitivity. Input tube is a EF86 pentode which is buffered from output tubes thru a 5687 dual triode connected as cathode follower.
Attachments

what max plate Watts?Output tubes are a paralleled matched pair of TJ Full Music 300B with solid carbon plates
have you been thinking about SV572-xx ?
SET monoblock B-part
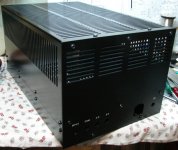
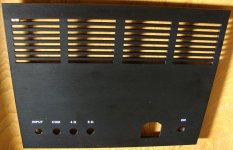
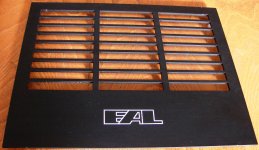
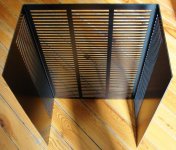
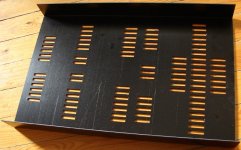
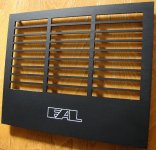
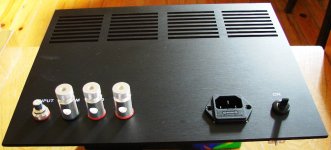
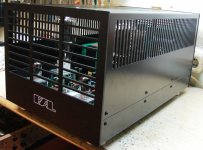
Here pictures of chassis parts. Front and rear panels are made from 4mm aluminum while top and bottom cover from 2mm. Front and rear panels are processed with CNC laser while top and bottom covers with CNC punching machine. All made in Greece. In two pictures the chassis assembled off-hand.
Here pictures of chassis parts. Front and rear panels are made from 4mm aluminum while top and bottom cover from 2mm. Front and rear panels are processed with CNC laser while top and bottom covers with CNC punching machine. All made in Greece. In two pictures the chassis assembled off-hand.
Attachments
Last edited:
SET monoblock C-part
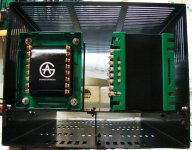
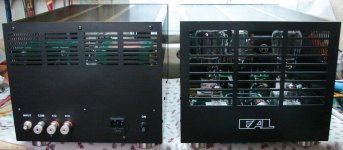
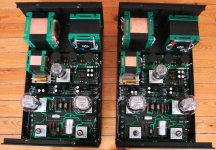
Here more pictures of chassis. In the first you can see the difficalty of assembly: the power and output transformers are mounted on a rised support plate because the lower space is needed for mounting of input RCA socket, output binding posts, IEC mains inlet and power switch.
Here more pictures of chassis. In the first you can see the difficalty of assembly: the power and output transformers are mounted on a rised support plate because the lower space is needed for mounting of input RCA socket, output binding posts, IEC mains inlet and power switch.
Attachments

SET monoblock D-part
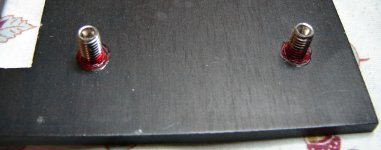
Here again details of chassis. In the first pic are shown the back panel parts: 1) The input CMC silver phono socket 2) The three Audio Note silver output binding posts 3) The Furutech rhodium IEC mains inlet, and 4) The APEM (Made in France) 2 pole 16A/250Vac toggle power switch which makes a nice "clonck" sound when is moved. In the rest pics you can see how the front panel is mounted on front support plate with "hidden" grubb screws.
Here again details of chassis. In the first pic are shown the back panel parts: 1) The input CMC silver phono socket 2) The three Audio Note silver output binding posts 3) The Furutech rhodium IEC mains inlet, and 4) The APEM (Made in France) 2 pole 16A/250Vac toggle power switch which makes a nice "clonck" sound when is moved. In the rest pics you can see how the front panel is mounted on front support plate with "hidden" grubb screws.
Attachments
Last edited:

SET monoblock part-F
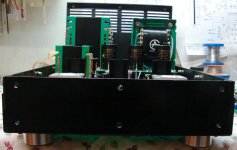
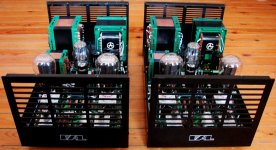
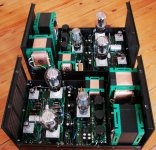
Now some internal pics. All internal wiring is made with Neotech UPOCC silver wire (either 0.8mm or 1.0mm) with PTFE sleeving. All colored cables are so because i added over the PTFE extra insulation from heatshrinkable tube where the tension exceeds 400V. Safety first!
Now some internal pics. All internal wiring is made with Neotech UPOCC silver wire (either 0.8mm or 1.0mm) with PTFE sleeving. All colored cables are so because i added over the PTFE extra insulation from heatshrinkable tube where the tension exceeds 400V. Safety first!
Attachments

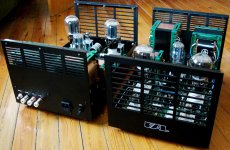
Thanks a lot 6L6 and i have to mention that i don't try to advertise my... skillsWOW!! That is a fantastic collection of photos!
Your constructions skills are incredible! You have made a beautiful pair of amps -- Bravo!!
. I haven't need of this, simply instead endless and tiring blah - blah i allways prefer to offer a bunch of pictures which are more enjoyable to everyone . I also appreciate very much and enjoy myself from the pics of some incredibly beautiful projects of other members! My good friend Gyuri, please let me feel more proud of you, because you are my friend.Hey friend, this is amazing.
I am proud that you are my friend.
Your everlasting wacky Gyuri.
- Home
- Amplifiers
- Tubes / Valves
- Photo Gallery