No, that part should not be in the cart.
I will post a clean Yarra cart tonight 🙂
OK.
If anyone in the U.S. needs an ideal diode bridge, send me your address 🙂
Measure the drop from the downstream point of the large 2R2 resistors (and same as the 4700uF caps) to the output jack. I soldered some test clip pins to points on the board to get an easy hook up for the alligator clips. It is good to set the voltage drop at this point just so that the left and right channels are consistent.
I am hoping to check these numbers.
I am using 15 Volt, 25 VA transformers.
I am getting about 23.37 volts at the large 2R2 resistors.
I've currently set the pots so that I am seeing +-20.6 volts at the output pins with no load.
Do these seem like reasonable numbers for the transformers I am using?
Is normal protocol to readjust voltage drop once the daughter board loads are in place?
Thanks!
Here is an updated Mouser Yarra shopping cart to populate the boards.
The Talema trafos need to be sourced from Digikey or elsewhere.
Mouser Electronics
The Talema trafos need to be sourced from Digikey or elsewhere.
Mouser Electronics
Last edited:
Is normal protocol to readjust voltage drop once the daughter board loads are in place?
Thanks!
Yes.
A psu acts differently without it being loaded. If you have confirmed your Yarra psu is working correctly (no smoke or shorts 😀) install the Melbs and readjust.
The trimpots have approximately 1V of adjustment. I have the 4 pots adjusted for the largest drop possible with all voltages being within +/-0.15 of each other.
I am using the 22v Telema transformers and so far have been able to use every available daughterboard with it: Melbourne, WBA18, PCA, and Korg 6P1. On the Korg, I dialed the voltage down to 29v. On the Melbourne, I had it at 30.5. ......
Are these voltages taken with, or without the load of the DB attached? Without the DBs, I can only dial down to 30.5. That's as low as I can go. Should I attached the DBs, check for smoke and re-adjust PSU to ~+-30VDC?
Those Korg 6P1's have voltage regulators that are designed for 30v maximum. I managed to get mine down to 29.5v They might be ok at 30.5v. You can also add a diode in series to drop it 0.6v for extra safety.
BTW, I'm using the Melbourne DB for these adjustments. My Korgs will come later. 🙂Are these voltages taken with, or without the load of the DB attached? Without the DBs, I can only dial down to 30.5. That's as low as I can go. Should I attached the DBs, check for smoke and re-adjust PSU to ~+-30VDC?
Also, on the schematic there are header pins at X123 and X133 on the Yarra MB. It looks like pins 2 and 3 should be jumpered for normal pre output, as opposed to headphone out. Yet on the Yarra MB it appears they are laid out in mirror image, which make the 2 outside pins jumpered for normal operation. Is that a correct assumption?


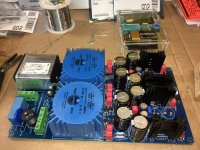
Yarra Showcase w/Melbourne Daughter Boards Pics
Hi all,
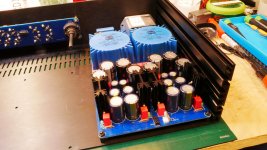
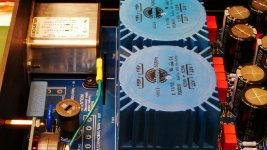
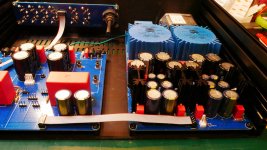
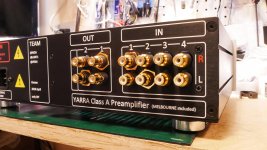
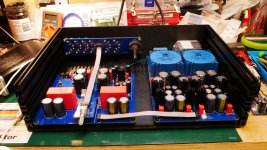
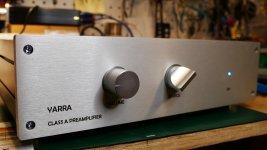
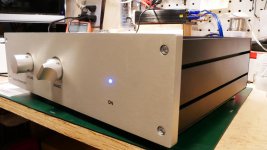
After a few weeks gathering parts and getting the last ModuShop enclosure, I finally have something to show. Thanks to X and Vunce for providing help along the way. And to JPS64 for his excellent layout work.
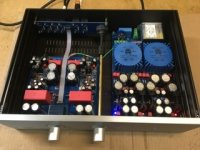
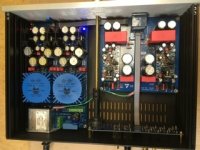
This version of the Yarra is using the Melbourne daughter boards. I do have the Korg 6P1 modules and will test them shortly. The pre is still on my bench burning in. Once I move it to my main listening rig I'll offer some sonic insights. On my bench it sounds very transparent. And very quiet indeed.
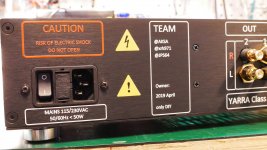
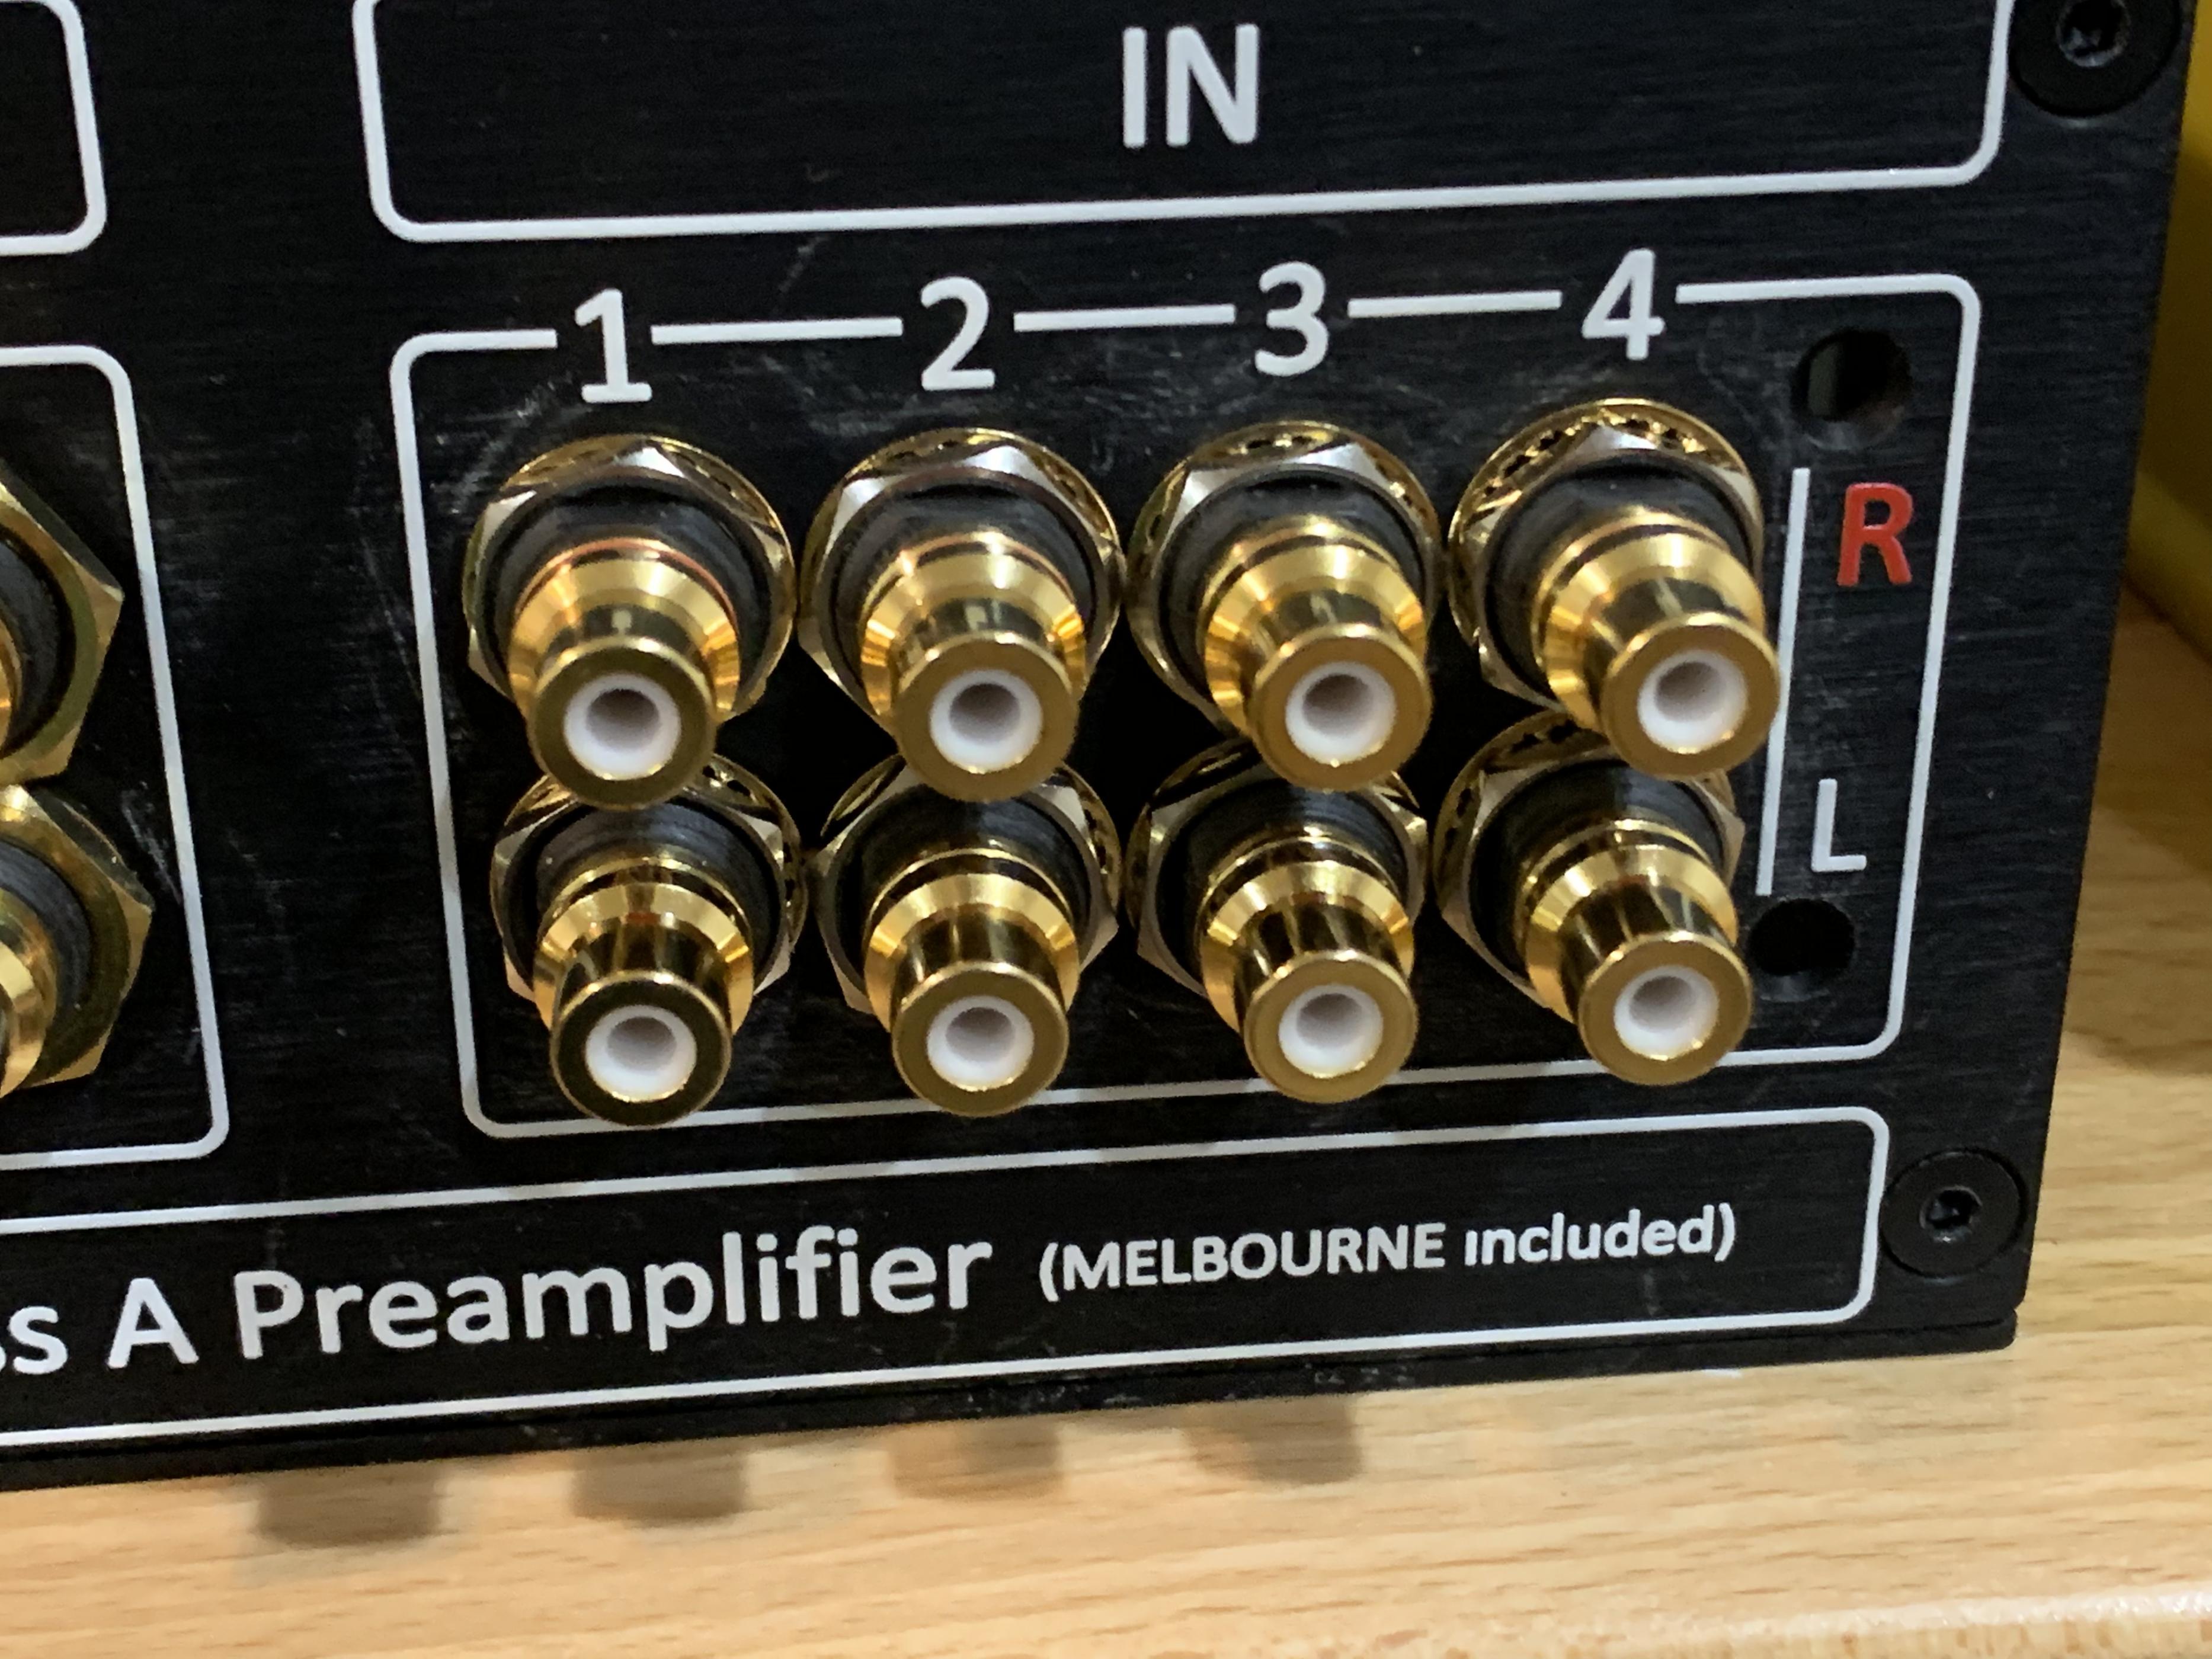
You will also notice on the back panel that it's impossible to get all the RCA jack nuts to fit.(At least the ones that came with the jacks I ordered from Audiophonics.) So I placed 4 in the strategic locations to help with stress on the middle of the input board. Otherwise it's very solid.
In addition, I reinforced the IEC inlet with 2 screws in the back panel. Without them I was noticing a slight 'give' of the socket when pressing in a power cord. These two screws solved that problem. The Schurter already had holes in the two aluminum tabs, so it was an easy fix.
The knobs aren't an exact fit, but was what I had in my knob box.
Here they are a few images;
Hi all,
After a few weeks gathering parts and getting the last ModuShop enclosure, I finally have something to show. Thanks to X and Vunce for providing help along the way. And to JPS64 for his excellent layout work.
This version of the Yarra is using the Melbourne daughter boards. I do have the Korg 6P1 modules and will test them shortly. The pre is still on my bench burning in. Once I move it to my main listening rig I'll offer some sonic insights. On my bench it sounds very transparent. And very quiet indeed.
You will also notice on the back panel that it's impossible to get all the RCA jack nuts to fit.(At least the ones that came with the jacks I ordered from Audiophonics.) So I placed 4 in the strategic locations to help with stress on the middle of the input board. Otherwise it's very solid.
In addition, I reinforced the IEC inlet with 2 screws in the back panel. Without them I was noticing a slight 'give' of the socket when pressing in a power cord. These two screws solved that problem. The Schurter already had holes in the two aluminum tabs, so it was an easy fix.
The knobs aren't an exact fit, but was what I had in my knob box.
Here they are a few images;
Attachments
-
 P1010708.jpg685.8 KB · Views: 426
 -
 P1010725.jpg730 KB · Views: 420
 -
 P1010729.jpg697.6 KB · Views: 415
 -
 P1010734.jpg744.5 KB · Views: 428
 -
 P1010800.jpg670 KB · Views: 560
 -
 P1010803.jpg864.9 KB · Views: 287
 -
 P1010742.jpg723.5 KB · Views: 289
 -
 P1010752.jpg845 KB · Views: 576
 -
 P1010761.jpg533 KB · Views: 580
 -
 P1010795.jpg553.4 KB · Views: 551
Beautiful work Redjr!
In case you missed it, there is a simple fix for the nuts that are too large to fit on the panel.
Or Manley RCa’s:
The YARRA Preamplifier/HPA for Melbourne DB Group Buy
Standard threaded panel RCA’s:
The YARRA Preamplifier/HPA for Melbourne DB Group Buy
Cheapest and easiest if you have the auiophonics already:
YARRA Preamplifier Custom Case at Modushop

Ah ha. Perfect solution X. Thanks for the links. Funny thing... I had a similar problem when I was building my DS pre a few years back. In that case, I needed a nut to hold the front panel pots in place - in recessed holes. I ended up finding some round slotted nuts that fit perfectly. Problem solved!
So far I'm very happy with the build, and it helps to be a meticulous person because those Mel PCBs were a real challenge - especially finding the heatsinks that would fit in the designed space. 🙂
So far I'm very happy with the build, and it helps to be a meticulous person because those Mel PCBs were a real challenge - especially finding the heatsinks that would fit in the designed space. 🙂
Attachments
I have extras of the smaller 1/2 1/2-28 hex trim nuts that work with the Modushop chassis. If someone in the u.s. needs them I can send some along.
Does anyone have a spare modushop Yarra case they can part with? A member contacted me looking for one. They are all sold out now as Redjr got the last one!
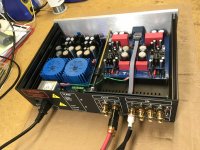
It’s alive!
My Yarra with Melbourne db’s has been playing nicely for week or so. No smoke or drama with it so far. It’s driving my F5T currently. With 18v tranfos there seems to be plenty of headroom. I really am enjoying it!
I’m building my whole system from the ground up, speakers and all. (Some *?!¥€]•? Is either happily enjoying my old system, or made a nice pile of cash at the pawnshop.)😡
Anyway I don’t have anyway of doing comparisons with established equipment. But my ears tell me I’m on the right path!😀 Here are some picks of the finished Yarra.
Attachments


Thanks X!
Ya I was having up loading full rez pics. Let’s try it again!
Ya I was having up loading full rez pics. Let’s try it again!
Attachments


- Home
- Group Buys
- The YARRA Preamplifier/HPA for Melbourne DB Group Buy