post916 shows a DC input to the lt3042 PSU.
post919 shows an AC input to the lt3042 PSU.
Only one can be correct.
What does the lt3042 PSU need as a power input?
In both cases all the inputs are isolated from each other.
post919 shows an AC input to the lt3042 PSU.
Only one can be correct.
What does the lt3042 PSU need as a power input?
In both cases all the inputs are isolated from each other.
Andrew,
Owen's LT3042 board is designed for an AC input. It has four diodes in a full-wave bridge configuration. Bimmer's reposting of the diagram from post916 in post919 was to correct showing DC input in his original drawing.
The LT3042 has a max input voltage of 20v, so a 13v-14v AC UNLOADED would be an appropriate max AC. But you should scale that to your desired output voltage... this regulator chip lists a dropout voltage of 350mV, I like at least a couple of volts above my output voltage at the cost of some additional heat, much more than that and you get a lot of heat!
Note that the 2 halves of Owen's LT3042 board can be powered using a single transformer with 2 independent secondaries instead of two separate transformers as shown in post919.
Greg in Mississippi
P.S. Note that one can leave the diodes off the board and jumper across them to use 2 DC inputs to the board. That is how the board I showed in post857 is configured.
Attachments
post916 shows a DC input to the lt3042 PSU.
post919 shows an AC input to the lt3042 PSU.
Only one can be correct.
What does the lt3042 PSU need as a power input?
In both cases all the inputs are isolated from each other.
Like I said in my post, I believe I had made an error posting the first image, hence posting the second image with a correction. I copied and pasted an image and go to rushing the quickie photchop. realized after I posted it that I posted AC to dc rectification. yet meant to only post image of AC primary to AC secondary. The lt3042 quad parallel psu needs AC secondary multiwave input.
Thank you for pointing out my error. I tried to quickly correct it yet this forum doesn't allow you to edit it after 30min of being posted. That's what I get for posting it while I was at work. Being that i'm not an expert like you or many others on this forum, i'm going to make some mistakes. I was pretty sure I made a mistake so quickly uploaded a correction so no confusion would be had. I apologize for the confusion to you, my correction is on post #919. And I know even that has some very minor errors.
thank you for posting your thoughts.
Greg,
Thank you for the compliments.
Thank you for the clarification on hookup with the BALBAL. in my mind that was the way I meant to have it hooked up... like you described. The green wire was to be a jumper, and then two more green wires going from those two points to GND on each board.
I'm not good with schematics and am reading a book on that now. I apologize for my sloppy ways of visualizing the wiring.
I asked about solder paste as I just not realized you didn't use any. I couldn't imagine how difficult that must of been to do with pre-tinning each piece. I'm not sure i'd be comfortable doing it that way to be honest. I'm sure I could, I just think lining it up with solder paste would likely be a bit easier. As parts naturally pull into perfect position 99.9% of the time if you align it properly before heating begins.
Do you know the operating temp of your board under full load? I plan to use a heatsink on top and bottom for maximum heat dissipation. I am still leaning towards a low temp solder paste to do the install. I'm pretty sure the results should come out perfect, even with the tiny pitch 3mmx3mm DFN package.
If and when I hear back from Owen about ordering more LT3042's I'd like to be sure I can get more of them so I can try to build them multiple ways. I'm really wanting to try the oven reflow option. I could build the whole board with a low chance of failure, and inspect the board with my usb microscope for any micro bridges. my vision is about 20/10 so usually don't need the microscope. But after doing some NDK NZ2520SD oscillator mod projects, I found that I needed a little help to be sure what frequency markings were on those tiny buggers. The good thing I see about the LT3042's is the time for solder reflow is reasonable (10sec @ 300C) and should allow for a reasonable amount of time to install them. Unlike the ndk's with 10sec max at 260C and fairly easy to burn up without low temp solder paste.
thank you for your recommendation on ordering from Linear Tech directly. I already have 32 of them from digikey, but likely will order more if I mess up on the first board 😀
I plan to set the output for my Lt3042 boards that power the dam1021 to 10V. so input of 12V should be ideal. You say a couple volts above is ideal due to voltage dropout?
I am planning to get ONE trafo with four secondaries, and use two secondaries for each lt3042 psu. One PSU per dam1021. My issue is I wish I could use the trafo I have that is 12V-0-12V CTapped. :/
I'm really honestly not sure the correct way to hook this up to the LT3042. Seems i'd only be able to use one PSU correct?
I am simply guessing, but the image below, maybe one is right? and maybe both, but am kindly asking if either may be correct?

-----------
and to answer some other things you mentioned...
Solder,
I've got boat loads of solder as i've tried so many kinds from
WBT Silver 4% Leaded
WBT Silver 4% lead free
Loctite Multicore Crystal 511
Mundorf silver 9.5% Supreme
Cardas leaded
Oyaide SS-47
Wonder Solder
Which I have a roll of each now and usually use most of them. But my favorites are definitely WBT 4% leaded, and Wonder Solder. Both flow the same imho, yet WBT leaded is able to flow at a lower temp so I use a little more often.
My least favorite is Mundorf. 😀 it's tough to work with imho.
Solder paste, I mentioned what I have... but I have 4 kinds...
ChipQuik SMD291SNL10
ChipQuick SMDLTLFP
247 Solder LowTemp T4 -
MG chem 4900P - silver 3%
SRA low temp Silver T3
- not sure what my fav is...usually SRA silver, 247 Solder, and haven't used ChipQuik enough as I just got some tubes of it.
But my opinion of using solder paste is "WOW" It makes everything incredibly easy if you choose a good paste.
, and lastly
I have Rev3 boards. So not sure what mods I can really do. from what I understand there is little to be had with Rev3 boards. I've heard about the lengendary Black Gates Caps, but really havent had many fancy caps in any of my gear. Maybe in the near future once my Holo Spring with Jensen Caps will arrive. but that's likely not fancy enough to compare.
I've contributed a bit to MOREDAMFILTERS as I found his site to be rather informative good reading. And certainly DIMDIM's site is awesome, I wish I knew as much as everyone on here.
I'm trying to stick to topic of the LT3042, and Hope to understand the ways to hook up a CT secondary to them. Otherwise I'm going to order another Simon tuned Ocore trafo with 4 secondaries. 😀
Thank you for the compliments.
Thank you for the clarification on hookup with the BALBAL. in my mind that was the way I meant to have it hooked up... like you described. The green wire was to be a jumper, and then two more green wires going from those two points to GND on each board.
I'm not good with schematics and am reading a book on that now. I apologize for my sloppy ways of visualizing the wiring.
I asked about solder paste as I just not realized you didn't use any. I couldn't imagine how difficult that must of been to do with pre-tinning each piece. I'm not sure i'd be comfortable doing it that way to be honest. I'm sure I could, I just think lining it up with solder paste would likely be a bit easier. As parts naturally pull into perfect position 99.9% of the time if you align it properly before heating begins.
Do you know the operating temp of your board under full load? I plan to use a heatsink on top and bottom for maximum heat dissipation. I am still leaning towards a low temp solder paste to do the install. I'm pretty sure the results should come out perfect, even with the tiny pitch 3mmx3mm DFN package.
If and when I hear back from Owen about ordering more LT3042's I'd like to be sure I can get more of them so I can try to build them multiple ways. I'm really wanting to try the oven reflow option. I could build the whole board with a low chance of failure, and inspect the board with my usb microscope for any micro bridges. my vision is about 20/10 so usually don't need the microscope. But after doing some NDK NZ2520SD oscillator mod projects, I found that I needed a little help to be sure what frequency markings were on those tiny buggers. The good thing I see about the LT3042's is the time for solder reflow is reasonable (10sec @ 300C) and should allow for a reasonable amount of time to install them. Unlike the ndk's with 10sec max at 260C and fairly easy to burn up without low temp solder paste.
thank you for your recommendation on ordering from Linear Tech directly. I already have 32 of them from digikey, but likely will order more if I mess up on the first board 😀
I plan to set the output for my Lt3042 boards that power the dam1021 to 10V. so input of 12V should be ideal. You say a couple volts above is ideal due to voltage dropout?
I am planning to get ONE trafo with four secondaries, and use two secondaries for each lt3042 psu. One PSU per dam1021. My issue is I wish I could use the trafo I have that is 12V-0-12V CTapped. :/
I'm really honestly not sure the correct way to hook this up to the LT3042. Seems i'd only be able to use one PSU correct?
I am simply guessing, but the image below, maybe one is right? and maybe both, but am kindly asking if either may be correct?
-----------
and to answer some other things you mentioned...
Solder,
I've got boat loads of solder as i've tried so many kinds from
WBT Silver 4% Leaded
WBT Silver 4% lead free
Loctite Multicore Crystal 511
Mundorf silver 9.5% Supreme
Cardas leaded
Oyaide SS-47
Wonder Solder
Which I have a roll of each now and usually use most of them. But my favorites are definitely WBT 4% leaded, and Wonder Solder. Both flow the same imho, yet WBT leaded is able to flow at a lower temp so I use a little more often.
My least favorite is Mundorf. 😀 it's tough to work with imho.
Solder paste, I mentioned what I have... but I have 4 kinds...
ChipQuik SMD291SNL10
ChipQuick SMDLTLFP
247 Solder LowTemp T4 -
MG chem 4900P - silver 3%
SRA low temp Silver T3
- not sure what my fav is...usually SRA silver, 247 Solder, and haven't used ChipQuik enough as I just got some tubes of it.
But my opinion of using solder paste is "WOW" It makes everything incredibly easy if you choose a good paste.
, and lastly
I have Rev3 boards. So not sure what mods I can really do. from what I understand there is little to be had with Rev3 boards. I've heard about the lengendary Black Gates Caps, but really havent had many fancy caps in any of my gear. Maybe in the near future once my Holo Spring with Jensen Caps will arrive. but that's likely not fancy enough to compare.
I've contributed a bit to MOREDAMFILTERS as I found his site to be rather informative good reading. And certainly DIMDIM's site is awesome, I wish I knew as much as everyone on here.
I'm trying to stick to topic of the LT3042, and Hope to understand the ways to hook up a CT secondary to them. Otherwise I'm going to order another Simon tuned Ocore trafo with 4 secondaries. 😀
Neither.
In both the upper and lower diagrams you are shorting windings. That will burn out your transformer, if the primary fuse is too big.
Ignore the Centre Tap and use the two 12Vac output for a 24Vac feed.
If that is too high, then you need a different transformer.
In both the upper and lower diagrams you are shorting windings. That will burn out your transformer, if the primary fuse is too big.
Ignore the Centre Tap and use the two 12Vac output for a 24Vac feed.
If that is too high, then you need a different transformer.
Neither.
In both the upper and lower diagrams you are shorting windings. That will burn out your transformer, if the primary fuse is too big.
Ignore the Centre Tap and use the two 12Vac output for a 24Vac feed.
If that is too high, then you need a different transformer.
What if I use one 12V per secondary and the center tap ground. Ignore the second 12V.
I know it's wasteful, but can't I use half the transformers output?
It's a 48Va transformer but effectively i would be using 24Va.
A friend of mine gave me a diagram that made it fairly confusing and hence my drawings above were done. Anyhow.
I "could" do one 12V and G Ct for one rail of the lt3042? And the second secondary for the second rail of the lt3042 if using only one 12V and 0.
But the problem would be powering the second dam1021.
Could I just have two wires from V+, one to dam1021 #1, and one to dam1021 #2. And the. Two wires from V-, one to DAC #1, and one to dac#2.
Then lastly... From the positive side link the negative to the positive of the negative side and then to ground of each DAC. Gosh seems overly confusing. But I'm pretty sure that would work. Albeit not ideal since I would be using one transformer and one psu to power two dac's. Albeit the DAC Power consumption spec is:
Positive Rail: .18A, 10V
Negative Rail: 0.06A, 10V
Total: 2.4W
The positive supply draw about 3 times as much current as the negative; the current is almost independent of input voltage.
So not a lot! Should be very easy to power two from one psu.
Also the dam1021 has its own regulators on board that are no where near as fancy as the lt3042 from what I understand. I would be great to bypass them. But I just want to get the thing running for now. It's not likely I will mod it until I fully understand what I'm doing with it.
I'm a builder, so I'm bound to copy someone's successful mod. I'm not a designer, so I'll likely screw something up 😉
I'm not afraid to admit it.
Thanks for your help Andrew.
My gut feeling on that wiring was not good.
But again, I could be wrong about just using one 12V and the ct gnd. But I can't imagine it wouldn't work. Other than be very wasteful.
Does anyone know if Owen posted some print outs of the top pads for the lt3042? I noticed he did for other boards. Like the bal bal and SE SE.
I want to make a stencil for reflow, and wish I had this info. I can def make one from scratch... But if anyone has it or knows where I can download it. I would appreciate it!!!
Please see this link on how to make solder paste stencil.
https://m.youtube.com/watch?v=JWUJtmgh55M
I want to make a stencil for reflow, and wish I had this info. I can def make one from scratch... But if anyone has it or knows where I can download it. I would appreciate it!!!
Please see this link on how to make solder paste stencil.
https://m.youtube.com/watch?v=JWUJtmgh55M
You can use either 12Vac - CT, or CT - 12Vac.
Just ignore (insulate) the thrid AC wire.
Will 12Vac give sufficient voltage to operate your circuits?
Just ignore (insulate) the thrid AC wire.
Will 12Vac give sufficient voltage to operate your circuits?
You can use either 12Vac - CT, or CT - 12Vac.
Just ignore (insulate) the thrid AC wire.
Will 12Vac give sufficient voltage to operate your circuits?
DAC Power consumption spec is:
Positive Rail: .18A, 10V
Negative Rail: 0.06A, 10V
Total: 2.4W
the trafo is 2A for 12V-0-12V
so likely 1A for each secondary if i'm using "half" of its available.
and at a mere 2.4watts per dac, i'm sure it should be OK.
but for voltage wise. I believe 12V is enough to supply 10V DC from the LT3042 with the voltage drop.
please someone correct me if i'm wrong.
but I can input somewhere between 7.5V or maybe 8V-15V input for each of the dam1021 dac boards.
I think voltage drop is about 350mA per LT3042, so a total of 2.8V drop... that would be 11.2V output. Maybe i'm missing something? I figure the Trafo will fluctuate a little on output. but My trafo i'm using is spec'd for 8% voltage regulation.
that would be up to 12.96V ? which should mean there is enough to supply 10V with worst case? I'm still not fully understanding the specs of transfomers, psu's etc. So i'm going out on a whim and guessing this is the answer based on what i've read.
Bimmer,
I should be able to respond and comment this evening
Greg Stewart
------------------

I spent a while making a precise stencil for the LT3042 psu. from scratch. using corel designer. Which is what I do for a living anyhow. I've ordered a stencil from Pololu.com with a dxf file. Will take a video of how the process works. OR doesn't work. But i'm pretty sure it should make assembly of the Lt3042 easy.
I will attempt it with a stencil and without. With my experience with solder paste in the past. It's proven to be incredibly accurate and reliable compared to soldering by hand.
but the caps are obviously still soldered by hand after the solder reflow has be finished.
I'm hoping Owen will see my messages and I'm able to order a few more of these boards. Once i'm done with this stencil I could pass it along to those who might be interested to try it.
Last edited:
12Vac is plenty into an LDO regulator set to 10Vdc.
You can get away with a big differential in -ve & +ve currents with a CT transformer, but I would recommend dual secondary and dual rectifiers into dual smoothing caps into dual regulators to keep the two channels isolated from each other. Then finally series connect the regulators to give the DAC a dual polarity supply.
You can get away with a big differential in -ve & +ve currents with a CT transformer, but I would recommend dual secondary and dual rectifiers into dual smoothing caps into dual regulators to keep the two channels isolated from each other. Then finally series connect the regulators to give the DAC a dual polarity supply.
------------------
I spent a while making a precise stencil for the LT3042 psu. from scratch. using corel designer. Which is what I do for a living anyhow. I've ordered a stencil from Pololu.com with a dxf file. Will take a video of how the process works. OR doesn't work. But i'm pretty sure it should make assembly of the Lt3042 easy.
I will attempt it with a stencil and without. With my experience with solder paste in the past. It's proven to be incredibly accurate and reliable compared to soldering by hand.
but the caps are obviously still soldered by hand after the solder reflow has be finished.
I'm hoping Owen will see my messages and I'm able to order a few more of these boards. Once i'm done with this stencil I could pass it along to those who might be interested to try it.
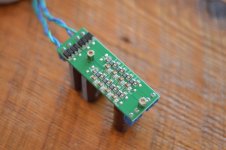
Just got my LT3042 board today, so thanks Owen!!
I've not used stencils before, so I'd be interested in giving this method a try. I look forward to your results. I just need to get my components ordered now that the board's arrived.
Just got my LT3042 board today, so thanks Owen!!
I've not used stencils before, so I'd be interested in giving this method a try. I look forward to your results. I just need to get my components ordered now that the board's arrived.
I will film the process with my USB microscope and take some photos of before paste, with paste, with component on paste, and then after paste melts and component is soldered properly.
I have a dxf file for the solder pads that I spent a lot of time testing its fitment
It's within a few hundredths of an inch accurate. And slightly smaller than the pads themselves to compensate for the laser that will be cutting the Mylar.
At least I can use this file as a template to mount the lt3042 to the chassis too. Easy enough with only two holes, but I couldn't find any templates that Owen uploaded. All boards except the lt3042 psu are found in this thread. Unless I'm blind. 🙂 my wife has told me many times over that this could very well be the case. 😉
Even with my 20/10 vision I don't need a microscope to do some fine pitch soldering, although it's helpful.
On another note:
Those who have an lt3942 quad parallel psu board... Can you please measure its peak operating temperature under extreme load? Do these Ldo's really get as hot as 150C? I must be misunderstanding the spec sheet on these. That sounds ridiculous. I'm guessing that is the maximum temp before damage occurs. I would like to know average temp under load. This will help me choose a good paste. I really want to use a paste that is T4 grade and 138C melting temp. It will be easier to do this build if so. That is if the temp of these don't get too high. I seriouslly can't imagine them being over 70C
And I will be using two heatsinks on each!!! One on top and one very low profile on bottom with gel pad.
You need to solve this equation:
DeltaT = Pdis * {Rth s-a + Rth c-s} * DF
Then Tc = Ta + deltaT
where DeltaT is temperature rise of the device case
Pdis is the power dissipation of the device = device voltage drop * device current
Rth s-a is the thermal resistance of the heatsink
Rth c-s is the thermal resistance of the case to heatsink interface
DF is the de-rating factor due to operating with a DeltaT << 75Cdegrees
Ta = ambient temperature of the air around the sink.
Average voltage drop and average current are usually used for checking temperatures of chips.
------------------
I spent a while making a precise stencil for the LT3042 psu. from scratch. using corel designer.
I have done this with much more complex PCB's by printing the PCB footprint (pads only) onto 0.005" DuraLar clear film with a laser printer. Then I cut the pads out with a scalpel. Works extremely well and cost pennies. It would be very easy for Owen to provide the pdf file for printing.
Last edited:
Excuse me if this is stated anywhere, but I've failed to find whether the newest prices are in Canadian or American dollars?
Earlier group buys have been listed in CAD, but is the current order form listing prices as CAD as well? (this one: https://docs.google.com/spreadsheet...UgCuzX58TXHaJvsF43iLg/edit?pref=2&pli=1#gid=0)
I ask this because the difference between 15 CAD and 15 USD will be huge for me because of import taxing/rules in my country
- crrd
Last edited:
ALL PAYMENTS ARE TO BE MADE IN US DOLLARS! This has changed recently, so please make note.
The exchange rate has become very unfavorable in the last year or so, and since I order everything from the US, and pay for everything in USD, I have now started charging in USD.
You need to solve this equation:
DeltaT = Pdis * {Rth s-a + Rth c-s} * DF
Then Tc = Ta + deltaT
where DeltaT is temperature rise of the device case
Pdis is the power dissipation of the device = device voltage drop * device current
Rth s-a is the thermal resistance of the heatsink
Rth c-s is the thermal resistance of the case to heatsink interface
DF is the de-rating factor due to operating with a DeltaT << 75Cdegrees
Ta = ambient temperature of the air around the sink.
Average voltage drop and average current are usually used for checking temperatures of chips.
The key part of this is the device voltage drop & device current.
Sorry, the one of these boards I have running is in a fairly low-voltage drop environment (1.5v & 3v for the two sides) and feeds a very low-current load (definitely under 100mA/side, likely around 50mA/side), so I cannot detect ANY heat above ambient and can't help you there.
I've thought a bit more about the setup you propose. 12vAC into each side is on the high side, IMHO, producing something like 17vDC at the input of each side... and likely higher as most transformers' voltages are rated at something near full load, so in most applications they run higher.
WHILE I am a big advocate of dropping more voltage than the minimum required (to allow for the dynamic peaks of musical signals), dropping 17vDC or 18vDC down to say 13vDC seems excessive for this application. 10vAC would be a better target input, IMHO.
Second, while I believe the configuration will work running the two halves of the boards off a center-tapped transformer, my experience is that you'll have a quieter setup with dual secondaries and bringing them together to ground at the load.
Third, I've been thinking about how good this reg board will be into the Soekris DAM. In my setup, I plan to use one of these boards to provide the 3.3v and 1.2v to run the digital side only and use a pair of small shunt regulators to feed +-8vDC into the +-5v ladder voltage regulators. Of course, this will take some mangling (oops, I meant modifying) of the Soekris. I think it will be a very good configuration and about as good as one can get with AC-power to the unit. AND based on my experience with Owen's board on my modified HiFiBerry DAC+ Pro, I think your plan to use it to provide power to the stock +-voltage inputs will work very well too, probably not as good as Salas shunts, but about as good as anything else using a monolithic chip regulator.
Fourth, long-term, consider how you are using the Soekris. With Owen's headphone amps being fed from the DAM's SE raw output, do you have any need for the output stage on the DAM board? If not, consider going to a lower +- voltage into the DAM for your target configuration and either disconnecting the output stages (easy to do by removing the resistors providing the R of the R-C filter into the last stage of the on-board raw DC power supply and if you lilke, making a tiny cut on the traces from the raw output to the output stage input) or pulling them off entirely (easy with your hot-air station). If you aren't trying to feed those stages sufficient +-voltage so they work well, you can input +-8vDC to +-9vDC into the DAM and have plenty of headroom for the 1.2v, 3.3v, and +-5v regulators. Long term, that may be the way you want to go. And if that is true, you could start with 9-10vAC transformer secondaries, feed them directly into the Soekris power input (using the on-board diode bridge and filter caps) to get it working for now, then later bypass or remove the output stage and install the ||LT3042 board between the transformers and the DAM's power inputs (bypassing the diode bridge possibly) for better sound.
Food for thought?
Greg in Mississippi
Running two regulators off a Centre Tapped transformer and connecting the outputs in series, requires a +ve and a -ve regulator....................
Second, while I believe the configuration will work running the two halves of the boards off a center-tapped transformer, my experience is that you'll have a quieter setup with dual secondaries and bringing them together to ground at the load..............
If one has two +ve regulators one MUST use a dual secondary transformer into separate rectifiers and separate smoothing capacitors to create two isolated supplies. These two supplies then feed two +ve regulators and one connects the outputs in series for that dual polarity supply.
- Home
- Vendor's Bazaar
- "The Wire" Official Boards for All Projects Available Here! BAL-BAL, SE-SE, LPUHP