Would you mind posting the final sim parameters from hornresp? I can also take the cross sectional areas from S1...S4 with L12..L34 and use that as a guide if that is easier for you.
I feel like I am asking a lot from you, and I don't want to inundate you with questions. I am sure you feel that you have spent too many hours on this already!
Let me know about the hornresp parameters. I see some old ones from the Synergy Tripp 10 thread, but not sure if they are final.
Thanks a million, Art!
The Hornresp parameters in the Tripp 10 thread are probably as "final" as they ever were.Would you mind posting the final sim parameters from hornresp?
Let me know about the hornresp parameters. I see some old ones from the Synergy Tripp 10 thread, but not sure if they are final.
Thanks a million, Art!
The actual measured response was similar to the simulations, but the arrangement of the bass reflex ports can't be exactly modeled in Hornresp, the length and size of the ports had to be worked out empirically to achieve the desired Fb of 81 Hz.

Nice work, everyone. Glad to see things coming together. Appreciating everyone's hard work and dedication from afar. Cheers!
Fin's model is matching up close enough, and got some further clarification on dimensions from Fin.
Proceeding with build!
Proceeding with build!
Fin's model is matching up close enough, and got some further clarification on dimensions from Fin.
Proceeding with build!
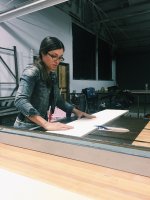
Nearly finsished updating the drawings. Feedback welcome!
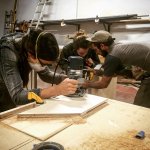
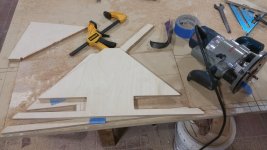
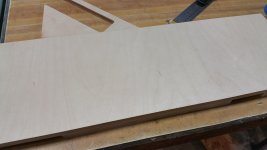
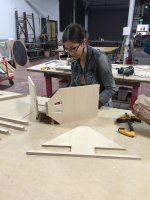
Made good progress in the shop today
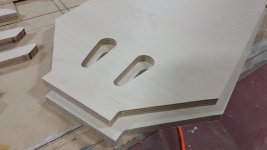
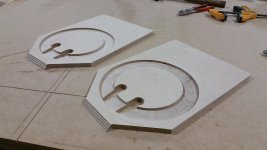
I decided to make router jigs for the inner horn pieces (the jigs include the longest miter dimension, so I can trim the miter off using the overhead fence on the table saw tomorrow).
I am using Fin's sketchup model mainly, and his plans as a guide/doublecheck.
I have the inner horn pieces cut, going to do the miters tomorrow and see how it fits before cutting more for the second horn
Hopefully my roommates don't mind being in one of the photos, they are building a new kitchen counter!
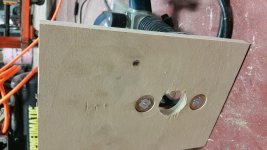
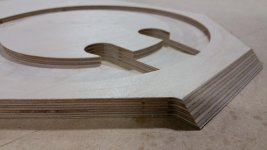
Still have to do the 1/4 round around the bass reflex ports that Art calls for
I decided to make router jigs for the inner horn pieces (the jigs include the longest miter dimension, so I can trim the miter off using the overhead fence on the table saw tomorrow).
I am using Fin's sketchup model mainly, and his plans as a guide/doublecheck.
I have the inner horn pieces cut, going to do the miters tomorrow and see how it fits before cutting more for the second horn
Hopefully my roommates don't mind being in one of the photos, they are building a new kitchen counter!
Still have to do the 1/4 round around the bass reflex ports that Art calls for
Attachments
Last edited:
That horn is coming along very nice. Great job taking your time an getting it fit together. Your results are way better than the horn I built.
Keeping an eye on your progress. I love my SH-60 clone. I am working on finishing a passive crossover for it soon, they are so much fun to listen to.
Keeping an eye on your progress. I love my SH-60 clone. I am working on finishing a passive crossover for it soon, they are so much fun to listen to.
JG,
Wow great progress and beautiful craftsmanship. Did you go from cad model to CNC mill because those are some of the best cuts I have seen. Nicely done and great new workshop you have.
Wow great progress and beautiful craftsmanship. Did you go from cad model to CNC mill because those are some of the best cuts I have seen. Nicely done and great new workshop you have.
Whoa that is one heck of a compliment, thanks xrk!!
I'll tell you about my process in more detail if ya want tomorrow (or later today by now I guess) I just got done cleaning up and getting settled into bed- finally. Was having a really great time!
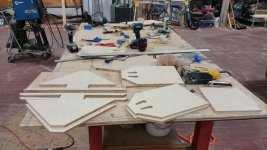
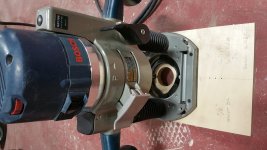
No CNC here yet (I hope someday soon). Using table saw, track saw, band saw, drill press, jig saw, files, and router. Improvised some good tricks with the router that really made the difference, I think. Man I love that thing!!
The tools... we have been slowly acquiring them over the past two years, collectively. At some point things got real, and it was time to start a builder space. Things are just getting into gear here (just moved in middle of Jan and pretty much done with build-out). It's been 0-100 since the beginning. All 12 of us here are makers, artists, builders, friends, living together for 3-5 years already. Pretty much family to me!
Okay must go to bed.. Thanks again for the kind words 🙂 More on process tomorrow, sleep I must.
I'll tell you about my process in more detail if ya want tomorrow (or later today by now I guess) I just got done cleaning up and getting settled into bed- finally. Was having a really great time!
No CNC here yet (I hope someday soon). Using table saw, track saw, band saw, drill press, jig saw, files, and router. Improvised some good tricks with the router that really made the difference, I think. Man I love that thing!!
The tools... we have been slowly acquiring them over the past two years, collectively. At some point things got real, and it was time to start a builder space. Things are just getting into gear here (just moved in middle of Jan and pretty much done with build-out). It's been 0-100 since the beginning. All 12 of us here are makers, artists, builders, friends, living together for 3-5 years already. Pretty much family to me!
Okay must go to bed.. Thanks again for the kind words 🙂 More on process tomorrow, sleep I must.
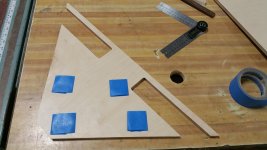
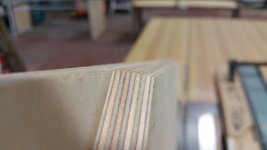
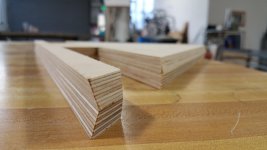
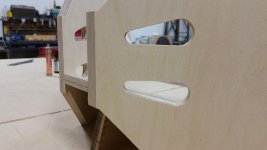
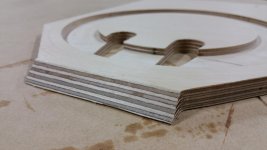
Miters are coming out great!
Overhead fence on the table saw is killing it!
Took some photos to show it
Overhead fence on the table saw is killing it!
Took some photos to show it
Attachments
-
 20160512_192040.jpg675 KB · Views: 1,044
 -
 20160512_192023.jpg408.9 KB · Views: 989
 -
 20160512_192228.jpg492.4 KB · Views: 960
 -
 20160512_192308.jpg437 KB · Views: 938
 -
 20160512_192400.jpg488.2 KB · Views: 920
 -
 20160512_192540.jpg397.3 KB · Views: 592
 -
 20160512_193041.jpg432.4 KB · Views: 616
 -
 20160512_193132.jpg514.7 KB · Views: 617

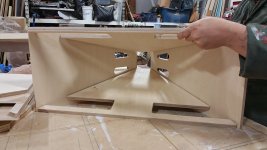
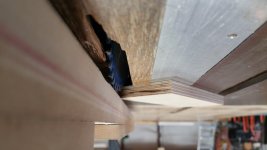
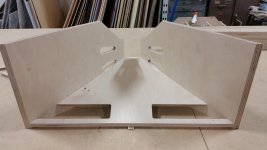
Miters are done, dry fit is flush
Made a router jig for driver relief channels and routed the sides
CHEERS to Fin who has been a HUGE help! Could not have gone this well so far without him. THANK YOU Fin!!
Made a router jig for driver relief channels and routed the sides
CHEERS to Fin who has been a HUGE help! Could not have gone this well so far without him. THANK YOU Fin!!
Attachments
-
 20160512_222048.jpg463.5 KB · Views: 723
 -
 20160512_222108.jpg516.2 KB · Views: 644
 -
 20160513_015547.jpg477.5 KB · Views: 581
 -
 20160513_015604.jpg584.1 KB · Views: 591
 -
 20160513_024223.jpg416.1 KB · Views: 653
 -
 20160513_024246.jpg400.6 KB · Views: 665
 -
 20160513_024405.jpg414 KB · Views: 657
 -
 IMG_20160513_025435_01.jpg115.7 KB · Views: 673
Your pic, looks a bit like a person on a certain forum building a bus, pretty keen on audio in her build as well...
Jennygirl, The speed of this construction and the precision of the work is amazing. I am in awe of your abilities.
Xrq, you have to invest in water cutting for foam.... the skill level is becomming huge here !😀
Btw xrq, Weltersys : what about foam flat pack to glue with just a little heavier damped wood throat ?
Weight & shipment abroad should be easier : so cost as well ? (I mean for the one with no cut skill 😉 )
Btw xrq, Weltersys : what about foam flat pack to glue with just a little heavier damped wood throat ?
Weight & shipment abroad should be easier : so cost as well ? (I mean for the one with no cut skill 😉 )
Last edited:
Eldam,
The neodymium drivers and well braced 15/32" cabinet construction result in a light and stiff (solid) enclosure, just under 34 pounds (15.5 kilos), I would not want to sacrifice the enclosure's rigidity by using foam.
Art
The neodymium drivers and well braced 15/32" cabinet construction result in a light and stiff (solid) enclosure, just under 34 pounds (15.5 kilos), I would not want to sacrifice the enclosure's rigidity by using foam.
Art
Jennygirl, The speed of this construction and the precision of the work is amazing. I am in awe of your abilities.
+1 - JG is perhaps one of the more talented constructors relative to speed and precision, and she has the shop to back it up. 😀
Those are some of the finest compound mitered joints I have seen.
- Home
- Loudspeakers
- Multi-Way
- SynTripP: 2-way 2-part Virtual Single Point Source Horn