audio1st said:Hi gychang
If your meter is set to milli-volts then those readings are fine...
they are set to milli-volts, thanks for the input.
gychang
Re: done!
how did u secure the heatsink?, what kind of paste (?CPU) has a bonding-glue so it will be immobile.
gychang
xaudiox said:after sometime of having this amp in my drawer.. i decided to do some mods with this little amp this afternoon.. so after an hour of work, here is the final results..
this are the mods ive done..
Heatsink added to the ta2024 chip
🙂
how did u secure the heatsink?, what kind of paste (?CPU) has a bonding-glue so it will be immobile.
gychang
nbrophy said:
I did the following mods to my Sureelectronic board based on this and other Tripath amp threads on Diyaudio.
Removed C-3 & C-24
Removed R-3 & R-16
Removed Input Caps C13 & C21 and replaced with EPCOS MKT 2.2-MFD Input Caps (DigiKey # 495-1127-ND)
Remove C7 & C16 and replaced with CAP POLYPROPYLENE .15UF 50V 1% Across speaker binding posts (DigiKey # P3876-ND)
Used DUAL SHIELDED RCA AUDIO CABLE to wire everything up (allelectronics #DCB-300)
Added Panasonic EVJ-Y91F03B54 Potentiometer (DigiKey # P2E9503-ND0)
Added Large Ferrite Bead to feed the output wires through (Electronic Goldmine # G16324)
thanks for giving the details of where I can get these parts, this is extremely helpful for newbies like me.
I will save your list, how does it sound?
gychang
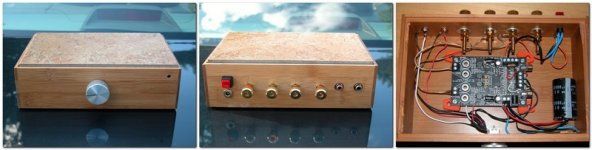
It's been 817 posts since I received my T amp wonder (Post #8) and I'm pleased to report that it has finally been properly packaged. This is my first DIY amp project, the Naim clone comes next. Look out for it in 2012.
The box is a bamboo "kamenstein" I got from Bed Bath and Beyond for $7 topped with ceramic tile from the Depot. About $30 in parts other than the sure T amp which was $25 I believe.
The box is a bamboo "kamenstein" I got from Bed Bath and Beyond for $7 topped with ceramic tile from the Depot. About $30 in parts other than the sure T amp which was $25 I believe.
Attachments
DreadPirate said:It's been 817 posts since I received my T amp wonder (Post #8) and I'm pleased to report that it has finally been properly packaged. This is my first DIY amp project, the Naim clone comes next. Look out for it in 2012.
The box is a bamboo "kamenstein" I got from Bed Bath and Beyond for $7 topped with ceramic tile from the Depot. About $30 in parts other than the sure T amp which was $25 I believe.
looks impressive, what extent did u mod?, any comment on the sound?
gychang
DreadPirate said:It's been 817 posts since I received my T amp wonder (Post #8) and I'm pleased to report that it has finally been properly packaged. This is my first DIY amp project, the Naim clone comes next. Look out for it in 2012.
The box is a bamboo "kamenstein" I got from Bed Bath and Beyond for $7 topped with ceramic tile from the Depot. About $30 in parts other than the sure T amp which was $25 I believe.
Nice! Creative to use a tile as the top of the box.
Regards H@kan
how to solder illuminated on-off switch?
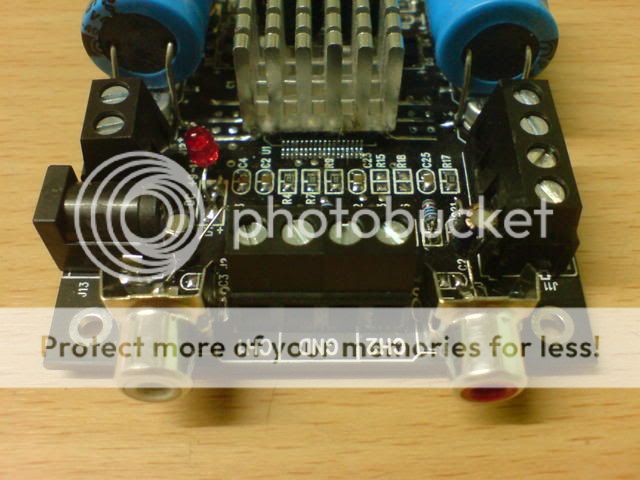
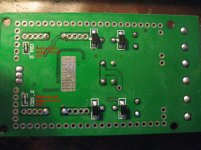
I have a volume pot working and sounds good, I followed the "audio1st" excellent photo. I have a used but working on-off button, lighted when on, how do I solder this on the board? I am unsure how to solder to get this working properly.
Light is in front of the horizontally located solder post (straight line). I assume this is to activate the light. Vertically oriented posts are I assume to turn on-off the amp.
Can anyone guide me where to solder which lead to what part of the PCB?
thanks in advance.
gychang
Attachments

Connect switch's LED in series with 10 - 30 kohm resistor and connect to ground and +12V on board. Check Led polarity.
If you have PS build in amp's box, and if your switch is suited for mains power, install switch between mains line and PS.
If you have external PS, connect switch to +12 on board and PS input socket.
Zigis.
If you have PS build in amp's box, and if your switch is suited for mains power, install switch between mains line and PS.
If you have external PS, connect switch to +12 on board and PS input socket.
Zigis.
Help modify Arjen T2024 MK1 board
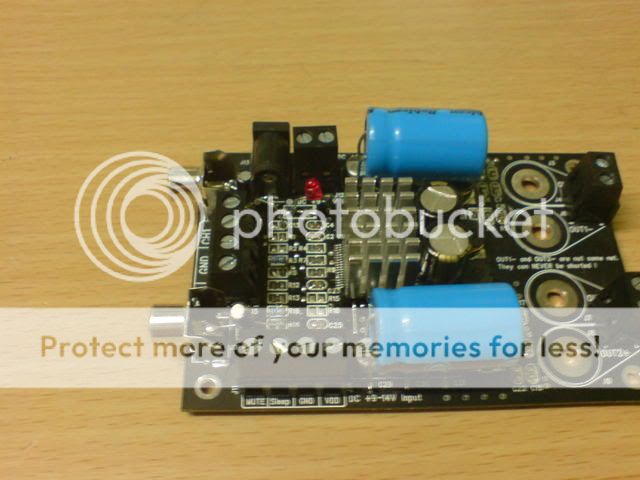
After sucsessfully modifying two Sureelectronics Tripath boards, I order one of Arjen MK1 boards and do a similar upgrade. These are the modification I had made (Based on mods I did to my Sureelectronics Tripath boards and tried to translate to the Arjen MK1 board). I
Removed and bridge C24 and C23
Replace C14 and C15 input caps and replace with EPCOS MKT 2.2-MFD 63V Metal Poly CAP
Replace C18 and c19 Power Filter capacitor with Panasonic FM 680UF 16V ELECT FM RADIAL CAP
Removed C29 and C30 and replace with POLYPROPYLENE .15UF 50V 1% CAPs across output terminals.
I must screwed up somewhere because I am getting no sound when trying to bench test the amp and the chip heat sink warms up quite quickly.
Anyone see any problems with the above listed modification?
Attachments
Zigis said:Connect switch's LED in series with 10 - 30 kohm resistor and connect to ground and +12V on board. Check Led polarity.
If you have PS build in amp's box, and if your switch is suited for mains power, install switch between mains line and PS.
If you have external PS, connect switch to +12 on board and PS input socket.
Zigis.
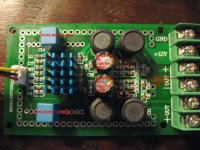
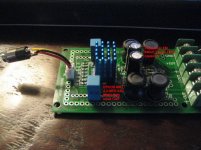
thanks Zigis, appreciate the help. It is singling with on-off lighted switch. Sounds great with the recommended limited mod.
Now the next step is trying to get the input selector switch working...
gychang
Attachments

gychang, if you turn amp board 180 degree, you can made as short as possible wires between pot and amp's input, it is important for sound quality.
Zigis said:gychang, if you turn amp board 180 degree, you can made as short as possible wires between pot and amp's input, it is important for sound quality.
thanks, I am new at this, appreciate the input. I will change it.
gychang
Re: Help modify Arjen T2024 MK1 board
Hi, I would guess it is C23 and C24. Should not have bridged..
You should not have caused any damage, bridging these caps is just the same as having your volume control at zero.
nbrophy said:After sucsessfully modifying two Sureelectronics Tripath boards, I order one of Arjen MK1 boards and do a similar upgrade. These are the modification I had made (Based on mods I did to my Sureelectronics Tripath boards and tried to translate to the Arjen MK1 board). I
Removed and bridge C24 and C23
Replace C14 and C15 input caps and replace with EPCOS MKT 2.2-MFD 63V Metal Poly CAP
Replace C18 and c19 Power Filter capacitor with Panasonic FM 680UF 16V ELECT FM RADIAL CAP
Removed C29 and C30 and replace with POLYPROPYLENE .15UF 50V 1% CAPs across output terminals.
I must screwed up somewhere because I am getting no sound when trying to bench test the amp and the chip heat sink warms up quite quickly.
Anyone see any problems with the above listed modification?
Hi, I would guess it is C23 and C24. Should not have bridged..
You should not have caused any damage, bridging these caps is just the same as having your volume control at zero.
Re: Re: Help modify Arjen T2024 MK1 board
Thanks that was it. I appreciate the help.
Thanks that was it. I appreciate the help.
audio1st said:
Hi, I would guess it is C23 and C24. Should not have bridged..
You should not have caused any damage, bridging these caps is just the same as having your volume control at zero.
Re: Re: Re: Help modify Arjen T2024 MK1 board
I have the same Arjen's board, care to comment on the sound with and without your mod?
thanks,
gychang
nbrophy said:Thanks that was it. I appreciate the help.
I have the same Arjen's board, care to comment on the sound with and without your mod?
thanks,
gychang
audio1st said:Nice work Bongoman..
You should try some better input and feedback resistors, seem to make a difference with top end sparkle.
I've teamed mine up with a 12V , 6A power supply, also from SURE , turned up to 13.5V (so far)...
I have removed the second stage of the output filter and put a single cap across the speaker terminals at the moment, (haven't listened yet)
I really like these boards...

bought one more at $16 delivered. Besides the recommended removal (my last one sounded good). This time I want to add input cap. Perhaps also need more bass.
In US where can I get a correct value with good price?
how about exact part for other recommended parts?
gychang
- Status
- Not open for further replies.
- Home
- Amplifiers
- Class D
- Sure Electronics Tripath boards?