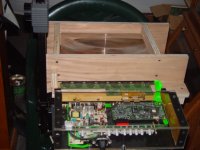
now all i have to do is controll the light leakage and make a shroud to the lens and i will post results after im done
Negative Design said:looks good.
what game is that?
its quake 3 urban terror fun game especially on the big screen 🙂
What's the advantage of changing the condenser on the 3M to the Elmo condenser? How are they different and what is the result?
Lifter said:What's the advantage of changing the condenser on the 3M to the Elmo condenser? How are they different and what is the result?
for some reason it gave me more light
i think it is the thickness because the lens the elmo lens was much thicker and i think it magnified the light more just look at the pics you can actualy see a difference this info came to me from ace3000_1 magnify the light
Wow. Is it easy to switch? Also, my 3m condenser has a little IR filter on it. I hope this doesn't create much more heat. Anyways, this is a good thing to try out. Thanks.
Lifter said:Wow. Is it easy to switch? Also, my 3m condenser has a little IR filter on it. I hope this doesn't create much more heat. Anyways, this is a good thing to try out. Thanks.
its a little bigger than the 3m so i just have it sitting on the holder now im gonna find a way to secure it in there and make sure you put the filter glass back on yeah it was a real good idea made a difference i could actualy see
and i dont understand why your split fresnels dont work for you
the 3m fresnels actualy allow me to see my whole desktop and i can still shrink my lcd some more i bet your elmo fresnel will give you 100% of the lcd im gonna split my buddys and see
I haven't split the Elmo fresnel, just the 3M one. I still have the bottom one in it's original spot, so I'll see what happens once I can raise it.
well yesterday i sat down and drew up some plans for a new encloser for the lcd and split fresnels the one i had wasent gonna work too well
so i called my buddy that i sold the first projector i built to and explained the split fresnel would give him a more evenly lit image and more pixels than he was getting now so he went for it
an hour later he was at my door this is what he brought
so i called my buddy that i sold the first projector i built to and explained the split fresnel would give him a more evenly lit image and more pixels than he was getting now so he went for it
an hour later he was at my door this is what he brought
Attachments
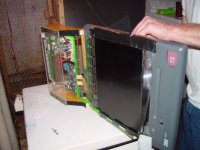
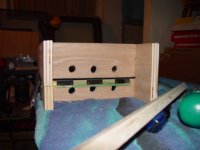
after dissembling it i got my plans out and took some more measurements and decided to split the fresnels right off
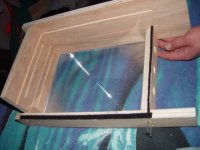
oh yeah gui thanks for the idea to sandwitch the top fresnel in plexiglass works like a charm🙂
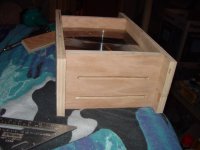
so i set up my table saw router table and miterbox
my buddy also brought some 3/4" oak plywood to construct the encloser since he had more than enough i decided to make mine at the same time
i layed out all the pieces and went to work this is a couple pictures of the construction phase
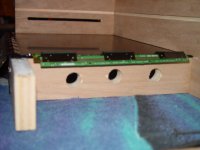
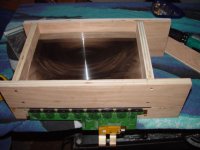
here i assembled the lower section to hold the bottom fresnel and lcd
oh yeah gui thanks for the idea to sandwitch the top fresnel in plexiglass works like a charm🙂
so i set up my table saw router table and miterbox
my buddy also brought some 3/4" oak plywood to construct the encloser since he had more than enough i decided to make mine at the same time
i layed out all the pieces and went to work this is a couple pictures of the construction phase
here i assembled the lower section to hold the bottom fresnel and lcd

now its time to put it on the ohp and see the fruits of my labor
at first it looked like crap moved it a little here and there and bam
a beutifuly lit screen on my cheap home depot shade he was amazed more pixels and more evenly lit image
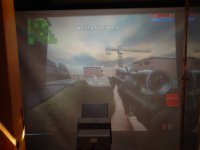
so i put one of my favorite games on and heres the image i got at 80"
at first it looked like crap moved it a little here and there and bam
a beutifuly lit screen on my cheap home depot shade he was amazed more pixels and more evenly lit image
so i put one of my favorite games on and heres the image i got at 80"
Attachments


- Status
- Not open for further replies.
- Home
- General Interest
- Everything Else
- The Moving Image
- DIY Projectors
- Spilt Fresnel Goodness