I guess I missed a couple of your pictures. Loops like you made at least three cabinets.
I'm looking forward to seeing measurements to. Hornresp is pretty good at simulation of what an enclosure will sound like.
But nothing beats a microphone.
Best way to measure a horn is outside on the ground. Put your mic on the same surface as the enclosure. If you want to you can place a sheet of plywood down to give a clean surface. You can get the equivalent of one watt one meter by putting your mic 2 meters from the mouth and delivering 1 watt as calculated from the drivers nominal load. 2 volts for a 4 ohm driver or 2.86 volts for an 8 ohm driver. Best if you have 30 feet from large objects like buildings. If you can pull off the proper space from reflective surfaces you have a pretty accurate measurement.
I'm curious to see the measured response of the 1,2, & 4 THT's. I don't recall seeing any measured responses on BFM's site after a build.
Would be great for you to meaure 1, 2 and all 4 both outside and in room
Lots of hype on BFM forum but perception of bass is very subjective!
I guess I missed a couple of your pictures. Loops like you made at least three cabinets.
I'm looking forward to seeing measurements to. Hornresp is pretty good at simulation of what an enclosure will sound like.
But nothing beats a microphone.
Best way to measure a horn is outside on the ground. Put your mic on the same surface as the enclosure. If you want to you can place a sheet of plywood down to give a clean surface. You can get the equivalent of one watt one meter by putting your mic 2 meters from the mouth and delivering 1 watt as calculated from the drivers nominal load. 2 volts for a 4 ohm driver or 2.86 volts for an 8 ohm driver. Best if you have 30 feet from large objects like buildings. If you can pull off the proper space from reflective surfaces you have a pretty accurate measurement.
I'm curious to see the measured response of the 1,2, & 4 THT's. I don't recall seeing any measured responses on BFM's site after a build.
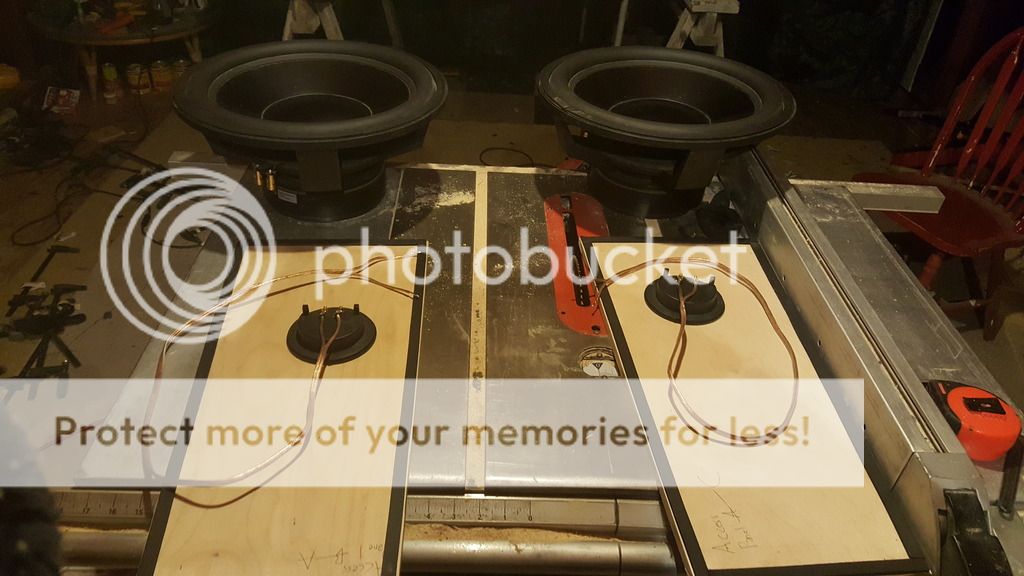
So these are the first two, I'm still building up my shop space and had trouble making space for doing 4 at once without more surfaces to stage the cabinets.
I fully intend to measure these once I pull the trigger on a decent mic. I'm torn between the minidsp option and dayton's MM6 (I believe that's it) I am also curious to see response of 1, 2 & 4, I have space in my front yard in which the only thing within 30ft is a mailbox. My neighbors are probably gonna file a complaint before long. 🙄
Then I'll take in-room response measurements at which point I'm going to try my hand at building tuned membrane bass traps. We'll see how that goes..
With that said, I miscalculated my plywood needs and will have to get more, but that's okay because Ill just grab all the material at the same time for once I finish the next 2 THTs I am going to build 4 Othorns, possibly in tandem with a few other smaller projects including a tri-amped full range tower to keep pace with the 4 Tubas.
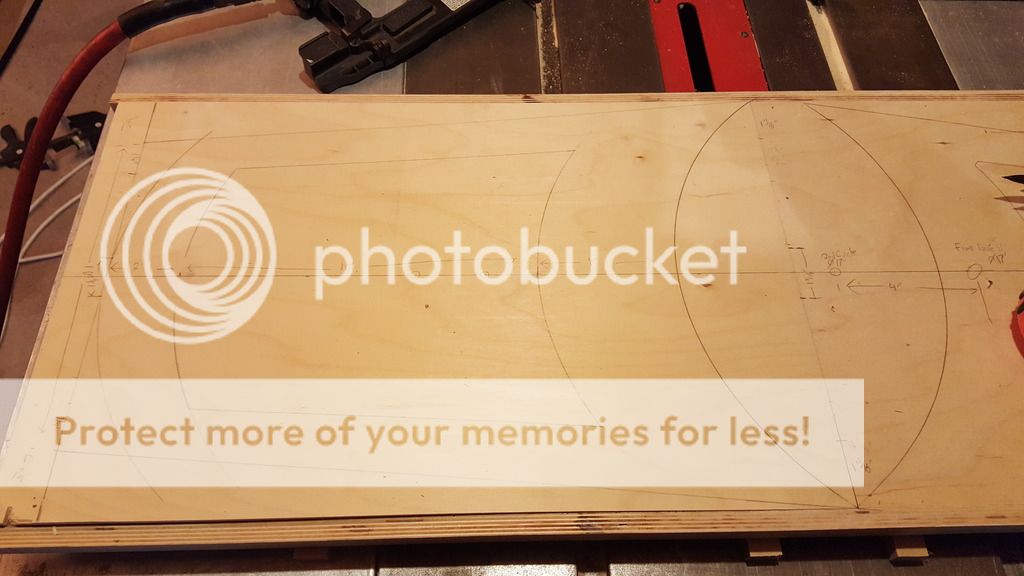
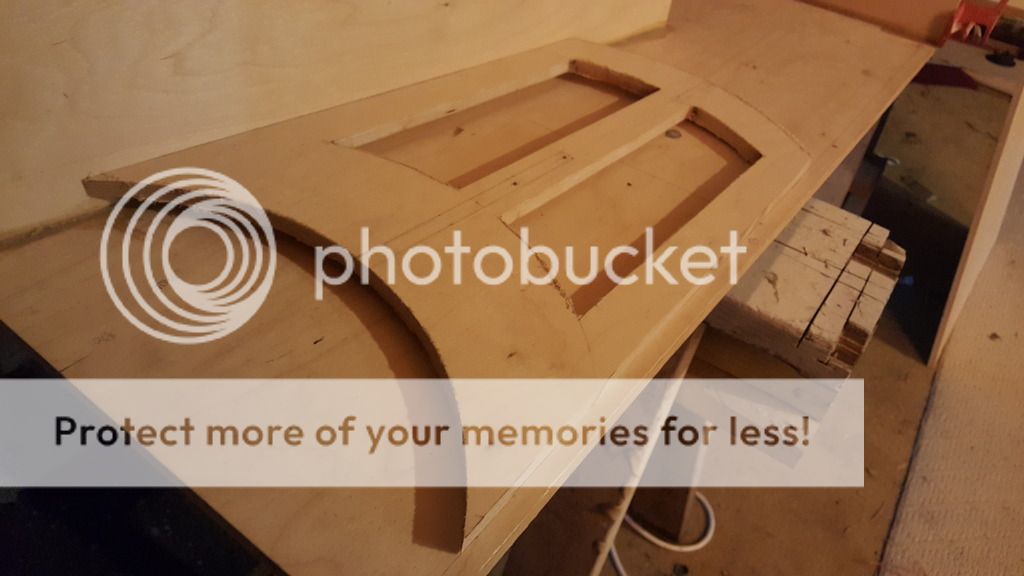
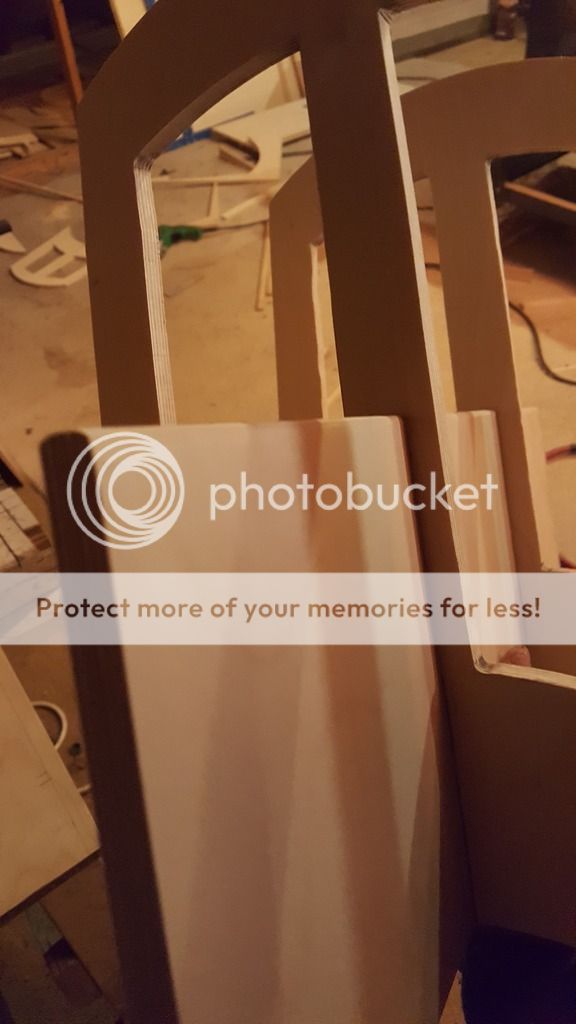
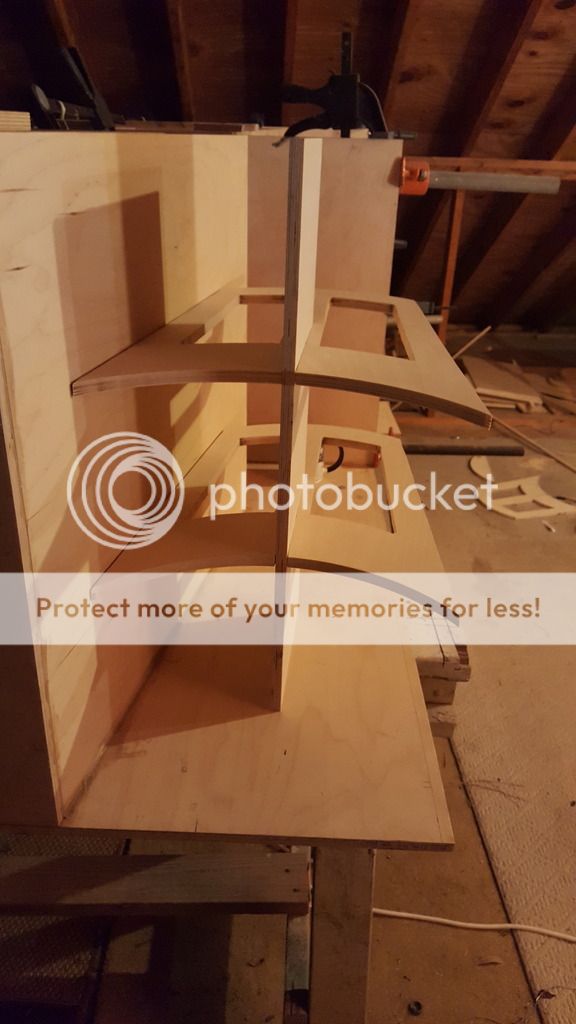
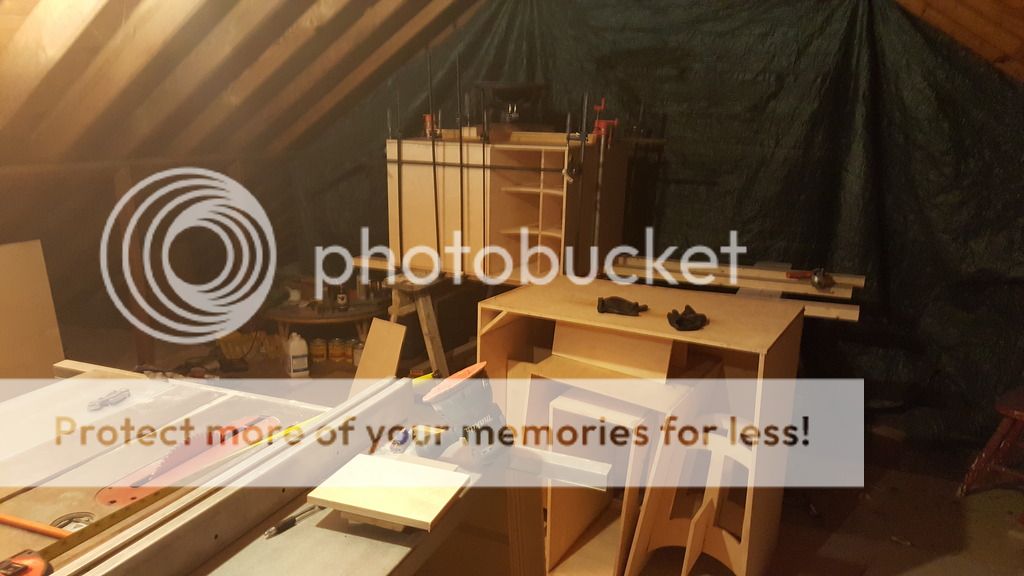
I have been fabbing up a custom design for the visible braces and those are slowing me down since I goofed my first revision up last night & then had to start from scratch this morning. However, I have a soilid template now. Just a time intensive task as there are quite a few very tedious lines & circles to cut. I'm taking a break now, but I should have the first set ( 2 braces+ cross brace done, gluing, and clamp in place shortly here. I cut almost all my panels as I went this round which was silly but I just had to get the jitters out as my skills were rusty coming into this.
However, I'm feeling very confident now so I will just cut all the panels & braces ahead of time then just cut them ever so slightly long. That way all I'll have to fret with is setting the pieces into place and clamping them.
Anywho, Hopefully you are enjoying watching this progression as much as I am building these.
To be continued...
-Josh
Keep up the good work Josh.
I've been around cabinet making for well over 30 years. You are doing a great job.
I've been around cabinet making for well over 30 years. You are doing a great job.
Keep up the good work Josh.
I've been around cabinet making for well over 30 years. You are doing a great job.
Thank you sir, that's good to hear!
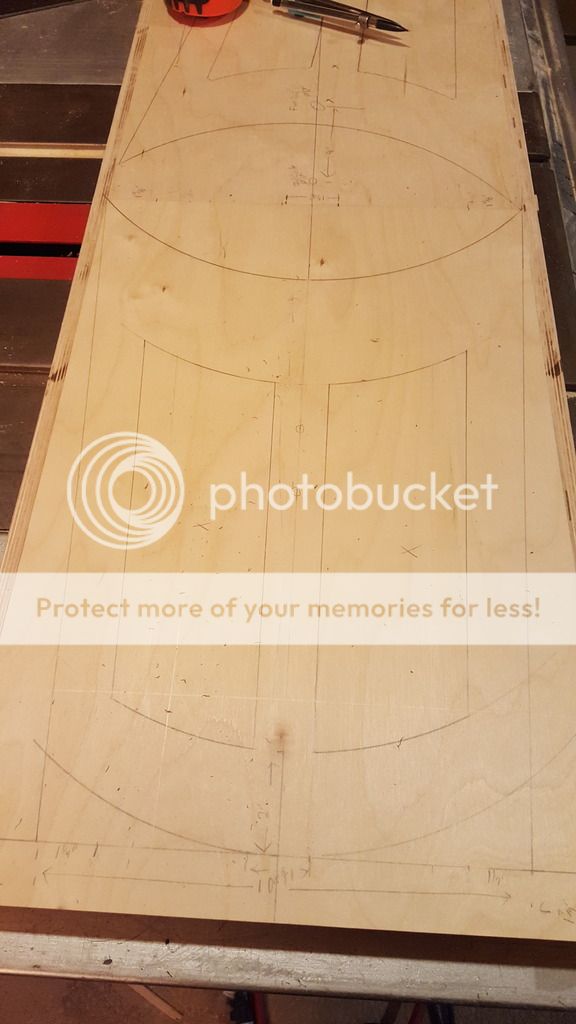
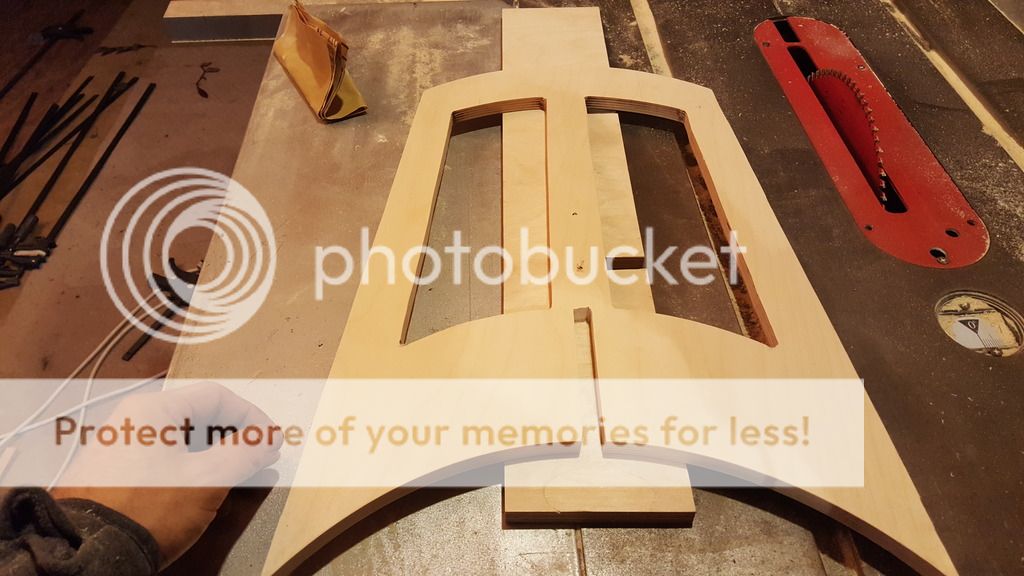
So it took took me the better part of a day to finally materialize the brace I wanted to make but I think my labor has paid off.
After a few edits and revisions I made up a jig so I can crank the next 6 out.

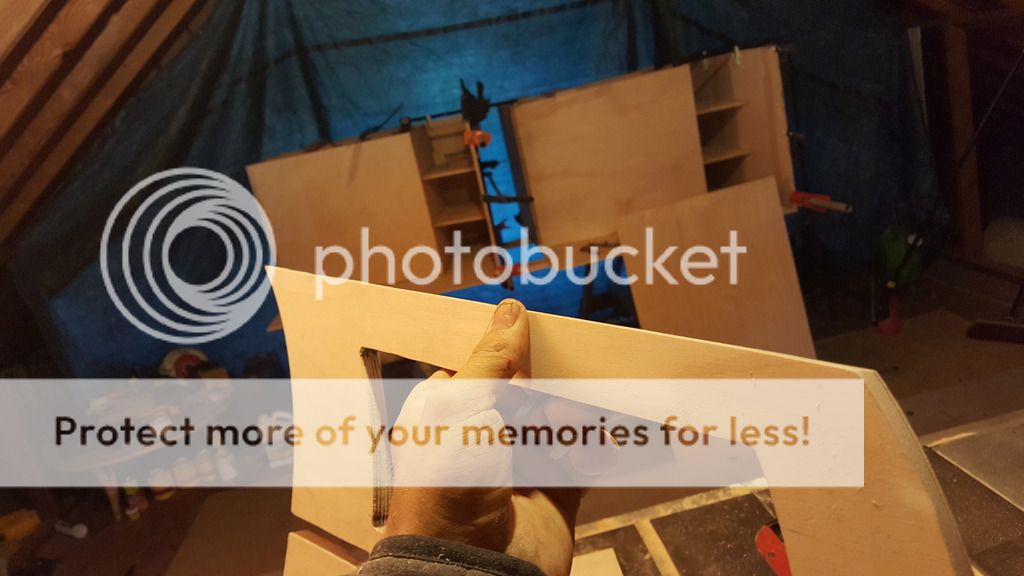
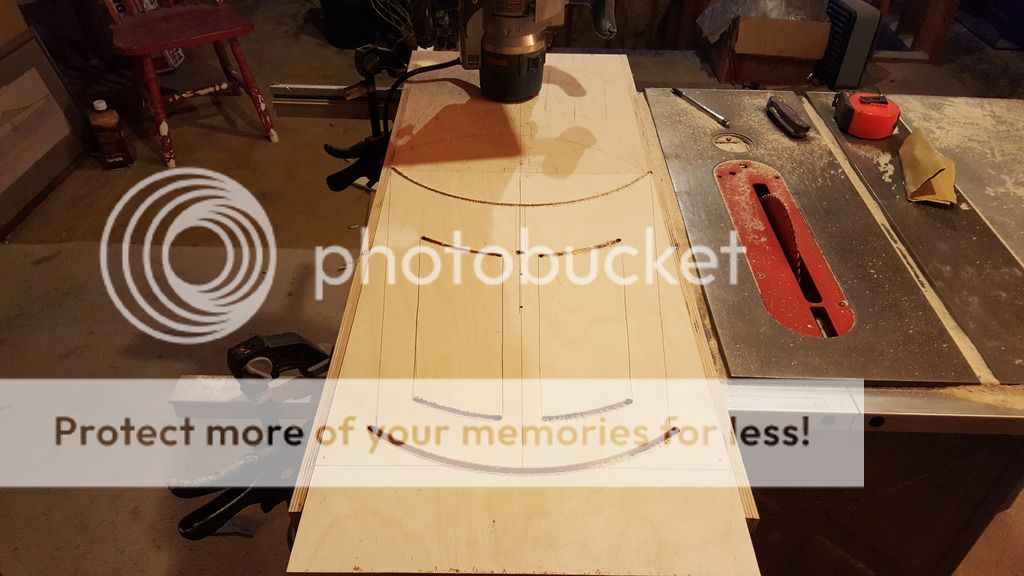
All marked up..
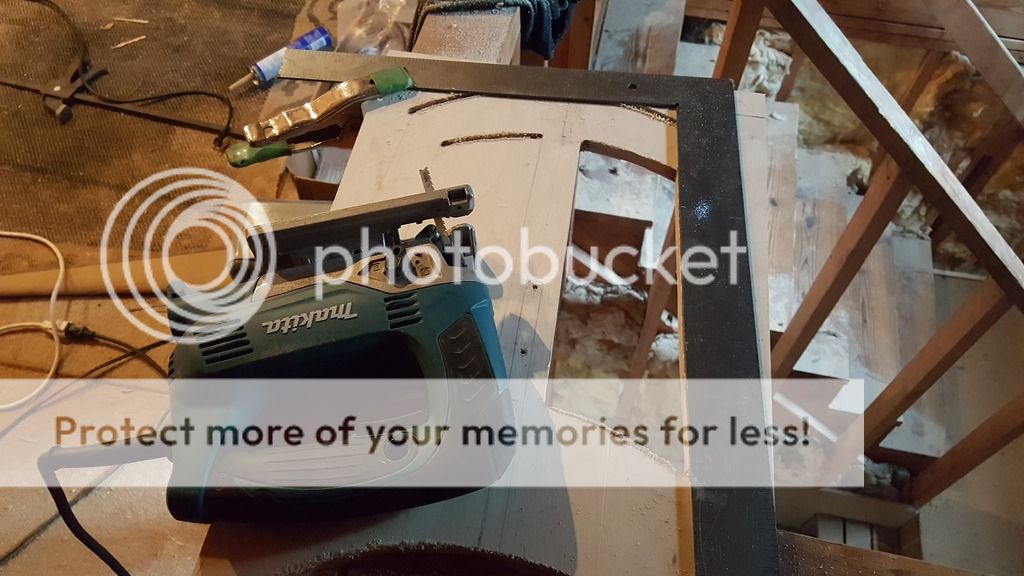
Arcs cut
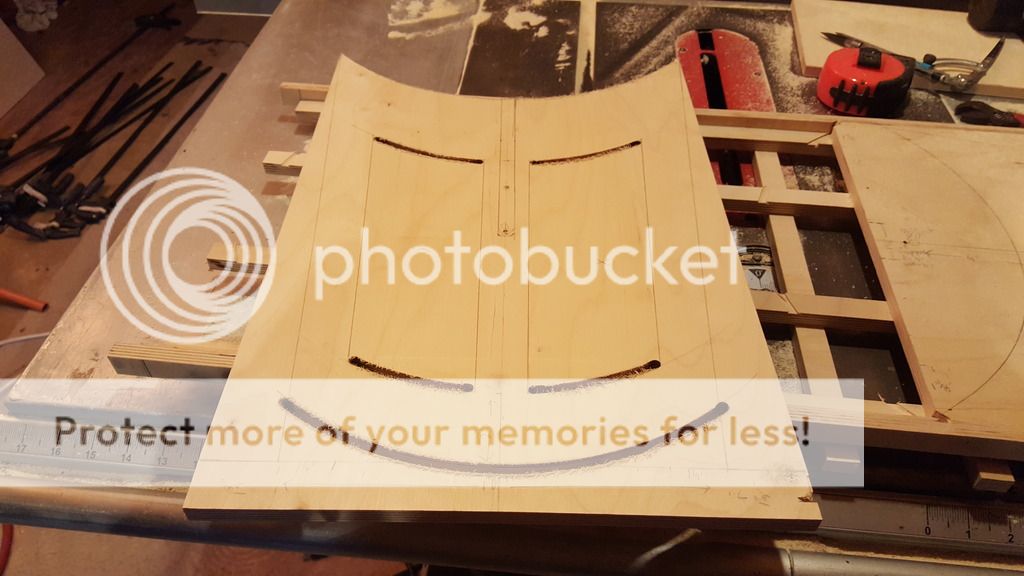
I slightly prefer free hand cutting the internal lines but I found using a square for a trim pass helped prevent the jigsaw from running away or gouging the finish edge.
After some sanding,
Edges are good for me,
Wash, rinse, repeat.
And viola!

Now to do it all over again for cabinet 2.. At least I have this jig set up. Time for some grub.
To be continued.
Like the brace. Not gonna do to much vibrating that's for sure.
Pitty the poor man who has to take them down from the 3rd floor!
On microphones.
The Dayton mic with the USB port UMM-6 and REW REW - Room EQ Wizard Room Acoustics Software is a great combination.
If you want to do it on the cheap (and completely portable except the amplifier) but still quite accurate you do with Audio Tool by Julian Bunn and a imm-6 mic. You will need a cable that goes from the 3.5mm jack to RCA to send test tones to your amplifier.
Pink noise is the least annoying of the test signals and is a pretty fair test of a speakers output. Pink noise approximates the sound intensity of normal music. It rolls off slowly as you go higher n frequency at 3db/octave. (doubling of frequency ie: 32 to 64 hertz, or 64 to 128 hertz). White noise is also a broadband signal that is flat across the frequency range.
REW or Audio Tool have built in means of producing and measuring the output via a microphone.
Hi SunGazer,
Great that you have the picture thing worked out. Very nice wood working! 🙂
Regards,
Great that you have the picture thing worked out. Very nice wood working! 🙂
Regards,
I'm curious to see the measured response of the 1,2, & 4 THT's. I don't recall seeing any measured responses on BFM's site after a build.
i did a quick and dirty measurement of one of mine... this is a 16" wide (overall) variant loaded with a jbl gt 12 dvc that has to be 12 years old, if not older. i have no horizontal mouth brace and i built off the plans that were published in speakerbuilder magazine back in '08 or whenever that was. using entire rear chamber volume.
these are indoors, the sub facing upwards in a corner, but measurements taken at the mouth. distortion measurements as well, c-weighted spl meter and levels verified, so actual spl. default subwoofer crossover from my avr
for what it's worth.
Attachments

Last edited:
Like the brace. Not gonna do to much vibrating that's for sure.
Pitty the poor man who has to take them down from the 3rd floor!
On microphones.
The Dayton mic with the USB port UMM-6 and REW REW - Room EQ Wizard Room Acoustics Software is a great combination.
If you want to do it on the cheap (and completely portable except the amplifier) but still quite accurate you do with Audio Tool by Julian Bunn and a imm-6 mic. You will need a cable that goes from the 3.5mm jack to RCA to send test tones to your amplifier.
Pink noise is the least annoying of the test signals and is a pretty fair test of a speakers output. Pink noise approximates the sound intensity of normal music. It rolls off slowly as you go higher n frequency at 3db/octave. (doubling of frequency ie: 32 to 64 hertz, or 64 to 128 hertz). White noise is also a broadband signal that is flat across the frequency range.
REW or Audio Tool have built in means of producing and measuring the output via a microphone.
I have an IMM6 laying around somewhere. It's probably in one of my 3 boxes full of loose ends & tiny pieces of hardware.
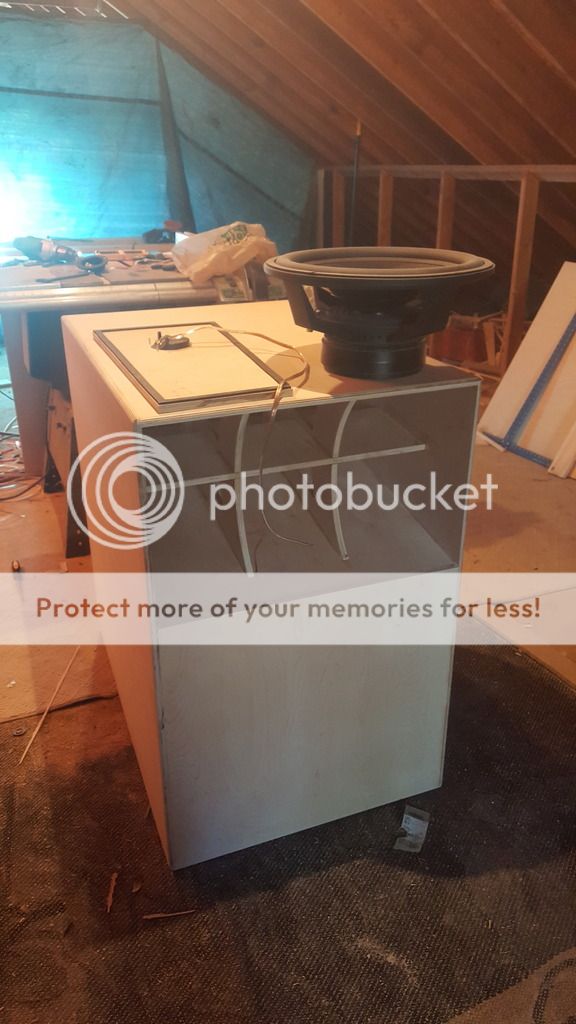
Actually, to my suprise these are fairly light being as it's all 12mm BB with the exception of the 3/4" plywood ring spacer for the driver.
I have a furniture dolley at my disposal which I fully intend to put to use.

Hi SunGazer,
Great that you have the picture thing worked out. Very nice wood working! 🙂
Regards,
Yeah, I'm glad too, I had to play around finding a suitable client for uploading from my phone online and then freely to post here. Sorry for the hit & miss initially.
Anyways, thank you. This my first horn and my 4th serious attempt at building a cabinet, thankfully I believe I inherited some of my dad's trim carpentry skills.
i did a quick and dirty measurement of one of mine... this is a 16" wide (overall) variant loaded with a jbl gt 12 dvc that has to be 12 years old, if not older. i have no horizontal mouth brace and i built off the plans that were published in speakerbuilder magazine back in '08 or whenever that was. using entire rear chamber volume.
these are indoors, the sub facing upwards in a corner, but measurements taken at the mouth. distortion measurements as well, c-weighted spl meter and levels verified, so actual spl. default subwoofer crossover from my avr
for what it's worth.
Those measurements are encouraging! I am SUPER stoked to fire these up.
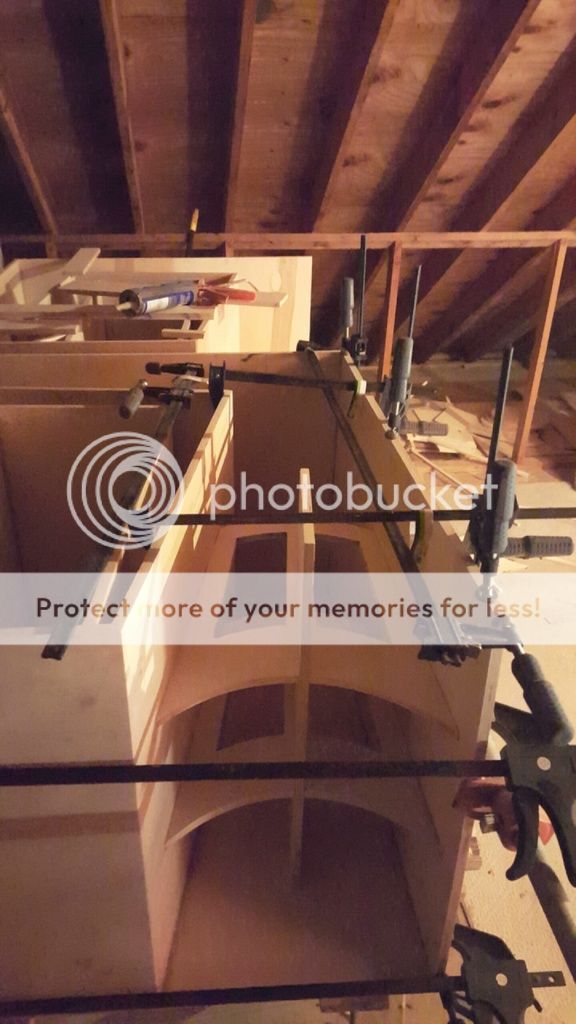
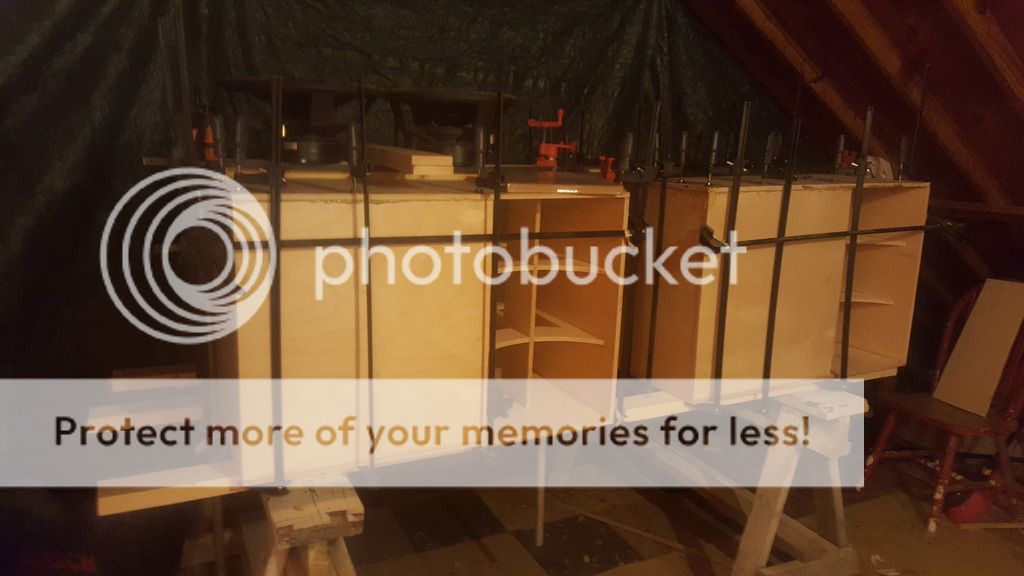
So for an update. I have finished the cabinets! All that's left to do is make a cutout for the terminal cups, drill the pilot holes for the access panel hardware, and install the driver.
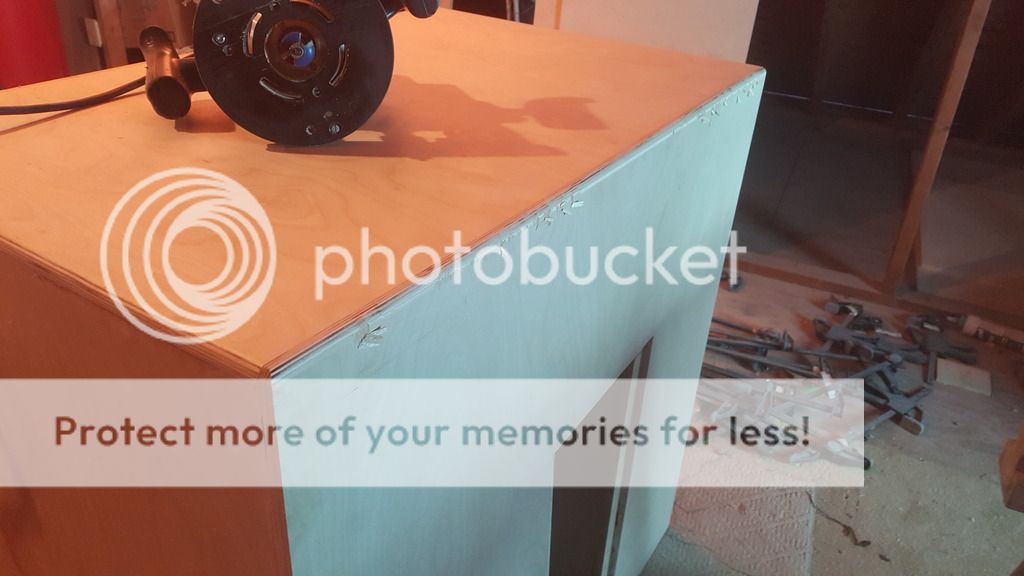
Once the last exterior panel was solid I drug the first cab off the work table and did some rough finishing. Flush cut the edges with the router, sanded the random glue spots down, and gently leveled at all the corner joints.
Moving it around was surprisingly easy!
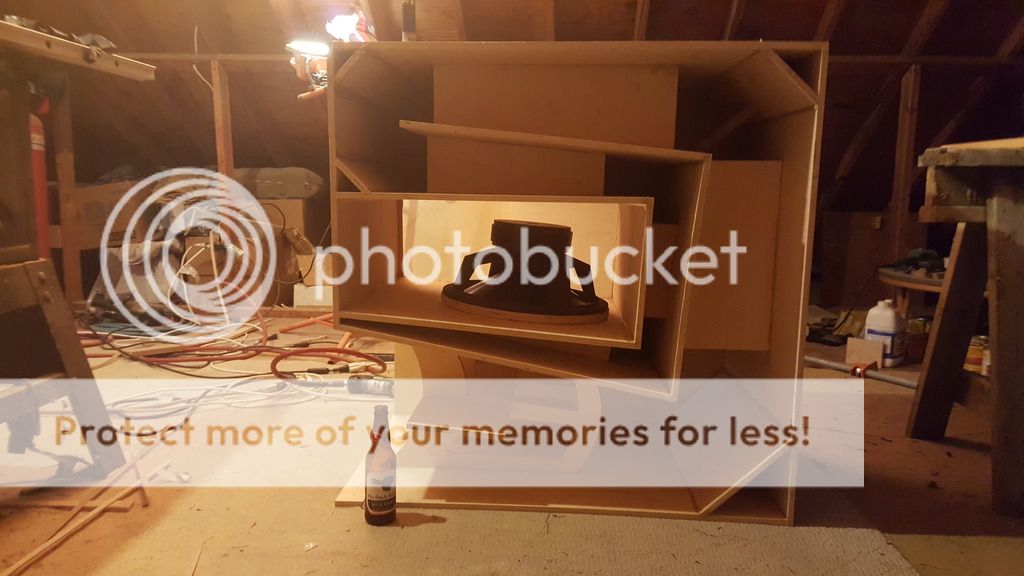

Back up onto the work surface. I took my time & laid a thick bead of PL. My hand was getting sore after about 5 minutes of squeezing. I ran my tube down to the last teeny tiny bit laying all the glue out.
I made sure to overlap any joints. I have 100% confidence this will not leak and judging by the squeeze out visible I think my confidence is justified.

So yeah. Got the first one clamped up REALLY good and then did the same the the 2nd cab. Notice how I'm putting the drivers to work securing their new home 🙂
& Viola! Now I just have to wait.
i did a quick and dirty measurement of one of mine... this is a 16" wide (overall) variant loaded with a jbl gt 12 dvc that has to be 12 years old, if not older. i have no horizontal mouth brace and i built off the plans that were published in speakerbuilder magazine back in '08 or whenever that was. using entire rear chamber volume.
these are indoors, the sub facing upwards in a corner, but measurements taken at the mouth. distortion measurements as well, c-weighted spl meter and levels verified, so actual spl. default subwoofer crossover from my avr
for what it's worth.
Nice graph! So you used the 36" width rear chamber volume with the 16" wide horn?
Nice graph! So you used the 36" width rear chamber volume with the 16" wide horn?
if im understanding correctly, no. i just used the whole chamber. as per the article, if i recall correctly, there was a board to be installed in the rear chamber when using a 12" driver. post #49 has a great picture of that rear chamber with the driver mounted, when using a 12" driver a board is put in to lessen some of that space.
haven't bought any of bill's plans ever, as he gave away most of those designs in speakerbuilder/audio xpress over the years, so i dont have any of the updates etc. i think he also specc'd the ability to use 2 - 10"ers in the article as well.
as an aside OP, your build is very clean, they are looking fantastic.
Attachments
as an aside OP, your build is very clean, they are looking fantastic.
I appreciate that good sir.
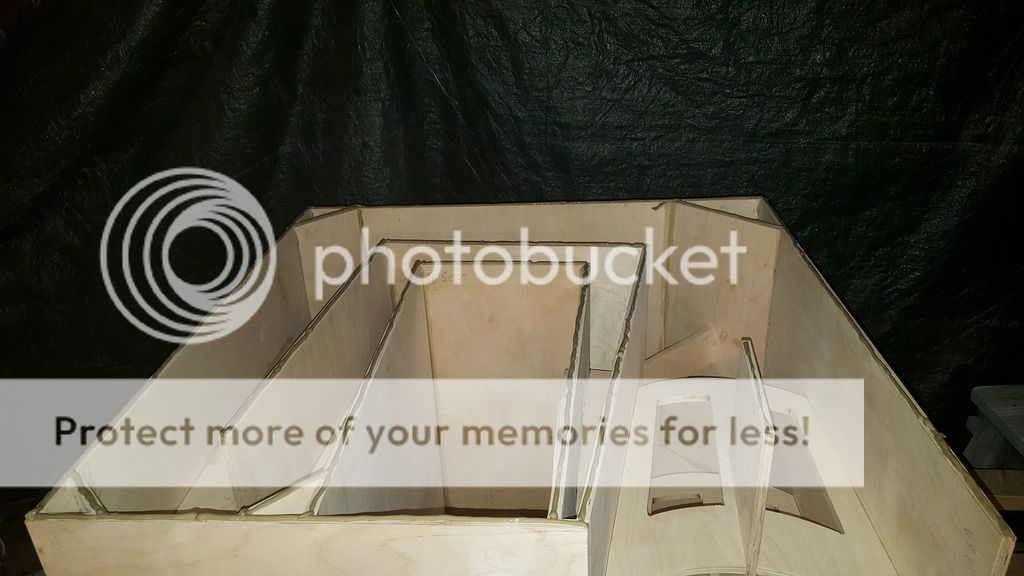
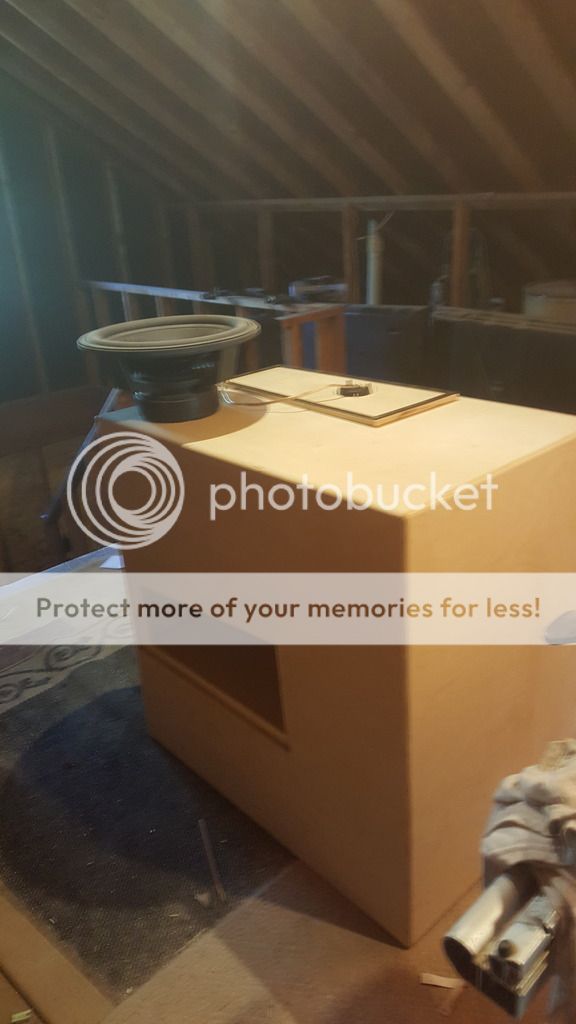
So I finished the first two cabs!
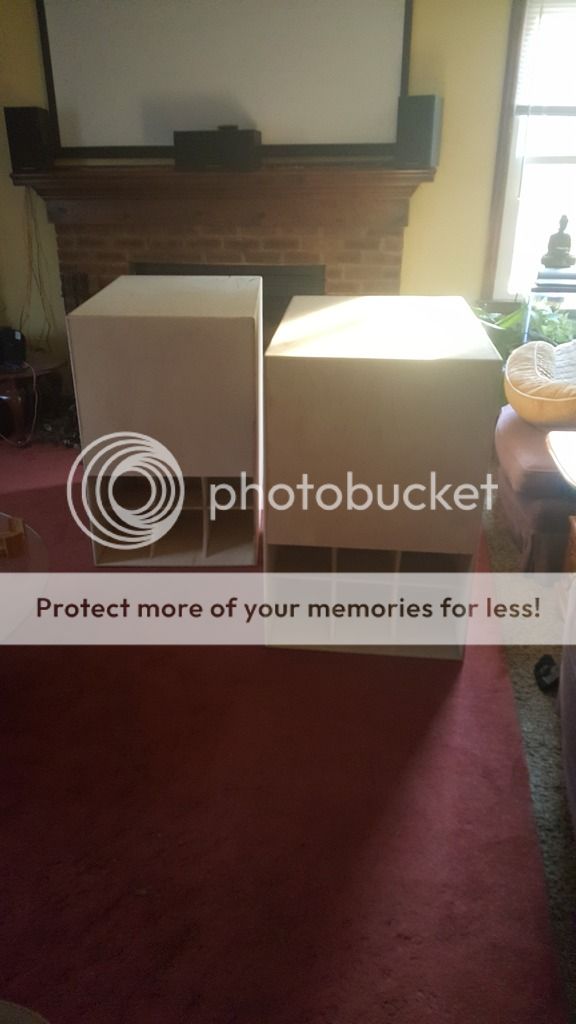
I did a rough finishing on them both, flush cut the edges, ran a roundover along the edges & sanded with the grain to smooth the suirface up and pull off any PL that happened to lose it's way.
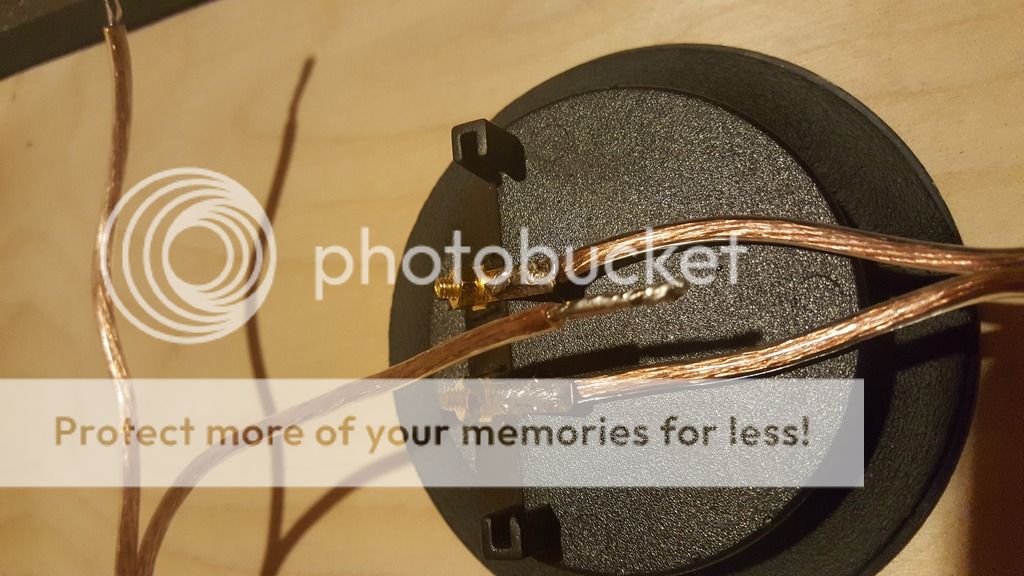
While I was waiting for the cabs to set I couldn't sleep so I took care of all the small odds & ends. Applying the gasket tape, soldered the leads to the terminals cups, installed those, and pre drilled all the fasteners holes.

Unfortunately I had to level the rear panel down a tad because my side panel came up short but it's not visible and after a the round over much less noticeable. I did have more tear out than I anticipated when running the roundover perpendicularly across the grain which was annoying...
Thankfully the pieces were all fairly thin thus I was able to sand them down into being nearly invisible, only someone with the intent of finding them will notice them (Me)
Fast forward an hour, #1 was staged at the stairs and ready to move.
I derped moving the downstairs. They are easily lift able with 2 people yuet I was so excited I opted to use the damn dolley which made life much more difficult that it needed to be. The second one went smoothly.
Here I was getting the driver's installed.. Of of the t-nuts cross threaded and I wasn't able to fully sink 1 fastener BUT I cranked all the others down to the point where I really doubt there will be any ill effect.
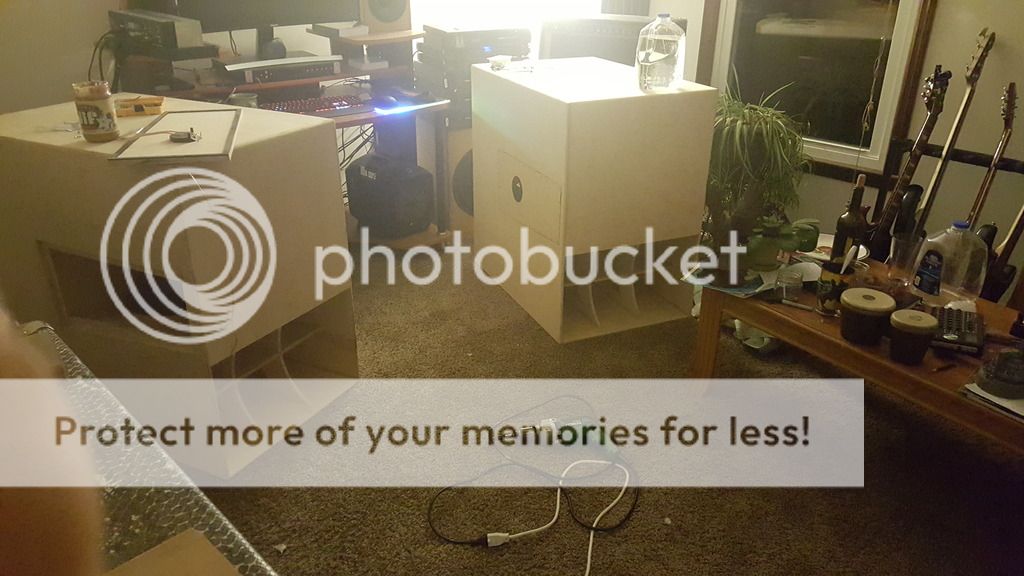
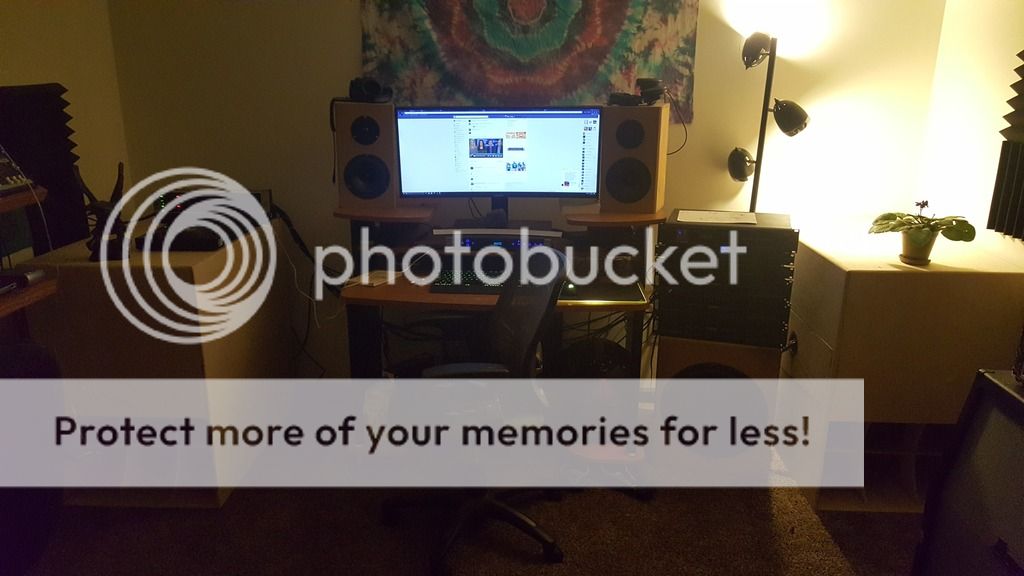
This is how it sits at the moment. All the amps on the sub are mostly just there. Currently running the small monitors as I haven't fully decided what to do for mains but at least now I have the backbone built.
Initial impressions? They are good, but not "Errmurrgud" great. Very accurate even though my signal chain and processing is sub par as I'm using the equalizer as a crossover, I need to spring for a mini dsp...
I played a variety of stuff through them & they really shine on the more instrumental tracks. I can really hear the kick drums and the pull of the bass strings now. The upper bass is definitely up to the hype, but then again from what I've come to understand this is characteristic of horns.
When faced with electronic music heavy in the 40-50hz bass the whole house COMES to life, which is neat. I'm trying not to knock anything over.
Power wise? I'm glad I'm building 4. Regardless of all the charts you can shake a stick at, 1 just isn't anywhere near enough for me. When I bring the 2nd one in the difference is very tangible, definitely excited to see what 4 will be like. Especially since I plan to couple the mouths in a stacked configuration.
I can't make a valid interpretation until I invest in a proper measurement and associated processing but these are definitely fun.
My one quarrel is that, at now, they don't dig as deep as I was expecting, or at least as linearly as I was expecting with room gain.
I need to take measurements to truly know but I was really wanting a solid grunt down to 25Hz and running test tones things kind of fall flat under 30Hz, or it could be that the room mode is the 45Hz range is skewing my perception..
This is a small room so that may play into it but anywho. I happy with how the first 2 look. The next 2 should go smoother since I have a much better idea of the work process.
This room is NOT nearly done, so please hold the judgement. I have to share this space with my roommates which is slightly annoying but won't be forever.
So yeah, my shop is a disaster and I haven't done any chores in a week. Going to have to get things caught up before I start on the next 2.
-Josh
Last edited:
they really did come out fantastic. i agree with your subjective impressions as well...they really do shine on acoustic passages and older passages....early 2000's hip hop too, but that bottom end...
you can eq down the top end a bit and it will bring things right and even to about 30hz where they do fall like rocks with deep music, but still do all the fun movie tricks for the most part, or at least let you know they are there.
in my small room i face the mouth vertically in the corner, by ear it just sounds better to me that way, so in the short term, you could try that and see if it nets you any change in regards to impact or umph. a nice healthy delay on your mains can help bring it all together as well.
you did do a great job with the enclosures though, hats off to you for that. and that looks to be quite a bit of firepower in a small space.
@ Snappyturtle.
Do you have the model number or possibly Thiele Small specs for your driver?
And if I remember correctly you used one?
Do you have the model number or possibly Thiele Small specs for your driver?
And if I remember correctly you used one?
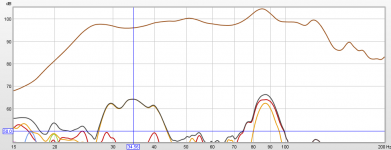
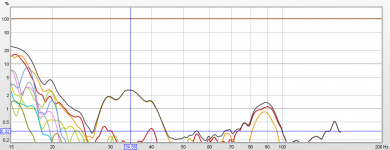
View attachment 576551
A single cabinet with the driver you used.
View attachment 576552
A four cabinet response in black with the single cabinet response in grey.
Hi, was just about to ask for the corresponding HornResp sim for this design. Do you mind sharing?
So I've had a little time to mess around. These are growing on me to say the least. I applied a childish s shaped eq bumping 20Hz by +3db, 25 +1, 32Hz +0 , 40 -4db, 50 -2db, and back to nominal at 64Hz.
After playing with the test tones and setting levels I'm getting the low end I was missing at first. Running sweeps with REW I'm subjectively getting STRONG response down to 22Hz. It seems to run flat into a wall @ 20Hz so I'm probably going to high pass at that range when I have capability too.
I haven't hooked up the multimeter to take voltage readings yet but I found the clipping point on my pro lite and dialed it back a safe distance.
At war volume these are phenomenally clairvoyant. I'm been using a sealed 15" Titanic MKIII from my car as my sub & I'm so used to it's colored response it's going to take me a while to adjust to REAL bass.
I am making a point to take my weekend off but I'm going to start on 3 & 4 Monday.
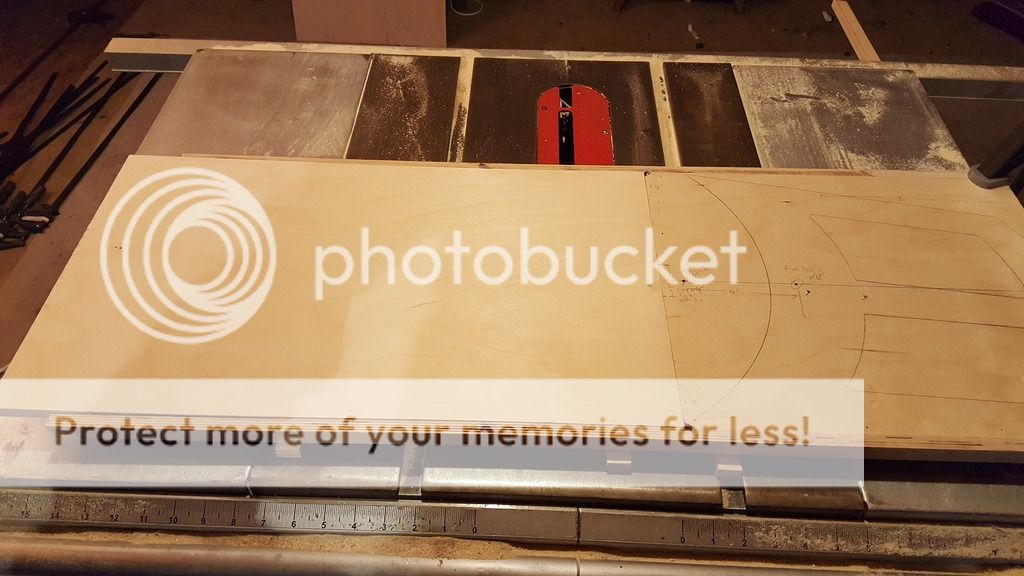
Unfortunately, I not only made few cuts in the wrong grain direction but I miscalculated my cut sheets so at one point i am going to have to drive 2 hrs one way to get more BB.
So chances are I'll build #3 as far as I can & then make my run.
I'm hoping to have all 4 done by Christmas but I do have other things to attend to as well. We'll see.
I hope you guys are enjoying the progress this far. As I said earlier, this is my first serious venture building cabinets & I'm feeling more and more confident as I make fewer & fewer mistakes.
-Josh
An aside, I have an Optima HD141x in the living room on an 80" screen which was originally slated for use in this room but I couldn't enjoy shows through the 42" tv that was up there before so now I'm contemplating a 65 " Samsung Curved 4k screen for this room. I spent a fair amount of time staring at the exact model in Best Buy & I'm SOOO tempted but I gotta build mains first....
After playing with the test tones and setting levels I'm getting the low end I was missing at first. Running sweeps with REW I'm subjectively getting STRONG response down to 22Hz. It seems to run flat into a wall @ 20Hz so I'm probably going to high pass at that range when I have capability too.
I haven't hooked up the multimeter to take voltage readings yet but I found the clipping point on my pro lite and dialed it back a safe distance.
At war volume these are phenomenally clairvoyant. I'm been using a sealed 15" Titanic MKIII from my car as my sub & I'm so used to it's colored response it's going to take me a while to adjust to REAL bass.
I am making a point to take my weekend off but I'm going to start on 3 & 4 Monday.
Unfortunately, I not only made few cuts in the wrong grain direction but I miscalculated my cut sheets so at one point i am going to have to drive 2 hrs one way to get more BB.
So chances are I'll build #3 as far as I can & then make my run.
I'm hoping to have all 4 done by Christmas but I do have other things to attend to as well. We'll see.
I hope you guys are enjoying the progress this far. As I said earlier, this is my first serious venture building cabinets & I'm feeling more and more confident as I make fewer & fewer mistakes.
-Josh
An aside, I have an Optima HD141x in the living room on an 80" screen which was originally slated for use in this room but I couldn't enjoy shows through the 42" tv that was up there before so now I'm contemplating a 65 " Samsung Curved 4k screen for this room. I spent a fair amount of time staring at the exact model in Best Buy & I'm SOOO tempted but I gotta build mains first....
@ Snappyturtle.
Do you have the model number or possibly Thiele Small specs for your driver?
And if I remember correctly you used one?
single driver, ill look for the spec sheet, pretty sure it's a jbl gt120d.
Brian you have mail.
And I have a confession to make. I messed up the TUBA names.
Given a generic driver this is the response as calculated.

Impedance as measured in the build article:

Looks like the right driver combination may smooth out the dip in the response.
Or the smoothing used in the measurement filled in the dip.
That's why I'm interested in the specs of the driver used in snappyturtles horn. Hornresp is usually pretty close in the simulation versus measurement.
And I have a confession to make. I messed up the TUBA names.
Given a generic driver this is the response as calculated.
Impedance as measured in the build article:
Looks like the right driver combination may smooth out the dip in the response.
Or the smoothing used in the measurement filled in the dip.
That's why I'm interested in the specs of the driver used in snappyturtles horn. Hornresp is usually pretty close in the simulation versus measurement.
- Status
- Not open for further replies.
- Home
- Loudspeakers
- Subwoofers
- Quad Tuba HT Build Log