4x Tuba HT Build Log
Hello my fellow fanantics,
I've been contemplating building THTs for my studio for a while now and alas the time has come to start making moves. I will document my progress and unforeseeable mistakes/victories here.
So in a nutshell my plan is to build not one, not two, but FOUR 24.5" wide Tuba HTs utilizing Dayton Audio RSS390HF-4 drivers. They will be placed in inverted stacks (2 coupled pairs) on each side of the room. effectively resulting in two monstrous 2'x3'x6' towers with an 80" projection screen filling the space in between perfectly.
For power I have a crest pro-lite 3.0 which I was going to run in 4 ohm bridged mode, I'll most likely be using a Behringer FBQ3102 for signal processing until I make the move for a proper crossover solution.
The room they will be in is fairly small at 11'6" x 18' x 8'. Why? First & foremost because I like it when my vision blurs to the beat. Also, of note, my studio will be my launch pad for practicing my A/V production skills (live VJing and lighting while also running sound) so I want to recreate an environment equivalent of being at a proper show.
Once I'm done I figure I probably won't even want to go to shows anymore... tehe. 😎
Moving on!
I am picking up the lumber, PL, and probably all the wood clamps in a 10 miles radius Monday. I intend on build all 4 at once, one cut at a time. This way while one is drying I am making progress on the next. Due to the nature of my career I have the next 3 weeks completely too myself and I intend to finish these well with in that time frame. I will most likely sand and finish the cabs in a mahogany gel stain or something of the like. I am going to practice with different techniques and products on my scraps before I make the call as I have only worked with furniture grade oak & pine plywood before and am not sure how birch will take. Any suggestions/advice is greatly encouraged!
I have access to a Bosch router, a Makita skilsaw, a Bosch 10" table saw, a Makita sander and just about everything I'll need except new blades/bits. I have read, re-read, and read again about a dozen separate build logs and I am fairly confident in my ability to build these granted I am thorough and meticulous with my work. Any big tools I'm overlooking?
I will probably be doing all the work in the attic space which is basically another unfinished room of the house so I am thankful I'll be able to be out of the elements with this, dust will be inevitable but I'll do my best to keep it contained.
So yeah, for now I have this weekend to gather everything I need and set up a work space. I am very excited to get started. As far as experience goes I've built a few custom sub enclosures ( ported, sealed, 4th order bandpass) and a pair of custom studio monitors which are in their 2nd iteration about to undergo another revision. Each cab has turned out better than the last and I don't see anything that scares me with the Tuba HTs.
No pictures yet, but that will change soon.
Stay tuned...
-Josh
Last edited:
For staining birch, I've had really good luck with General Finishes Dye Stains: https://generalfinishes.com/retail-...ains-dyes/water-based-dye-stains#.V_ALhpMrL-Y
Birch can come out blotchy when stained, but the dyes seem to work really well. Here is a cabinet I did, which also happens to be a THT:

Birch can come out blotchy when stained, but the dyes seem to work really well. Here is a cabinet I did, which also happens to be a THT:

For staining birch, I've had really good luck with General Finishes Dye Stains: https://generalfinishes.com/retail-...ains-dyes/water-based-dye-stains#.V_ALhpMrL-Y
Birch can come out blotchy when stained, but the dyes seem to work really well. Here is a cabinet I did, which also happens to be a THT:
Looks beautiful!
That's the long version of the THT. What did you do in terms of prep? What I've read concurs with your statement that birch can come out blotchy when stained seems to be the overwhelming consensus, I haven't used dyes before but I have read into them.
Thanks for the heads up!
I'm far from an expert (having never purchased or used stains or dyes) but I've read the blotchiness is due to certain patches of wood sucking in more stain than others. Hints I have seen include applying and immediately removing the stain so certain parts can't absorb more than others or applying a clear coat of some other kind and then applying the stain over top of that so the wood isn't actually absorbing any of the stain at all, it just sits on the clear coat.
I have no idea if either of those tips would work as I haven't tried them.
I have no idea if either of those tips would work as I haven't tried them.
Haha Awesome. You will not be disappointed. I did the same thing last year. Pro tip; rip all of the wood for the internal panels at the beginning without moving the fence. Then use this stock only for the internal panels and the cabinets will come out exactly the same width with no gaps to fill or sand.
With that much firepower in that small of a room you will have drywall issues if you really crank on them. Also if you put in a 25-30Hz hi pass filter they can take waaaay more than the recommended 28volts playing music. But if you let them run unrestricted like I do, you can actually get decent output down to about 15Hz for Home theater use.
https://r.tapatalk.com/shareLink?ur...hare_tid=2306602&share_fid=47413&share_type=t
Sent from my iPhone using Tapatalk
Looks beautiful!
That's the long version of the THT. What did you do in terms of prep? What I've read concurs with your statement that birch can come out blotchy when stained seems to be the overwhelming consensus, I haven't used dyes before but I have read into them.
Thanks for the heads up!
The one I built isn't a THTLP, for some reason the forum distorts the image. If you click on the image it will expand to the proper dimensions.
Staining birch can definitely create issues with blotchyness. Using the dye stain I recommended you don't really need to do anything, but I do recommend raising the grain with water and sanding it down a couple times before staining. The stain is water based and will raise the grain if not done so before hand.
If you use an oil based stain there are pre-stain conditioners that will help, or you can give the wood a coat of 1/2 lb. shellac before staining.
I'm far from an expert (having never purchased or used stains or dyes) but I've read the blotchiness is due to certain patches of wood sucking in more stain than others. Hints I have seen include applying and immediately removing the stain so certain parts can't absorb more than others or applying a clear coat of some other kind and then applying the stain over top of that so the wood isn't actually absorbing any of the stain at all, it just sits on the clear coat.
I have no idea if either of those tips would work as I haven't tried them.
Diluting wood glue (aliphatic resin) and painting it on before applying the stain should work as well, though I recommend testing on a scrap piece of wood first. I do that in any case to seal up the edges of any ply that I cut.
Should be a cool build, looking forward to it. 
@ thejessman,
Just so happens this is the type of finish I'd like to apply to 2 new birch subs I have in progress.
How long are you allowing for dry time before sanding, and what grit sandpaper? thanks
@ thejessman,
Just so happens this is the type of finish I'd like to apply to 2 new birch subs I have in progress.
How long are you allowing for dry time before sanding, and what grit sandpaper? thanks
Should be a cool build, looking forward to it.
@ thejessman,
Just so happens this is the type of finish I'd like to apply to 2 new birch subs I have in progress.
How long are you allowing for dry time before sanding, and what grit sandpaper? thanks
When raising the grain with water, it doesn't have to dry very long, it depends on your climate, but for me a hour is plenty. Just until its dry to the touch. I then use 180 or higher grit sandpaper to knock down the raised grain. You want to only sand just enough to knock down the raised grain. I do it by hand and if you go over the same spot with the sandpaper more than twice, you are sanding too much.
One note on the water based dyes/stains. After they are applied they always look like garbage, it looks like it just sucked all the life out of the wood, this is normal. Once you apply a clear coat of your choice the wood will look much better. In the pictures I posted I gave the enclosure a couple coats of clear lacquer.
Update:
I picked up 10 sheets of 13ply 5x5 today & that alone ate up most of my day since it was a 2 hour one way trip but at $20.12/sheet you can't complain too much.
As always my wagon proves very versatile!
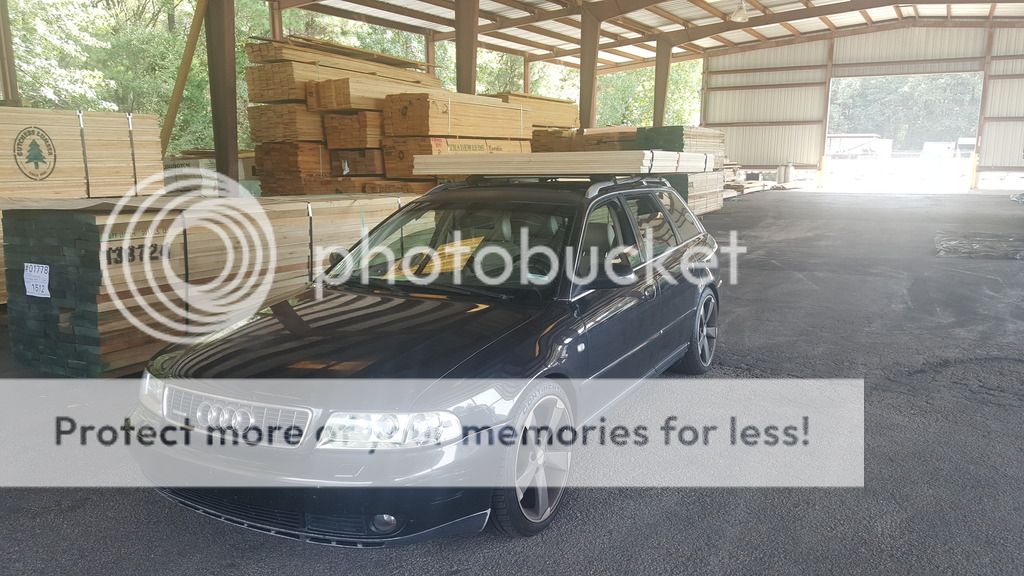
Drove 65mph back home without a hitch.
I then spent the remainder of my day rallying up tools, squares, and making space for this project. While I was really hoping to get everything ripped down today the table saw was one thing I couldn't grab with my car & it needs a new blade SO I went ahead and marked out the horn path/panel locations on 4 sheets, stayed up late doing this but once I got into the rhythm I didn't want to stop.
I really took my time with the first sheet and measured everything multiple times. I wish I could've found the 4ft t-square but it was MIA is I had to double check all my measurements with the tape measure against the framing square which slowed my down but best believe I got everything laid out exactly as per the plans.
Fast forward to about 3:30 am & this is where I am.
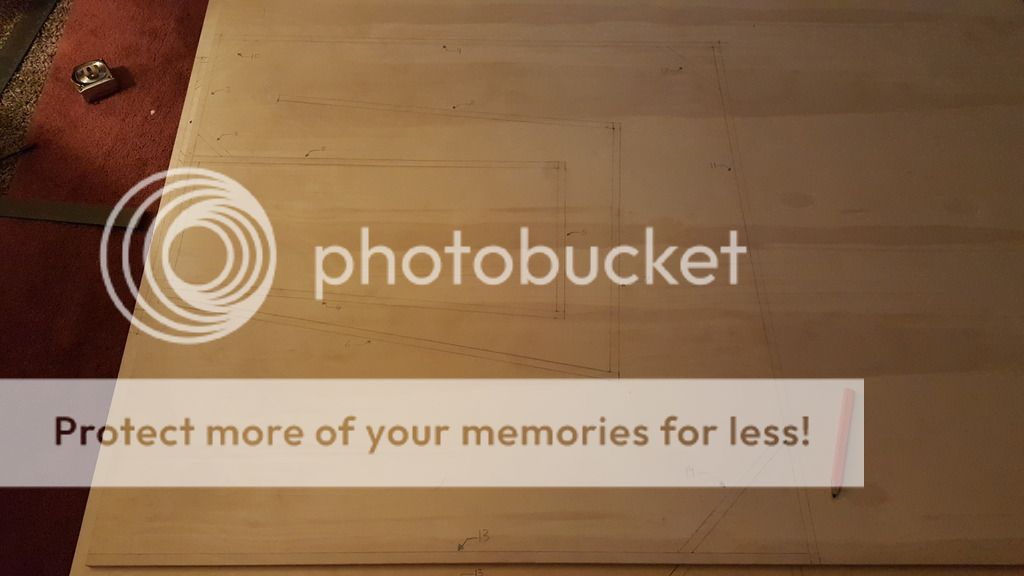
Decided that was good for now. I'm going to catch some shut eye and hit it fresh tomorrow. The plan is set up a canopy over the table saw, rip all stock down to is respective sizes and then set up a table and track for the skilsaw.
My goal is to have the access panels cut, and hopefully get panels 1 & 2 set on all 4. Possibly panel 3 on two of them but for one that's ALOT of clamps and secondly I want to adhesive fully set, no point in rushing it but at the same time I'm very excited.
The drivers are slated for delivery Wednesday, I figure Thursday to run test tones through them and loosen them up and the possibly firing up an unfinished cab (or 4) this weekend. It's aggressive I know but I'm making it a point to treat this as if it was my full time job, everything else is at the way side atm.
I am beat and need to rest.
I picked up 10 sheets of 13ply 5x5 today & that alone ate up most of my day since it was a 2 hour one way trip but at $20.12/sheet you can't complain too much.
As always my wagon proves very versatile!
Drove 65mph back home without a hitch.
I then spent the remainder of my day rallying up tools, squares, and making space for this project. While I was really hoping to get everything ripped down today the table saw was one thing I couldn't grab with my car & it needs a new blade SO I went ahead and marked out the horn path/panel locations on 4 sheets, stayed up late doing this but once I got into the rhythm I didn't want to stop.
I really took my time with the first sheet and measured everything multiple times. I wish I could've found the 4ft t-square but it was MIA is I had to double check all my measurements with the tape measure against the framing square which slowed my down but best believe I got everything laid out exactly as per the plans.
Fast forward to about 3:30 am & this is where I am.
Decided that was good for now. I'm going to catch some shut eye and hit it fresh tomorrow. The plan is set up a canopy over the table saw, rip all stock down to is respective sizes and then set up a table and track for the skilsaw.
My goal is to have the access panels cut, and hopefully get panels 1 & 2 set on all 4. Possibly panel 3 on two of them but for one that's ALOT of clamps and secondly I want to adhesive fully set, no point in rushing it but at the same time I'm very excited.
The drivers are slated for delivery Wednesday, I figure Thursday to run test tones through them and loosen them up and the possibly firing up an unfinished cab (or 4) this weekend. It's aggressive I know but I'm making it a point to treat this as if it was my full time job, everything else is at the way side atm.
I am beat and need to rest.
Take a look at the pic posted earlier in the thread for an alternative access panel location. I've found that front mount is a little easier to get a good seal on. Look forward to your progress.
Heads up on the access panel location. Only certain drivers will actually fit through the hatch located above the mouth. For example; The Dayton HF15 will only fit from the side hatch location if you are using a recessed (with flange) hatch mounting strategy.
Take a look at the pic posted earlier in the thread for an alternative access panel location. I've found that front mount is a little easier to get a good seal on. Look forward to your progress.
I am honestly not a fan of the front access panel. I am fairly confident I won't have an issue getting a good seal.
Heads up on the access panel location. Only certain drivers will actually fit through the hatch located above the mouth. For example; The Dayton HF15 will only fit from the side hatch location if you are using a recessed (with flange) hatch mounting strategy.
Well noted, I plan on having the access panels on the wall side of where these will be located so on two they will on the left side and on two they will be on the right side since two will sit on top of the other two.
On that thought < i almost considered laying out the second 2 side panels flipped 180 on the x-axis but I decided that was introducing too much room for error and that I can easily cut the panel from the opposite side.
Also, on these panels I may end up cutting 4 totally separate panels, for one that will get me a much tighter fit and since these sides will be hidden I am not too concerned with that grain's being mismatched.
Anyways, I am having issues acquiring the table saw & it needs a new blade so my contingency plan is to use the skilsaw. I'm not going to use the jig track in the plans in favor of a straight edge and clamps. I've done this before and have had very good results.
I went to the store but I was NOT prepared for the cost of clamps and Im not willing to pay $30 - $40 per clamp depending on length. So I am going to source my clamps online, since these won't be used on a daily basis I cannot justify $400 in clamps from a local store.
That will put a damper in my time table but there is also a hurricane barreling down on us so I need to prepare everything around the house for th possibility of a category 2 or 3 hurricane.
For now I've moved the materials inside and I am working on setting up a good work area in the attic.
I will update once I make some more progress.
-Josh
In Canada the place to buy inexpensive clamps is Princess Auto, I think I paid $5 each (on sale) for 3 foot clamps.
In the US I've heard Harbor Freight has similar products for a similar price, here's a 36 inch clamp for $7.99 regular price, and you can probably get it for half that on sale.
36 in. Quick Release Bar Clamp
Depending on how many panels you glue together at one time you can get away with as little as two clamps.
Have built four of Bfm flh's, a tip is to get a big piece of sturdy paper and pencil out the horn path as you did on the side panel, then cut it out with a carpet knife and use as a blueprint, placing them on each side of the panels and draw lines with a pencil in the cutout. It helped for me a lot to have the outer side of the panel painted aswell to locate nail/screw positioning. 16 horn paths is so much simpler to get down this way! I did not do this(however I did for my keystones) and it was a pain in the *** doing it every time with the measuring stick.
Are you using screws or nails? Nailgun are so much faster and im, not sure the weak driver in the tht need the very sturdy structural integrity of a screwed together cabinet, someone else might be of another opinion but I would use nails 🙂
Are you using screws or nails? Nailgun are so much faster and im, not sure the weak driver in the tht need the very sturdy structural integrity of a screwed together cabinet, someone else might be of another opinion but I would use nails 🙂
Last edited:
Hope you avoid any hurricane catastrophes.
If you have not decided on clamps, the most economical way I have found is to buy the kits that thread onto .75" pipe.
I recently bought 6 kits and 3-10' pipes and now have 6 very heavy duty 5' clamps.
Harbor Freight sells the kits for 9.99 usd, and HD sells the pipe for 10.82 per 10' length, and will cut and thread to spec right in the store.
Couple links:
Pipe Clamp - 3/4" Cast Iron Pipe Clamps,2 Piece
http://www.homedepot.com/p/Mueller-Streamline-3-4-in-x-10-ft-Black-Steel-Pipe-584-1200HC/100540481
*edit* You can also drill and screw, say, a 3"x5" piece of the birch onto the clamp faces and have pretty much cabinet grade clamps
Last edited:
Any word on your build? I was looking forward to it! 🙂
The clamps listed above would work, but I'd like to let you known that Bessey now has 3/4 pipe-clamp kits for less than $14 at HD, and these are QUITE a bit better than the HF kits.
Hope all is well.
Cheers
The clamps listed above would work, but I'd like to let you known that Bessey now has 3/4 pipe-clamp kits for less than $14 at HD, and these are QUITE a bit better than the HF kits.
Hope all is well.
Cheers
Any word on your build? I was looking forward to it! 🙂
The clamps listed above would work, but I'd like to let you known that Bessey now has 3/4 pipe-clamp kits for less than $14 at HD, and these are QUITE a bit better than the HF kits.
Hope all is well.
Cheers
Hey wreckingball,
good to know someone is interested.
I had written up an extensive update post right before I had to leave town for work but right as I was doing a quick edit my comp froze up. Out of anger & frustration is just left it at that.
As for an update, between logistical challenges gathering the tools needed, transporting them up to the 3rd floor, the storm & about 3 other major ongoing projects around the house I've haven't been able to stampede this build down as quick or as with as much gusto as I had originally intended.
-
The driver's arrived in short order.
An externally hosted image should be here but it was not working when we last tested it.
I immediately unboxed them so I could gawk. These RF drivers are very nice, not only is the cone visually appealing but I ran them through a gauntlet of test tones around the 25-30 Hz range with voltages varying from 10-25v. They are incredibly linear all way up to perceived xmax, and even then the vent noise is minimal.
An externally hosted image should be here but it was not working when we last tested it.
As for the cabinets, I ended up processing 2 at a time as I realized that trying to build all 4 simultaneously was a stretch not only on my mental place keeping but on my resources.
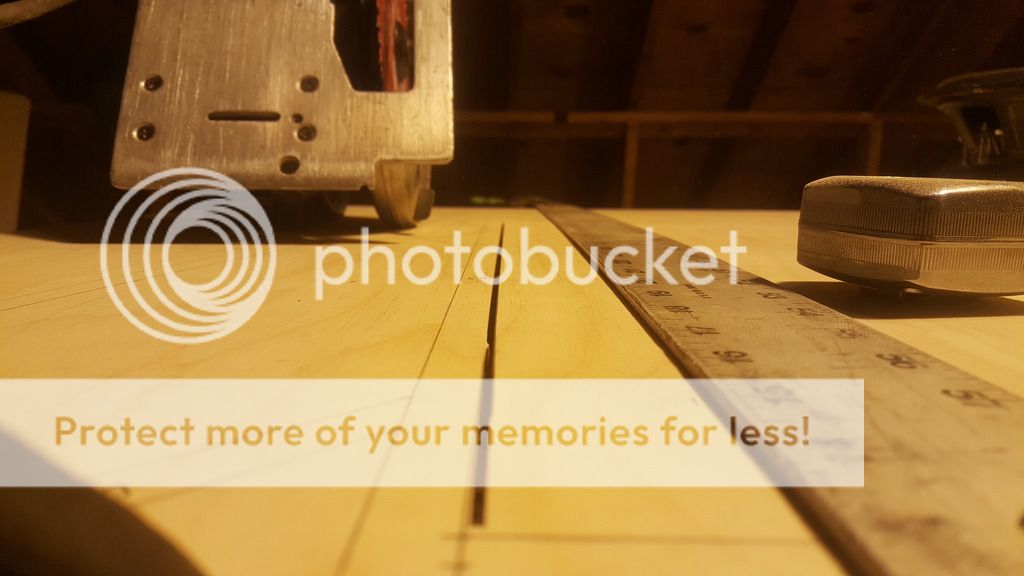
I used a 4 ft straight edge and clamps as a guide jig to make the plunge cuts on the side panel nd finished with a the a 12 TPI blade in the jug saw. Didn't come out too shabby.
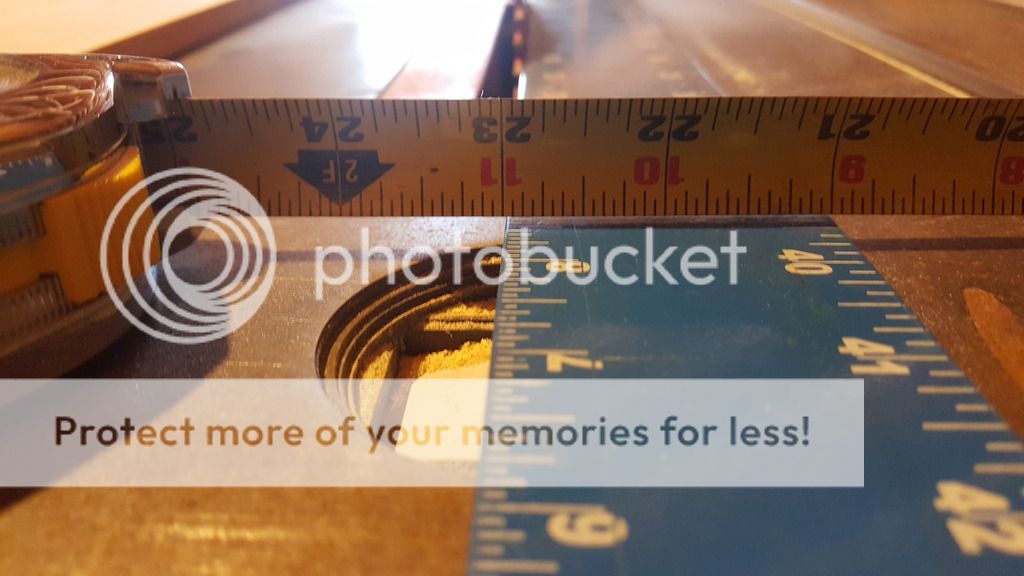
Of note, the fence on my dad's table saw is not trust worthy & I ended up with 22 7/8" wide internal panels after coming to realize that something was wrong after the fact, so I ended up shaving them down from 23"
From that point on I have been anal about making sure the fence is set perfectly square using the framing square and tape measure. Picture is from when I realize my issue after lining the cut panels up...
I am trying to avoid uses fasteners of any sort beyond those needed for the driver and access panel panel being as my goal is to build furniture quality cabinets so I picked up a cart full of HF clamps and as many squares as I could get my hands on. I am using titebond against the overwhelming conscientious of the good people on the BFM forums but I A) don't like working with PL B) find the opinion that it's impossible to make an air tight horn without as a challenege & C) don't see the need for it in this deign. Now on a bigger project, maybe. However I've had moderate success using titebond ultimate and I'm going to stick with what I know. ohh, and it's water soluble so clean up is a breeze.

Before I left I just finished setting and gluing the first brace (panel 3) and was waiting on the plunge bit for the router to come in to cut the driver hole in panel 4.
An externally hosted image should be here but it was not working when we last tested it.
Unfortunately, I ran out of time before the bit came in so everything is sitting at home waiting for me.
- Status
- Not open for further replies.
- Home
- Loudspeakers
- Subwoofers
- Quad Tuba HT Build Log