A "lively box" style could work for Accuton mids. It's where you give up on the usual OCD of overbuilding the box in a futile attempt to stop the speaker's dipole vibrations, and instead use thin walls as radiating surfaces.
As long you can avoid excessive use of soft polymers, which tend to absorb energy non-linearly, energy out should = energy in.
As long you can avoid excessive use of soft polymers, which tend to absorb energy non-linearly, energy out should = energy in.
That’s an interesting idea, thanks. I‘ll play around with a thin walled cabinet for the Accuton build.
What characteristics make the Accuton more suited to such an arrangement? The very light cone?
What characteristics make the Accuton more suited to such an arrangement? The very light cone?
Just an idea really -- I previously had issues with a 7" Accuton where the stiff cone seemed to trap the backwave resulting in vague but persistent ringing related to box modes. At the same time, over-stuffing the box only had a limited damping effect and wasn't entirely satisfying. Theoretically, the magnet vibrations should be the mirror image of the cone movement, so there could some interesting dipole or multi-polar effects off-axis.That’s an interesting idea, thanks. I‘ll play around with a thin walled cabinet for the Accuton build.
What characteristics make the Accuton more suited to such an arrangement? The very light cone?
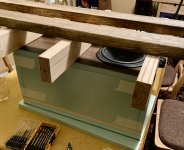
Box gluing progress.
I made a frame of 1.5 x .75” pine glued to the back for a removable screwed-on back panel. Hoping the caulk I’m using will hold well enough to survive a few attachment/removal/reattachment cycles.
I am quickly learning my cabinet making limitations. This box is not square. Off by a sixteenth here and there. It adds up. 😀
Attachments
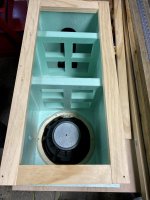
There is promise. I got the major construction of the bass box functional.
The removable back works well. I installed a PE 2.5” flared port.
I played around with borrowing the Manzanita crossover (this iteration is crossed at around 900Hz) plus some resistors to get music to the woofer and a DE360-8 on top. I know this is way less than ideal or scientific, but I am optimistic I can get this ironed out properly. The box works and sounds pretty good. I know I have lots of bracing and dampening to do, but I like what I’ve heard so far. This can be a versatile low end section for a number of 2- or 3-way systems. 😎
Attachments
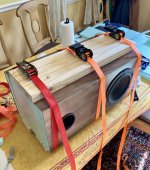
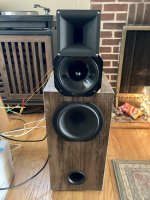
Cabinet 1 of 4+ finished! 🙂
This XPS-plus-vinyl-flooring-skin is slightly lively, but sounds pretty good. I think the window braces may have helped a bit, but they’re not exactly rigid. Having everything glued up secure certainly is better than the previous test with just front and back skins glued on.
I bought noico to line the insides, but thought I’d move forward without it for now. I expect I’ll get to measuring and playing with DSP with the top mid-high cabinets (still planning on trying the Focal-B&C combo first) before finding out how much difference noico/stuffing will make.
Even though this cabinet is obviously flawed, I am quite happy with how it turned out. It’s my first medium sized speaker from scratch. 😀
Attachments

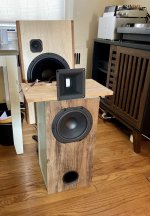
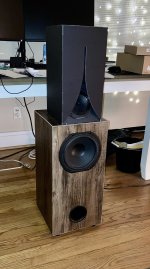
This is good silly fun.
Put my Audax Karlsonator on top. First order passive crossover at about 385 Hz. Padded the Audax down with a couple resistors. Left signal to top, right signal to bottom. Sounds way better than it deserves to. 😎
Put my Audax Karlsonator on top. First order passive crossover at about 385 Hz. Padded the Audax down with a couple resistors. Left signal to top, right signal to bottom. Sounds way better than it deserves to. 😎
Attachments
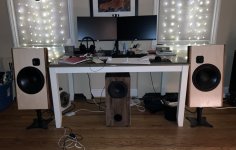
Proof of concept is advancing.
I’m using Tfive’s PulseAudio Crossover Rack (Raspberry pi 4 and Bullseye OS), an ESI Gigaport EX, and three little class D amps. 4th order LR at 300 and 3K Hz.
It sounds really really good, despite cheapie amps and a bit of noise on the CD from the DAC. Hopefully I’ll get measurements over the weekend and maybe play with analog crossover parts.
Fun!
Attachments
- Home
- Loudspeakers
- Multi-Way
- Options with lucky little collection of high-end drivers