I was wondering if the fpd file used is available? It's a very nice design.
PM me with your email address and I'll send it to you..
I received the panels and the anti-tarnish tissue for shipping. I will be working on sending them out. Hopefully I can get them done soon and mailed.
Thanks
Thanks for the update. Please disregard my PM.
My custom job. 😀
I got an email on friday that they will be shipping the panels on monday. It should take a few days to get them. I'll let every know when I get them.
I just ordered some anti tarnish tissue paper and am waiting for that to come in as well.
Thanks for the update. Please disregard my PM.
My custom job. 😀
Thanks for the update. Please disregard my PM.
My custom job. 😀
Looks great Ohmer.. the gold case and the plywood front panel really work well together..
Lucky for us your GB skills > your photography skills 😀
Just ribbing you... thanks for the new update.
Just ribbing you... thanks for the new update.


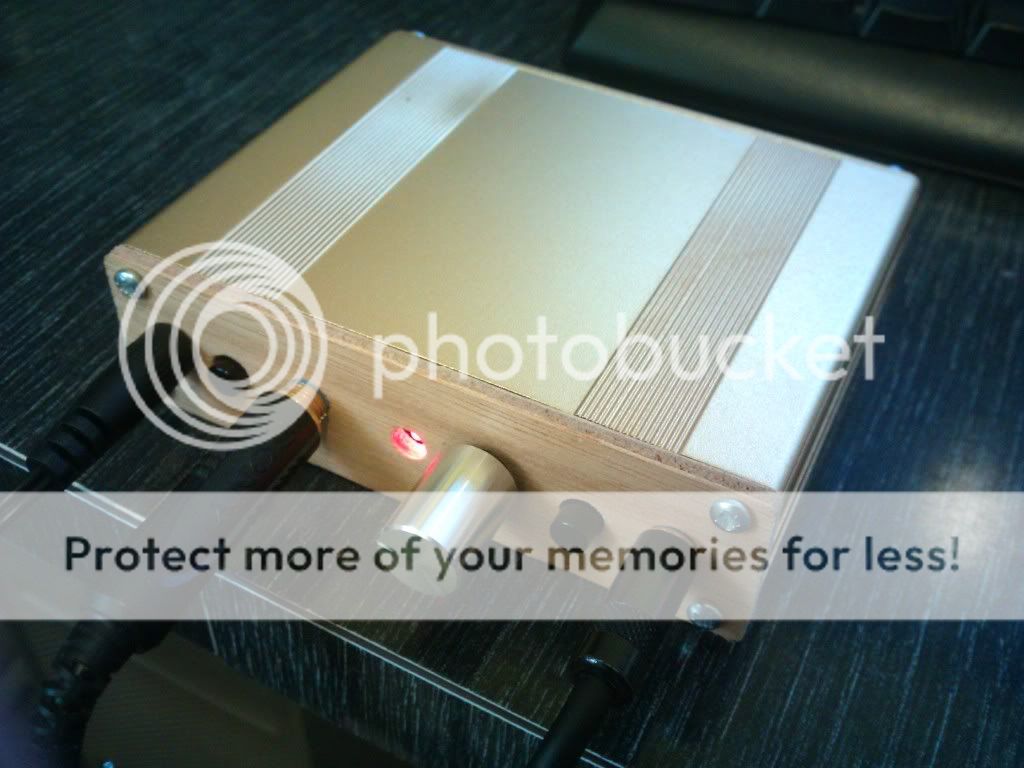
I got bored waiting for the group buy so I drilled out (by hand) the panels that came with the B3 enclosure. My amp is strictly for my desktop so I decided to get the biggest metal Kilo knob digikey had for a 6mm shaft. However, I had to sacrifice the batteries. The panels that I get from the group buy will let me convert it back to a portable version. 🙂
Does anyone have their stock B3 panels that they don't want? I made the LED hole too big and would like to remake a front panel.
Thanks
Thanks Mr Slim, The color coordination was a pleasant surprise. 🙂
I just wish I had better wood. (insert joke here)
I'm surprised how accurate I was able to make the holes with a dremel, caliper and some beer. 😀
Looks great Ohmer.. the gold case and the plywood front panel really work well together..
Thanks Mr Slim, The color coordination was a pleasant surprise. 🙂
I just wish I had better wood. (insert joke here)
I'm surprised how accurate I was able to make the holes with a dremel, caliper and some beer. 😀
I got bored waiting for the group buy so I drilled out (by hand) the panels that came with the B3 enclosure. My amp is strictly for my desktop so I decided to get the biggest metal Kilo knob digikey had for a 6mm shaft. However, I had to sacrifice the batteries. The panels that I get from the group buy will let me convert it back to a portable version. 🙂
Does anyone have their stock B3 panels that they don't want? I made the LED hole too big and would like to remake a front panel.
That looks sweet, love the kilo knob.
How are you using both the 3.5 input/output and the off board input/output? Did you cut any traces and all that jazz? Can this introduce any issues if I just wire bot kinds to the same holes on the 3.5 solder points? Thanks
Thanks Mr Slim, The color coordination was a pleasant surprise. 🙂
I just wish I had better wood. (insert joke here)
I'm surprised how accurate I was able to make the holes with a dremel, caliper and some beer. 😀
Heh.. Beer is always a good lubricant, in moderation..
That looks sweet, love the kilo knob.
How are you using both the 3.5 input/output and the off board input/output? Did you cut any traces and all that jazz? Can this introduce any issues if I just wire bot kinds to the same holes on the 3.5 solder points? Thanks
Should be able to just use a 3 pin 3.5mm jacks and wire both to the input/output pads along with rca/ 1/4 plug. The 5 pin mounted the the board mute the input if no plug is in the jack.
That looks sweet, love the kilo knob.
How are you using both the 3.5 input/output and the off board input/output? Did you cut any traces and all that jazz? Can this introduce any issues if I just wire bot kinds to the same holes on the 3.5 solder points? Thanks
If you check NwAV's (RS) Blog, there are instructions on which PCB traces you need to cut to use an offboard input connector, to disable the shorting switch inside the 3.5mm input connector.. Also, RS, in his ever thoughtful way, has added header points for both extra input and output connectors (called P1 and P2 on the boards)..
Last edited:
Question, you don't have to cut any traces unless you have 5pin jack mounted on the pcb, correct?
If you check NwAV's (RS) Blog, there are instructions on which PCB traces you need to cut to use and offboard input connector, to disable the shorting switch inside the input connector.. Also, RS, in his ever thoughtful way, has added header points for both extra input and output connectors (called P1 and P2 on the boards)..
I am aware of P1 and P2 and about the traces to cut but I thought it was either the 3.5 or or off board output, I did not realize you could use both which I'm interested in. I'll go read it again. 🙄
Thanks
- Status
- Not open for further replies.
- Home
- Group Buys
- Official O2 Headphone Amp Front Panel Group Buy