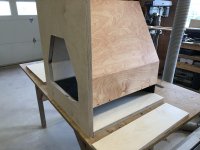
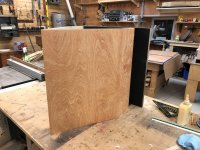
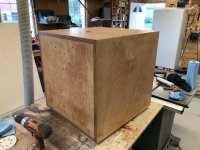
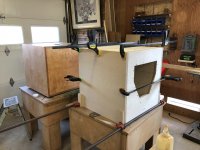
Last of the cuts are done and everything is mocked up. Now it’s a matter of doing the stain on the inside surfaces of the outer walls, painting the inside of the back panel black and then working on assembly. Looks like my horns have finally hit customs so hopefully they show up as I’m finishing the bass bins and then I can start working on the HF cabs.
Side note: these things are heavy.
Side note: these things are heavy.
Attachments

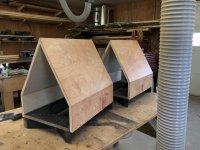

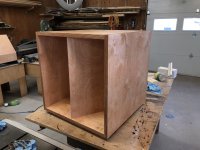
The back panel is on one of the doghouses, honestly the project is going quicker than expected. Will probably have these done (the bass bins anyway) within the next week.
Attachments
Looking good. You've practically built a pair of horns in the same time that I've sanded one down for spraying 😀
Yes, disgustingly quick levels of progress happening. It's really not the DIYaudio way, maybe the mods should step in here?
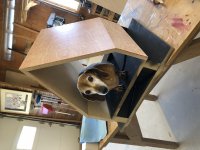
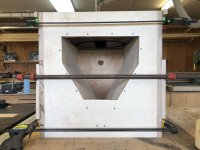
Hopefully my pace doesn’t get me ejected from the diy community haha. This morning was just a third coat of clear on the inner surfaces of the main box and some very important testing of the doghouse. Checks out and functions as a doghouse.
Attachments

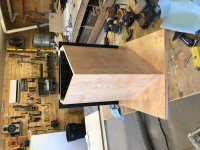
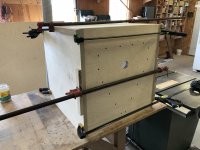
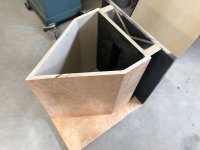
Bottom of the first speaker is on. Biscuit joints along the back edge with screws and glue into the doghouse from the bottom. There are some insignificant little gaps along the edge between the doghouse and the bottom piece but it’s sealed with silicone from the back so no issues. This thing is getting dense, I’m not worried about much in the way of resonance and I’m very glad I haven’t been slacking at the gym.
Attachments

Sketchup link to 1" thick LaScala Bass Bin
I thought I'd share this. If you have SketchUp, you can open it.
Here is a LS BB with 1" walls.
Obviously it isn't a necessity, but it adds a bit of rigidity and the weight add is a bonus. I have never built it, but used the interior dimensions of the real McCoy LS to draw it up.
I thought I'd share this. If you have SketchUp, you can open it.
Here is a LS BB with 1" walls.
Obviously it isn't a necessity, but it adds a bit of rigidity and the weight add is a bonus. I have never built it, but used the interior dimensions of the real McCoy LS to draw it up.
Unfortunately don't have sketchup but already did most of this math. Solidworks was very useful for figuring out the dimensions of the doghouse with the kinkless transition from the two surfaces like in the LS2's. 3/4" was used for the doghouse and the 1" sides already feel significantly less resonant than my '78 lascalas I measured for this project (that I also sold to fund this project).
Unfortunately don't have sketchup but already did most of this math. Solidworks was very useful for figuring out the dimensions of the doghouse with the kinkless transition from the two surfaces like in the LS2's. 3/4" was used for the doghouse and the 1" sides already feel significantly less resonant than my '78 lascalas I measured for this project (that I also sold to fund this project).
You don't need it. They have it as a cloud app:
Free 3D Modeling Software | 3D Design Online | SketchUp Free Subscription
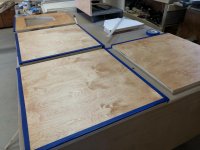
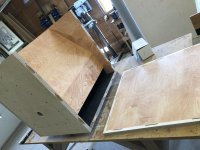
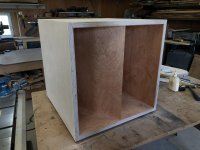
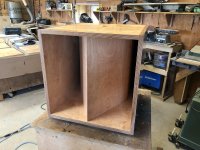
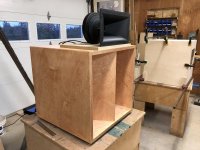
The first box is essentially assembled. I’m doing one at a time at this point mostly because laying out all the panels for sanding and finishing wasn’t a great use of space. With one done I can go through the finishing steps on the exterior of the first while finishing the inner panels of the second. Looking forward to weighing these things when they’re done.
Attachments

Stain is on the first one, went on well although it was a race to wipe it off as it’s about 32 degrees today and it was just getting sticky very fast. Happy with the look though. Tomorrow will be finish work and assembling the other cab. Might start on the 2” risers as well.
Attachments
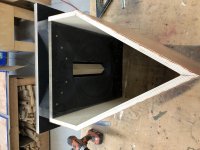
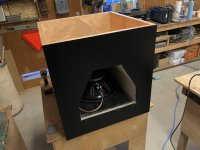
Got a little bit done today, the drivers are in the first cab and the second is ready for assembly. Wired one up and painted the bottom black. Pretty happy with how it’s looking so far and will be sealing it up tomorrow and making the bases. K510 horn clones arrive Wednesday to start on the cabs for those, also did a quick test with my Tubelab amp and the compression drivers and there isn’t nearly the hiss or hum that I was getting with my Bryston 2B so it will probably be doing highs duty.
Attachments
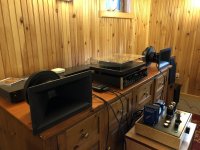
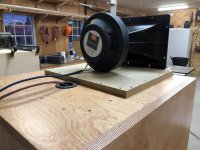
Bolted up the horns and threw a quick and dirty EQ on the minidsp to see how things are with the tubelab, honestly without even doing much measuring or fiddling around it already sounds impressive. This was with a 10” sub filling out 150hz and down so there’s a giant hole between there and 500hz. The scale of the 2446h’s is just hilarious.
Attachments
Second bass bin is assembled and drying. After a little thought I decided the bases won’t be raised as much as the LS2’s but instead use a square of 18”x18” inch thick ply to seal the doghouse and also serve as a base with some low profile rubber feet. Simplifies the build and keeps the bass bin nice and close to the ground. Also did a quick sound test with the first bin, I forgot how bad 50-500hz sounds without highs but no leaks or weird noises at relatively high volume.
Attachments
Wired one up together, volume will not be an issue and even with barely any tweaking of the EQ it already sounds impressive. Anyone that has seen a LaScala bass bin will get an idea of the scale of the JBL 2446h’s.
Attachments
- Home
- Loudspeakers
- Multi-Way
- Not exactly small two way project - horn loaded, active crossover, Jubescala clones.