Hey guys!
First: thank you all for the suggestions! I’m learning a lot!
Reading the previous post, there are some points that I would like to bring:
1. spikes – GM, my bad! I thought you meant outside the cabinet, not inside;
2. length vent – I draw the worst scenario and I’m intended to cut different lengths trying to get the one that will satisfy me – just following GM and Kevin suggestions;
3. drive support – GM, thanks once again. The brace is amazing and I’m not so skilled to draw it in my cab. So I’ll leave the draw as it but I’ll use your suggest in my real cabinet. Can you post more detailed info?
4. bracing system – I’m not intended to use internal braces. I’ll go with double 20mm MDF to get rid of any cab reflection. I hope that it works.
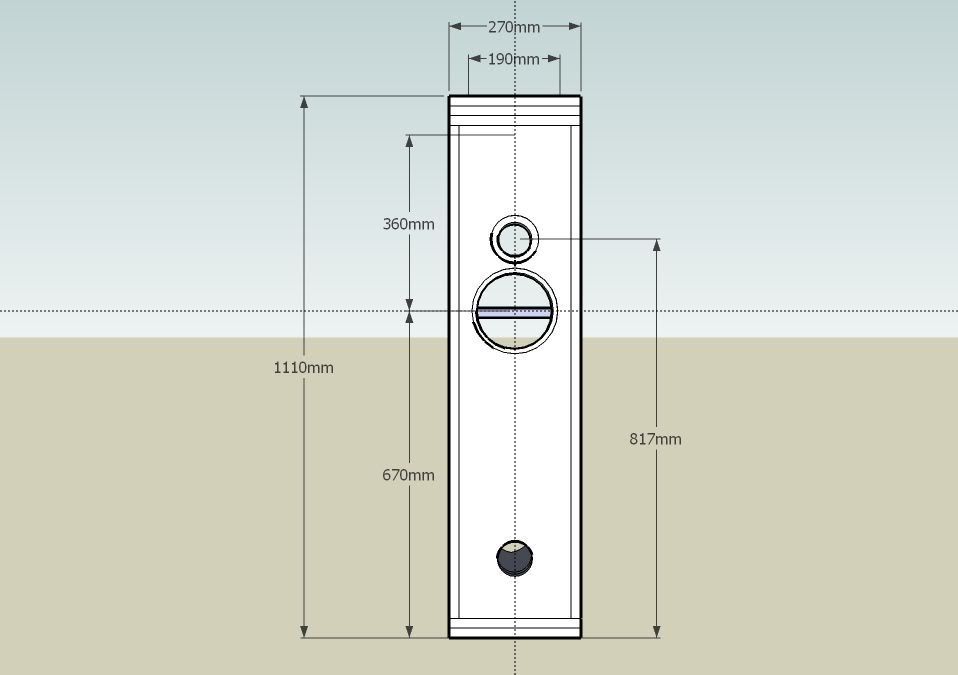
Today I’ve call the guy who will cut the MDF and put it all together for me. He said that in Brasil there’s no 19mm MDF but I could use 18mm or 20mm MDF instead. So guess what? For those who enjoy my draws here you can find rev#5.
Cheers,
Front view
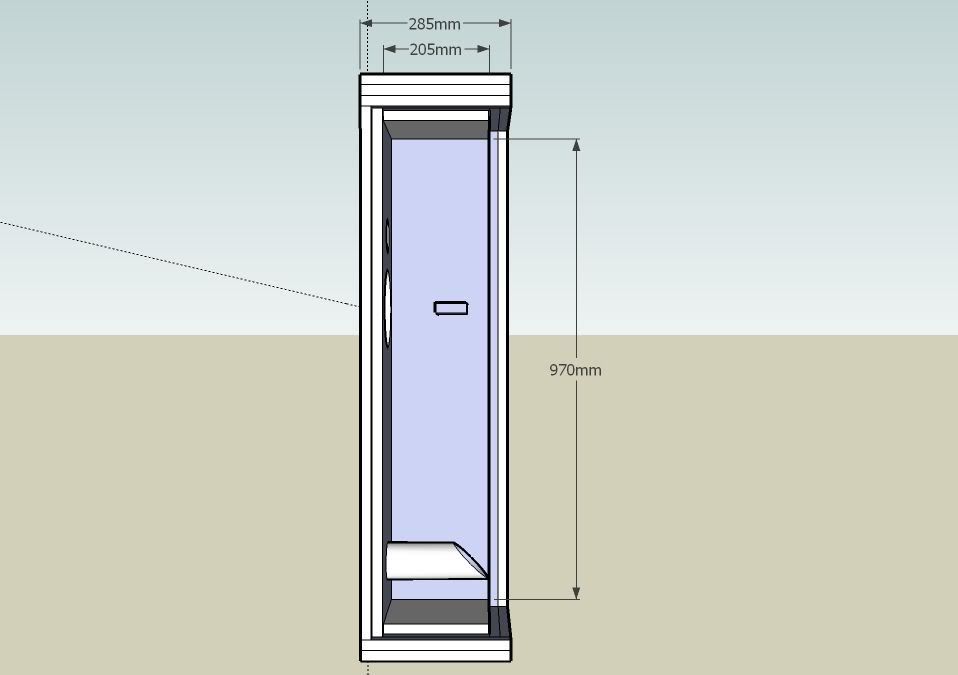
Side view
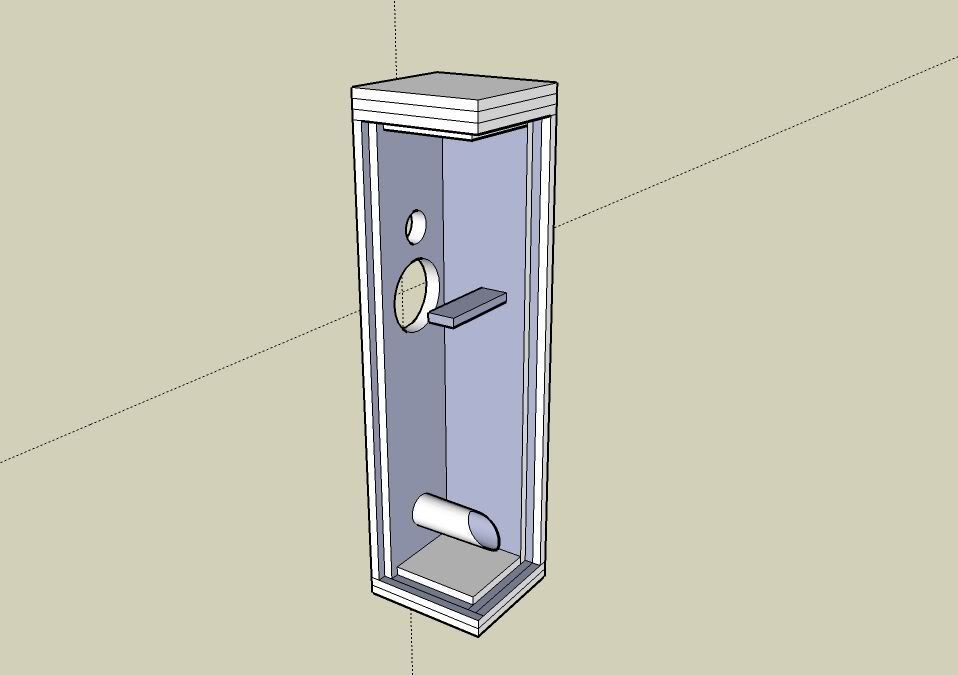
3D view
First: thank you all for the suggestions! I’m learning a lot!
Reading the previous post, there are some points that I would like to bring:
1. spikes – GM, my bad! I thought you meant outside the cabinet, not inside;
2. length vent – I draw the worst scenario and I’m intended to cut different lengths trying to get the one that will satisfy me – just following GM and Kevin suggestions;
3. drive support – GM, thanks once again. The brace is amazing and I’m not so skilled to draw it in my cab. So I’ll leave the draw as it but I’ll use your suggest in my real cabinet. Can you post more detailed info?
4. bracing system – I’m not intended to use internal braces. I’ll go with double 20mm MDF to get rid of any cab reflection. I hope that it works.
Today I’ve call the guy who will cut the MDF and put it all together for me. He said that in Brasil there’s no 19mm MDF but I could use 18mm or 20mm MDF instead. So guess what? For those who enjoy my draws here you can find rev#5.
Cheers,
Front view
Side view
3D view
Lookin' good Mutuano. I see no reason not to go ahead with the cabinet. The port can be tuned after assembly and bracing can be added/changed later. Any changes inside the cabinet will not be visible after assembly. I'm curious to know how the port tuning goes. In my opinion either the 18mm or 20mm doubled up will do (in this case). Anyone see any reason not to go ahead speak now 🙂.
Kevin
Kevin
Hey Kevin,
I'm curious too!! 😀
Anyway here it goes revision #5.1 with suggested vent and mass load drive support.
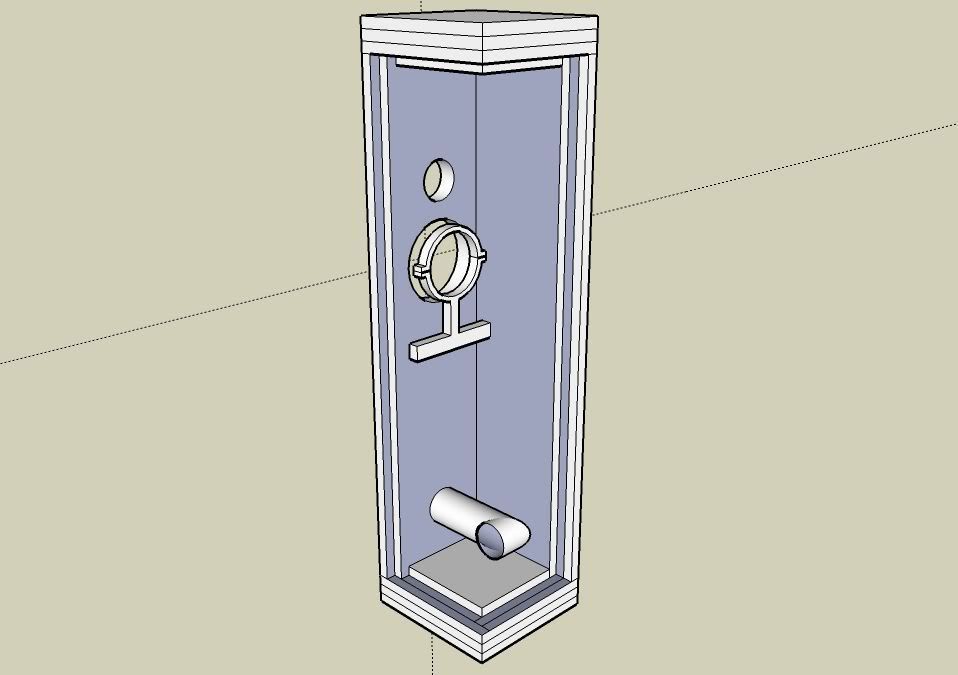
After to get the OK from all. We can step forward and discuss tweeter positioning (center or off-center) and leave the front baffle square of rounded. What do you think?
Merry Xmas to all!
I'm curious too!! 😀
Anyway here it goes revision #5.1 with suggested vent and mass load drive support.
After to get the OK from all. We can step forward and discuss tweeter positioning (center or off-center) and leave the front baffle square of rounded. What do you think?
Merry Xmas to all!
Hey guys!
I'm just refreshing the topic. I'm planning to start cutting MDF by tomorrow.
I would like to hear about the topic that I've raised in the previous message.
Happy 2008!
I'm just refreshing the topic. I'm planning to start cutting MDF by tomorrow.
I would like to hear about the topic that I've raised in the previous message.
Happy 2008!
Baffle Diffraction Simulator
I don't like that woofer support. It reminds me of the diving board at the pool. It supports the weight of the motor but it doesn't effectively couple the mass of the cabinet to the woofer. If I were you I'd go with the vertical brace or eliminate it entirely.
With such thick walls you can afford a healthy roundover on the front baffle. A baffle diffraction simulator will help you determine where to put the tweeter. Try this one:
http://www.pvconsultants.com/audio/diffraction/downloadbds.htm
Kevin
Greets!
Gees, these aren't built yet? 😉
Cone/dome tweeters XO'd down in their point source (non beaming) BW should always be off-set at some acoustic ratio if no acoustic pad or at least ridge is used around them.
Rounding over sharp edges look nice, but it's only really effective when the radius is >1 WL, ergo if a 3/4" (19 mm) router bit is used it will only be effective above ~18,080 Hz, well into its beaming BW, so strictly cosmetic.
Anyway, if the XO point is 2 kHz, then the round over needs to have a ~8.14" radius, so you could split a ~16" Sonotube in half to make add on baffle round overs for both speakers and fill them with kitty litter/oil dry to damp them. Personally, I'd rather either just damp the baffle as required or make a simple WG to increase its directivity to a lower frequency, though as always YMMV.
GM
Re: Baffle Diffraction Simulator
ditto
dave
Kevin_Murray said:I don't like that woofer support. It reminds me of the diving board at the pool. It supports the weight of the motor but it doesn't effectively couple the mass of the cabinet to the woofer. If I were you I'd go with the vertical brace or eliminate it entirely.
ditto
dave
Re: Baffle Diffraction Simulator
Me too, but I gave him two very good choices to choose from or use as examples to make some variation of and he chose to come up with this mostly unrelated sprung collar, so not knowing how to make it any more understandable, I gave up. At least it's better than just screwing them to the baffle.
GM
Kevin_Murray said:I don't like that woofer support.
Me too, but I gave him two very good choices to choose from or use as examples to make some variation of and he chose to come up with this mostly unrelated sprung collar, so not knowing how to make it any more understandable, I gave up. At least it's better than just screwing them to the baffle.
GM
Hey guys (GM, Dave and Kevin)
Thank you all for your suggestions. I'll go with Kevin and Dave and make first the cabinet and run some trials with and without the vertical brace.
Sorry for my misunderstanding referring to the drive support, GM. I tried to draw what I've saw at the pic. As I said I'll put the brace stuff on my test-list.
I guess that I have to put my hands on it and make it real. And any detail as round edges, vertical braces or vent length must come along with trials.
Many thanks once again and I'll keep you posted.
I'll post pic of the cabinet construction soon.
Many thanks once again.
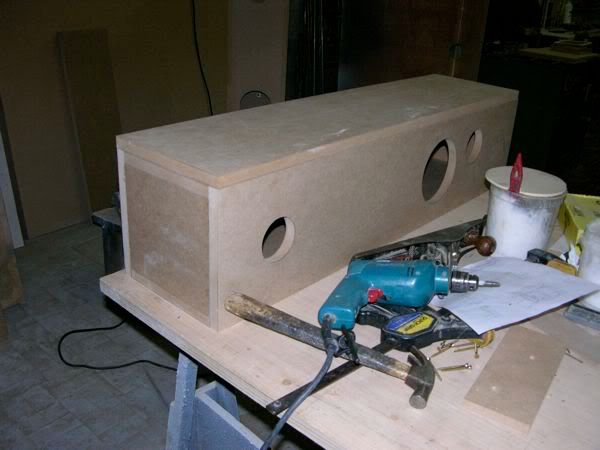
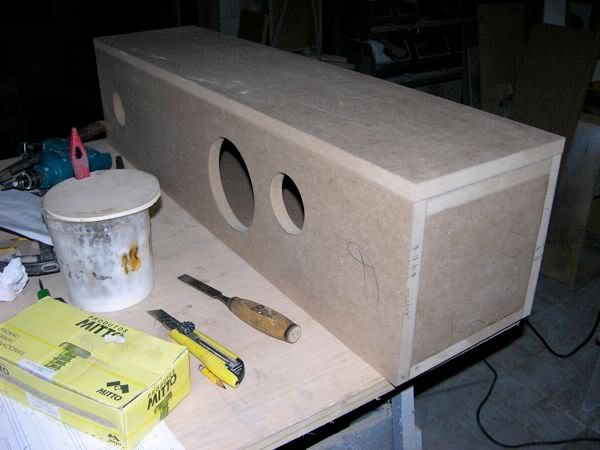
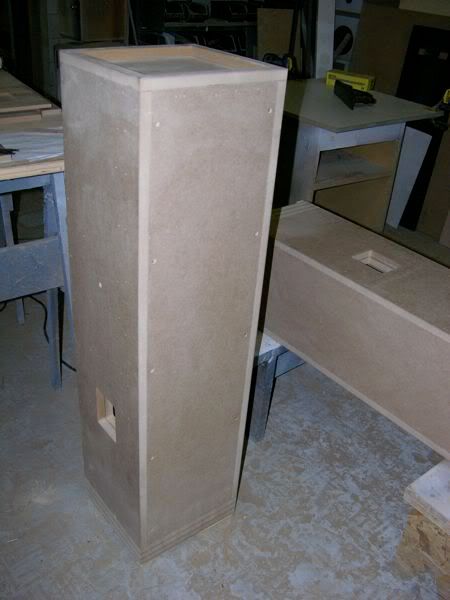
Hi guys!
After a loooong time I've got back my ML-TL project and I'm making some progress on this.
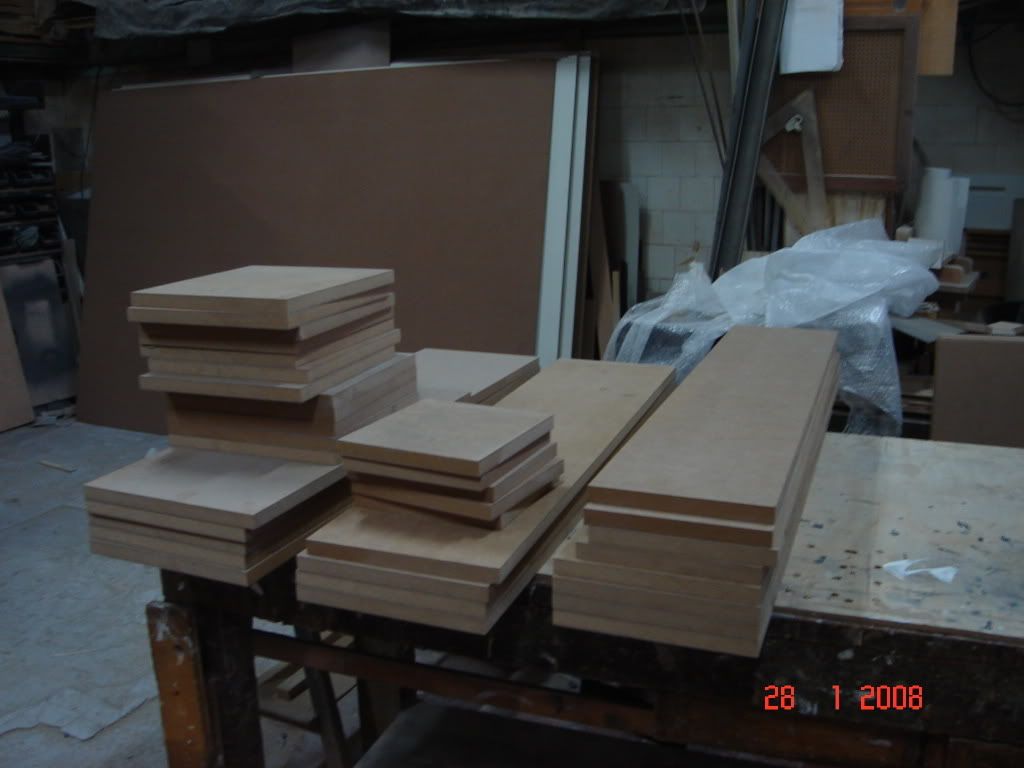
For those who enjoy pics of cabinets showing parts where the sun can't reach, here it goes 😉
A bunch of cutted MDF
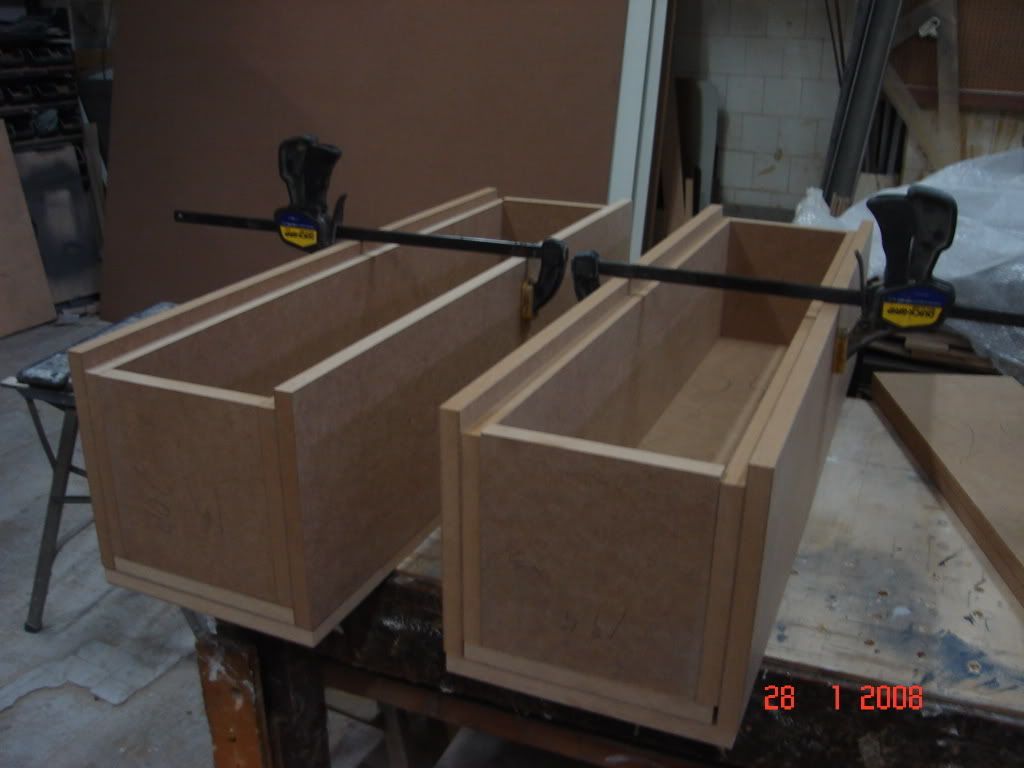
Pre-assembling
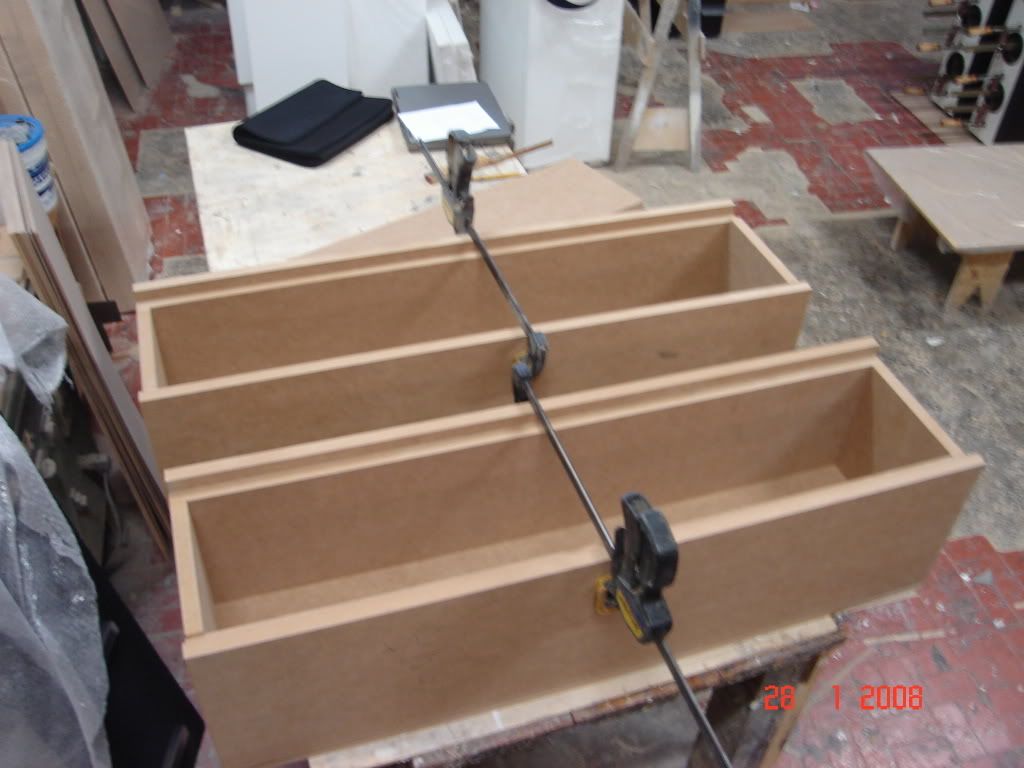
Both cabinets
I'm going to feed the topic with pics of the further steps sooner.
Thanks once again for those who help me to make it's true.
Best,
After a loooong time I've got back my ML-TL project and I'm making some progress on this.
For those who enjoy pics of cabinets showing parts where the sun can't reach, here it goes 😉
A bunch of cutted MDF
Pre-assembling
Both cabinets
I'm going to feed the topic with pics of the further steps sooner.
Thanks once again for those who help me to make it's true.
Best,
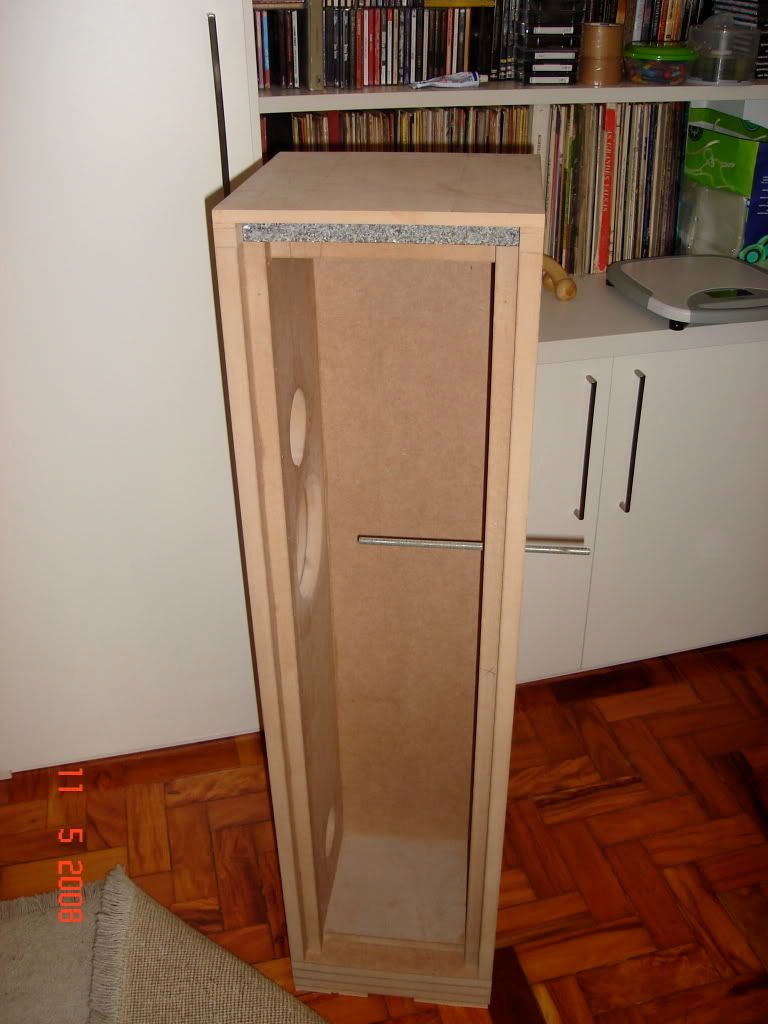
Hi Kevin!
Don't worry I will!
Honestly I'm very surprised about how heavy the cabinet will be... Rock solid!!
If the project doesn't perform as expected I can use it as weight for weightlifting.
Best,
Don't worry I will!
Honestly I'm very surprised about how heavy the cabinet will be... Rock solid!!
If the project doesn't perform as expected I can use it as weight for weightlifting.
Best,
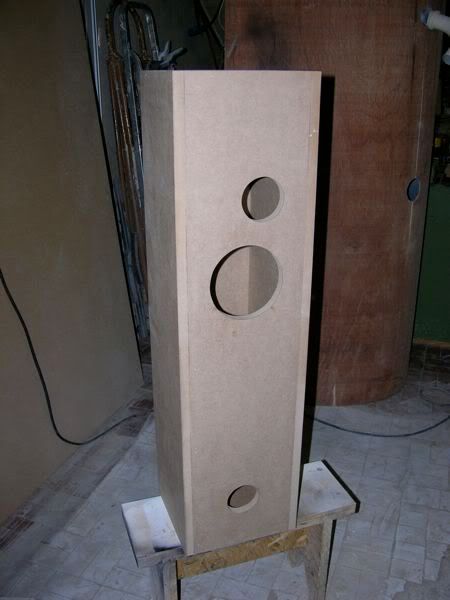
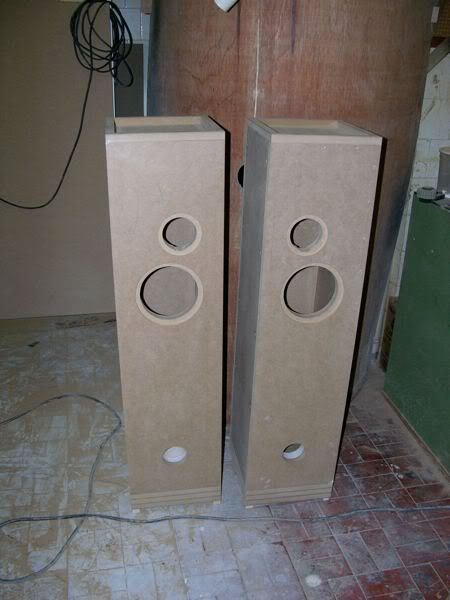
Hello guys!
I'm glad to announce that the project is moving... I know that it's not moving faster than an old snail 😉 But I've been traveling a lot. Sorry...
Let me cut the crap and go straight to the photos 🙂
I'll keep you all posted.
Regards!
I'm glad to announce that the project is moving... I know that it's not moving faster than an old snail 😉 But I've been traveling a lot. Sorry...
Let me cut the crap and go straight to the photos 🙂
I'll keep you all posted.
Regards!
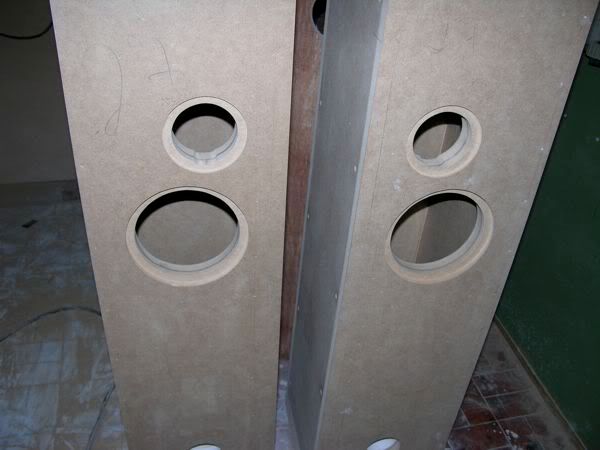
Looking at the last picture, it looks like you might not have champhered out the back of the driver cutout.
dave
dave
planet10 said:Looking at the last picture, it looks like you might not have champhered out the back of the driver cutout.
dave
Hi Dave!
You're right! I haven't. The guy who is doing all the wood work doesn't have the right tool though I decided to round it instead.
Yeah! I know, it's not the ideal! But I hope it works.
I'll keep you posted.
Regards,
Just curious how heavy is each cabinet with double thickness?
Can one person carry it? I guess not.
Can one person carry it? I guess not.
Mutuano said:The guy who is doing all the wood work doesn't have the right tool though I decided to round it instead.
A big semi-round rasp will work just fine....
dave
Hi guys!
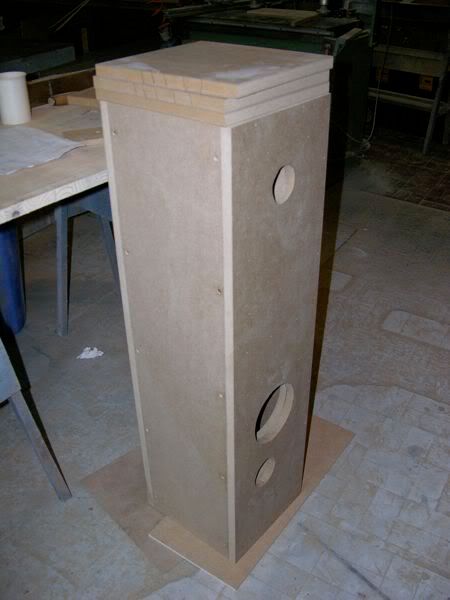
After a long and dark winter 😉 Finally I've got time to go into this project and it's almost finished.
Now I'm through the final adjustment and tunning. I decided to name it as Chorinho. Chorinho is the first original Brasilian musical genre and its origins are in 19th century. According to some experts Chorinho is very similar to Jazz where players “talk” to each other. Basically Chorinho is played using cavaquinho, flute, 7 strings guitar, bandolin and pandeiro.
Below some photos.
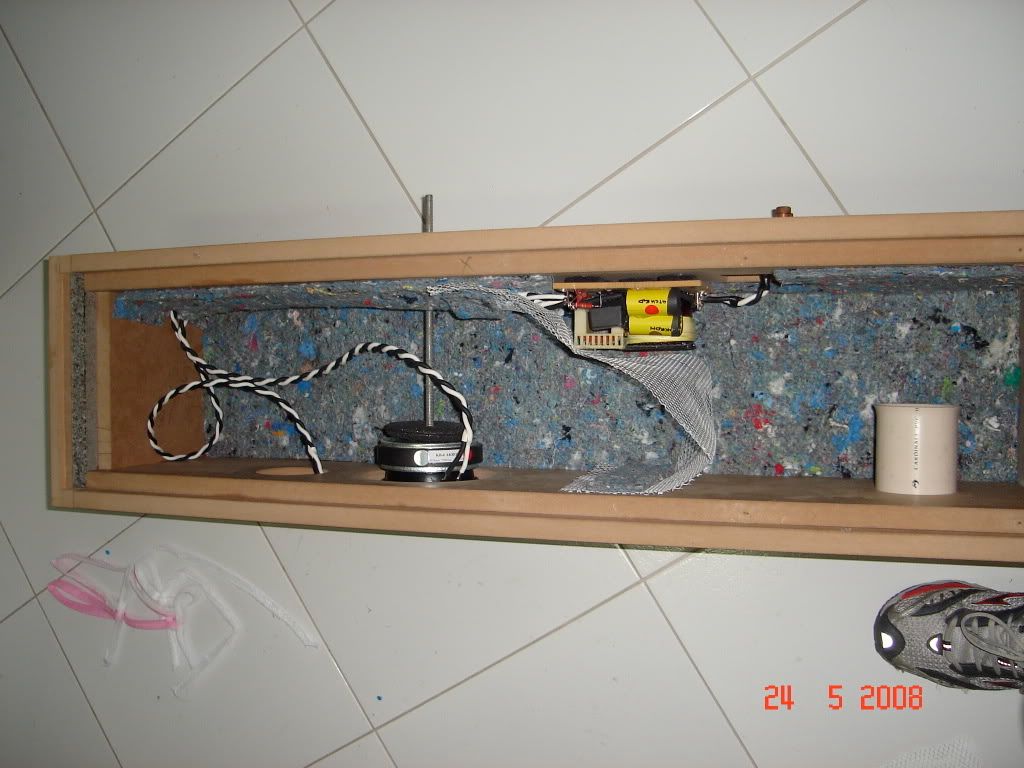
A pic from the left cabinet:
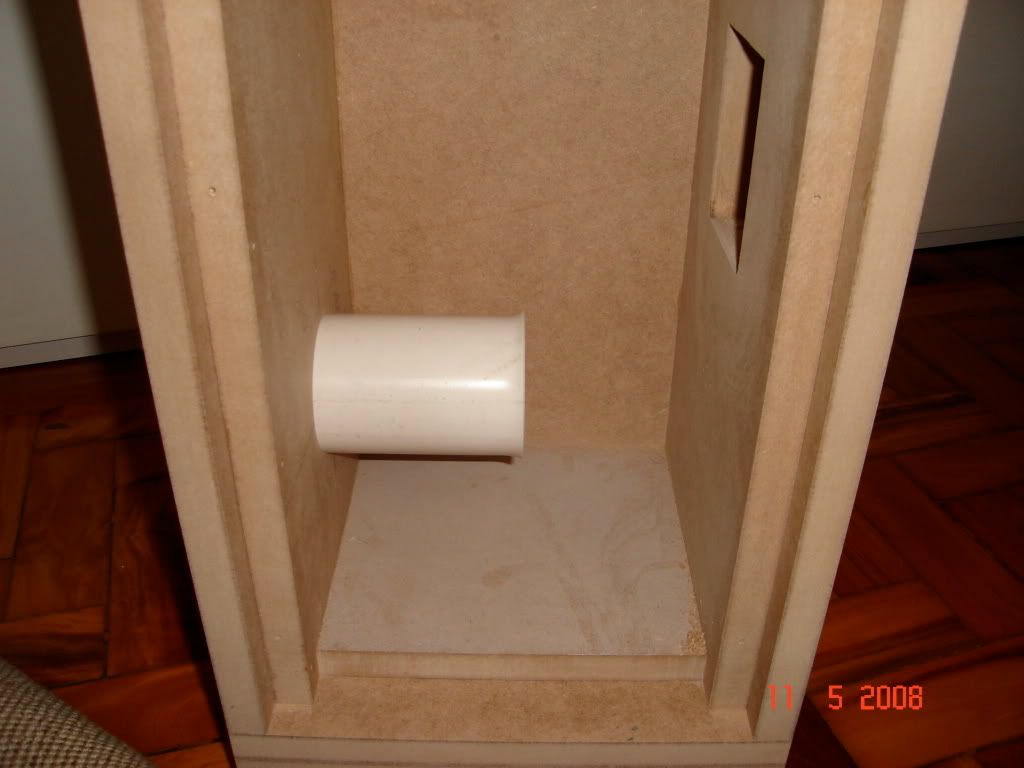
A close from the port:
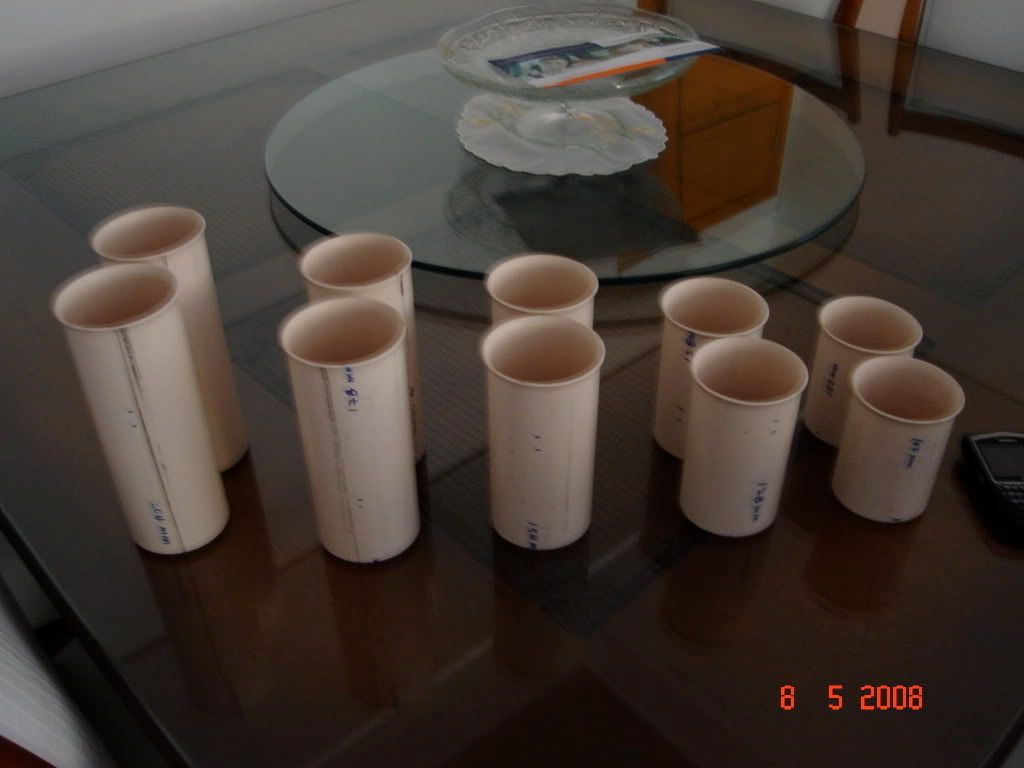
Different sizes from the port:
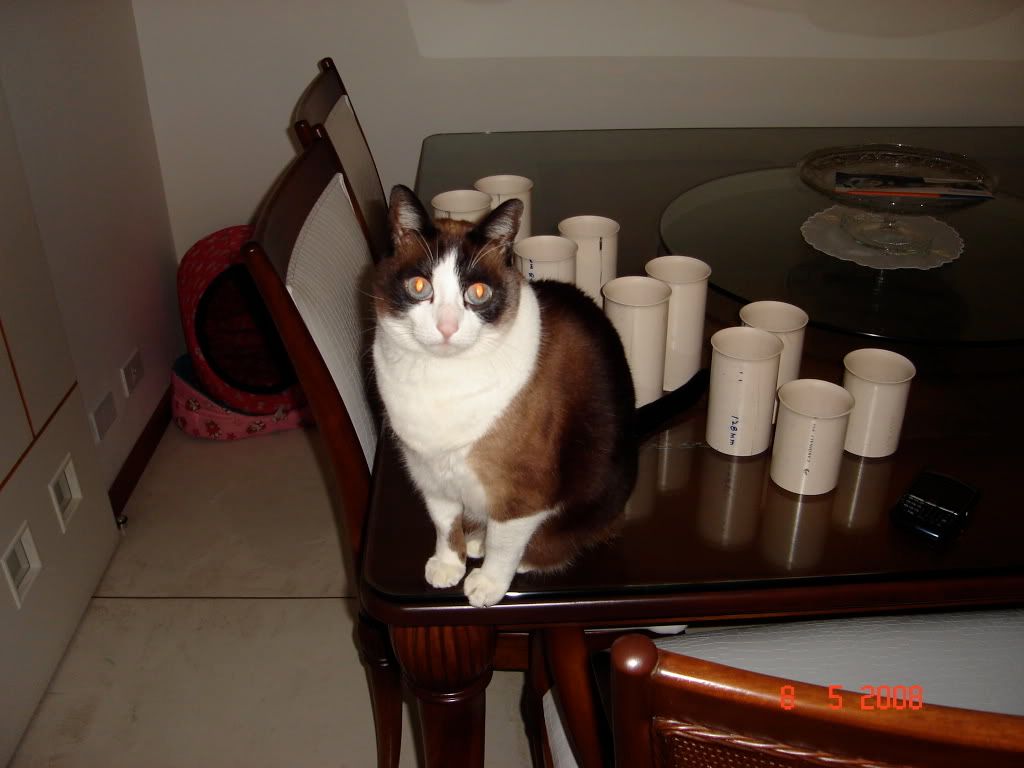
The port guardian 🙂
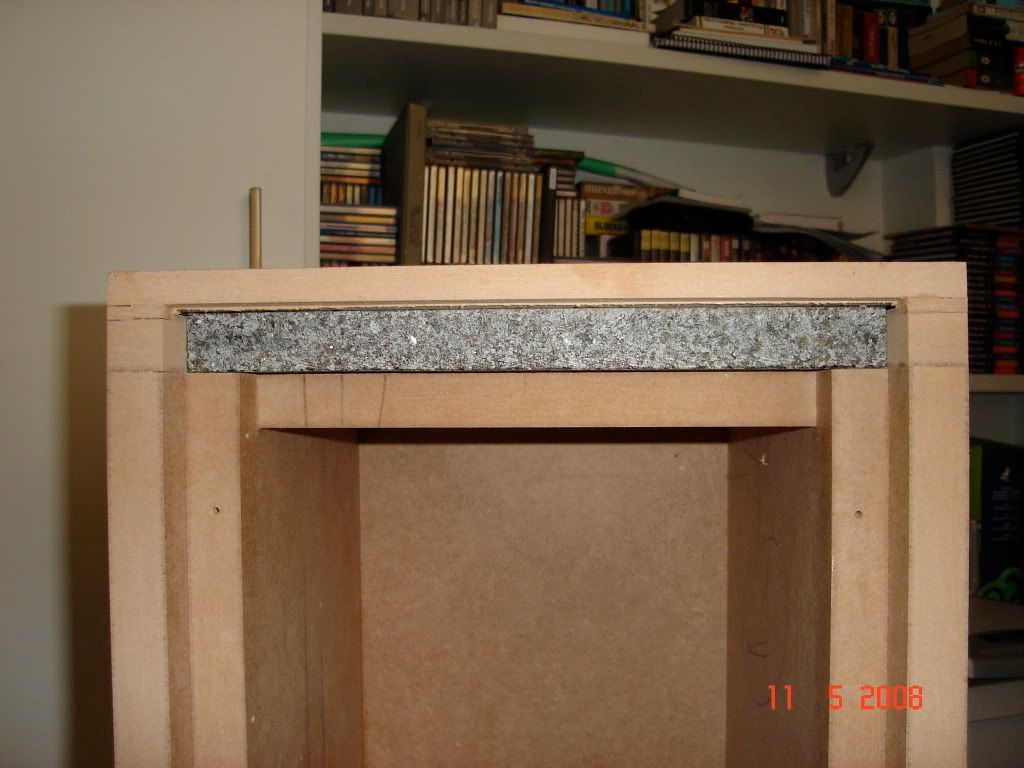
A close from the "brain":
Glueing the dumping material:
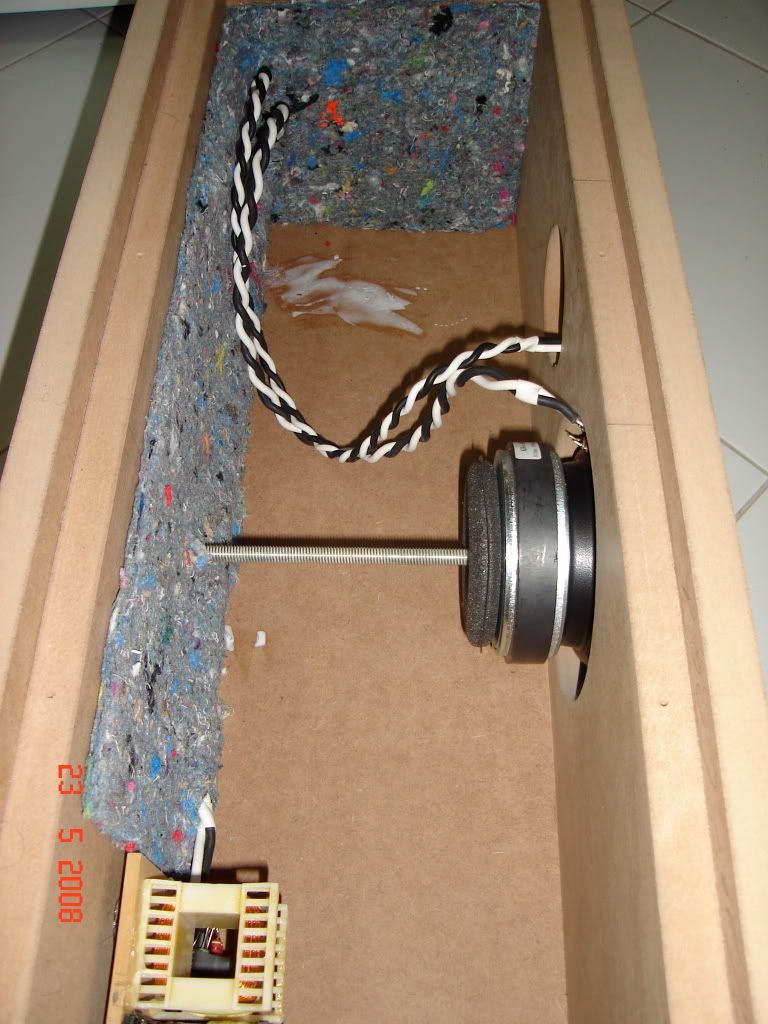
Before stuffing the cabinet:
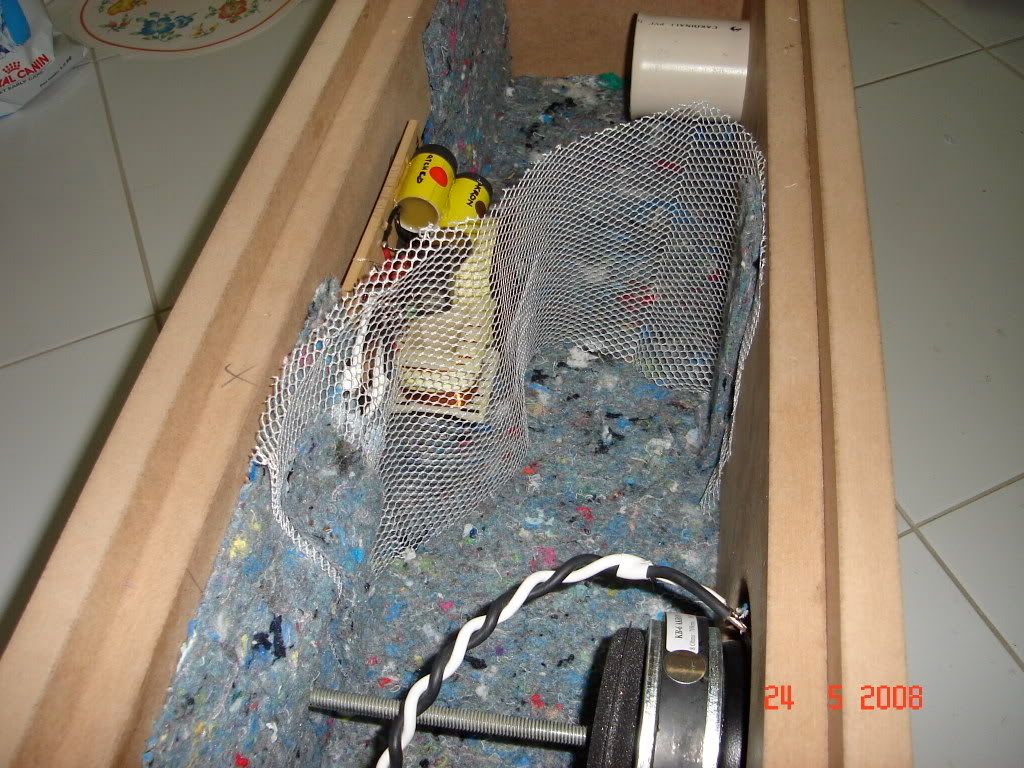
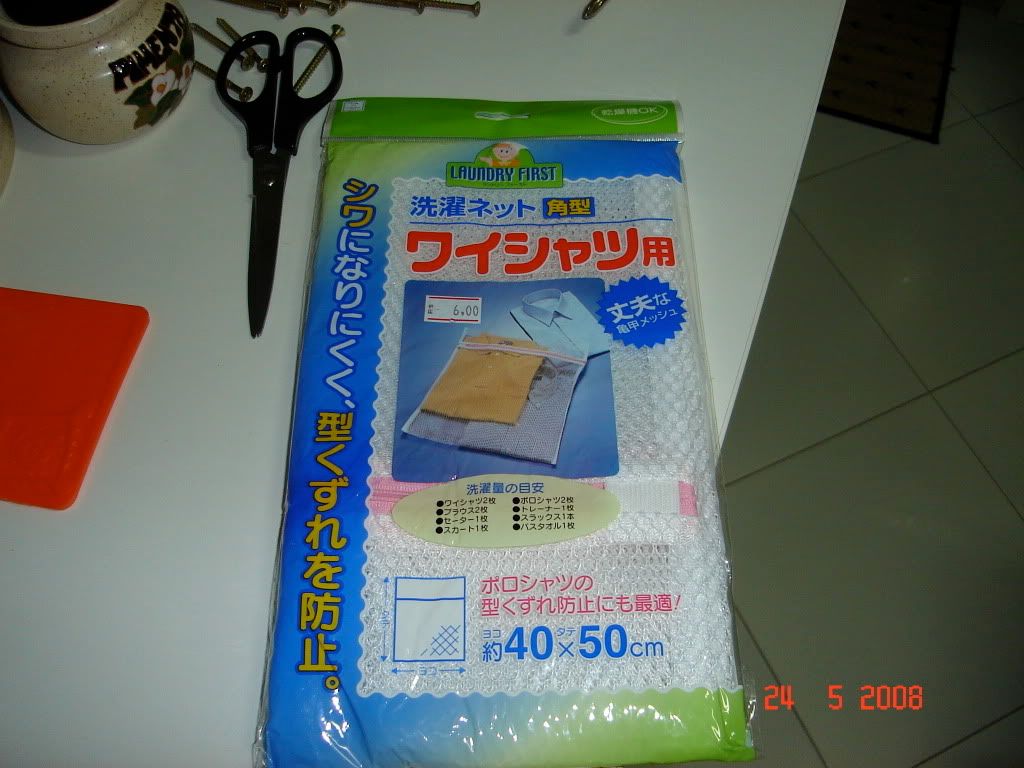
The "secret" for holding the acoustical fiberglass:
Ready for stuffing:
BTW it's weighting 38kg each...
I'll keep you posted.
[]'s
Mutuano
After a long and dark winter 😉 Finally I've got time to go into this project and it's almost finished.
Now I'm through the final adjustment and tunning. I decided to name it as Chorinho. Chorinho is the first original Brasilian musical genre and its origins are in 19th century. According to some experts Chorinho is very similar to Jazz where players “talk” to each other. Basically Chorinho is played using cavaquinho, flute, 7 strings guitar, bandolin and pandeiro.
Below some photos.
A pic from the left cabinet:
A close from the port:
Different sizes from the port:
The port guardian 🙂
A close from the "brain":
Glueing the dumping material:
Before stuffing the cabinet:
The "secret" for holding the acoustical fiberglass:
Ready for stuffing:
BTW it's weighting 38kg each...
I'll keep you posted.
[]'s
Mutuano
- Status
- Not open for further replies.
- Home
- Loudspeakers
- Multi-Way
- Need some help for designing a MLTL