
I faced similar problem with my NAD C352, balance pot was the culprit. Try removing pre-power link from the backside and use it as a power amp (CAUTION -very loud as vol. control is bypassed!) to isolate the issue. This will help to point the problem in either the preamp (input selectors, tone control pot or defeat switch, bal. ,preamp modules ) or power amp section (bad solder or output relay issues)My C372 gradually looses volume in the right channel after some playing
it is tricky . I was almost sure it was problem with my right speaker, but no. Yesterday the phenomenon occured , so I again quickly swapped left to right speakers and I am sure they are not the problem. The same is with headphones. It will need more careful measuring....
ok , running only power amp , measured 213mV DC with speaker connected in channel R (and 224mV with 4ohm speaker disconnected), channel L 2mV
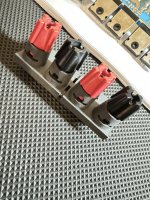
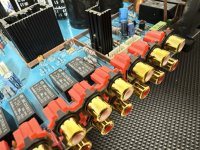
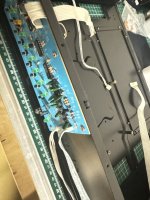
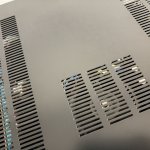
Just replaced all the RCA plugs on the main board. It’s really a great board to work on and well built. Some of the traces are a bit undersized but all in all this is quite an easy board to work on. I’ve replaced all the power caps as well but need to wait for the rest to arrive before I can move it forward again… 🙂
Attachments
problem with fading R channel was with cable coming into port CB403 , yet another question , the power rails voltage should be +-64V , however I have only +-51V, isc can be brought to approx 65mV and the pot ends,

Sockets perhaps?Just replaced all the RCA plugs on the main board.
What was the goal of this excercise?
Yes, sockets, sorry bad terminology! The other ones were a bit damaged, so with the board our already, I wanted to replace things that were likely to have issues in future… I’m basically trying to refresh anything that had rust on it, anything damaged, the electrolytic caps and any loose resistors.Sockets perhaps?
What was the goal of this excercise?
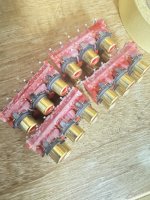
These are the old sockets with some kind of weird damage to the plastic:
Attachments
Last edited:
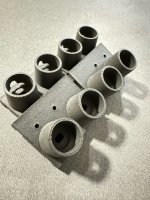
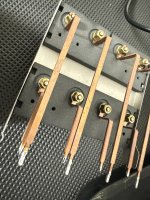
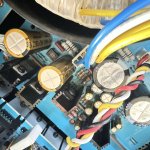
Some more progress photos showing the burned and repaired trace that connects to one of the bridge rectifiers. Hopefully I have sized the wire correctly at 1.0mm! Also blasted and then nickel plated the speaker terminal backing plate and a couple of minor things… 🙂
Attachments


Finally finished the repair today and wow, what a beautiful sounding amp now that it’s been completely refreshed. It’s got a real nice clean and clear sound and the onboard preamp is super quiet. The new high powered resistors are getting a little warm, but hopefully it will all settle in. Really glad I’ve got this as a spare now, I think I’ll get some good use out of this now. 🙂
Attachments


Hello, I am new to the forum
. I would like to upgrade my amplifier nad c316bee . An engineer advised me to changing the input buffer input transistors from NPN to a J-Fet (J112 or 2SK246). Is there a noticeable difference? Where is it located on the board?

. I would like to upgrade my amplifier nad c316bee . An engineer advised me to changing the input buffer input transistors from NPN to a J-Fet (J112 or 2SK246). Is there a noticeable difference? Where is it located on the board?
Nad usually has class A input modules that already use jfet for input buffer 2sk369 I think is part number they used and 2sk170 I may be wrong but I have seen this in majority of C series integrated amplifiers made since 2000 they feed a set made of 2sb649 2sd669 the best place on those to spend your hard earned money is replace the cheap ceramic capacitors on module with c0g np0 monolithic ceramics that will reduce variation that comes as amp warms up they keep value constant which improves stability. Next would be get rid of entry level polyester film caps 63 volt rated put in 100 volt rated wima or vishay roderstein polypropylene caps there is 4 0.1 uf film caps 8n each module I think 4 100 pf ceramics and 1 33pf and 2 22pf this is from memory double check the input section in service manual print. Ceramics are known issue in most of c series I had some that were WAY OUT OF SPEC. Keep old parts check caps with LCR meter this will give u an idea of how components in rest of amp are u can get 1kv monolithic c0g from digikey for about 50 cents each I used the Murata ceramics with great results Good luck.on your Quest
Thank you, Mr. Michel.
I understand that they are already using jfeT and replacing the ceramic capacitors.
I understand that they are already using jfeT and replacing the ceramic capacitors.
- Home
- Amplifiers
- Solid State
- NAD C372 Repair and Upgrade