Long Overdue SE Build need help troubleshooting
So this is about 10 years in the making. This was a 2A3 that is about 10 years old.
Edcore Power
Electraprint TM3Kb outputs
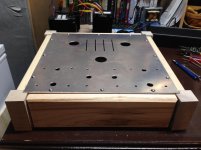
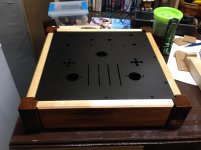
Maple/Walnut base
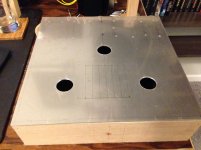
Aluminum top plate
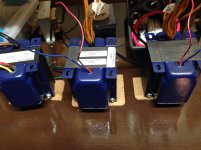
The wife picked out the blue color for me on the trannies. Hoping to have this done in a couple months.
Painted w/spay cans.
Thanks,
Jeremy
So this is about 10 years in the making. This was a 2A3 that is about 10 years old.
Edcore Power
Electraprint TM3Kb outputs
Maple/Walnut base
Aluminum top plate
The wife picked out the blue color for me on the trannies. Hoping to have this done in a couple months.
Painted w/spay cans.
Thanks,
Jeremy
Attachments
-
 IMG_1339.jpg617.4 KB · Views: 407
 -
 IMG_1194.jpg667.8 KB · Views: 190
 -
 IMG_1193.jpg500.8 KB · Views: 390
 -
 IMG_1192.jpg547.9 KB · Views: 396
 -
 IMG_0391.jpg504.9 KB · Views: 396
 -
 IMG_0275.jpg706.5 KB · Views: 413
 -
 IMG_1198.jpg546.9 KB · Views: 180
 -
 IMG_1247.jpg454.8 KB · Views: 143
 -
 IMG_1248.jpg469 KB · Views: 170
Last edited:
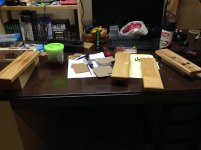
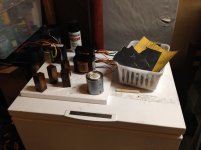
More pics....
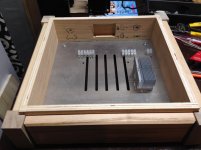
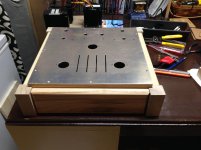
Need to attach, fine sand and rub the mirror finish on the base.
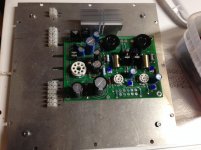
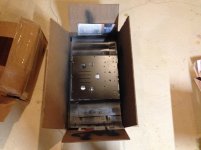
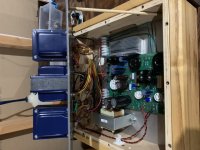
Install the board
run my wires and wire the jumpers.
I am running jumpers to the main top plate since I want the rectifier and 300B tubes mounted to the top plate.
Need to attach, fine sand and rub the mirror finish on the base.
Install the board
run my wires and wire the jumpers.
I am running jumpers to the main top plate since I want the rectifier and 300B tubes mounted to the top plate.
Attachments
I am looking forward to more pictures and descriptions of your build. I am in the process of building one myself and would like some ideas on how to make the board integrate into a nice a case. Looking good so far.


So after 2 years I started work on this again. 1st step is refreshing my memory and my notes on where I left off. I’m almost ready for initial checkout.
Coming soon!
moto x3m
An externally hosted image should be here but it was not working when we last tested it.
moto x3m
Thanks for the kind words.
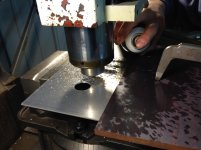
We did use a mill for the vertical lines on the top plate.
Everything else was done by hand and hole punches.
We did use a mill for the vertical lines on the top plate.
Everything else was done by hand and hole punches.
Made some progress a year later.
Working to finish the tranny wiring.
View attachment 715878
View attachment 715879
View attachment 715880
Nice looking layout. Please finish it.
Thanks for the comments. I’m actually planning to get it done. It has been hanging over my head for almost 15 years when it started life as a 2A3.
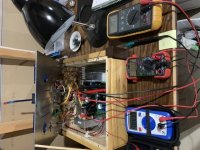
It’s alive!
First power up specs no tubes.
B- @260v
B+ @ .69v
Filament @4.98v
Slight hum in the chassis but at least no smoke.
First power up specs no tubes.
B- @260v
B+ @ .69v
Filament @4.98v
Slight hum in the chassis but at least no smoke.
Attachments
Last edited:
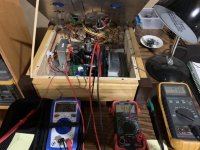
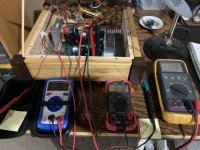
No 5842 installed:
B+ 445v
R/L channel coupling cap 138v
5842 installed
B+ 445v
R/L coupling cap 10v no change using the potentiometer.
Any ideas why voltage is low and won’t change?
B+ 445v
R/L channel coupling cap 138v
5842 installed
B+ 445v
R/L coupling cap 10v no change using the potentiometer.
Any ideas why voltage is low and won’t change?

- Home
- More Vendors...
- Tubelab
- Long Overdue SE Build