Potentiometer resistor track differences are the usual suspect.Just measured gain of all channels in rb-976MK2. For most channels imbalance is about 0.1-0.2dB but for one channel difference if closer to 1dB. Who is to blame for it? Feedback resistors?
Even when pot is on maximum? It should not be a difference as this is resistance to ground only then, but I'll check that to be 100% sure.
The potentiometer shaft and knob may be at maximum - but is the wiper inside? Is it (or other contacts) clean?
To set your mind at ease you probably have to measure the signal from the input through each stage to see what part of the amp causes the difference.
To set your mind at ease you probably have to measure the signal from the input through each stage to see what part of the amp causes the difference.
That's pretty heathern isn't it - max channel mismatch of 1.6dB worst case, probably < 1dB in practice, but who uses anything but 1% or better these days in analog? Its not like 1% costs much more and resistors are not even 1% of the cost of an amp anyway...Many units use 5% resistors for feedback as well, so there will be some variance.
Hi Mark,
Quality 1% resistors should be used, you can get garbage easily enough. Tempco matters as well as voltage coefficient. In practice, 5% carbon film resistors are what you would expect to see. Marantz often used 2% back in the 70's and early 80's (before Philips). That was on better product, and many measured reasonably close channel to channel.
Don't forget, it isn't the cost of 1 - 1% resistor. It's the entire production volume x # of channels. Accountants won't allow good parts these days unless the equipment is expensive. Surface mount is often worse.
Hi AngelP,
Most pots when maxed are on the metallic end, they have some extra area to ensure both wipers are on the metallic portion. When measuring gain, one assumes full volume or direct amplifier input. Volume controls can have over 2 dB mistracking even 1/3 the way up.
Hi AngelP,
Most pots when maxed are on the metallic end, they have some extra area to ensure both wipers are on the metallic portion. When measuring gain, one assumes full volume or direct amplifier input. Volume controls can have over 2 dB mistracking even 1/3 the way up.
He he Chris, you seem to have a recommendable belief in the screen printing perfection of cheap commercial pots. I admire that - but I don't quite share it.
I was once a material consultant in this area and saw first hand the range of problems these companies faced - particularly making log pot tracks.
Maybe these days the materials and production quality control has improved, I don't know, but still - as the pot ages, the wiper can smudge the end silver with carbon, in addition to the dust/dirt buildup. And you can get funny results - not just the >2dB mistracking as you rightfully point out.
Which is why no one really shouldn't lose any sleep over a 1dB variation between channels - you would need a sharp ear to pick that out in the soundstage.
I agree, massive tracking problems even with linear controls. But the ends have a longer zone where both wipers will be on the metallic end. At the low end, tracking is generally universally horrible. That's what a -20dB mute switch is for, most people don't know that.
I have no confidence in level controls, but up in the normal listening range most folks would never really notice the difference. Differing speaker efficiency between the pair and rooms will cause higher variations some times.
I have no confidence in level controls, but up in the normal listening range most folks would never really notice the difference. Differing speaker efficiency between the pair and rooms will cause higher variations some times.
In stereo probably not. I use it with digital crossover for 3w spreaker. Each driver is using own amp/channel. Additionally I have two different midrange drivers which I can switch between on fly and there is a slight drift of sound stage when switching from one to other. I want to only hear difference caused by different driver/horn and not by amp . Also sound balance changes slightly when at some point (while switching) mid range driver is 1db hotter or colder to tweeter.Which is why no one really shouldn't lose any sleep over a 1dB variation between channels - you would need a sharp ear to pick that out in the soundstage.
I already modified 2 of 6 channels. For those I replaced feedback and input resistors with Dale RD60 1%. For those two imbalance is 0,15dB which is fine.
Hi there, back at it again sorry to say.
An experiment with a new interconnect didn’t work out fine so one of the amps blew both fuses on one of the channels and I was afraid of what also could happen.
Outputtrannies measured dead, 😡.
So I contacted Per for assistance and in between strolled the DIYAUDIO threads for more on the RB-991, you never know, do you.....
Then I stumbled on this: https://www.diyaudio.com/community/threads/rotel-rb-991-clicking-popping.317603/
With some very interesting points of view and a clever way to solve problems, reverse engineering.
This thread was put under the attention of Per to be scrutinized.
Anyway, the damage to the busted channel was not extensive, just 1 NPN and 1 PNP were broken.
Time to order new parts with some upgrades mentioned in the other thread and okayed by Per the partslist became longer.
Anyway, I let you see what I did with the help of some photo’s
It occurred that the mains filter wasn’t there where it should be, even worse, it was totally absent.
So a new mains entry with filter was ordered and I shielded the mainswires that went from back to front.
The stock setup is puzzling to say the least.....from back to front, back again en then to the front.
All these wires (4) run very close beside the left channel....

Stock setup, mains going back and forth and over again.......powerfilter components missing on pcb on the right......

New parts for the mains setup.....missing here is a small piece of copperfoil.....

Filtered and shielded mains without the long fuse wires......
Then an upgrade from Per himself, new matched LTP’s with EDR’s and 2 resistors, this package for both amps arrived in februari ’23 so it was about time I did this.
As the amp already was taken apart the time lost was minimal.
He’d already did this upgrade on a RB-991 for a customer in the UK and was impressed what it did with the amplifier.

Stock LTP setup left channel......

Left stock LTP, right Per's matched LTP with EDR's.....


2 resistors and 2 pairs of the new LTP's mounted.....
I also mounted 40 x 22r resistors on the base of the both amplifiers 40 output transistors, a fiddly job but in the end it looks like a line of soldiers

Before......

After......

Before.......

After....
After careful reassembling the amplifiers it was time to hook them up to the mains and switch them on.
A very scary moment for me every time, it gives me sweaty hands and my heart rate is up....the 6,3A fuses are changed for 0.5A fuses and bias set to 0.
Carefull warmup and then slowly building up the bias to the prefered value of 7mV
If everything is fine I replace fuses for stock value and close the hood.
After 2 days it was very clear that the heart of these beast were definitely changed.........for the better I might ad.
Crisp, articulate and precise are a few words to describe what I notice....
Soundstage is more embracing, trying to fould around you, much more involving.
I hope Per will explain to you all what his new LTP's with EDR's do exactly.
Best,
Paulus 😉
An experiment with a new interconnect didn’t work out fine so one of the amps blew both fuses on one of the channels and I was afraid of what also could happen.
Outputtrannies measured dead, 😡.
So I contacted Per for assistance and in between strolled the DIYAUDIO threads for more on the RB-991, you never know, do you.....
Then I stumbled on this: https://www.diyaudio.com/community/threads/rotel-rb-991-clicking-popping.317603/
With some very interesting points of view and a clever way to solve problems, reverse engineering.
This thread was put under the attention of Per to be scrutinized.
Anyway, the damage to the busted channel was not extensive, just 1 NPN and 1 PNP were broken.
Time to order new parts with some upgrades mentioned in the other thread and okayed by Per the partslist became longer.
Anyway, I let you see what I did with the help of some photo’s
It occurred that the mains filter wasn’t there where it should be, even worse, it was totally absent.
So a new mains entry with filter was ordered and I shielded the mainswires that went from back to front.
The stock setup is puzzling to say the least.....from back to front, back again en then to the front.
All these wires (4) run very close beside the left channel....
Stock setup, mains going back and forth and over again.......powerfilter components missing on pcb on the right......
New parts for the mains setup.....missing here is a small piece of copperfoil.....
Filtered and shielded mains without the long fuse wires......
Then an upgrade from Per himself, new matched LTP’s with EDR’s and 2 resistors, this package for both amps arrived in februari ’23 so it was about time I did this.
As the amp already was taken apart the time lost was minimal.
He’d already did this upgrade on a RB-991 for a customer in the UK and was impressed what it did with the amplifier.
Stock LTP setup left channel......
Left stock LTP, right Per's matched LTP with EDR's.....
2 resistors and 2 pairs of the new LTP's mounted.....
I also mounted 40 x 22r resistors on the base of the both amplifiers 40 output transistors, a fiddly job but in the end it looks like a line of soldiers
Before......
After......
Before.......
After....
After careful reassembling the amplifiers it was time to hook them up to the mains and switch them on.
A very scary moment for me every time, it gives me sweaty hands and my heart rate is up....the 6,3A fuses are changed for 0.5A fuses and bias set to 0.
Carefull warmup and then slowly building up the bias to the prefered value of 7mV
If everything is fine I replace fuses for stock value and close the hood.
After 2 days it was very clear that the heart of these beast were definitely changed.........for the better I might ad.
Crisp, articulate and precise are a few words to describe what I notice....
Soundstage is more embracing, trying to fould around you, much more involving.
I hope Per will explain to you all what his new LTP's with EDR's do exactly.
Best,
Paulus 😉

Q: Should I be concerned of a dust-attracting film coating the PCB from the unit described below? Suggestions for cleaning solution? Thanks in advance
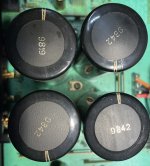
Took a quick peek & a couple of pics from “under the hood” of a 981 purchase. One eye-catcher: one of the PS filtering caps has a different number compared to the others. I plan to replace per Smartdriver’s (SD) lead in due course anyway.
Side note 1: I plan to make this unit my first attempt to resto-mod under Per’s guidance and some of SD’s success w/his 991s.
Side note 2: The unit was originally European. Previous owner moved to USA & had it modified accordingly. The tech also installed an IEC to allow removable power cords - one less thing for me to do.
Attachments
Hi there gp4Jesus,
I use this;
Isopropyl alcohol (IPA): This is a common solvent used for cleaning PCBs. It is effective in removing flux residues and other contaminants, and it evaporates quickly without leaving residue.
When I look at the task at hand, do this in a wel vented area 😉
Best,
Paulus
I use this;
Isopropyl alcohol (IPA): This is a common solvent used for cleaning PCBs. It is effective in removing flux residues and other contaminants, and it evaporates quickly without leaving residue.
When I look at the task at hand, do this in a wel vented area 😉
Best,
Paulus
Some cleaners can wick up into electrolytic capacitors and some older transistors. Failure comes later on. So use a minimal amount of fluid after you get rid of loose dust as Per suggested. An Aqueous solution is better. Never, ever clean where you have trimmer capacitors, some relays (take them off) and some trimmer controls. Fluid under ICs can be a nightmare too.
Once fluid gets into a small space, time and heat are required to remove it. Trimmer capacitors may be ruined for years, and it will destroy any alignment until completely dry.
Once fluid gets into a small space, time and heat are required to remove it. Trimmer capacitors may be ruined for years, and it will destroy any alignment until completely dry.
IPA is quite safe though, evaporates quickly without leaving any residue. And it is relatively cheap.
However, it can sometimes struggle cleaning off very old baked on/crusted flux or other goop.
And of course ensure some ventilation during use.
However, it can sometimes struggle cleaning off very old baked on/crusted flux or other goop.
And of course ensure some ventilation during use.
The problem is ... IPA is not always safe Per. If any fluid wicks up into a capacitor or transistor (or anything else), damage done. Evaporation can take a long time depending on where it went. In a capacitor seal, eventually you're going to have trouble. Up a transistor leg, I know of a recording console where fluid wicked up into many transistors and caps forcing a rebuild of the entire thing (a Neve).
It was believed to be a safe procedure.
When we clean test equipment, all fluids are carefully controlled as to where they end up. In tuners, any fluid can be very bad news if it gets where you don't want it to. I clean tuners all the time - carefully.
It was believed to be a safe procedure.
When we clean test equipment, all fluids are carefully controlled as to where they end up. In tuners, any fluid can be very bad news if it gets where you don't want it to. I clean tuners all the time - carefully.
On market there are products called IPA cleaner for electronics that are not always 99,99% IPA alcohol but with some additions. So better is to check the label before buying.IPA is quite safe though
Hi all,
I have often been asked why I chose Rotels for this thread and do upgrades on.🤔
Well, firstly even in stock condition they sound very nice and do actually compete way beyond their price tag compared to many upper range amps. Hence their huge popularity over the years.
Secondly, I find these relatively inexpensive entry/mid range amps very well built which makes them much easier to work on. And to enable modifications to look organised and professional without oversized component eyesores or rats-nest airwiring.
Ok, some people think that the Rotels are a bit too 'black and discrete' - which I personally like, but I admit that perhaps they could be cosmetically upgraded too. 'Blinged up' a bit if you like - or just given a more 'exclusive' appearance.
The single thing that looks 'cheap' on these amps, IMHO, are the plastic end bungs of the front plate.
So, I removed them on the RA-820BX3 and cut out pieces of dense rosewood, trying to get the look of high end amps of the 70'ies era.
(Note that these pics were taken before sanding, rounding and waxing of the end bits.)


Actually these pictures do not give full justice to the actual appearance - it really works for the amp and definitely ups the 'perceived quality' to match the audible improvements inside.
And all without breaking the bank - just a bit of time and woodworking effort.
The result isn't half bad, no?
Anyway, please let me wish all readers here a Merry Christmas🎄 and a Happy diyAudio New Year🎆
Ho, ho ho....
Per
AngelP@angelhorns.co.uk
I have often been asked why I chose Rotels for this thread and do upgrades on.🤔
Well, firstly even in stock condition they sound very nice and do actually compete way beyond their price tag compared to many upper range amps. Hence their huge popularity over the years.
Secondly, I find these relatively inexpensive entry/mid range amps very well built which makes them much easier to work on. And to enable modifications to look organised and professional without oversized component eyesores or rats-nest airwiring.
Ok, some people think that the Rotels are a bit too 'black and discrete' - which I personally like, but I admit that perhaps they could be cosmetically upgraded too. 'Blinged up' a bit if you like - or just given a more 'exclusive' appearance.
The single thing that looks 'cheap' on these amps, IMHO, are the plastic end bungs of the front plate.
So, I removed them on the RA-820BX3 and cut out pieces of dense rosewood, trying to get the look of high end amps of the 70'ies era.
(Note that these pics were taken before sanding, rounding and waxing of the end bits.)
Actually these pictures do not give full justice to the actual appearance - it really works for the amp and definitely ups the 'perceived quality' to match the audible improvements inside.
And all without breaking the bank - just a bit of time and woodworking effort.
The result isn't half bad, no?
Anyway, please let me wish all readers here a Merry Christmas🎄 and a Happy diyAudio New Year🎆
Ho, ho ho....
Per
AngelP@angelhorns.co.uk
Last edited:
- Home
- Amplifiers
- Solid State
- Improve a Rotel amp THD by 20dB!