This was the second "group-build".
After Fostex changed the parameters of the FE166 , I had to do some changes in my design as wel.
The first group build ended with everybody using the fostex FT17H as a helper tweeter.
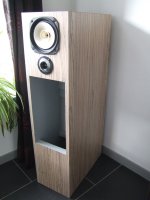
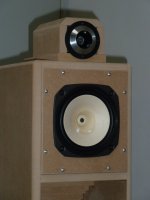
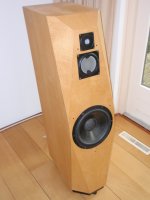
So for the second group we decided to integrate the tweeter in th front baffle.
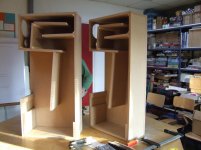
First pics ; Marco did, together with my brother in law, a great veneer job!!
and a pic if the first series, with "putt on tweeter".
After Fostex changed the parameters of the FE166 , I had to do some changes in my design as wel.
The first group build ended with everybody using the fostex FT17H as a helper tweeter.
So for the second group we decided to integrate the tweeter in th front baffle.
First pics ; Marco did, together with my brother in law, a great veneer job!!
and a pic if the first series, with "putt on tweeter".
Attachments

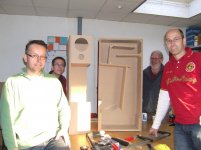
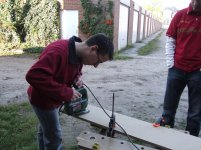
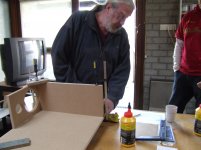
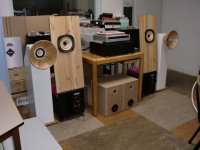
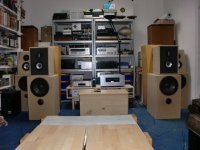
Time to introduce the builders: from left to right
Carlo , Marco , Leon (with beard) and Frank.
They had never build anything before!!
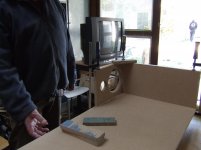
Everybody is very pleased with the results and is starting to improve their electronics.
I take 3 full saturdays to complete the job.
First saturday we do our own flatpacks and the first part of the build for one set of speakers.
Everyone else takes his pack home and does the same at home.
They have about 3 weeks for holding up to the same point.
Second saturday we continue with the second set of speakers.
So I can check upon the job the second person has done.
If there are some points unclear , then we use e-mail and digital camera's to correct each other.
I always aim that on each saturday a difficult thing can be done at my place.
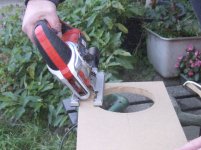
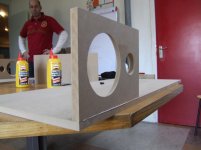
Some pics of the first day ; starting with the baffle openings!!
Carlo , Marco , Leon (with beard) and Frank.
They had never build anything before!!
Everybody is very pleased with the results and is starting to improve their electronics.
I take 3 full saturdays to complete the job.
First saturday we do our own flatpacks and the first part of the build for one set of speakers.
Everyone else takes his pack home and does the same at home.
They have about 3 weeks for holding up to the same point.
Second saturday we continue with the second set of speakers.
So I can check upon the job the second person has done.
If there are some points unclear , then we use e-mail and digital camera's to correct each other.
I always aim that on each saturday a difficult thing can be done at my place.
Some pics of the first day ; starting with the baffle openings!!
Attachments
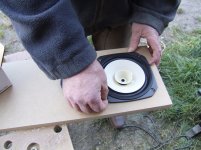
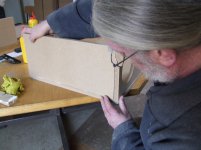
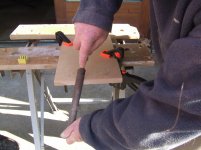
I'm in a lot of the pics because Marco took them.
I do one speaker , so they can watch the proces and then they do the other speaker.
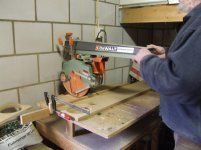
The use of clamps only takes 15 minutes!! for a corner.
The first corner is the most important ; check always several times for 90 degrees!!
Also recheck after clamps!!
So take your time , don't rush things!!
I do one speaker , so they can watch the proces and then they do the other speaker.
The use of clamps only takes 15 minutes!! for a corner.
The first corner is the most important ; check always several times for 90 degrees!!
Also recheck after clamps!!
So take your time , don't rush things!!
Attachments
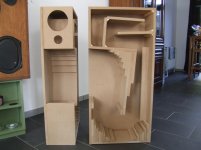
Now it's about time for the PDF-drawing.
When you study the drawing you can see a difficult angle under the front baffle!!
It is the only angle to be precize!!
all the others are 90 defrees.
I shall try to explain the next steps as good as I can!!
This in combination with more pics.
When you study the drawing you can see a difficult angle under the front baffle!!
It is the only angle to be precize!!
all the others are 90 defrees.
I shall try to explain the next steps as good as I can!!
This in combination with more pics.
Attachments
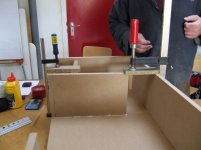
First draw some helping lines with a pencil.
Then start rasping until everything fits as good as possible.
Use "closers" !! =
Triangular shaped hardwood pieces with 2 funktions :
1 Close the (slight) gapes with a lot of glue
2 support for airflow in the narrow piece of the horn
Time for dinner, back in about 2 hours!!
Shall I continue??
If nobody is interested .......it's a lot of work al them uploading......??
Attachments

Latest update on the drawing.
Some small adjustments.
And some more of the same.
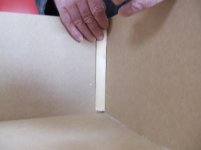
Pay attention to the "setting" of the top inner panel ; keep exact dimensions as in the drawing!!
This is the thraoth setting and important for the commpression ratio!!
Some small adjustments.
And some more of the same.
Pay attention to the "setting" of the top inner panel ; keep exact dimensions as in the drawing!!
This is the thraoth setting and important for the commpression ratio!!
Attachments
Hi! It works without fostex FT17H? There is no need sound-proofing? Some measurements are? I have a pair of fe166en, I want to build somethings with them. Victor is too big. This is very similar what I have now, a Buschhorn MKII. It's better to have the throat to the front? Thank you for the answers!
You can always start without the tweeter.
Add it if you feel the need for it.
This set of speakers has been build 8 times ; everybody is playing WITH the FT17's at this moment : large improvement!!
I didn't notice any interesse in thid build so I stopped posting.
I do have a lot more pics to help building them!!
Just let me know if and when you need them.
btw ; nobody ever complaint about the bass !!Plenty!! of it!!
They need a lot of "burn-in" about 200~~300 hours!!
We used some soft filling in and arround the whizzer for the first 200hrs.
Attachments
btw ; nobody ever complaint about the bass !!Plenty!! of it!!
Comparing to the official Fostex Recommended Back Loaded Horn Type Enclosure your Concerti looks much smarter.
Have you got any recorded frequency measurments ?
Yes, I also think it's smarter.
Took me several drawings to reach my target.
By placing just ONE panel different I succeded getting a hybrid horn that was without parallel pieces.
The other differences are a result of HornResp and AJ-horn.
No, I don't have any measurements ; but I own , about 14 , different sets of loudspeakers to compare to.
This design is one of my best!!
I used the same cd's to voice them as for my "Eidoclone's" ; the midi concerti's hold up very wel!!
You can adjust the CC by adding some woodblocks inside by ear.
Attachments
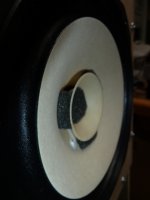
wired in the tweeter
Hey Leon, thanks for the build thread. I had a look at the PDF and cannot quite understand how you wired in the tweeter?
Hey Leon, thanks for the build thread. I had a look at the PDF and cannot quite understand how you wired in the tweeter?
the tweeter is in series with a C ; 0,82 -2,2 uF and then parallel to the Fr.
add an R ; 1 - 2.2 ohms in series to the C to adjust the level of highs ; is room dependent.
At this moment , after burn-in , everyone uses only 2,2 uF.
add an R ; 1 - 2.2 ohms in series to the C to adjust the level of highs ; is room dependent.
At this moment , after burn-in , everyone uses only 2,2 uF.
- Status
- Not open for further replies.
- Home
- Loudspeakers
- Full Range
- FE166En+FT17H "Concerti clone" (lots of pics!!)