Enabel'ed Selenium 8W4P filnally arrived.

Thanks a lot for this beautiful work, Bud !
Please forgive me, but first off, I was most curious how they sound.
Instead of hooking them to the amps, I thought I "audition" in a way I can share results more objectively - by tapping with a wooden stick.
For those not been following previous posts, this is *not* a before / after comparison. I already owned a pair and now I compare the untreated speakers (A, B) with the treated (C, D) ones.
The Selenium 8W4P I love due to its high Qms and its linen surround (cant stand rubber surround coloration) and use it in nude OB multi way configuration.
Below is how I did the recording setup.
You can watch the video clips and listen to its mono track, or you can listen to the stereo tracks I recorded simultaneousely with a Schneider disk and a pair of AKG 480B with CK 61-ULS capsules.
This is neither the equipment nor the place I usually use for measurements, but for the clip it was sort of as good as it gets.


I took two recordings of each driver - one with the Schneider disc perpendicular and one with the Schneider disc at 90 deg. Mic distance was roughly 35 cm to the middle of the disc in either setting, the wall was roughly 1m behind the speaker. Setting was kept untouched - only speakers were changed.
So all in all you have 4 clips in two settings each from two sources (camera and external mic) to listen to:
http://www.kinotechnik.edis.at/pages/diyaudio/enabl/Seleniu_8W4P-D_treated_perpend.AVI
http://www.kinotechnik.edis.at/pages/diyaudio/enabl/Seleniu_8W4P-D_treated_perpend-2.wav
http://www.kinotechnik.edis.at/pages/diyaudio/enabl/Seleniu_8W4P-D_treated_90deg.AVI
http://www.kinotechnik.edis.at/pages/diyaudio/enabl/Seleniu_8W4P-D_treated_90deg-2.wav
http://www.kinotechnik.edis.at/pages/diyaudio/enabl/Seleniu_8W4P-C_treated_perpend.AVI
http://www.kinotechnik.edis.at/pages/diyaudio/enabl/Seleniu_8W4P-C_treated_perpend-2.wav
http://www.kinotechnik.edis.at/pages/diyaudio/enabl/Seleniu_8W4P-C_treated_90deg.AVI
http://www.kinotechnik.edis.at/pages/diyaudio/enabl/Seleniu_8W4P-C_treated_90deg-2.wav
http://www.kinotechnik.edis.at/pages/diyaudio/enabl/Seleniu_8W4P-B_un-treated_perpend.AVI
http://www.kinotechnik.edis.at/pages/diyaudio/enabl/Seleniu_8W4P-B_un-treated_perpend-2.wav
http://www.kinotechnik.edis.at/pages/diyaudio/enabl/Seleniu_8W4P-B_un-treated_90deg.AVI
http://www.kinotechnik.edis.at/pages/diyaudio/enabl/Seleniu_8W4P-B_un-treated_90deg-2.wav
http://www.kinotechnik.edis.at/pages/diyaudio/enabl/Seleniu_8W4P-A_un-treated_perpend.AVI
http://www.kinotechnik.edis.at/pages/diyaudio/enabl/Seleniu_8W4P-A_un-treated_perpend-2.wav
http://www.kinotechnik.edis.at/pages/diyaudio/enabl/Seleniu_8W4P-A_un-treated_90deg.AVI
http://www.kinotechnik.edis.at/pages/diyaudio/enabl/Seleniu_8W4P-A_un-treated_90deg-2.wav
Hope you enjoy
🙂
Michael
Thanks a lot for this beautiful work, Bud !
Please forgive me, but first off, I was most curious how they sound.
Instead of hooking them to the amps, I thought I "audition" in a way I can share results more objectively - by tapping with a wooden stick.
For those not been following previous posts, this is *not* a before / after comparison. I already owned a pair and now I compare the untreated speakers (A, B) with the treated (C, D) ones.
The Selenium 8W4P I love due to its high Qms and its linen surround (cant stand rubber surround coloration) and use it in nude OB multi way configuration.
Below is how I did the recording setup.
You can watch the video clips and listen to its mono track, or you can listen to the stereo tracks I recorded simultaneousely with a Schneider disk and a pair of AKG 480B with CK 61-ULS capsules.
This is neither the equipment nor the place I usually use for measurements, but for the clip it was sort of as good as it gets.
I took two recordings of each driver - one with the Schneider disc perpendicular and one with the Schneider disc at 90 deg. Mic distance was roughly 35 cm to the middle of the disc in either setting, the wall was roughly 1m behind the speaker. Setting was kept untouched - only speakers were changed.
So all in all you have 4 clips in two settings each from two sources (camera and external mic) to listen to:
http://www.kinotechnik.edis.at/pages/diyaudio/enabl/Seleniu_8W4P-D_treated_perpend.AVI
http://www.kinotechnik.edis.at/pages/diyaudio/enabl/Seleniu_8W4P-D_treated_perpend-2.wav
http://www.kinotechnik.edis.at/pages/diyaudio/enabl/Seleniu_8W4P-D_treated_90deg.AVI
http://www.kinotechnik.edis.at/pages/diyaudio/enabl/Seleniu_8W4P-D_treated_90deg-2.wav
http://www.kinotechnik.edis.at/pages/diyaudio/enabl/Seleniu_8W4P-C_treated_perpend.AVI
http://www.kinotechnik.edis.at/pages/diyaudio/enabl/Seleniu_8W4P-C_treated_perpend-2.wav
http://www.kinotechnik.edis.at/pages/diyaudio/enabl/Seleniu_8W4P-C_treated_90deg.AVI
http://www.kinotechnik.edis.at/pages/diyaudio/enabl/Seleniu_8W4P-C_treated_90deg-2.wav
http://www.kinotechnik.edis.at/pages/diyaudio/enabl/Seleniu_8W4P-B_un-treated_perpend.AVI
http://www.kinotechnik.edis.at/pages/diyaudio/enabl/Seleniu_8W4P-B_un-treated_perpend-2.wav
http://www.kinotechnik.edis.at/pages/diyaudio/enabl/Seleniu_8W4P-B_un-treated_90deg.AVI
http://www.kinotechnik.edis.at/pages/diyaudio/enabl/Seleniu_8W4P-B_un-treated_90deg-2.wav
http://www.kinotechnik.edis.at/pages/diyaudio/enabl/Seleniu_8W4P-A_un-treated_perpend.AVI
http://www.kinotechnik.edis.at/pages/diyaudio/enabl/Seleniu_8W4P-A_un-treated_perpend-2.wav
http://www.kinotechnik.edis.at/pages/diyaudio/enabl/Seleniu_8W4P-A_un-treated_90deg.AVI
http://www.kinotechnik.edis.at/pages/diyaudio/enabl/Seleniu_8W4P-A_un-treated_90deg-2.wav
Hope you enjoy
🙂
Michael
Last edited:
to be continued there:
http://www.diyaudio.com/forums/multi-way/119677-enabl-technical-discussion-18.html#post2344189
Michael
http://www.diyaudio.com/forums/multi-way/119677-enabl-technical-discussion-18.html#post2344189
Michael
new EnABL´er seeking advise
Hi.
I just received my kit from Ed and wanted to do some practicing on a piece of paper today.
But I can´t seem to get the paint to flow from the pen.
After putting 10-15 drops of alcohol in the paint it will flow on the A-3 pen, but not on the A-5.
What am I doing wrong ?
I´m using the paint right from the bottle and I have burned the tip of the pens.
When I can make consistent paint blobs I´ll practice on an old pair of Philips fullrangers.
Where should I placed the rings ?
Sorry for all the questions, I have read through the EnABL kit thread, and is making my way through this one too.
Attachments

Kim,
I don't think you are doing anything wrong...learning as you go...
The alcohol works as a flow aid. However, it is more volatile and will evaporate faster than water.
It may be that what you are adding is a combination of alcohol and water.
Consider moving the combination into a separate container. This will keep a stock of original paint.
You will experience more consistent results from tempering the paint with distilled water. Add as needed.
Location: EnABL1.1 would have you place rings at the junctions of the cone and surround, the cone and the voice coil and the outer edge of the whizzer cone.
EnABL 1.2 would have you using a wooden stick to "sound" the cone, listening for changes in resonance coming from tapping the cone and/or dragging the stick across. This aids in identifying the locations where treatment is most beneficial.
Try this post:
http://www.diyaudio.com/forums/multi-way/100399-enabl-processes-117.html#post1428990
Last edited:
Kim,
Any open container is going to dry out with time. Alcohol leaves faster. Even using distilled water requires adjustment to maintain a suitable viscosity.
Any open container is going to dry out with time. Alcohol leaves faster. Even using distilled water requires adjustment to maintain a suitable viscosity.
Hi Kim,
You might want to read through the original training documents. I think they are all still available and I have posted a txt document below with url's for most of the important EnABL sites. I will look through the terabyte of data I have for a picture of your driver treated, but I do need a model number.
Are you practicing with the tip upside down? That is the way you need to practice.
Bud
Attachments
I´m using it upside down like in the lowther pic.
And I have read the tutorial 3-4 times now, but I could´t find out if it was ok to thin the paint and by how much.
I did some more test yesterday evening and got some results from the thinnest pen, but how much paint should be one the paper ?
Should it be small bumps of paint, or is it ok to have the paint suck into the paper and only create a dark shade ?
Hi Kim,
Ok, the basic pen position is good. There is a fairly narrow range of angle that works well. The closer to horizontal you can get the better, up to a point. Also, after dipping the tip in the paint, just about to the top of the curve that makes the pen tip a particular size, only remove excess paint from the sides of the quill, not the knee, where the tip bends at an angle to the quill.
Water is the best "thinner" to use, just as Ed points out. However, most of us are not experiencing your level of difficulty with right from the bottle paint.
If the surface is a calendered surface, with a hardness and flatness to it that raw paper does not exhibit, you should end up with a bump just tall enough to feel. Approximately 0.002 inches raised above the surrounding surface. If the cone material is a soft paper, or a fibrous mashed paper with a rough surface, the paint will likely just sink in. It will still have the needed characteristics as it will dry as a cohesive shape.
If you are not getting the 0.002 thickness on a calendared paper, your paint is too thin and you need to look for what mechanical problem you are having. Another subtlety in this is a need to push down until both halves of the pen tip touch the paper. This will start the welt of paint flowing and you can then just draw it out for the bar shape. Best to keep practicing until you find the pen angle, pressure, amount of paint in the pen tip crook and side wipe style that promotes the paint flow. You will find it.
Bud
Thx.
I´m getting better now, but I think I ruined the A-5 nib by heating it to much, the A-4 is working much better.
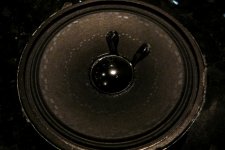
Here is a test speaker, it´s a 3" inch taken from a boomblaster donor for the Shigaclone transport.
The middle ring is just done by using a template and is not in the correct place, it´s all learning and no listening.
I´m getting better now, but I think I ruined the A-5 nib by heating it to much, the A-4 is working much better.
Here is a test speaker, it´s a 3" inch taken from a boomblaster donor for the Shigaclone transport.
The middle ring is just done by using a template and is not in the correct place, it´s all learning and no listening.
Attachments
but I think I ruined the A-5 nib by heating it to much
I just throw a new nib into the alcohol for a while before using it... and then a run under hot water.
dave
Kim, what you have done on that small cone is actually good enough. Sure, there are irregularities between sets of blocks, there always will be, but they will get less obvious. The important point is that, what you have already accomplished will provide EnABL's benefit. So, good on you and keep practicing.
Bud
Bud
I keep a compass in my toolkit to mark guide lines on the cone. It helps to have a dust cap present to stick the point in. That center point is going to get painted, anyway.
There are some good pointers being offered in response to Kim's questions. There are lurkers out here who are listening. I may be getting brave enough to try this out when I clear the bench of 3-4 projects...
Carl
Carl
Lurker steps forward...
OK, I have NOT read the entire body of this or the thread from which it was split. It caught my attention because I have used FE126E's, whose qualities seem very amenable to 'upgrading'. But I'm not writing about implementing modifications on those drivers - though I'd be glad to try it at some time in the future. Instead, I'm curious about whether and how my 'reference' midranges might be improved.
For many years I have owned and enjoyed a pair of JBL LE8T-H drivers. I've 'kept them up' with periodic re-cones and found that despite their age, they set a high standard not often approached by other drivers with which I have experimented. I've used them in both full-range and mid-range mode. At the moment they cover from ~120Hz on up and are supplemented by a nice dome tweeter starting at 8kHz.
A tap test of the cones reveals very little - pitch lowers perceptibly from the edge of the voice coil out about 8mm, and then is remarkably constant practically to the outer edge where it is damped by the foam backing. The outer surfaces of the paper cones are treated with something that looks 'resiny' and appears to have been sprayed - on brand new cones it is/was white, slightly uneven and obscures the paper surface. On older cones it yellows somewhat. I'm not really keen to surface treat the cones.
The driver's one fault that I would like to address is some high-frequency beaming that I believe originates from the 2" diameter aluminum dust cap. And because it is (relatively inert) aluminum, I figure there may be some room for non-permanent experimentation. [If I did something permanent and didn't like it... $160 per re-build.] I have a nice cardioid mike and could run some sweeps (indoors), I am a research scientist (stuff that lives, not 'lectrons or waves!), and I like to 'play audio'. But the proof of the pudding must come from my own slightly damaged Organs of Corti.
So, any opinions on what kind of dust-cap "beam treatments" might be worth exploring? 🙂
Best regards and TIA!
Frank in Minneapolis

Thanks! It is worth a try.
With respect to the driver, a doughnut would certainly be a simple and non-destructive approach. With respect to the sound, I'm not so sure about non-destructive. Correction for a 'darkened' tone, as mentioned in the article, presents a different set of challenges in hi-fi vs. guitar amplification. I don't have the 'ice pick' sort of problem that the doughnut solution addresses in guitar amps. As my electronics and source recordings have improved over the years, the beaming of the LE8T has diminished.
All other suggestions for beaming correction most welcome!
Frank/Mpls.
nothing ventured nothing gained.... try some tiny blobs of tooth paste (gel is better) on the center of the cone, like the patterns you see in this thread. If you don't like it you can take it off with a qtip and water. It may not help the beaming other than take the edge of it. I used it on full range Jordan speakers (in this tread) at least a year ago and it sounds so good I haven't touched them since.
- Home
- Loudspeakers
- Multi-Way
- EnABL - Listening impressions & techniques