Thanks Bas,
Were you at the ETF this year? If so, did anyone mention these speakers in conversations? I would ask SY, but I am not sure how much attention he would have paid, though he has some similar interests. I had weighed him down with a pocket of Snake Oil and I am sure he was trying to cope.
If you did attend and heard them, what was your response?
Bud
Unfortunately not. I've never had the finances to attend. 🙁Were you at the ETF this year?
I don't think Stuart goes to these things to listen to anything except his buddies. (Nah probably just talks to them) 😉I would ask SY, but I am not sure how much attention he would have paid
Last edited:
OK, joining this thread instead of the technical discussion, as suggested by the man himself, BudP.
Enabl for Scanspeak 3-way. Bring it on, Bud! I will do the cabinets too, but right now, I am more specifically interested in the tweeters and mids (though I suppose the bass drivers would be the easiest starting point).
I would dearly love to do something about the 18w8545's rather nasty cone breakup at around 3 to 4khz. I am even considering slicing it and gluing it back together as in the slit paper cone revelator series, but I think maybe I should get a recone kit first.
I saw the treatment of the Yamahas right near the beginning of the thread, but I seem to recall there was something you pointed out as sub-optimal with them. I have printed out your article from positive feedback. I also tried to get a peek at the doc's treatment with felt on the back, but couldn't see any pictures.
What would you suggest?
Last edited:
ETF - "It's A Man's World"🙂 can EnABL help an Altec 511 cowbell moreso than a skin/cocoon of damper which leaves a dull "moosch" combined with a "klink" sound?
hihopes,
First thing you must do is learn to find resonant nodes on your drivers. They all have them, some are worse than others. Were you to buy Ed LaFontaine's $30 EnABL kit, you wouild have THE tool of choice for this resonant hunt. A dense wooden wand (the pen tip holder), with a thin, hard, round, tip. Light weight enough that it can be ticked against the driver surface and removed without damping it's own decay note, coming off of the cone at you. This decay note is you friend. You need to spend some time getting used to listening to it.
If your cone is made so that the dust cap is mounted down near the voice coil, or actually on it, here is where you start. Tap in a radial line, from voice coil to surround. You will note that the cone sounds different as you move up the radial line towards the surround. After a bit of time, you may notice that the decay has a direction, not pronounced on it's own, but noticeable because a little farther up the cone that direction losses it's arrow. Then, a little farther on up the radial line a new direction shows up. This one is headed towards the surround. Again, not a big deal, but clearly noticeable in context with the other two areas. That zone without a direction? That is your resonant propagation zone. With an EnaBL pattern applied over that zone, the arrows will suddenly all point towards the surround.... until they don't.
There is usually a "subduction" zone, fairly close to the surround, where the decay just goes dead. At this point, a second EnABL pattern is applied and this will lift that subduction to the surface again, with the proper arrow of decay direction.
Then you need to address the beginning of the cone, the joint with what ever, down near the voice coil. Just apply the same pattern here that has always been applied, one you will see over and over in the pictures and individual driver treatments. This pattern set covers both theof the beginnings, cone and dome.
A tap test on the dust cover will reveal another dead zone, Typically half way up the domed surface. This needs to be dealt with too. And then the final small set of patterns at the dome center, to turn off the energy propagation from that hot spot.
And now you know how to treat cones with dust covers and dome tweeters. Yup, all domes require the same thing. As do all cones, doesn't appear to matter what material they are made of. The things that will differ are exactly where the cone resonances arise and how many of them there are.
Enough for now. When you have tapped your way to an edumacation, we can discuss how to turn these discoveries into solutions.
Here are most of the EnABL threads. Do pay attention to the tutorials on tool use and material use please.
Bud
Attachments
freddi,
I would bet we could effect some serious clarity, but I do not know what an Altec 511 is. Sorry! Can you provide a pic or an easy location so I can see what we are discussing please?
Bud
I would bet we could effect some serious clarity, but I do not know what an Altec 511 is. Sorry! Can you provide a pic or an easy location so I can see what we are discussing please?
Bud
Bud - re:511, it's a welded Altec horn of hardened aluminum used in smaller Voice of Theater system and like a bunch of cowbells welded together (or worse) for resonance - top and bottom plates ring, lips ring, fins ring - I've piled on pounds of mortite and the sound was subjectively a combination of dull and metallic tone - like most old-school horn it has some acoustic EQ at HF due to the narrow neck and that can make it ok on axis and somwhat dull off axis compared to modern waveguide - Exemplar's (John Tucker & Jeff Markwart) article in Sound Practices showed their sand-box attempt to kill the rings and clangs - they finally just built a wood tractrix - - -other than that its a good horn with reasonable support to 500 - lol - maybe blocks of Dynamat would work?
http://www.eifl.co.jp/index/speaker/image/altec_511b01.jpg
http://www.eifl.co.jp/index/speaker/image/altec_511b01.jpg
freddi,
Hmmm. I have treated a plastic copy of this horn style. It did remove the odd diffractions, but it also made the thing unbearably intense, for me, so I gave them to someone who thought them just right. A farily heavy coating of Gloss coat from Microscale would help here, along with patterns placed over the gloss coat.
Thing is, I do not know exactly how to find the resonant nodes in this horn, that are causing the ringing. You can try the tap test method and use removable tape blocks for the patterns, up into the horns. This is what I would be doing anyway. An entrance pattern and an exit pattern were all I applied to the much smaller version of this, maybe 20 years ago, before soongsc taught us how to find the mid cone resonances too.
Bud
Thanks for all the instructions. As much as I would like to have the recommended kit, it would cost a bomb to get it here and would probably take weeks. I have found some model paint, a water soluble acrylic called Tamiya (I seem to recall seeing a photo of this somewhere in these discussions). I got a "smoke" colour. My daughter wants to buy me a set of calligraphy pens for christmas. I will try to find some speakers to practice on.
When I get to my speakers, my thoughts are to try the outer and inner rings first, then find the middle ring position and implement that. Should keep me busy for quite a while. It is easy to find Modge Podge and similar products here. There is also a commonly found white, water soluble wood glue that dries clear. Is the gloss coat you refer to the same as either of these, or something different? Should one coat the cones before or after application of the pattern?
When I get to my speakers, my thoughts are to try the outer and inner rings first, then find the middle ring position and implement that. Should keep me busy for quite a while. It is easy to find Modge Podge and similar products here. There is also a commonly found white, water soluble wood glue that dries clear. Is the gloss coat you refer to the same as either of these, or something different? Should one coat the cones before or after application of the pattern?
As much as I would like to have the recommended kit, it would cost a bomb to get it here
When I purchased my kit US$30 included international delivery.
I believe that's still the case - check with Ed to be sure.
Here what you get:
Update to revise some info/
1) type B nib holder
1) set, A-1 through A-5 Speedball pen nibs (5 nibs)
1) #99 Speedball pen nib
1 oz. Microscale MI-4 Gloss coat
1/2 oz. Floquil Poly Scale #404106 flat finish (stealth finish)
One bottle of Micro Gloss direct from the manufacturer incurs a minimum US$20 delivery charge (plus US$3 for the Micro Gloss).
Ed's kit contains the tools recommended by Bud and represents outstanding value for anyone wanting to get into EnABL.
Cheers,
Alex
Last edited:
hihopes (ww),
YGM...I must restock pen nibs
Alex, why should I advertise with such an advocate as you? 😉
May each and every one of you have a Blessed, Peaceful Christmas...Love on your families...
YGM...I must restock pen nibs
Alex, why should I advertise with such an advocate as you? 😉
May each and every one of you have a Blessed, Peaceful Christmas...Love on your families...
Last edited:
Bumping up with some reports of the treatment process I'm applying to my FE127E in fonkens.
I will apply EnABL soon and decided to the Planet-10 trifoil first. The results are interesting. The sound is smoother and less fatigue is noticed in long auditions.
I had to use a small gauze with isopropyl alcohol to remove the excess of modpdoge. Need to be careful with modpodge and don't over paint, what is not difficult to do. Clarity and highs can be the cost of that.
Using the correct amount of MP (as minimum as possible) makes the driver more organic and I'm enjoying a lot.
I hope the EnABL to put the driver more steps up.
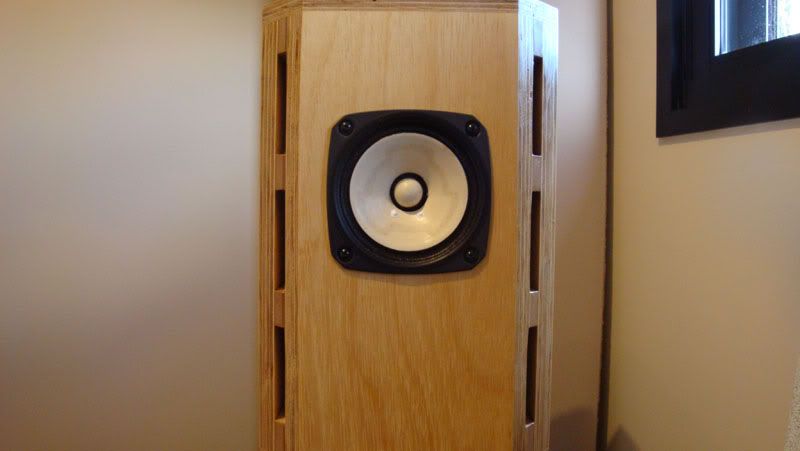
thanks
Highef
I will apply EnABL soon and decided to the Planet-10 trifoil first. The results are interesting. The sound is smoother and less fatigue is noticed in long auditions.
I had to use a small gauze with isopropyl alcohol to remove the excess of modpdoge. Need to be careful with modpodge and don't over paint, what is not difficult to do. Clarity and highs can be the cost of that.
Using the correct amount of MP (as minimum as possible) makes the driver more organic and I'm enjoying a lot.
I hope the EnABL to put the driver more steps up.
thanks
Highef
Last edited:
I read somewhere in the maze of posts about enabl that it is possible to "overdo it" (Bud's words). Is this with respect to the block patterns, or does it only refer to the coating process?
Primarily the Gloss. And, as we get further into mid driver patterns it appears that you can raise the phase of the previously non minimum phase portion of the FR, that portion above the breakup point, and thereby get some odd sounding response. In Soongsc's work, this took quite a few pattern ring sets, but more than two inner cone or dome pattern ring sets does begin to create this very hollow sound, so some care is needed if you are exploring this facet.
Too much Gloss just ends up sounding harsh and edgy, so I do advocate 50% max mix of Gloss and water and careful listening between coatings. If you follow the specified activities for the 126/127 family you will end up with a gorgeous sounding musical device. I have them as my main system, the 127's that is, and I really am quite satisfied. Plus, they are from Planet 10 and I didn't have to do anything to them.
First time ever for that!
Bud
Thanks Bud. BTW drivers are Scanspeak, not full range. I did find that the freqency range was tending towards the high side after treatment with pattern rings. There was a bit of confusion to the sound too. I decided try the Dr. Mamboni process, but found the felt very difficult to stick to the back of the cone, so opted to give a light coat of diluted pva wood glue on the back of the cone instead, since I had already applied some to try to stick on the felt triangles. The result was most encouraging. Excess highs seem to have gone, leaving a delicious, almost "woody" sound. Waiting for proper drying before giving a critical listen for clarity etc.
BTW, I haven't done exactly as per your recipe. Since my midrange drivers had quite fierce cone breakup, I applied a pattern designed to deal with that before applying the EnABL blocks. (It worked very well BTW) Now I am really having to feel my way through uncharted waters, but so far, so good.
BTW, I haven't done exactly as per your recipe. Since my midrange drivers had quite fierce cone breakup, I applied a pattern designed to deal with that before applying the EnABL blocks. (It worked very well BTW) Now I am really having to feel my way through uncharted waters, but so far, so good.
Soongsc was using full-range aluminium cone drivers, wasn't he? Jordan, if I recall correctly. I can understand how they might begin to sound weird and hollow if overdone with blocks, but has anyone experienced this with softer-coned drivers too?
Oh yes. It is in fact what advises all pattern layout now. The inner and outer rings are usually where they have always been, but tap test now provides a much more precise location for them and also other patterns needed. Hence Alex, Dave and I have begun reducing the amount of Gloss coat applied. We no longer have to control the whole cone with it, just the areas between pattern sets.
This has held true for about 30 different cones now, both metal and various papers. I am sure the material makes a positional difference, just as cone geometry does, but all so far have benefited from interim patterns. You just have to be careful about applying too many as the sonic results are not musical. Extremely clear, just not musical.
Bud
I read somewhere in the maze of posts about enabl that it is possible to "overdo it" (Bud's words). Is this with respect to the block patterns, or does it only refer to the coating process?
Micro Gloss does some amazing stuff all by itself.
It's worth getting a cheap pair of drivers and deliberately 'over-treating' them with Micro Gloss (no pattern) by applying successive coats with listening in between each coat.
Learning the end result of too much Micro Gloss on cheap drivers will help prevent "overdoing it" on good drivers.
Cheers,
Alex
Quick question for you glossy guys... Can I apply a thin coat of micro gloss with the drivers in situ or will it run and not work properly? These are not precious speakers so a slight risk is acceptable to me.
Thanks,
Simon
Thanks,
Simon
- Home
- Loudspeakers
- Multi-Way
- EnABL - Listening impressions & techniques