The latest photos for today....🙂
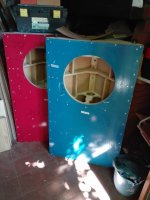
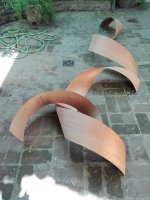
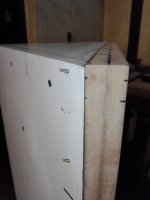
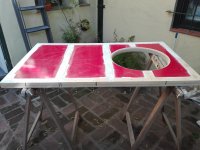
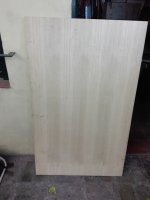
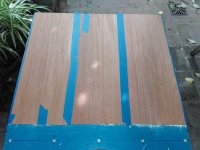
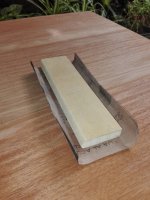
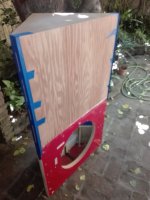
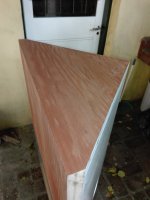
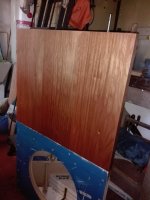
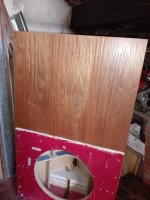
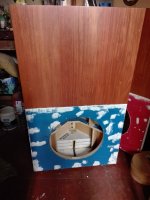
I remembered that in the loft I kept a beautiful cedar veneer wood many years ago. So I will use it for the front of the cabinets.

I remembered that in the loft I kept a beautiful cedar veneer wood many years ago. So I will use it for the front of the cabinets.
Attachments
-
 IMG_20191009_105305.jpg722.8 KB · Views: 77
 -
 IMG_20191009_104843.jpg806.9 KB · Views: 76
 -
 IMG_20191008_181222.jpg538.3 KB · Views: 78
 -
 IMG_20191008_181013.jpg691 KB · Views: 70
 -
 IMG_20191008_175408.jpg627.6 KB · Views: 191
 -
 IMG_20191007_164857.jpg493.6 KB · Views: 184
 -
 IMG_20191007_164838.jpg623.1 KB · Views: 187
 -
 IMG_20191007_164851.jpg658.2 KB · Views: 197
........... apply the vinyl glue on the two surfaces to be joined, and then finally screw again.
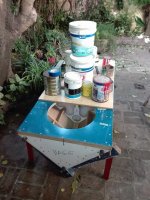
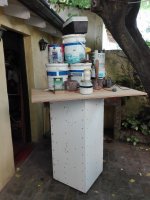
Passing the photos through the Windows Paint to reduce its "weight" takes time, first I choose the most appropriate for the development of the story, and then leave them in a position to view them in detail.
Normally I pass them by applying a 40% reduction in the amount of pixels, so they go from around 4 Mb to 500 Kb.
So, I forgot this picture that I didn't want to throw in the "recycle bin" ......😀
Attachments


On what???
You're right ....
The washing machine, the roof, the car, etc, etc ...
But I'm still working on the subwoofer ! 😉
drugs? Men At Work - Down Under (Live, US Festival, 1983) 😉
or putting on the veneer and finishing them?
or putting on the veneer and finishing them?
drugs? Men At Work - Down Under (Live, US Festival, 1983) 😉
or putting on the veneer and finishing them?
No drugs ! Just some drink every so often .....
Yes, the plating is ready and I am applying the varnish, I will upload photos as soon as I have some time. 😉
1983 ..... is a very special year for us Argentines ....
Last edited:
Last edited:
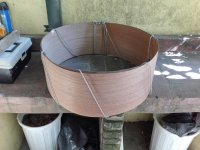
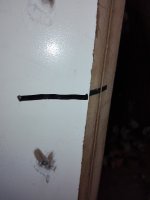
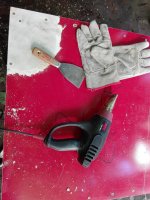
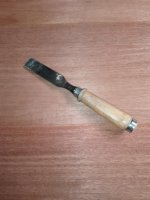
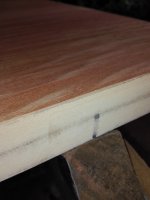
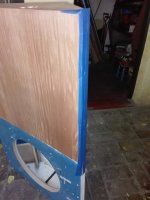
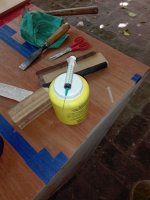
I have done this work previously with contact cement, and my conclusion is that over time it takes off, being very difficult also the application on large surfaces, balloons are formed, etc.
So now I use classic carpenter's glue, a good press is all that is needed, and apply a lot.
Even if a small sector remains without adhering well, the PVC adhesive can be injected with a syringe, apply a weight again and let dry.
The rest is not secret, trim the edges, remove traces of the glue, apply diluted varnish to 50% of "primer", and finally two coats of varnish or more, gently sanding between hands with fine sandpaper.
PD: The glue remains must be thoroughly removed, or they will be visible under the varnish, spoiling the finish. A good trick is to use pieces of broken glass, and then very fine sandpaper.
Attachments
-
 IMG_20191022_163055.jpg965.3 KB · Views: 65
 -
 IMG_20191105_121850.jpg670.4 KB · Views: 70
 -
 IMG_20191112_155141.jpg382.8 KB · Views: 65
 -
 IMG_20191112_162550.jpg733.2 KB · Views: 68
 -
 IMG_20191113_103008.jpg829.4 KB · Views: 84
 -
 IMG_20191113_103900.jpg650.1 KB · Views: 72
 -
 IMG_20191113_104339.jpg774.5 KB · Views: 70

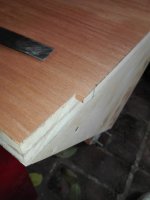
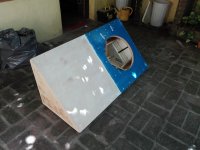
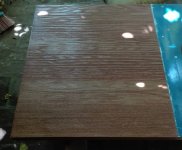
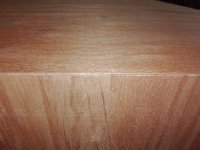
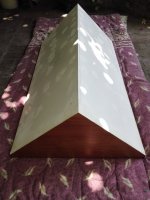
Last installment of this chapter, in the next photos of the veneered wood already varnished, I hope you like it......😉
Attachments
-
 IMG_20191129_122958.jpg367.6 KB · Views: 75
 -
 IMG_20191129_120946.jpg798 KB · Views: 78
 -
 IMG_20191120_124413.jpg387.4 KB · Views: 80
 -
 IMG_20191120_124342.jpg377 KB · Views: 71
 -
 IMG_20191115_123244.jpg686.8 KB · Views: 79
 -
 IMG_20191115_123215.jpg553.4 KB · Views: 75
 -
 IMG_20191114_121255.jpg803.3 KB · Views: 66
 -
 IMG_20191114_121245.jpg589.7 KB · Views: 80
Un poquito de cola vinílica intramuscular no te vendría nada mal 🙂
A little bit of intramuscular vinyl glue could not hurt you ;-)
A little bit of intramuscular vinyl glue could not hurt you ;-)
Un poquito de cola vinílica intramuscular no te vendría nada mal 🙂
A little bit of intramuscular vinyl glue could not hurt you ;-)
I do not understand that comment
No entiendo ese comentario
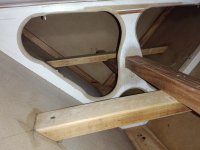
I have already applied two coats of pure varnish, and there is one more left for last, since it will be applied over the entire cabinet.
The following steps are:
1) Remove the provisional rubber feet, fabricate and place the final ones, they will be made of plywood. (I have BB leftovers since the construction of DTQWTII)
2) Putty all imperfections - the screw heads included -, sand and paint.
3) place the connection terminals
4) Connect the speakers and place them, previously the lower sector will be filled with polyfill.
Attachments

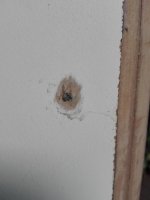
Taking a look to the 4Th pic, it seems that the syringe has glue inside it, ready for injecting to someone. Perhaps you.I do not understand that comment
No entiendo ese comentario
Taking a look to the 4Th pic, it seems that the syringe has glue inside it, ready for injecting to someone. Perhaps you.
Ahhhhh ! 😱 what sense of humor do you have, who writes you the script ?
Last edited:
LOL, he was probably inspired by my last comment about the Men At Work on drugs... I love the song btw but was really surprised with their 'tight' looks first time I saw them; I expected some really laid back guys....... maybe smoking herbs..... 😉
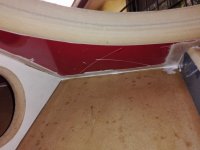
The veneer looks great, are you finishing the speakers this year?
The veneer looks great, are you finishing the speakers this year?
LOL, he was probably inspired by my last comment about the Men At Work on drugs... I love the song btw but was really surprised with their 'tight' looks first time I saw them; I expected some really laid back guys....... maybe smoking herbs..... 😉
The veneer looks great, are you finishing the speakers this year?
Do not worry, your comment and the link were very well accepted, and I do not think that they have influenced those of other people, rather I think that some should reread all their shares in my thread and realize that they have been very hurtful and aggressive.
Yes, the idea is that ..... but if I do not arrive on time, there is no problem, nobody dies !
Hi everyone !
They will definitely not be finished this year ! 🙄
Currently putty before spray painting.
You already know the saying, "Man proposes, and God disposes" 🙂
In addition, I owed a few days of vacation to WAF for having such patience with me, this work was too long, so a few days at sea fixed the relationship ... 😀
Happy new year to all !!
Attachments


- Home
- Loudspeakers
- Subwoofers
- Eminence Delta Pro 18 A in prism sealed 150 liters