
Regarding TU8888 output,
When you are using KT170, you can adjust the bias at the max within the green zone,
or maybe just a little over the green zone, then the output will be higher than 60W..
with KT-170 installed, we tested how the power changes depending on the position of the bias level.
When the bias is adjusted at the highest position of the green zone, the power is around 9-10% more
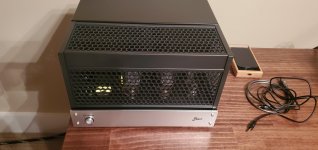
Finally I have time to assemble a pair of TU-8888 for the up coming review.
It drives my Stenheim 2.5 with a very good result.

It drives my Stenheim 2.5 with a very good result.
From Lundahl May 2025 News Letter

| Japanese company Elekit is renowned for its high-quality electronic kits, offering both beginners and experienced enthusiasts an exceptional building experience. Building Elekit kits provides a sense of satisfaction and pride, as users assemble and customize their devices themselves. One of the latest kits is a TU-8888 a push-pull monoblock amplifier that utilizes various tube types, including KT88 and KT170. This amplifier is designed to deliver high-quality audio performance with a maximum output of over 50W per unit when used with KT170 tubes. It boasts a wide frequency response from 10 Hz to 50 kHz. Elekit TU-8888 includes Lundahl LL3733 output transformers. It is designed to provide dynamic and detailed audio experience, making it an excellent choice for audiophiles. LL3733 is a push-pull tube amplifier output transformer with 50% ultra linear taps and a separate winding for 2% negative feedback. As usual from Lundahl, the transformer is built up from two coils, each consisting of 3 sections, one primary and two secondary sections. The secondary sections are tapped for 5- and 8-ohms load. The transformer’s windings are arranged to minimize capacitive coupling between primaries and secondaries, and for extremely small phase error between anode and UL tap. This transformer is made with our renowned winding precision using the finest winding copper wire, and the high-quality grain-oriented silicon steel C-cores from our own production. |
Last edited:
Just receved TX2575 2K2.. I will replace the R 2 with Vishay Foil 1% Resistors...

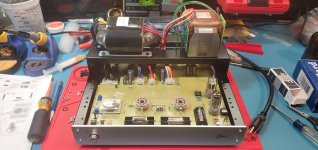
I've recently completed the build of two TU-8888 Monoblocks. The first unit I built is functioning fine. However, the second has a crackling sound coming from it. I disassembled it and went over all my solder joints and improved a few but under magnification I cannot find any other questionable solder points. When I went through all 27 voltage measuring points I have two values out of spec. Point 5: I have 88.5vdc when it should be 95vdc. The second is point 6: I have 175vdc and it should be 245vdc. Any help would be greatly appreciated to determine which components in the 12AU7 area of the board are faulty. Thanks so much!
Attachments
Sent me all the test points
The PCB is good plated so you need to make sure all soldering points are properly jointed together
The PCB is good plated so you need to make sure all soldering points are properly jointed together
- 2.93
- 133.7
- 107.3
- 80.5
- 88.5
- 175
- -52.5
- -52.6
- -53
- -53
- 0.26
- 0.21
- 446
- 446
- 442
- 445
- -120.4
- 4.98
- 341
- 450
- 475
- 475
- 4.98
- 6.26
- 6.54
- 66
- 366
Please swap the working amp tube set to the problem amp to make sure not the tube set issue.
What type of output tube you are installed?
What type of output tube you are installed?
Test Pointt 6 is 175V (ref is 245V). Please check the soldering points around this area and the 12AU7 installed.
I'm using quads of both the Mullard KT88 and Tung-Sol KT170. I swapped all four tubes, EF86, 12au7, KTxx one at a time so it's not a tube. I will disassemble and check all solder joints in this area.
I ordered some Zener diodes off Amazon, I think I was a little rough installing this one. I completely missed this step and had to put them in after the board was done.
I ordered some Zener diodes off Amazon, I think I was a little rough installing this one. I completely missed this step and had to put them in after the board was done.
Last edited:
I just realized I posted to the wrong thread. I completely removed the included zener diode, re-bent the leads and soldered it back in. Reflowed everything in the area and now I'm getting 97vdc and 245vdc. Upon testing I still have have a slight crackle but no where near as bad. I'm going to have to buy a desoldering tool and completely re-solder the entire area of the 12au7 and EF86 tubes.