nope common gndHi manniraj, I can see now, that what I wrote this morning was not quite right: I was thinking of a more "regular amp" with +/- power supply. Sorry about that..
You do need to isolate the Mosfets in some way, but not for the reasons I wrote - rather because you else will be summing the output of R and L channel through contact with the aluminium case you are using. Signal OUT from the Mosfets is coming from the Drain pins, which are tied together on the PCB.
The PCB is designed to have seperate heatsinks for R and L ch, so whan you are using a metal case, where everything becomes connected, things change... 🙃
See the link from Chris Jones above, and also the manual:
View attachment 1094983
Is this what spellchecker does to deburred, or a new electronics term for me?It helps if the heat sink holes have been demurred.


Thanks Chris, and here is what Nelson suggested and if I understand it correctly as I am mounting the mosfets over the single heat sinks I need to cut the trace of the drain 'D' of each of the mosfets to the pair of on board sink mounting holes. I marked the same and then need to connect each of these drains to the ground via a wire?Nelson Pass explained how to isolate the mosfets from the sinks here (Post #1156): https://www.diyaudio.com/community/threads/diy-aca-mini.379037/page-58#post-7109835
"If you want to isolate the sinks from the Drains of the transistors, you will also want to cut the top
and bottom traces from the Drain to the mounting holes of the sinks, as they are tied together there.
If you do that I suggest connecting them to ground."
Last edited:
Thanks Papa and now I need to read what is 'demurred' 🙂It helps if the heat sink holes have been demurred.
edit: Its deburred 😉
Google does not give even deburred a proper meaning and its actually called "Deburr" got it
Looking at the above pic with the traces even with the onboard sinks the Drains are shorted to the sinks and also shorted for each channel. Just that in my build I am transferring these sinks to offboard heat sinks and these sinks are completely isolated from the amp board, rca jacks, speaker binding posts anyway. I made sure to mount the amp board using nylon spacers so apart from the mosfets 'D' the sinks are not connected to any other amp parts or connections going to the amp board.
Do I make sense with my above explanation?
Thanks
Do I make sense with my above explanation?
Thanks
Don't cut the traces where you marked! Then the amp will not work.
It is the traces connecting to the heatsink mounting holes you can cut.
-But seems to me, there is really no need to cut traces in your build, as long as the PCB mouting holes are isolated and also the Mosfets are isolated from the heatsinks. I think this is what you mean also, yes?
It is the traces connecting to the heatsink mounting holes you can cut.
-But seems to me, there is really no need to cut traces in your build, as long as the PCB mouting holes are isolated and also the Mosfets are isolated from the heatsinks. I think this is what you mean also, yes?
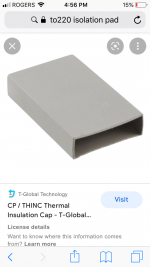
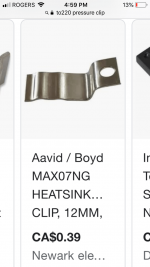
If you’re having these issues you could simply use the following:My ACA Mini in progress inside a small cabinet having its own heat sinks. Now I see that the mounting holes of the ACA are shorted to the ground I am using the Nylon spacers to isolate from the chassis. I have a quick question on the mosfets as the ground pins are shorted to the metal portion of mosfet, so I am using the TO220 plastic bushes to mount them on the heat sink. I still see that the mosfet metal portion is shorting to the sink. I hope that is fine to mount them this way or do I need to somehow isolate the mosfets from the sinks completely?
View attachment 1094855
View attachment 1094856
Eric
Attachments
I was able to get all the mosfets isolated with the right amount of screw turning from the heat sinks. I checked the continuity of the metal portion against the sink holes to be on the safer side. All well and good for now, will power up with the wiring over the weekend.
Thanks
Thanks
Amp is ready for testing in the new cabinet. Looks super cool for my second bedroom system and it will play with Wharfdale D310 mini monitors which I had tested it few weeks back with the kit sinks.


Today testing the working amp in the new cabinet and getting all weird results.
I see that when switched on the led is dimming and then increasing the brightness a bit and this is happening continuously. Also the reading VB and VO are jumping all over the place. I double checked that all mosfets are isolated from the sinks and the amp board mounting also is isolated with Nylon spacers from the bottom panel. All RCA jacks are isolated from the back plate, speaker binding posts too are isolated from the chassis.
Turning the P1/2 does not seem to have any effect as the values keep jumping around like VB from 10mv-64mv and VO hovering around 5.15vdc. Any pointers where the issue might be?
Thanks
Are you using the smaller power supply? Were you sure to turn the bias switch OFF before applying power to the unit? Someone else had this problem (search this thread) and it was the protection circuit in the PS cycling power when the amp drew too much current at power up.Today testing the working amp in the new cabinet and getting all weird results.
I see that when switched on the led is dimming and then increasing the brightness a bit and this is happening continuously. Also the reading VB and VO are jumping all over the place. I double checked that all mosfets are isolated from the sinks and the amp board mounting also is isolated with Nylon spacers from the bottom panel. All RCA jacks are isolated from the back plate, speaker binding posts too are isolated from the chassis.
Turning the P1/2 does not seem to have any effect as the values keep jumping around like VB from 10mv-64mv and VO hovering around 5.15vdc. Any pointers where the issue might be?
Thanks
No I had built this amp without the cabinet and on top of the stock kit heat sinks and ran the amp with my speakers for couple of weeks. I had purposely used wires from the mosfet legs from initial as intention was to put this amp with proper case. So no chance of mixing of mosfets and isolating from the sinks.mixed mosfets?
Hmm I am using the 24v laptop adapter that was suggested as one of the psu. I am using the on board toggle switch by keeping it always 'On' and using a front panel push button where it switches on/off the main DC socket +24v.Are you using the smaller power supply? Were you sure to turn the bias switch OFF before applying power to the unit? Someone else had this problem (search this thread) and it was the protection circuit in the PS cycling power when the amp drew too much current at power up.
is there schematic edited with DC voltages in various points?
at least - connect alligator probes to proper points, to confirm that you have established 24Vdc at pcb, when powered ON
at least - connect alligator probes to proper points, to confirm that you have established 24Vdc at pcb, when powered ON
@audiosteve You are right I followed that post and turned off the toggle switch after powering the amp on the adapter. Then after few mins I switched the toggle and now I see that the VB and VO coming correctly and readjusting back to 11.5vdc and 0.35vdc
Thanks again for bringing up this post, I guess my best bet now would be use the front panel switch on the toggle rather than the main +24v of the psu adapter.
Thanks again for bringing up this post, I guess my best bet now would be use the front panel switch on the toggle rather than the main +24v of the psu adapter.
Last edited:
- Home
- Amplifiers
- Pass Labs
- DIY ACA mini