Does the absolute hardness of the powder used to create the "glass bubbles" really matter?
Couldn't I take fine diamond dust, lightly bind it together with quite a bit of void space, and still have a relatively soft material for the purposes of sanding? I would think as long as the powder is finer than the abrasive, you are not breaking any bonds within the material itself (diamond, quartz, etc.) but rather just pushing those particles around and removing them from the binder.
Couldn't I take fine diamond dust, lightly bind it together with quite a bit of void space, and still have a relatively soft material for the purposes of sanding? I would think as long as the powder is finer than the abrasive, you are not breaking any bonds within the material itself (diamond, quartz, etc.) but rather just pushing those particles around and removing them from the binder.
I thought of that too. Maybe the sanding paper actually won't have to sand glass but works by ripping out the small glass bubbles within the binder.
Best, Markus
Best, Markus
Just wanted to post a couple pics of the waveguides I've received. These are merely the Nathan 10 baffle with the lower part cut off, which is what I was expecting and will make it easy to integrate into an open baffle I'm going to build.
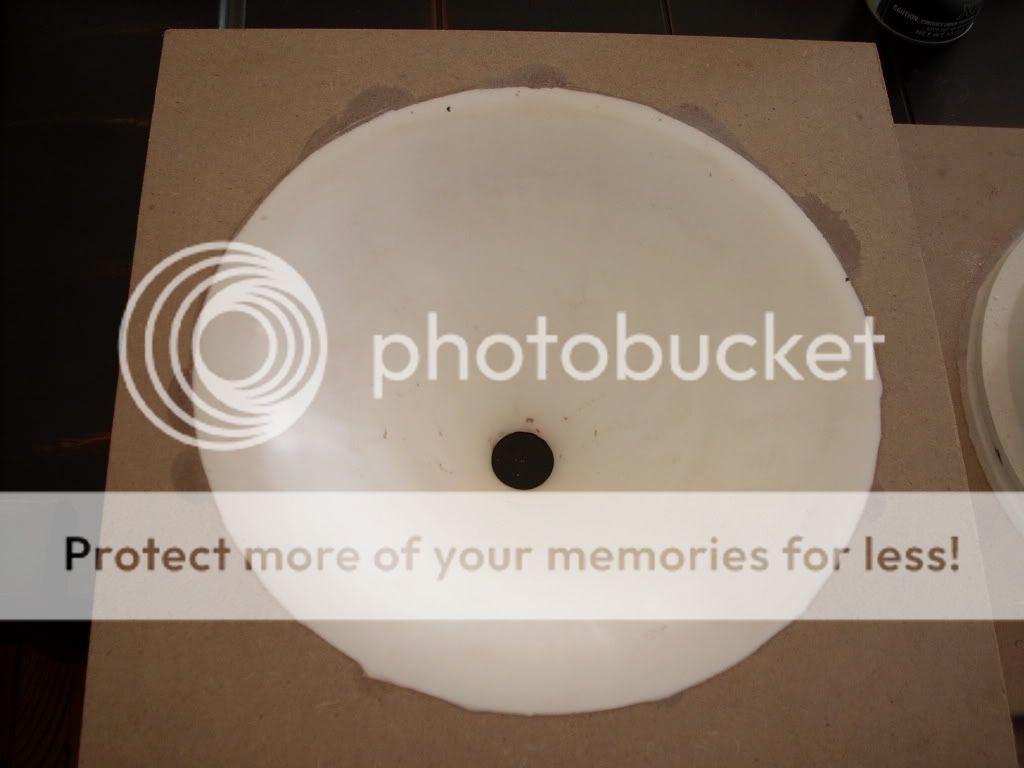

Real thick walls. Finish on the front side is perfect one and some slight sanding marks on the other but no big deal. The plexiglass CD mount is perfectly machined and mates to my DE250's great. It doesn't exactly match the throat of the waveguide however, the throat is about 0.7mm too small. Shouldn't be too big a deal to make work, but I'd like to see this improve in the future. All in all I'm satisfied. I don't mind the finishing work that will need to be done, but it would be nice to have a higher level of fit and finish. Earl seems to be doing quite well so far, take some of that money and find someone that can mass produce these to a higher standard, whether here or in Asia. It certainly has promise.
Real thick walls. Finish on the front side is perfect one and some slight sanding marks on the other but no big deal. The plexiglass CD mount is perfectly machined and mates to my DE250's great. It doesn't exactly match the throat of the waveguide however, the throat is about 0.7mm too small. Shouldn't be too big a deal to make work, but I'd like to see this improve in the future. All in all I'm satisfied. I don't mind the finishing work that will need to be done, but it would be nice to have a higher level of fit and finish. Earl seems to be doing quite well so far, take some of that money and find someone that can mass produce these to a higher standard, whether here or in Asia. It certainly has promise.
You're going to try an open baffle? That should be quite impressive, the Emerald Physics speakers were undoubtedly the best thing I heard at the 2007 CES. And there was tough competition, some costing 5x as much.
I don't think that an open baffle is such a good idea because of the deformed indirect sound field an open baffle creates. Even Linkwitz has added a second tweeter to his Orion...
Best, Markus
Best, Markus
You might be able to modify the compression driver by removing the back as is done in the "Airforce" model of the Bastanis.Even Linkwitz has added a second tweeter to his Orion...
augerpro said:It doesn't exactly match the throat of the waveguide however, the throat is about 0.7mm too small.
You are saying the the waveguide throat is too small, or the plate throat? The waveguide should be a little larger than the plate because of the gasket. Don't try anything with the throat until it is all assembled together with the gaskets in place. Then use the clay technique as suggested. If you can't get a perfect fit that way then resort to a little fine sandpaper.
Now if the hole in the waveguide is a little small, then the correction here is to sand down the mounting surface until it is correct. Make sure and do this with a sanding block to keep the surface flat. The material sands quite readily so be careful. Use nothing lower than about 150 grit.
The ridge was my mistake in the casting - won't happen again. I filled in it with surfacing putty.
After five years, multitudes of waveguides, made in Asia, here and myself, none of them ever fit perfectly. The best so far has been the poly that I make and you have. The Asian made fiberglass ones were the worst and had to have the throats recast.
"take some of that money and ..." What money? This project has not yet shown a profit.
Amiklos,
Adam, I received the boards - just fine shape. Thankyou!
Frank
Tried to email but you're not activated through the boards.
Adam, I received the boards - just fine shape. Thankyou!
Frank
Tried to email but you're not activated through the boards.
Originally posted by gedlee Lidia and my paper was never submitted for publication, but I think that its on my web site.
Where?
Originally posted by gedlee The data in AES is sparse and not directly applicable, but you can glean some important information from the works of Brian Moore in the audibility of group delay.
Do you remember the title?
Would appreciate if you could comment on my last question about image shifts due to diffraction/reflections AFTER 1-2 ms.
Best, Markus
Markus
I'm on the road right now and complex discussions are beyond the scope of what I can do right now. Get back to me next week.
I'm on the road right now and complex discussions are beyond the scope of what I can do right now. Get back to me next week.
Earl, yes the waveguide throat is a bit too small. I was actually considering making a jig "table" attached to the mdf at the corners and use a router to mill down the back a hair. But there is some danger of a catastrophic screw up with that so who knows. By gasket are you referring to the foam donuts you included? These go between the plexiglass and the waveguide? I was wondering what they were for...
Brandon, if I understand you correctly, the "donuts" are to be glued into the waveguide from the outside: http://www.diyaudio.com/forums/showthread.php?postid=1587060#post1587060
Best, Markus
Best, Markus
Markus I'm not referring to the foam insert to reduce HOMs but these little foam donut things that were included, about a a half dozen of them or so. Or maybe it was 10, for the 8 bolt holes and throat of the plexiglass mounts maybe?
Augerpro
In your case those donuts were just packing. In the full kit I provide gasket material. Its just thin foam with adhesive. get it at a crafts store like Michaels.
All in all you guys are taking this all too extreme. With all the possible tollerance buildups and errors the only hope is to smooth it all out in the end. Thats the way every speaker that I have ever sold was done and nobody seems to be complaining about those.
One trick I use when making my own waveguides is to hold a piece of 1" PVC pipe against the throat of the waveguide, then use a round file to gently sand down the waveguide throat until it matches the PVC pipe EXACTLY.
And when I say exactly I mean EXACTLY 😀
The throat needs to be the exact same size as the throat of the compression driver.
I'm not sure if this trick will work with the Nathans, because the entrance angle of my waveguides is zero degrees - it may be larger on the Nathans to match the exit angle of the compression driver.
Does that make sense?
You're right. It won't work. The mounting plate is part of the waveguide expansion.
The relevant posts are 567 and 574.
I'm not sure if this trick will work with the Nathans, because the entrance angle of my waveguides is zero degrees - it may be larger on the Nathans to match the exit angle of the compression driver.
The relevant posts are 567 and 574.
Hi guys,
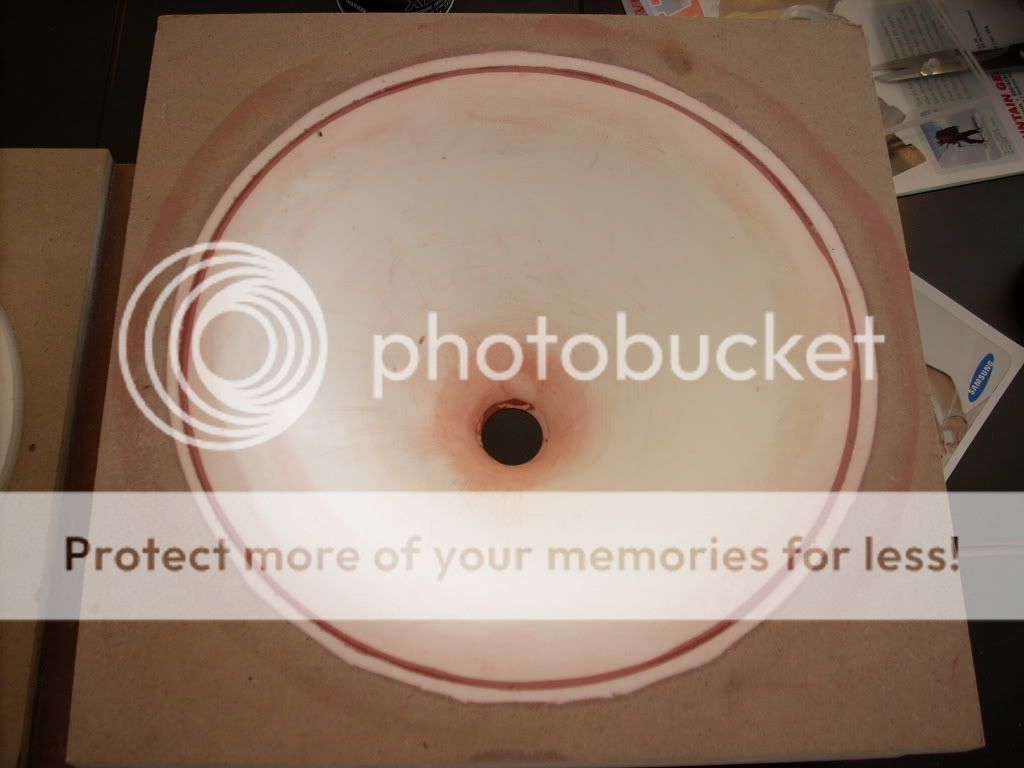
here's a little update what the surface looks like after applying 4 coats of sanding sealer (sanded with grid 220 sanding paper between coats):
It's actually smoother than it may look like. But that's the main problem with a clear primer: dents and pits are much harder to see because of the MDF shining through.
Tomorrow I'll roll on this "latex" paint (which is water based acrylic and contains no latex at all): http://www.rustoleum.com/CBGProduct.asp?pid=96
Bought semi gloss white at Home Depot. If it doesn't look ok there's a flat white version too 😉
Best, Markus
here's a little update what the surface looks like after applying 4 coats of sanding sealer (sanded with grid 220 sanding paper between coats):
An externally hosted image should be here but it was not working when we last tested it.
It's actually smoother than it may look like. But that's the main problem with a clear primer: dents and pits are much harder to see because of the MDF shining through.
Tomorrow I'll roll on this "latex" paint (which is water based acrylic and contains no latex at all): http://www.rustoleum.com/CBGProduct.asp?pid=96
Bought semi gloss white at Home Depot. If it doesn't look ok there's a flat white version too 😉
Best, Markus
Markus,
If you are having trouble seeing dips and dents it might be helpful to apply a light guide coat and then hit the enclosures with a flat sanding block using pretty fine grit. I'd use a dark paint. The sanding block will remove the light coat of paint from the flat surfaces but paint will remain in the dips and dents. It will give you a better visual indication of where you might need some additional work before you go spending time and money on your actual color coats.
Looks pretty good so far. I'm envious that you'll get to hear yours so soon.
Yeah, clear coats are hard to detect. On paint shop that did work on our enclosures kept getting rejected until I finally explained to them how to look for the problems areas holding it up that it reflects some light. Everything went well after that.
If this is an off-topic question, please mods, delete. No offense intended.
In the SP Technology Timepiece speaker ( http://4sptech.com/version2/t3.html ), do any of you know if the waveguide is carved into the baffle, or is there a hole in the baffle, and a waveguide is inserted and painted to match?
In the SP Technology Timepiece speaker ( http://4sptech.com/version2/t3.html ), do any of you know if the waveguide is carved into the baffle, or is there a hole in the baffle, and a waveguide is inserted and painted to match?
- Status
- Not open for further replies.
- Home
- Loudspeakers
- Multi-Way
- Building the Nathan 10