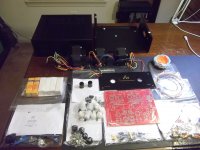
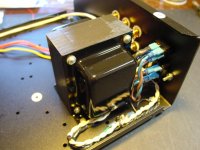
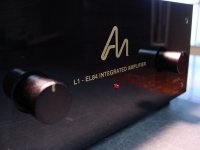
Received my EL84 tube integrated L1 kit from Brian Smith of Audio Note Kits Canada this week--only regret is the lack of time to build. Nevertheless, wow, what a nice package! All high quality parts very well packaged and well laid out. Can't wait to get to the listening point.
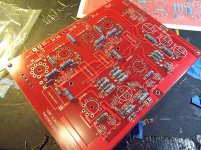
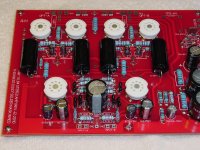
For now, I have populated all the resistors on the 3 mm PC board.
Thought you all DIYers would like to look over my shoulder as I build it.
For now, I have populated all the resistors on the 3 mm PC board.
Thought you all DIYers would like to look over my shoulder as I build it.
Attachments
Thought you all DIYers
Well, not all but maybe some. I'd rather watch Columbo.
Well, not all but maybe some. I'd rather watch Columbo.
You have permission 😀
Well, not all but maybe some. I'd rather watch Columbo.
Stop trolling the innocent! 😛
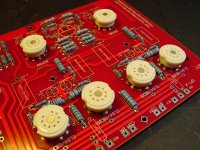
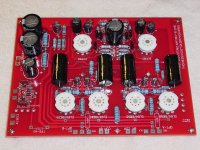
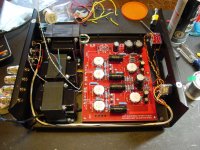
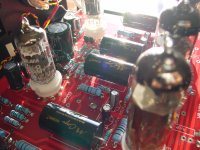
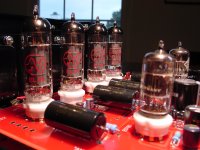
OK, I was able to squeeze in putting on the tube sockets, nice gold plated pins, then had to go out for dinner.
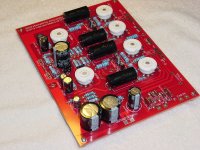
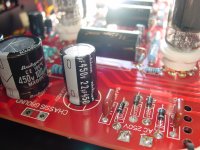
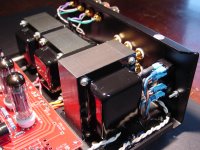
Later the Rubycon electrolytics, then the silver micas, and the power supply components were installed.
Last were the venerated Mundorf M Cap Supreme couplers, $17 each, but well worth it.
Now the board is totally populated. Let see how far we get tomorrow.
Later the Rubycon electrolytics, then the silver micas, and the power supply components were installed.
Last were the venerated Mundorf M Cap Supreme couplers, $17 each, but well worth it.
Now the board is totally populated. Let see how far we get tomorrow.
Attachments

Last edited:

Take your time, enjoy the build one bit at a time.
Andrew
Yes, agree. My tendency is to want to rush through. I have to stop now and do something else.
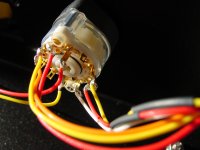
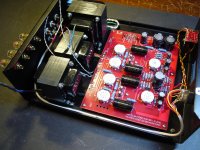
Just wired the inputs:
Attachments


Thanks for the detailed pics!Just wired the inputs:
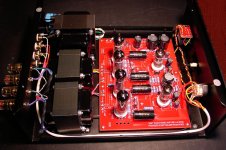
It looks like the input cabling (between jacks and selector switch at front) is unshielded. Two 3-conductor cables (R,L) and a separate ground/common conductor?
Looking at a 'proven' design and layout like this one can be quite instructive.
Looks like a nice kit, though spendy. The output transformers are a big part of the value, I suppose.
And you do get a pro-looking finished project.
Keep those pics coming!
Thanks for the detailed pics!
It looks like the input cabling (between jacks and selector switch at front) is unshielded. Two 3-conductor cables (R,L) and a separate ground/common conductor?
Looking at a 'proven' design and layout like this one can be quite instructive.
Looks like a nice kit, though spendy. The output transformers are a big part of the value, I suppose.
And you do get a pro-looking finished project.
Keep those pics coming!
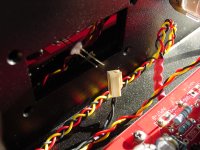
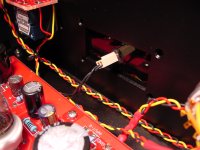
Yes, unshielded individual silver plated copper teflon coated, six cables in white heat shrink. I decided to braid the rest since it looked like I had enough.
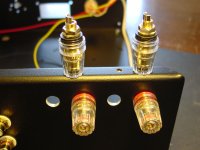
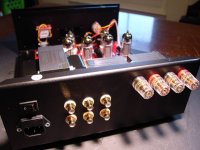
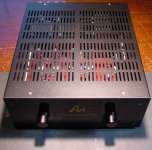
Here are more pictures showing progress. I like the binding posts that I normally use more, so I had to drill bigger holes for them! But worth the risk. Lots of metal on the floor, this is thick aluminum. No harm done...
Almost ready for the cover...more tomorrow.
Attachments

Yes, agree. My tendency is to want to rush through. I have to stop now and do something else.
Just wired the inputs:
I was under the impression that earth should shield the signal cable for lowest noise? Comments on that, guys?
I was under the impression that earth should shield the signal cable for lowest noise? Comments on that, guys?
I think you are right. I normally braid the signals with the ground (see pic). More progress and final touches like glue the LED to the faceplate.
Attachments

I was under the impression that earth should shield the signal cable for lowest noise? Comments on that, guys?
That's what I usually do, but if AudioNote can get this amp to be quiet without shielding, perhaps it is not so important?
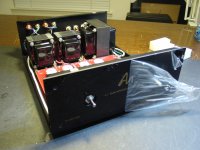
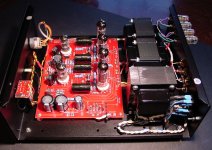
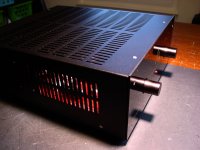
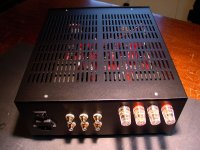
The L1 integrated is finished. It is well worth it. It is the best sounding unit in the house. Tons of detail and imaging. Lots of depth. Extremely quiet, you can't hear a thing when it is on. Bass is amazingly good. I was going to clean up while it was playing but I ended glued listening.
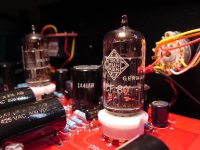
The matched quad set of JJ tubes and NOS Telefunken tubes are working their magic.
Enjoy the pics and hope someone follows with an L1 build.
The matched quad set of JJ tubes and NOS Telefunken tubes are working their magic.
Enjoy the pics and hope someone follows with an L1 build.
Attachments
-
 DSC00138.JPG254.4 KB · Views: 1,617
 -
 DSC00140.JPG222 KB · Views: 783
 -
 DSC00144.JPG261.4 KB · Views: 839
 -
 DSC00001.JPG852.9 KB · Views: 806
 -
 DSC00003.JPG893.4 KB · Views: 691
 -
 DSC00002.JPG859.4 KB · Views: 734
 -
 DSC00017.JPG825.9 KB · Views: 762
 -
 DSC00010.JPG203 KB · Views: 757
 -
 DSC00012.JPG849.5 KB · Views: 683
 -
 DSC00018.JPG805.1 KB · Views: 724
Last edited:

That's what I usually do, but if AudioNote can get this amp to be quiet without shielding, perhaps it is not so important?
You can't be too thin, too rich, and your amp can't be too quiet 😛
Nice pictures, but I don't understand the internal layout...why place the input terminals close to the mains input and mains transformer and the let long cables run to front?
Looks over performance?
Very, very possible. But then, as a manufacturer, you want your product to look tidy for cabling...
I realize that I'm late to the party here, but I wanted to post my thoughts on the L1 kit that I assembled. To be honest, at first I was underwhelmed by the performance straight out of the gate. But after replacing the tubes and giving it a few weeks of burn in, I have to say that this is a fantastic amplifier...especially for the money. I was using a Unison Research Simply Italy prior to the Audionote, and the Audionote is superior in every way I can think of. The bass is MUCH tighter and deeper, and there is a much higher level of resolution with the Audionote. I'm using mine with Nola Boxer speakers (90db, 8ohm) and there is more than enough power for me.
In short, I absolutely love listening to my L1 and recommend it highly. It's a bargain.
In short, I absolutely love listening to my L1 and recommend it highly. It's a bargain.
I have built 2 kits from Brian, the L4 and the DAC4.1, both with the new c-core transformers he is selling as upgrades for the standard ones. I spent extra $$$ on AudioNote resistors, and copper capacitors where appropriate.
Absolutely stunning gear, and a great way to learn about DIY electronics. I moved on to Some more DIY projects, but I am glad I started with these kits.
Absolutely stunning gear, and a great way to learn about DIY electronics. I moved on to Some more DIY projects, but I am glad I started with these kits.
- Home
- Amplifiers
- Tubes / Valves
- Audio Note Kits L1 Build...