
dammit!
lip up, 7-10mm spacers (longer screws, 2-3pcs of M5 nuts as spacers), mains wires bellow
@uptownsquash - I'm not disagreeing with his-mightiness... just adding a POV.
With that particular PSU... your mains wiring can be quite short. It does not run all the way from the back of the chassis up to the front. It simply runs a few inches from the PEM to the PSU board.
So... flipping the panel to leave sharp edges upward and leave more space to put mains wires between the bottom panel and perforated plate in a Modushop chassis is a bit less critical with this PSU layout. As an example with a typical layout seen with the Universal PSU boards, I almost always flip the baseplate.
The AJ I built for the guide was absolutely hum free with sensitive speakers, and I didn't flip the plate.
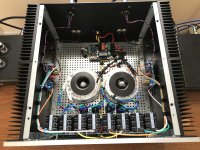
Note - I can't quite tell what the blue module is, but the two relays? make me think it's a speaker protection board. You probably wouldn't want your mains wires running right under it (unless separated by the perforated plate).
YMMV.
Okay, so flip the plate and run taller stand offs to run mains under board? I like being able to open the top and being able to remove components with just screws. That’s why I decided to do the terminal up top versus the build guide.
If it’ll help with noise I can attempt to desolder the screw terminals and flip them under board and run them that way. I do want my Jzm to be quite!
I also need to see if any of the hard ware on hand will fit between a flipped plate and the bottom plate. I haven’t fully assembled one of the amplifier chassis yet so I dunno how much space is down there. It’s hard for me to get hardware locally here in middle TN for whatever reason. Everyone hates metric I guess. Dang USA.
The blue board home isn’t in that location it’s just where I ended up putting it when I moved everything back to the table I use for assembly.
Or leave it alone...Okay, so flip the plate and run taller stand offs to run mains under board?
Or drill a larger hole and run the wiring through the baseplate and back up (protecting the wiring with grommets and/or shrink tubing) like Birdbox. If you flip the baseplate and run the wiring under it... you're going to need to get the wiring back "up top" somehow... so, if you're drilling one hole... you may as well drill two. You don't need to flip the baseplate and add spacers to have room under the baseplate for the mains wiring.
Or... flip the baseplate and run the wiring all the way from the back of the chassis to the front of the chassis... rounding the lip of the baseplate... then run the wiring all the way back to the top of the PSU board.
There's only two (fairly common) ways to do it without drilling holes in the baseplate, and I know which I'd choose. 🙂
Totally understand. 🙂 I often use quick-disconnects and an easier to fiddle with construction for certain builds. It's all fun.I like being able to open the top and being able to remove components with just screws. That’s why I decided to do the terminal up top versus the build guide.
Enjoy your build!

Birdbox offered to send me some of his grommets so I think I will desolder the screw terminals and drill some holes! Thank you for the suggestions!
If I run the mains wires under the plate could I put the speaker protection board where it was at in my previous picture? Or should I still move it further away from the wires?
If I run the mains wires under the plate could I put the speaker protection board where it was at in my previous picture? Or should I still move it further away from the wires?
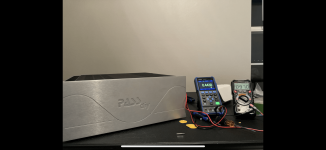
8 hours later, a care package from @birdbox, much learning and many advice later, I have a cooking Aleph Jzm.
Hopefully she will be ready to sing in an hour or so.
Time to bias!
Hopefully she will be ready to sing in an hour or so.
Time to bias!
Attachments
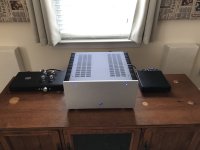
I’ve been listening to the Aleph Jzm for about an hour now, and I just have to say. WOW.
Going from a crap receiver to this is an absolute night and day difference. The aleph brings so much to the table. By no means do I have golden ears, but to me the Aleph brings out the high so well. Bright and beautiful, yet not in my face. The mid range is incredibly wide. The accuracy is incredible. Everything so well separated. I am able to hear things in the background I wasn’t aware of before. Even wide open, it doesn’t tire.
For those of you involved with this project and those who helped me see my own through thank you.
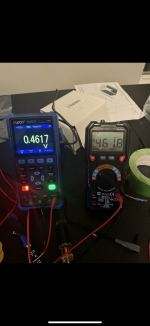
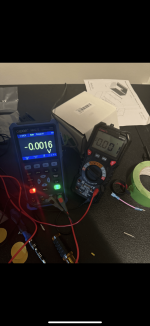
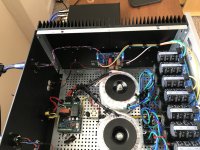
Tid bit about the final bias and off set here is where I landed. I think it took me a few hours. Only issue I had with my build is the diyaudiostore protection boards. I had to bypass them to listen to the amp. For whatever reason the relays aren’t closing.
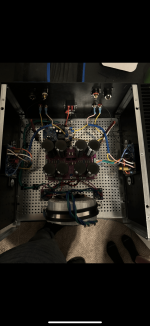
Also attached is an almost done and not so tidy picture of the inside I’ll post a cleaned up and finalized one when I wake. For now it’s time for sleep!
Going from a crap receiver to this is an absolute night and day difference. The aleph brings so much to the table. By no means do I have golden ears, but to me the Aleph brings out the high so well. Bright and beautiful, yet not in my face. The mid range is incredibly wide. The accuracy is incredible. Everything so well separated. I am able to hear things in the background I wasn’t aware of before. Even wide open, it doesn’t tire.
For those of you involved with this project and those who helped me see my own through thank you.
Tid bit about the final bias and off set here is where I landed. I think it took me a few hours. Only issue I had with my build is the diyaudiostore protection boards. I had to bypass them to listen to the amp. For whatever reason the relays aren’t closing.
Also attached is an almost done and not so tidy picture of the inside I’ll post a cleaned up and finalized one when I wake. For now it’s time for sleep!
Attachments
Building one of these, I have the original, but why not? Boards assembled and hanging in the special edition "Pass DIY" deluxe chassis, transformer on way from Antek, and DIY "back panel kit" parts should be here any day.
Russellc
Russellc
Good afternoon,
I just finished my build, big shout out to ItsAllInMyHead for an awesome build guide! and, of course, Mr, Pass, Zen Mod and the helpful members of this forum. This is my first attempt at building a dual mono, it is dead quiet no hum. The sound is very captivating and engaging!
I just finished my build, big shout out to ItsAllInMyHead for an awesome build guide! and, of course, Mr, Pass, Zen Mod and the helpful members of this forum. This is my first attempt at building a dual mono, it is dead quiet no hum. The sound is very captivating and engaging!
Attachments
hope you have one of everything per channel
common IEC and common switch, then separate:
-fuse, soft start NTC, Donut, bridges, cap bank, NTC from GND to chassis
common IEC and common switch, then separate:
-fuse, soft start NTC, Donut, bridges, cap bank, NTC from GND to chassis
Yes common IEC, switch, but the soft start handles both donuts. Everything else is separate, I was going fuse the 2 lines, but the soft start allows a 1sec delay to handle the surge allowing a single 3amp slow blow to handle both transformers. I am new to this so if this is not correct please let me know.
I am new to this so if this is not correct please let me know.
matter of good manners, obligatory blue eyes, blue hair, 2m height and proper engineering praxis is to have (at least) one fuse per Donut
so if one channel goes Dodo from any reason, there is a possibility to not end inflames, because (increased value of ) didn't cover situation of measly short in just one channel
I would use even separate soft start for each Donut, but that's just me, Chicken
if you already have all hardware, make it proper dual mono, it'll pay of, dearly; tied grounds between channels means just halfway to that
of the two bridge rec one was reading 24VDC output while the other was reading 17 VDC so ordered two more, so i had a spare, and they also outputting
17VDC same make. input at19VAC all good . nothing else was connected just the transformer and the Bridge Rec to 240 V mains. Thatcher board has been tested all seems good.
so not wanting to proceed to connecting the board from the B/REC
Thanks
17VDC same make. input at19VAC all good . nothing else was connected just the transformer and the Bridge Rec to 240 V mains. Thatcher board has been tested all seems good.
so not wanting to proceed to connecting the board from the B/REC
Thanks
If each diode has a 1v Vf, then 17V would be right, no?
However and also... I have no real idea about this - but output from the bridge is a weird waveform. Will your DMM read correctly on either AC or DC? What should it read? Peak voltage? RMS?
However and also... I have no real idea about this - but output from the bridge is a weird waveform. Will your DMM read correctly on either AC or DC? What should it read? Peak voltage? RMS?
The DMM IS A 19999 counts auto -ranging DMM watching a you tube video Aleph J test on the B/Rec he had 17VDC I guess 17VDC is fine but why the difference ?
- Home
- Amplifiers
- Pass Labs
- Aleph Jzm