The original nibbler.
Purchase the Original Adel Nibbling Tool here
I think I have been using mine of almost 60 years. Actually wore the first one out!
However the price has gone up quite a bit in that time!
So two votes for a nibbler.
First you drill a hole then you can cut away!
The German version.
Sheet Metal Nibbler | Knipex
Last edited:
Nibblers are better with softer metals like aluminum, but tedious too.
And for odd holes, a Dremel with the right bits (diamond) are time-savers.
And for odd holes, a Dremel with the right bits (diamond) are time-savers.
My best tool for sheet metal is a Nisshinbo MAP 500. https://www.gindumac.com/product/nisshinbo-map-500_NL-PUN-NIS-2001-00001
However it is out of almost anyone’s budget.
I have found Dremel tools to be quite light duty. They use a DC motor to get the high speed. Unfortunately as they warm up they have been known to overheat the internal bridge rectifier. That fails by shorting out, sometimes taking out the rotor windings. I am on my fourth one and it is rarely used. It also does not inherently cut square as a nibbler does.
A nibbler does require hand strength and occasional bit sharpening or replacement. It will give reasonably precise square corners and holes. It really is a nice tool and for this application the rear panel is 1mm thick and nicely in the thickness range specified for the Knipex tool.
My best three hand cutters are made by Channellock, Erem and Knipex. They use great steel and make excellent products. The Adel nibbler as far as I know was the first small handheld one. It works well but is not of the quality of the other three. I find the weakness is in the die part of the tool. As a result it does work better on weaker materials. Of course few folks know even with a nibbler lubrication of the cutting surface is still important.
My MAP 500 pretty much keeps the punch floating in oil. Small punches are good for 200,000 holes when properly sharpened and oiled.
I currently am rebuilding a Brown and Sharpe 2B surface grinder to be able to sharpen my tools. The long ways have been scraped, the arbor was yesterday’s project and as soon as I figure out how to get there, the cross ways will be refinished. Interestingly enough the original paint was battleship gray. The real battleship gray from the WWI surplus stock. No date on the machine, but it is labeled as being compliant with the requirements of the WWII production board. The unit was modified by the prior owner to work as a model 2, but I don’t need the power drive feature for my use.
Old but the build quality is fabulous down to even the machined screws that hold everything together. All mated parts are precisely ground to fit.
Scrap steel is currently about 11 cents a pound. The machine weighs 1400 pounds, but I got it for $75.00!!! Working it is worth a few thousand. The offshore copies do not use the same quality of material or parts and wear out quickly. (Grinders have lots of destructive swarf!)
Last edited:
Here scrap steel is double that...
Good luck with your project.
Level and align the machine properly, check for squareness on the job with a micrometer and surface plate.
Good luck with your project.
Level and align the machine properly, check for squareness on the job with a micrometer and surface plate.
I own a few precision levels, bought the first one and found the rest at garage or estate sales. A precision level not just shows level but is calibrated so the bubble moves one division for an error off level of .005” per foot.
As to testing for flat I have both a granite plate and a ground straight edge. The straight edge is used with “high spot blue”. A tinted grease that when squeezed between the reference flat surface and the test piece will be darker blue where it is low.
I use a diamond block to scrape the light blue high surface until the entire length is of uniform color.
Granite is used as the reference material. It can be ground flat by testing for level across the entire surface while grinding. The advantage of granite over steel is that if one accidentally bangs something into it, a piece chips off leaving a low spot. That is easily seen and spanned in use if needed. If you use steel when you bang into it and cause a dent, it also raises a high spot.
Now to test surfaces for dings and dents, you use a dial indicator. It is a round scale dial with a pointer tied to a protruded rod. As the rod is pushed in the dial moves. It can go around the dial several times if things really are off. My best one measures .050” per revolution. Never found one at a garage sale! Fortunately they are not that expensive.
Testing for squareness is done with a level plate with a hole through it. A plumb bob holds a wire passing through the hole. As it is important that the load weight be centered the wire is considerably longer than needed to pass through the hole. A square is then placed against the setup and adjusted by looking at the light illuminating the gap. However I no longer use the traditional candle. Really precision squares are adjusted by scraping with the diamond block.
These are just some of the basic tools used to set up machinery.
The humor came one time when I lent one of my precision levels to a fellow trying to level a table saw. He was using 1/4” plywood as his leveling shims. Didn’t quite figure out that anytime he put in a shim the level went off the scale in the other direction.
I do keep shim stock on hand. Assorted sizes from .0003” to .032”. Thinest shims are needed to keep the base of my engraver flat. Typical engraving depth is .007”, so an error in flatness of a trivial amount will show up as some letters would look “bold” when others are normal width.
Now I did have my guys who are in their thirties participate, as this is the most basic of shop skills and rarely taught
Last edited:
I have 3 -5 and 7 Ton punchers and an assortment of punching dies, both commercial (round - rectangular - square holes) and custom: slider pot slots in various sizes, , rectangular toggle switches, XLR connectors, etc.
Best investment I ever made, self paid in less than a year, then solid money makers.
Paraphrasing the MasterCard ad: "Priceless, there ARE things money can buy" (and change your life 😉 )
EDIT: Simon, you have an ENVIABLE set of tools and machinery.
As of:
My lathe was German WW1 vintage, an old Graf Spee sailor told me once, way more solid than a rock, I used it to turn flat surfaces on sand cast 15" and 18" speaker frames, and could accommodate up to 21" if needed, plus turning *square* magnet plates, but sadly I had to sell it cheap to recover the lathe room and turn it int a child´s room to receive my Granddaughter safely.
Oh well, we Grandpas are soft and anyway hadn´t used it for years.
Oh, it wasn´t Navy Gray but olive green, very similar to WW2 Jeep paint. 😕
Best investment I ever made, self paid in less than a year, then solid money makers.
Paraphrasing the MasterCard ad: "Priceless, there ARE things money can buy" (and change your life 😉 )
EDIT: Simon, you have an ENVIABLE set of tools and machinery.
As of:
I am not the one who will argue against 😉Old but the build quality is fabulous
My lathe was German WW1 vintage, an old Graf Spee sailor told me once, way more solid than a rock, I used it to turn flat surfaces on sand cast 15" and 18" speaker frames, and could accommodate up to 21" if needed, plus turning *square* magnet plates, but sadly I had to sell it cheap to recover the lathe room and turn it int a child´s room to receive my Granddaughter safely.
Oh well, we Grandpas are soft and anyway hadn´t used it for years.
Oh, it wasn´t Navy Gray but olive green, very similar to WW2 Jeep paint. 😕
Last edited:
Easy...mark out the rectangle on the metal, then get your metal cutting blade for your jigsaw & measure the depth from the tooth point to the back spine. Then get a drill bit a few mm bigger than this & drill inside the markings in each corner of the rectangle. This allows you to then place the jigsaw in each hole & cut each straight side. Then file it to finish.
Easy...mark out the rectangle on the metal, then get your metal cutting blade for your jigsaw & measure the depth from the tooth point to the back spine. Then get a drill bit a few mm bigger than this & drill inside the markings in each corner of the rectangle. This allows you to then place the jigsaw in each hole & cut each straight side. Then file it to finish.
That's the way I cut a rectangular hole, but in aluminum chassis.
Only I drill just 2 holes, opposite corners, to start the saw blade from.
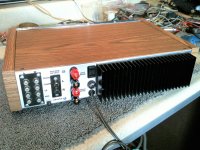
This is done when an external heatsink is mounted, so that the output transistors are directly mounted to the heatsink.
Attachments
What, $20K for an AP analyzer?
That $360 tool was made for someone who’s livelihood depends on it working for an extended period of time, what did you expect to pay really?
Get a scrap piece of metal and give it a try with drills, snippers, and some files.
I could probably do that in 10-20 minutes max…
Oh, if it’s aluminum, then half that time.
Patience, my young padawan. With drills and files, make holes, you will.
What profiles are those in the 2nd picture holding the sides panels and the screws for the top and bottom panels? Thanks, appreciated.
I agree with drill, jigsaw, and files. I've made a nice adapter plate for a twin-shaft car radio out of stainless steel plate using exactly those tools. Two things I've learned are: use new(ish) sharp files, and, scribe the outline with a sharp point. You can't file precisely to a fuzzy line.
I guess a Dremel or grinder with a cutting disc would work, and may in fact be better than drilling holes for starting the jigsaw cuts.
I guess a Dremel or grinder with a cutting disc would work, and may in fact be better than drilling holes for starting the jigsaw cuts.
There is a dremel for this job, but it is slow, you break a lot of cutting discs and need eye protection and hands etc. I watched someone take an hour to do it in 1mm steel.
I'd just drill and jigsaw and file.
I'd just drill and jigsaw and file.
Take a day or two and drill and file. If you are filing steel, it will be very loud, you might need hearing protection. I have done this many times before, and no special tools are required. Use a round file, it will cut quicker, a flat file can be used to flatten at the end.
- Home
- Design & Build
- Construction Tips
- $360 for a hole...?