Long time to get to this point. I remember listening to a Threshold in the early 80's as a teen and never really got over how great it sounded. Just beyond anything I'd experienced to that point and the audio hook was set. Over time I've had many an amp but couldn't afford Mr. Pass' work. Until now.
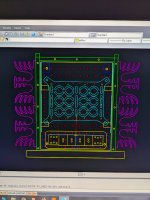
The usual thanks to all the generous souls that populate this nook o' the net. Per Mr. Pass, I submit a nod/homage to your online avitar that adorns the faceplate of a newly minted F5m.
Merci!


The usual thanks to all the generous souls that populate this nook o' the net. Per Mr. Pass, I submit a nod/homage to your online avitar that adorns the faceplate of a newly minted F5m.
Merci!
Attachments


This one has been a long time coming.
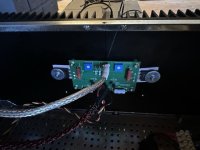
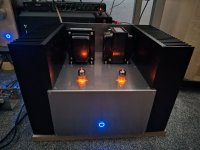
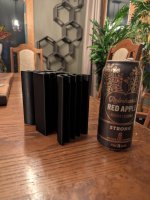
Not exactly a fully Nelson Pass amp but a “big” Hammond 193V Mofo with FE2022.
I initially used the FE2022 as a general use amplification stage after a 6-24 2-way crossover board and was left unimpressed. They were replaced with LM4562 opamp stages. However, after messing around with an unsatisfactory valve front end on the Mofo, I had the FE2022 boards already built and thought it would be silly not to try them. Needless to say, they worked very well in this application. The FE2022 is powered by a “Studer 900” dual supply +/-24V. The valve sockets have been replaced with acetal dummy ones I machined, with an amber led at the base to provide a nice cosmetic feature without needlessly burning out valve filaments.
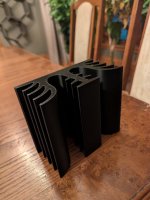
The two heatsinks are 300mm x 300mm x 83mm (oversized slightly!) and the rest is 6mm aluminium plate.
This amplifier has now displaced the 2A3SE that I had for many years, and currently provides amplification for the midrange and upwards.
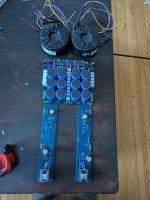
I’m so impressed that I’m building a second Mofo (with the remaining left over 2 FE2022’s), to provide LF duty to replace the aged and heavily modified Sugden A21 series 2, that I’ve had on LF duty since the heavily modified TG “The Loudspeaker” speaker build earlier this year.
Not exactly a fully Nelson Pass amp but a “big” Hammond 193V Mofo with FE2022.
I initially used the FE2022 as a general use amplification stage after a 6-24 2-way crossover board and was left unimpressed. They were replaced with LM4562 opamp stages. However, after messing around with an unsatisfactory valve front end on the Mofo, I had the FE2022 boards already built and thought it would be silly not to try them. Needless to say, they worked very well in this application. The FE2022 is powered by a “Studer 900” dual supply +/-24V. The valve sockets have been replaced with acetal dummy ones I machined, with an amber led at the base to provide a nice cosmetic feature without needlessly burning out valve filaments.
The two heatsinks are 300mm x 300mm x 83mm (oversized slightly!) and the rest is 6mm aluminium plate.
This amplifier has now displaced the 2A3SE that I had for many years, and currently provides amplification for the midrange and upwards.
I’m so impressed that I’m building a second Mofo (with the remaining left over 2 FE2022’s), to provide LF duty to replace the aged and heavily modified Sugden A21 series 2, that I’ve had on LF duty since the heavily modified TG “The Loudspeaker” speaker build earlier this year.
Attachments

Yeah, sure.
I did a build log of them here: https://www.audio-talk.co.uk/phpBB3/viewtopic.php?t=8827
I did one of the amp as well, here: https://www.audio-talk.co.uk/phpBB3/viewtopic.php?t=8888
I did a build log of them here: https://www.audio-talk.co.uk/phpBB3/viewtopic.php?t=8827
I did one of the amp as well, here: https://www.audio-talk.co.uk/phpBB3/viewtopic.php?t=8888
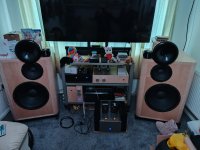
Here is my armada of NP-design DIYaudio amps. Clockwise from top they are -- you know 'em, you love 'em -- Aleph J, F5, F5m, F6, F4, F6 Diamond, BA-3, F5 Turbo, and M2x (with all 5 of the original IPS's). As some point or another, they've each done time as my regular listen-to-music amplifier.
Attachments

Wow, what a collection! incase something is for spare, let us know!🙂Here is my armada of NP-design DIYaudio amps. Clockwise from top they are -- you know 'em, you love 'em -- Aleph J, F5, F5m, F6, F4, F6 Diamond, BA-3, F5 Turbo, and M2x (with all 5 of the original IPS's). As some point or another, they've each done time as my regular listen-to-music amplifier.
Ok, you convinced me, i will take it off your hands. But you have to pay the shipping 🙂Here is my armada of NP-design DIYaudio amps. Clockwise from top they are -- you know 'em, you love 'em -- Aleph J, F5, F5m, F6, F4, F6 Diamond, BA-3, F5 Turbo, and M2x (with all 5 of the original IPS's). As some point or another, they've each done time as my regular listen-to-music amplifier.

I realize this was 10 years ago, are you still here?ACA - Burning Amp, almost done. I could use input
All,
Attached are my ACA pics. I hadn't thought abut building an ACA, I'm in the middle of a J2 clone and I have SIT parts sitting on the shelf. The change of heart came at this year's BA Festival. I won an ACA kit in the raffle! I've never won any contest, never mind a Pass amp!
I usually like to design and etch my own PCBs. In this case, the kit provided them, so I would have to add the DIY touch in another way. The chassis was the obvious choice. I have never built my own chassis, as I only own hand tools, and I want my Class A amps to be made of metal (for safety), so thought was in order.
Off I went to SF scrap metal, and bought some salvage aluminum buss bar for $1/lbs.
Next I bought a Bosch Jig Saw (awesomeness) and cut my aluminum pieces to size. Cutting aluminum with the Bosch was a breeze. I'd never cut metal before, and I was worried about safely and accuracy, but the Bosch is highly recommended.
Some elbow grease and bastard files later, and I was ready to put the box together. The ACA logo was hand done on the drillpress, boy I wish I had a CNC mill...
I decided on M4 screws (I had a bunch left over from my XF5 project), drilled and tapped my heatsinks (part of the kit), and the chassis was born.
The next issue was tough for me, many of the parts were meant for a thin sheet metal chassis, and I would have to mill out some of the thickness to use them - this was especially true of the power connectors.
I had a 1/2" end mill from a speaker project, I mounted in my $30 Harborfreight drill press, using oil and going slowly, and I got lucky (see pictures). I also had to file down the FET washers to let the top sit correctly (see pictures).
Left to be done - the power switch. I don't have a drill bit large enough to mount the powerswitch supplied, and I would also have to mill metal away to make it stay in place. I'm seeking a nice, mountable with a drill press, power switch. I'd been thinking about the momentary switch solution here:
The ε24 Power Switch Driver Circuit
I was also thinking about a capacitive touch switch for the chassis itself, but I am concerned about a touch switch going rogue in the case of a Class A chassis with the heat involved.
Suggestions are welcome. I would also welcome anyone doing anodizing in the Bay Area.
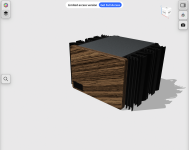
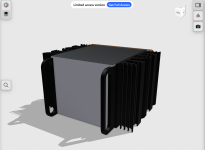
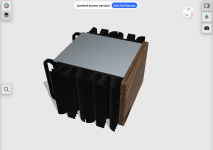
Working on a dual mono F6 in a custom aluminum chassis. I purchased some gigantic heat sinks off eBay kinda by accident, I decided to 3D print one at 1/2 height for mockups.
Attachments
Folks:
I had planned on building an upscale B1 Rev. 2 after listening to B1 buffers built by friends, both diyAudio members (@schubert and @vdi_nenna, who started the B1 Rev 2 thread). Then, at the BA2024 raffle, I won a B1 Korg Nutube board (fully populated and signed by NP!) and decided to build two B1 variants, mostly just to hear how they differ.
Soon afterwards I stumbled on an interesting attenuator/input/display system in Vendor’s Bazaar ( https://www.diyaudio.com/community/threads/volume-control-relay-attenuator-passive-preamp.415972/ ) and reached out to the designer, @serglobo, who was happy to customize his system slightly to better suit my design for the two preamps. I bought two systems from him and am thrilled with their performance and the excellent support serglobo provided. I also asked for help (and struggled a bit) with a “standby LED” circuit and appreciate, very much, the support received ( https://www.diyaudio.com/community/threads/standby-mode-indicator.419954/#post-7884521 ). It may be the norm here, but it’s still remarkable.
The preamps are identical other than the B1 variant and its power supply. I’ve only just finished building them and haven’t begun a serious “compare and contrast” yet, but I am looking forward to starting that evaluation soon. diyAudio members living in the Philadelphia, PA region who are interested in auditioning these two preamps themselves are invited to contact me.
Regards,
Scott
Attachments
Last edited:

bhjazz:
The larger display is nice; time will tell if it's too prominent. And yes, I keep on reusing certain design elements in my builds. I tell myself they represent my "house look" but one could just as easily argue that recycling them as I do demonstrates a lack of imagination (shades of R. W. Emerson's "a foolish consistency is the hobgoblin of small minds"). That said, I do like those design elements.
Regards,
Scott
- Home
- Amplifiers
- Pass Labs
- Pictures of your diy Pass amplifier