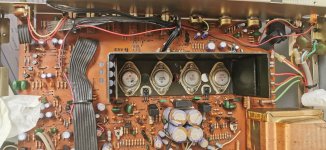
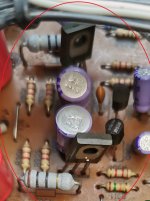
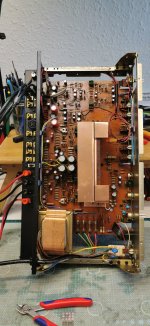
all in now.It needs a clean up, but what a shame about the 3rd transistor down, the print came off and broke so i had to do a repair.
I have to decide now if to take it of and connect with wire or leave it.
It just looks scruffy like this
would you leave it or take it off and connect it up more neatly with wire?
so much better access around the amp now
before and after photos, and the set up now complete.Ive not removed or modified for driver removal yet, ill try the amp first with them in to make sure it all works first.
Attachments

It needs a clean up, but what a shame about the 3rd transistor down, the print came off and broke so i had to do a repair.
I'd leave it. You never see it and another way to think of it is that it id no worse than many a thing NAD would do in production. Its fine 🙂
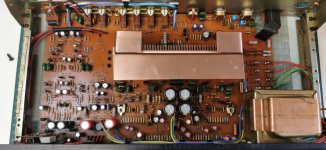
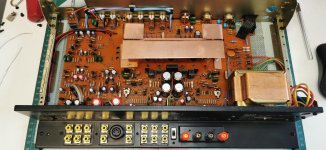
so im getting close to do some of the final bits now
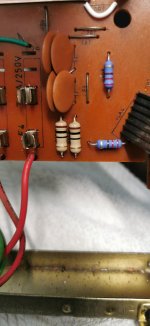
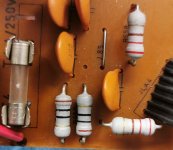
ive replaced the old composite resitors with film types
ive also altered the regulated supply transitors so they are not near the caps(as @Vrystaat stated the caps dry out) all of these ar also uprated to 50v so they should last longer
as you can see in the 2 comparative photos
ive replaced the old composite resitors with film types
ive also altered the regulated supply transitors so they are not near the caps(as @Vrystaat stated the caps dry out) all of these ar also uprated to 50v so they should last longer
as you can see in the 2 comparative photos
Attachments
![IMG_20240519_115534[1].jpg](/community/data/attachments/1219/1219871-57577a3cef7f1021923272560fc4df7b.jpg?hash=V1d6PO9_EC)
I did look at doing that but it kind of defeated the object in this case as it brought the heat back closer again
Modern 105C rated caps will be in a different league to the NAD standard fitment so there should not really be any reliability issues cap wise.
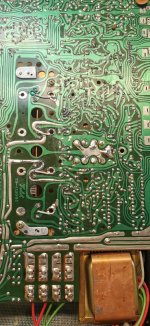
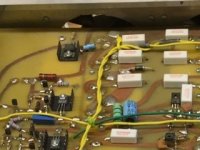
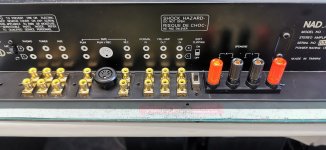
finished converting the back now, so its all down to a few little bits really,put the power cord back in and the switch,alter the base feed to the multiplier for now
I will try it with the drivers first to make sure it works.
Actualy the design, i think is actualy quite good from a lay out perspective,now the cables have been removed you can see its almost mirror image more or less for each channel on both pre and power sections,this proberbly accounts for the spagetti junction print layout.
Hopefully by the time ive finished, i will at least given it justice with the work that has been done.
Attachments

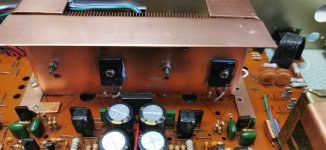
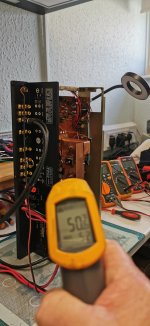
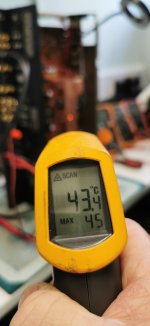
So turned on this morning, no lamp. Set up the bias at 100ma and the heatsink is getting hot but not too much. The amp sounds great, so taking my time paid off
Attachments
Last edited:
😎 literally 🙂
When the outputs start sizzling water its getting a bit to hot... when they unsolder themselves its time to switch off 😉
When the outputs start sizzling water its getting a bit to hot... when they unsolder themselves its time to switch off 😉
Around 100ma is the optimal bias point for lateral FET's but that doesn't mean you can't experiment. Try it at lower settings and see if you can hear any difference... just trust what you hear.
Tried it at 30ma and then 60ma.sermed somewhat lacking at 30ma,like I had to raise the volume to hear it properly, and I'm sure a bit of distortion. Over 100ma, def less 'effort' I would say to acheive same volume and clearer
Well 100ma is the recognised point to aim for. There is also 'expectation bias' 😉 which is an appropriate term and where you are wanting the higher figure to be better. It can be worth listening for a few days at different settings and see if the impressions really are real or not.
Nice work though 👍
Nice work though 👍
- Home
- Amplifiers
- Solid State
- Last, but (hopefully) best ever modified and complete NAD 3020