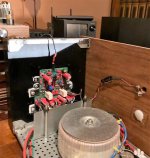
I'm still assembling the second batch of amplifiers and some components are missing that have not yet arrived. The other is working and I'm finishing modifying the chassis. It is a beautiful amplifier, very very quiet and with a great sound.

Attachments

How big a piece of sheet metal do I need for the bridge rectifiers for heat sinks? (Ripple Eater)
I have the new board layout. I need to get Jim’s Audio to stop supplying the old boards. Job for January 3rdI will call my friend to redraw the pcb for To247 case still.
I don't like flying cables😉
🙂
Normally If you are using a Modushop hounding with aluminium cover plates you can use the 3 mm base plate without problems. At a very rough guess, 150mm x 150mm would be about right.How big a piece of sheet metal do I need for the bridge rectifiers for heat sinks? (Ripple Eater)
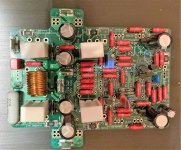
You may have misunderstood my question. On the power supply board. Do the bridge rectifier's need heat sinks? They have holes for attaching heat sink. That's where pics help the beginners.
Look at the KX2 main document. Slide 32 states: “D4 is the main bridge rectifier. It must be bolted directly onto the base of the chassis with thermal grease between the chassis and the exposed heatsink tab on the bottom of the rectifier (the tab is isolated electrically from the internal rectifier diodes).The legs are bent up at 90 degrees and enter the PSU board from the bottom.”You may have misunderstood my question. On the power supply board. Do the bridge rectifier's need heat sinks? They have holes for attaching heat sink. That's where pics help the beginners.
Although he is using a normal PSU as an example here, the same applies for the ripple eater.
What you may not realize is that because you have mounted the bridge rectifier to the base of the chassis, the chassis now acts as a “heat spreader” and a rough guess as Andrew has said is a minimum of 3mm thickness, and 150 mm square of aluminum. Most chassis bottoms are larger than this and will easily accommodate the dissipation from this rectifier (about 7-8 watts - I am guessing a little here) when running it with current spreads up to 1.2A/ch or 2.4A total.
If you insist on using a “heatsink”, then understand that it will need to dissipate about 7-8 watts for a stereo amplifier. You will want to aim for a heat rise of no more than 20 degrees C over ambient to be on the safe side. So that would mean about 2-3 degrees C/watt. You can always contact Heatsink USA and get aluminum cut for that. But that seems like a lot of work when just bolting the rectifier to the base of the chassis or to a front panel is pretty easy.
7-8 watts dissipation on a worst case scenario isn’t really that much. Remember if you were to use the switch and go to Class AB or AAB the dissipation is much, much lower.
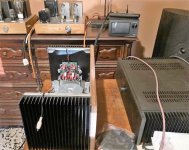
I like attaching my power supplies to the front panel as it frees up space inside the chassis and if any dissipation from rectifiers or BJT’s in the ripple eater need to addressed, a thick front panel can easily accommodate.
Best,
Anand.
Last edited:
Great pic! Most helpful. I'll start digging thru my junk pile to see what I can find. Would mounting it on the amplifier heat sink be acceptable?
Here: https://hifisonix.com/projects/hifisonix-kx-amplifier-v2/Some links are already dead. I'm looking for Jim's boards BOM?
BOM Here: https://hifisonix.com/wp-content/uploads/2022/11/kx2-Amplifier-BOM-Nov-2022.xlsx
Nice new look Andrew to your Hifisonix webpage. Well deserved thanks to your son, Chris.
Best,
Anand.
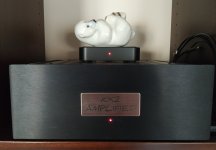
I'm happy with my Kx2!
Hi!
Pics of the inside and rear please!! It will help some of the newbie builders to this circuit like crispycircuit above…😉
Best,
Anand.
Hi Andrew,
I’m impressed by the very detailled documentation.
One of the best building guides I’ve ever seen including a fantastic looking amp once finished.
Hans
I’m impressed by the very detailled documentation.
One of the best building guides I’ve ever seen including a fantastic looking amp once finished.
Hans
- Home
- Amplifiers
- Solid State
- New Hifisonix KX2-Amplifier