You are correct, that was enough to get me started. I have amplified sound with it. At this point, I am using inexpensive speakers in case something doesn't work, but the sound quality seems to be good - I don't hear any noise, and I haven't tried any heroic attempts at noise rejection. I'm driving it directly with the balanced output of a Motu M4. I haven't done anything with the BTSB board yet, it seems some parts on the BOM are back ordered. The M4 will provide a +18db output, which should be sufficient for the time being.
I need to make/find a proper heatsink.
Thanks!
I need to make/find a proper heatsink.
Thanks!
You might look here:
TPA3255 Reference Design Class D Amp GB
Another way is to find a small heatsink about 100mm long x 25mm wide and drill and tap two M3 holes 36mm apart. Use two Amp brand 0.250 Faston tabs as thermal spacers with thermal paste compound to elevate the heatsink above the nearby parts.
You could even use a small GPU cooler and connect to the on board 12v:

TPA3255 Reference Design Class D Amp GB
TPA3255 Reference Design Class D Amp GB
Another way is to find a small heatsink about 100mm long x 25mm wide and drill and tap two M3 holes 36mm apart. Use two Amp brand 0.250 Faston tabs as thermal spacers with thermal paste compound to elevate the heatsink above the nearby parts.
You could even use a small GPU cooler and connect to the on board 12v:
TPA3255 Reference Design Class D Amp GB
Last edited:
Yeah, I’ve been looking at that drawing you made of the spacer block and the CAD file that is on that page you linked. I plan to take those dimensions and either get an interface block made or get one of my heatsinks milled to match. I like the idea of the interface block for easy ground isolation between the heatsink and the interface block.
I ran it with a small heat sink for a little while, the heatsink pretty quickly exceeded 70c.
Luckily for me, I already have piles of the connectors and the proper tools for the connectors you chose. They just happen to match ATX pc power connectors. The 4 pin mini connector is an ATX cpu connector with the polarity reversed, the 6 pin speaker connections are mates for PCIe power connectors, and the balanced input connectors match 3 pin fan connectors, which I appreciate.
I think I provide all amp shipments with a bag containing a complete set of two 6-pin connectors and crimp terminals, one 4-pin and terminals, and two three pin audio input and terminals. You do need your own crimp tool thouugh.
You are right though, PC motherboard power connectors is where this stuff is used and is very reliable.
You are right though, PC motherboard power connectors is where this stuff is used and is very reliable.
Yep, I got the bag of parts - everything I needed was included. I just appreciate that they are all standard connectors since I have an endless supply of them and the required tools.
Hi folks, for updates on the commercial version of this amp fully built and ready to use please see my Forum here:
TPA3255 Reference Design Class D Amp with PFFB
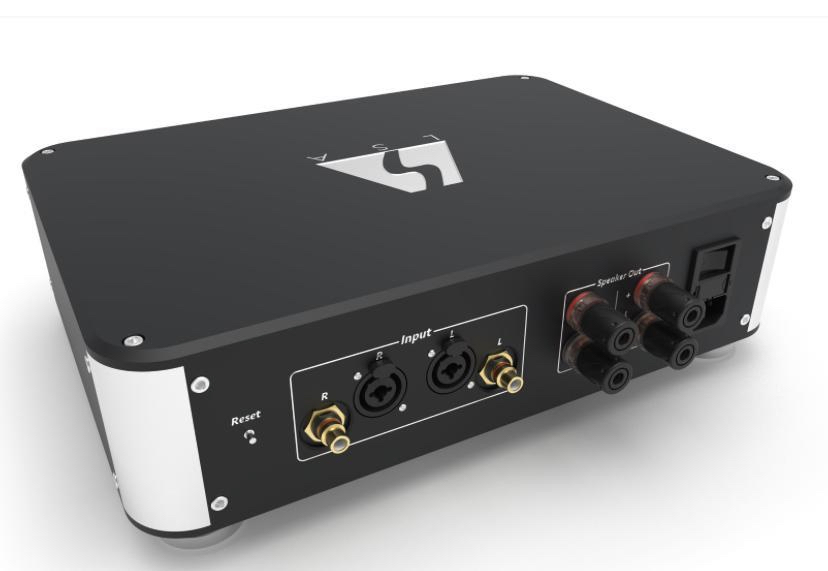
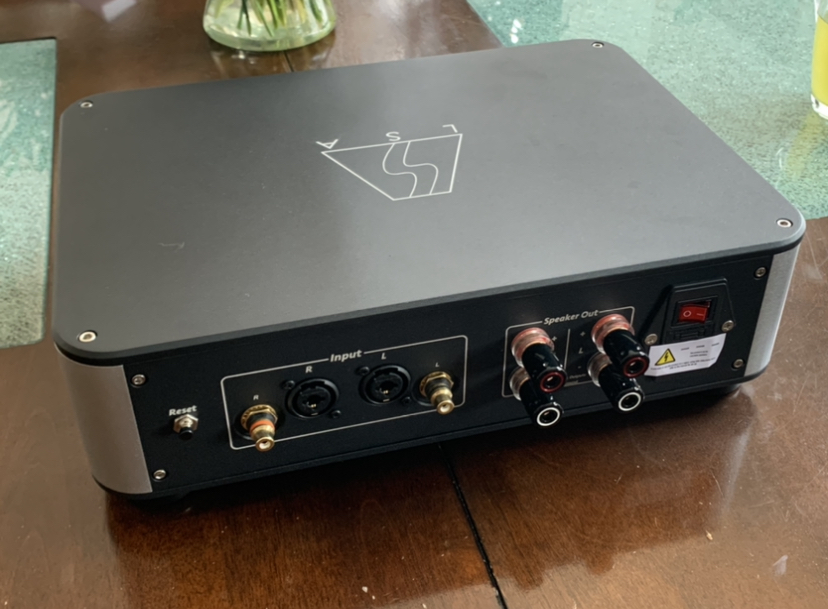
The rear panel is sometimes more beautiful than the front panel 🙂
TPA3255 Reference Design Class D Amp with PFFB
The rear panel is sometimes more beautiful than the front panel 🙂
Last edited:
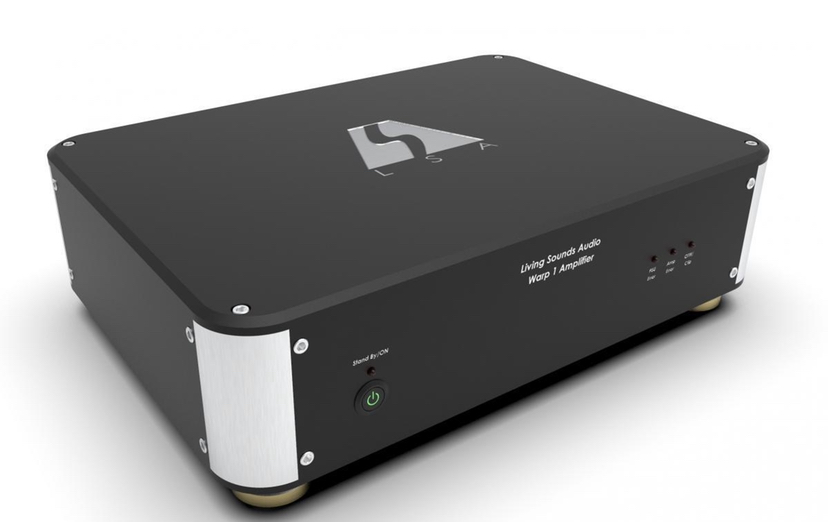
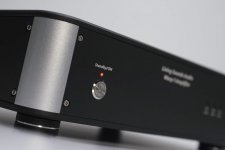
The first production unit of the Warp-1 amp is here and it looks and sounds stunning.
More info here:
TPA3255 Reference Design Class D Amp with PFFB
Rear panel with Viborg solid copper binding posts, RCA and TRS/XLR inputs via BTSB Panel Mount buffer board:
More info here:
TPA3255 Reference Design Class D Amp with PFFB
Rear panel with Viborg solid copper binding posts, RCA and TRS/XLR inputs via BTSB Panel Mount buffer board:
Last edited:
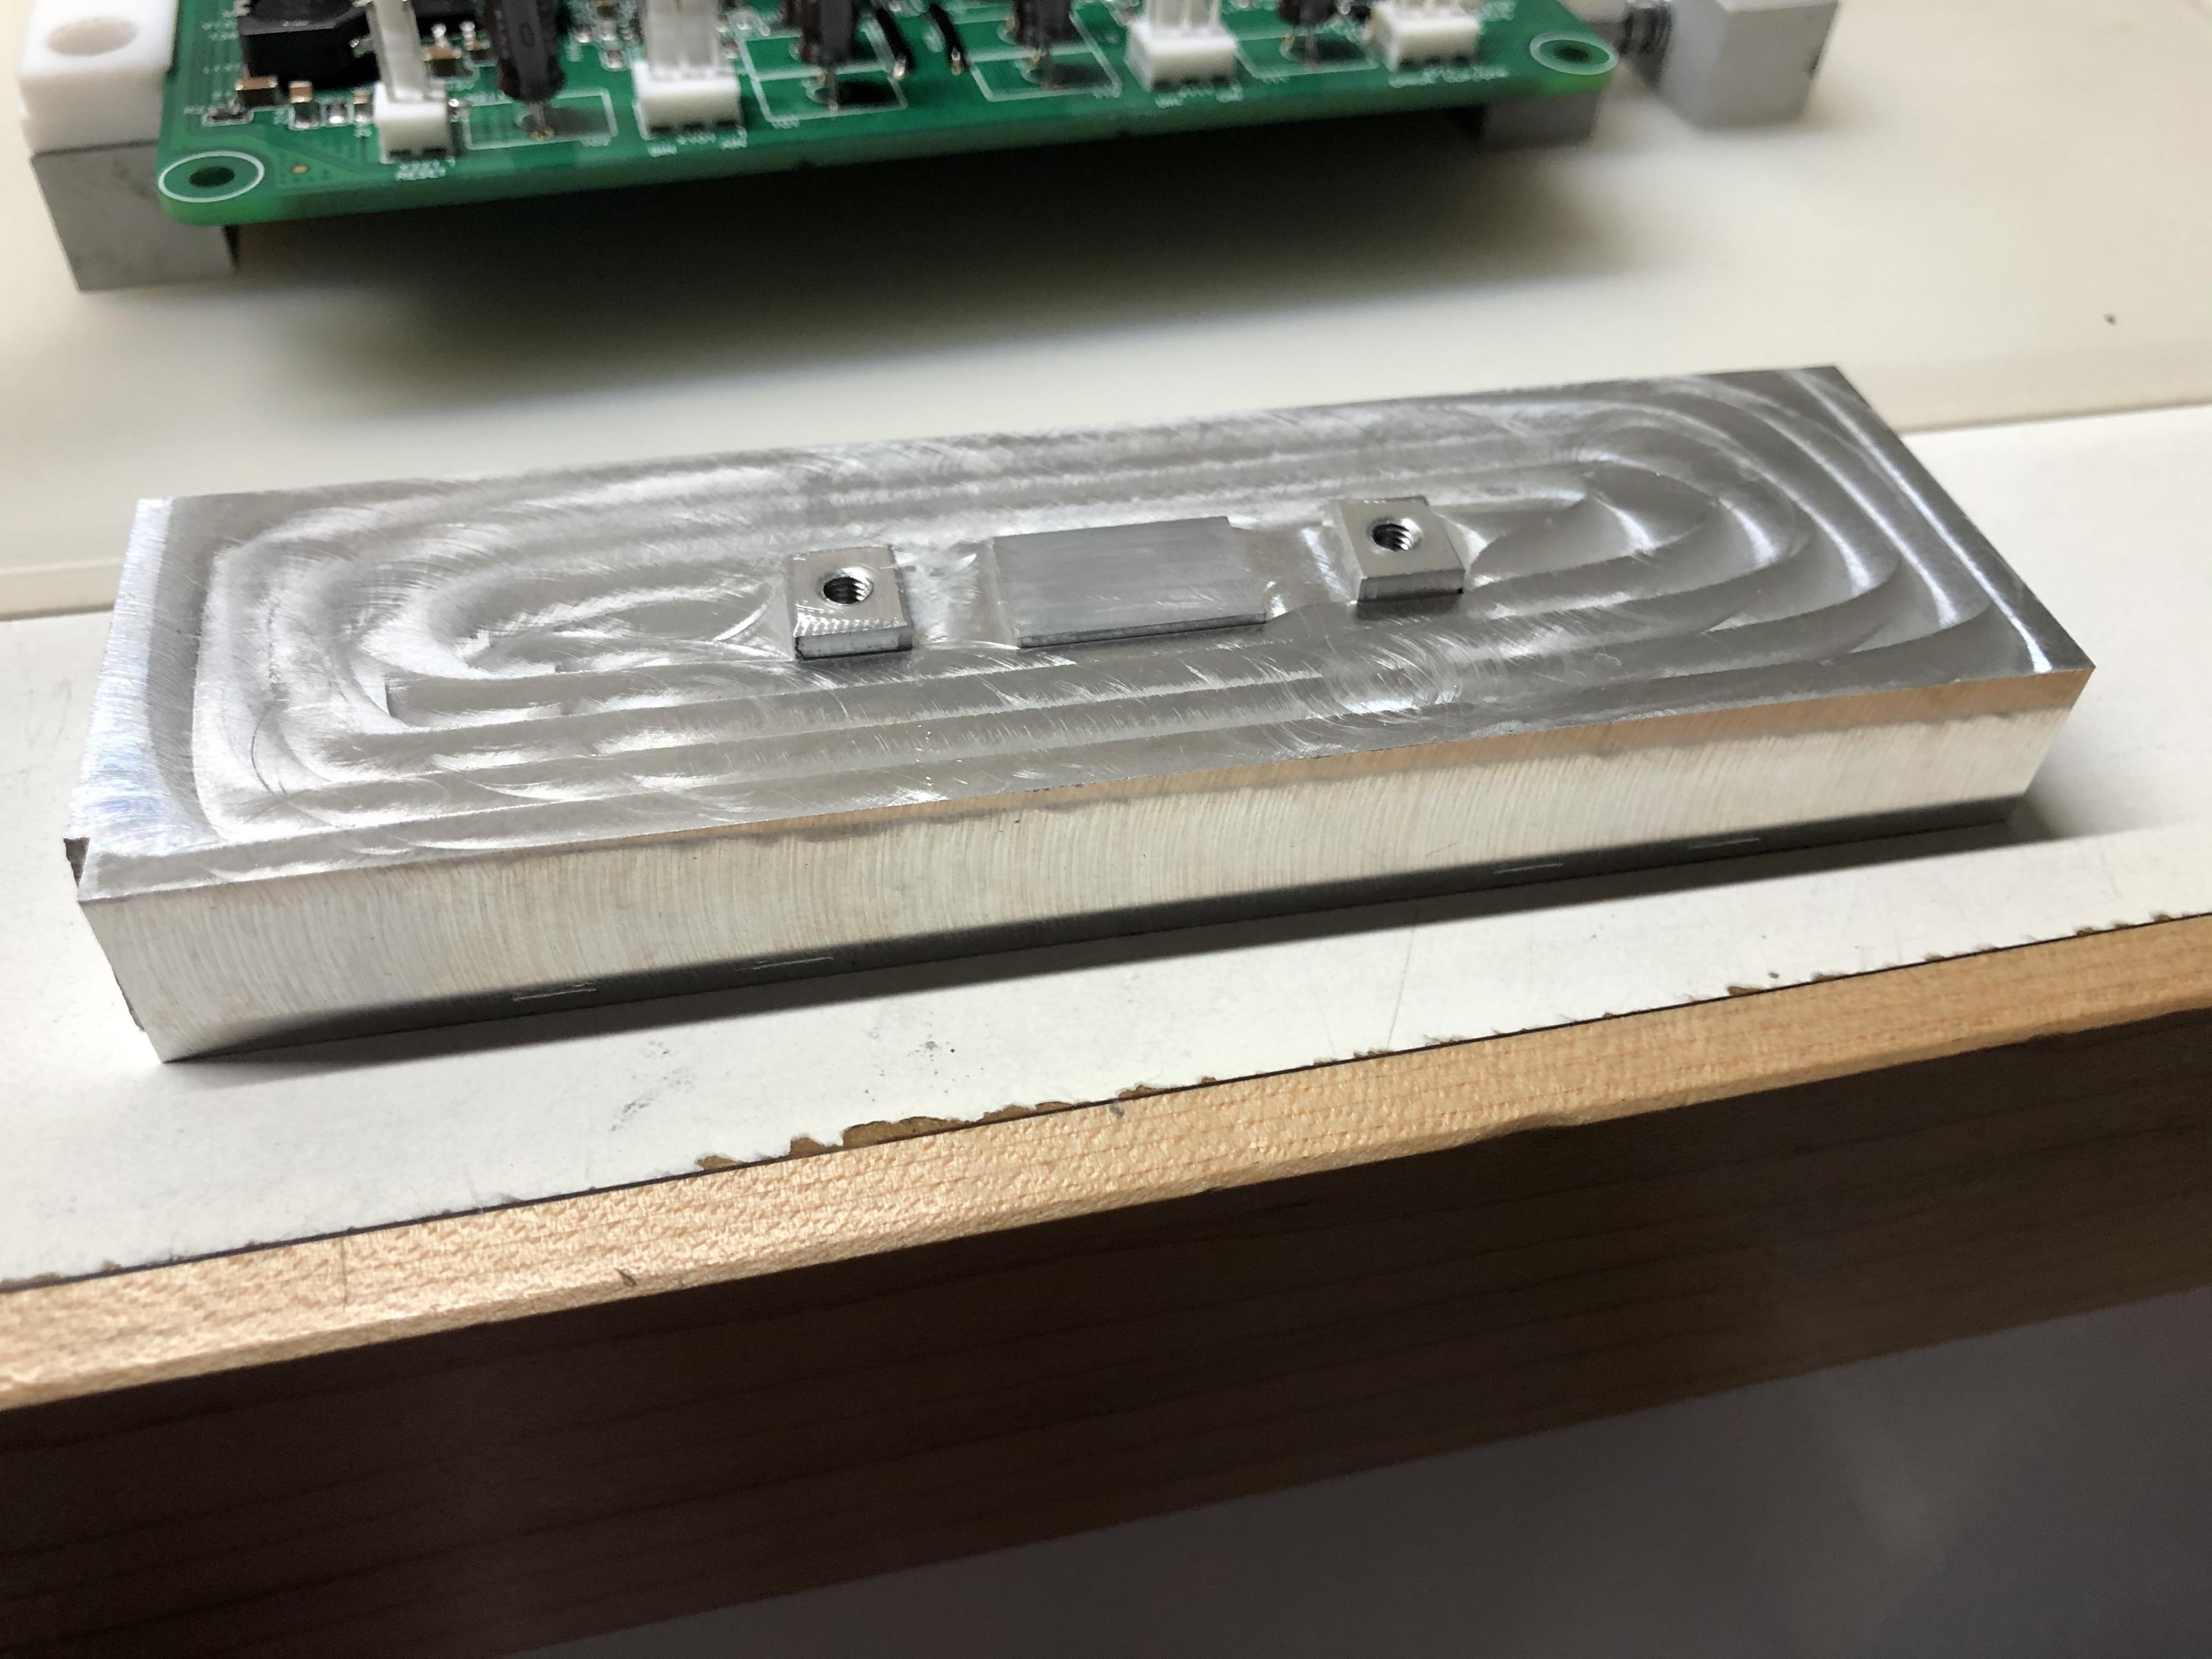
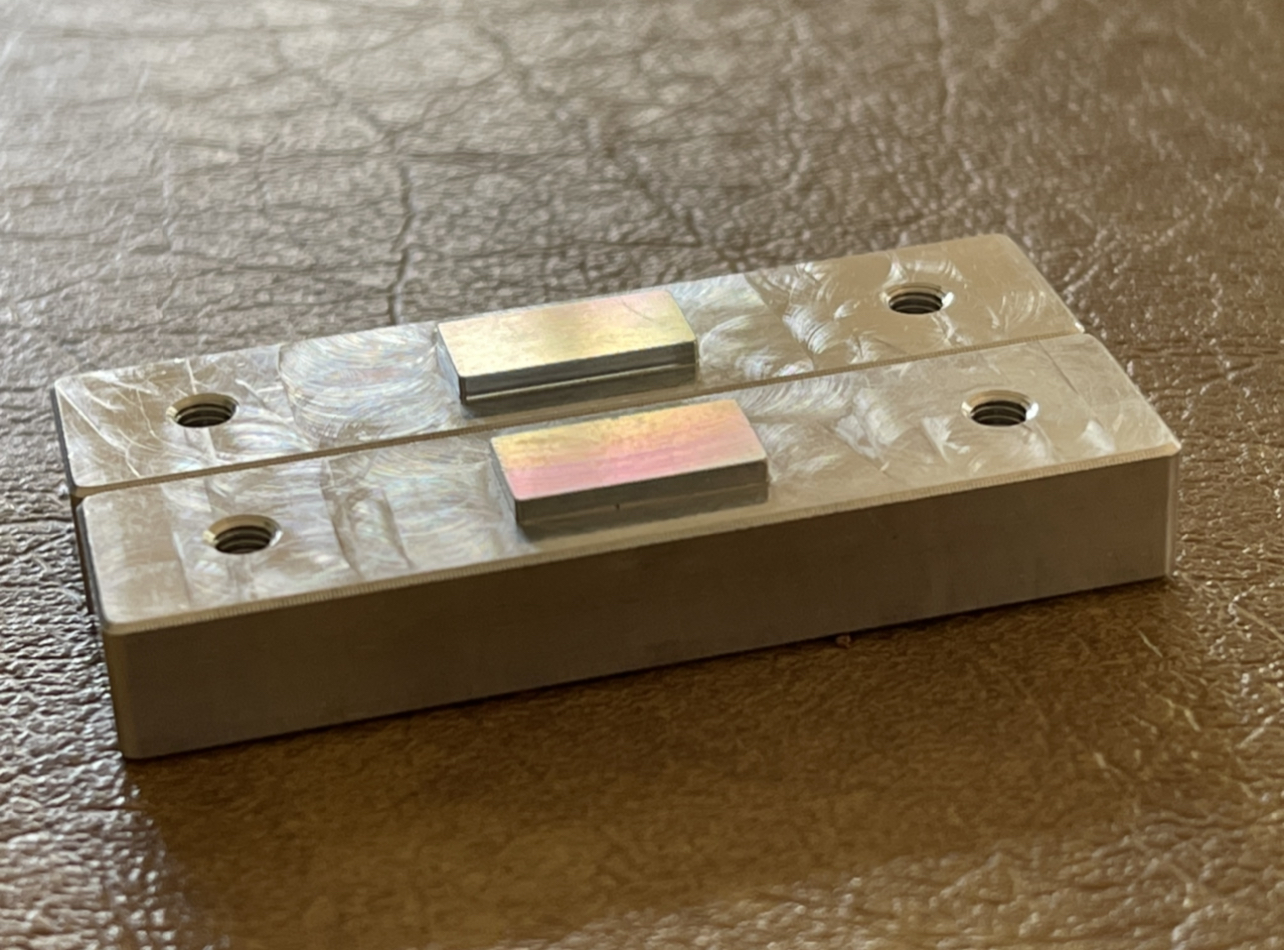
I have a batch of these nicely CNC made thermal transfer blocks designed for this amp. I’ll put them in my shop. Notice that all surfaces are milled flat. They are designed for proper stack up height using 10mm M3 brass standoffs on the PCB with this block and 0.5mm to 1.0mm thick silicone (electrical insulator) thermally conductive pad between the chassis and the block. The block is held onto the PCB with two M3 screws from above. Make sure you use thermal compound between the block and the TPA3255 chip thermal pad.
Attachments

Review of Warp-1 amp just came out on TONE.
REVIEW – The LSA Warp 1 Power Amplifier – Reviews | TONEAudio MAGAZINE
REVIEW – The LSA Warp 1 Power Amplifier – Reviews | TONEAudio MAGAZINE
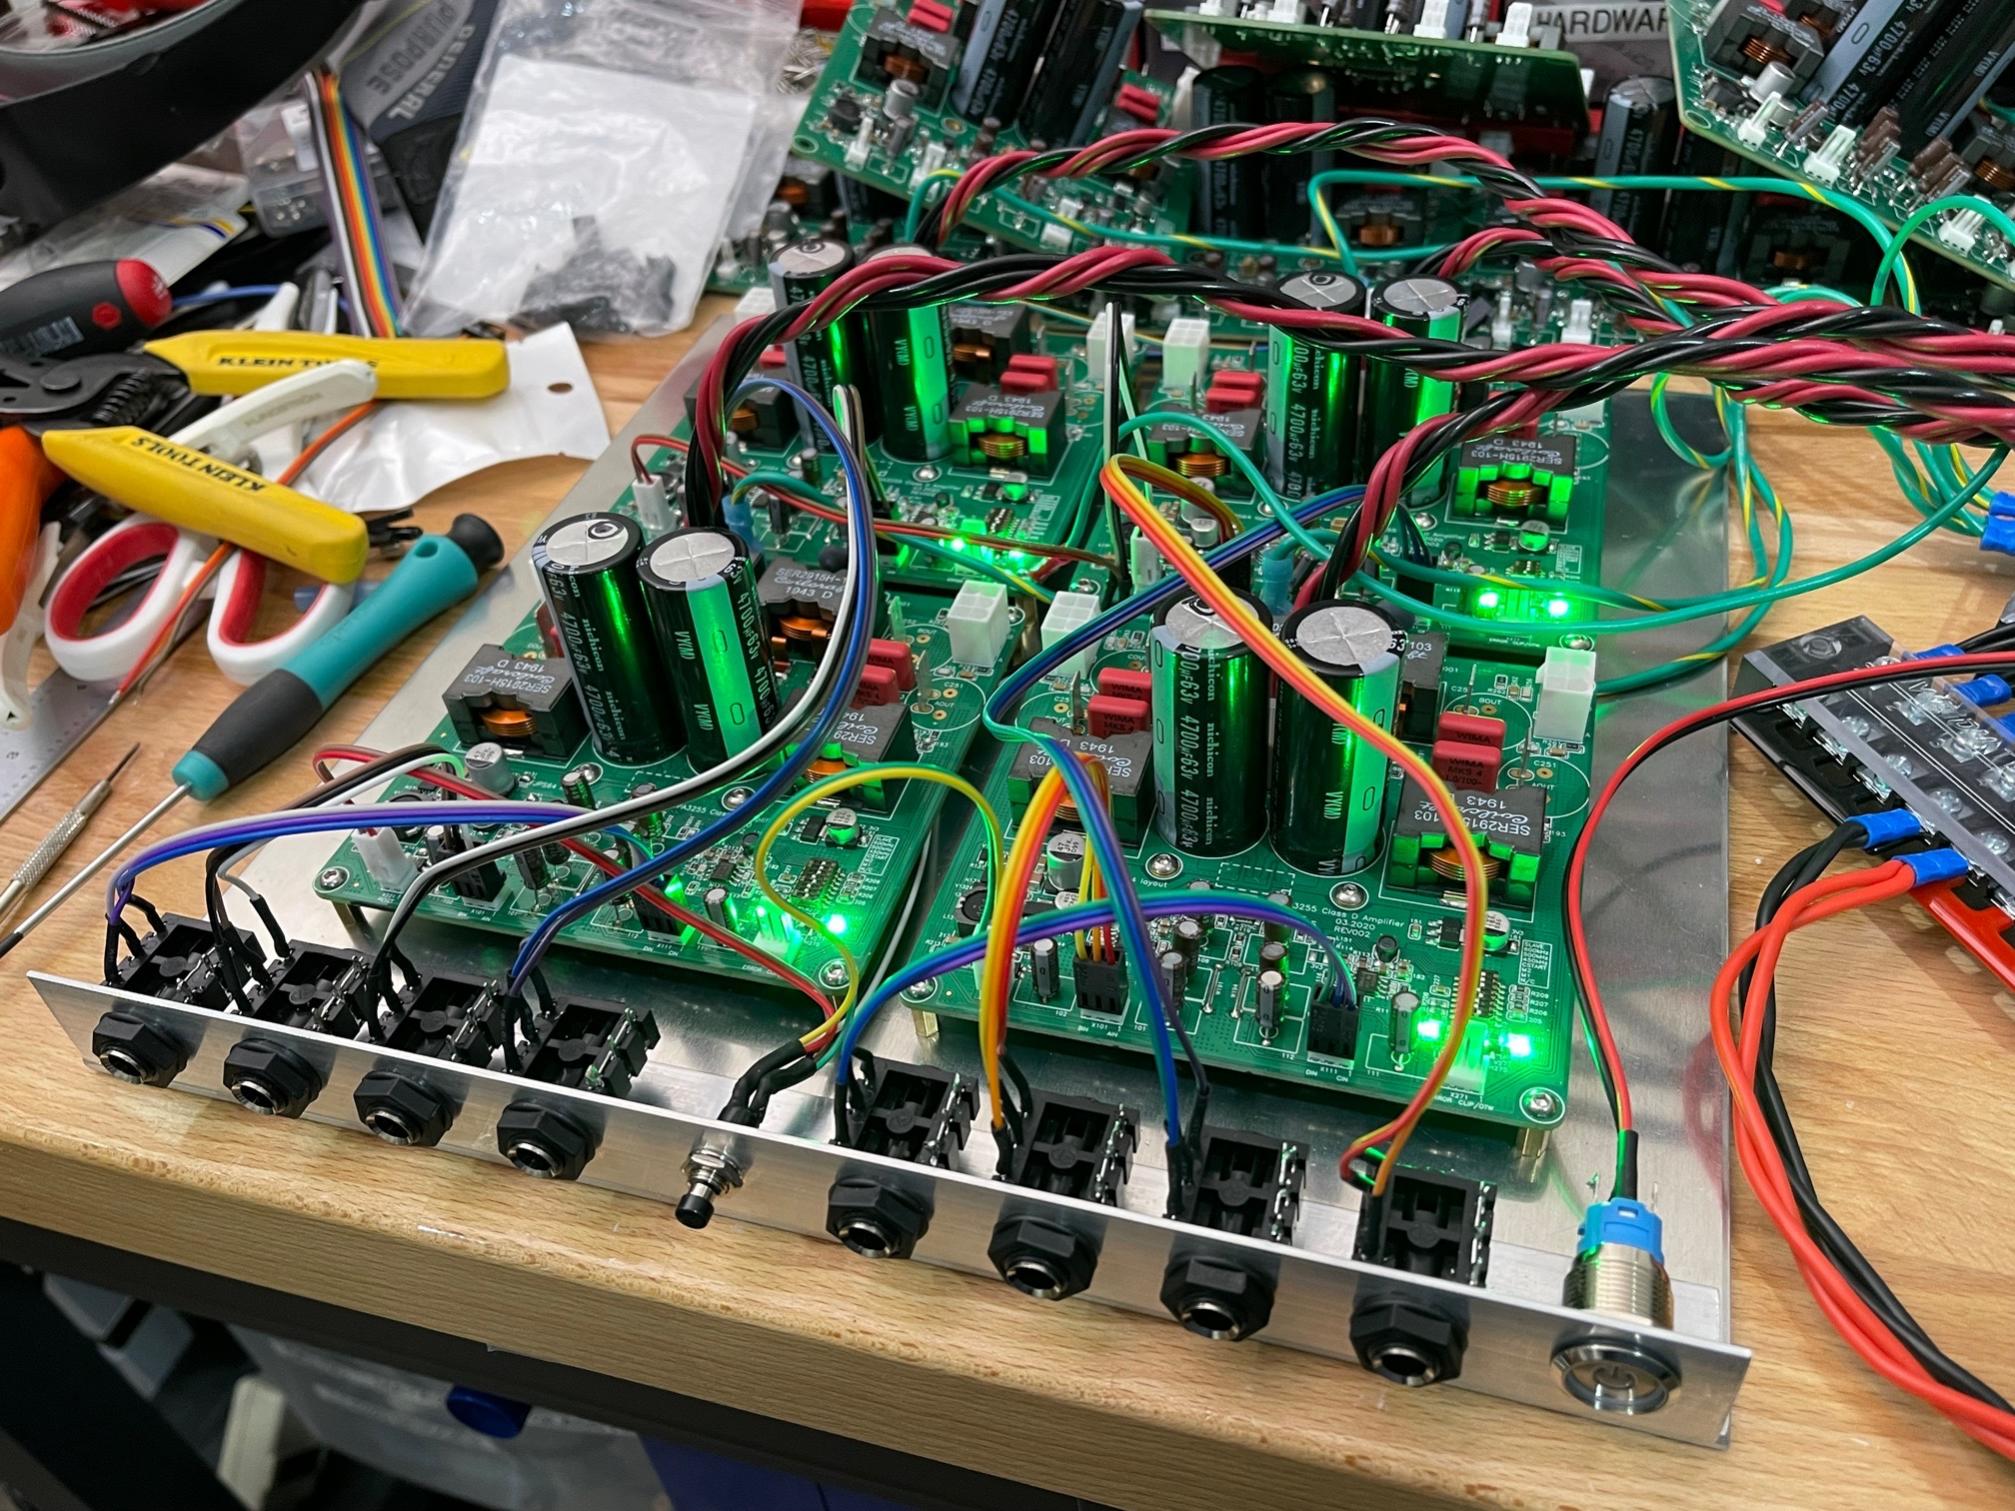
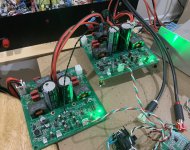
I made an 8 channel amp with 4 of these amp modules. It’s using a MicroAudio 1000w SMPS with PFC. This is a for a pro sound rig with DSP active speakers, and I have disabled the PFFB in order to get maximum power out of the amps with 22dB gain.
In case anyone is interested in getting the thermal heat transfer blocks, they are now available in my shop.
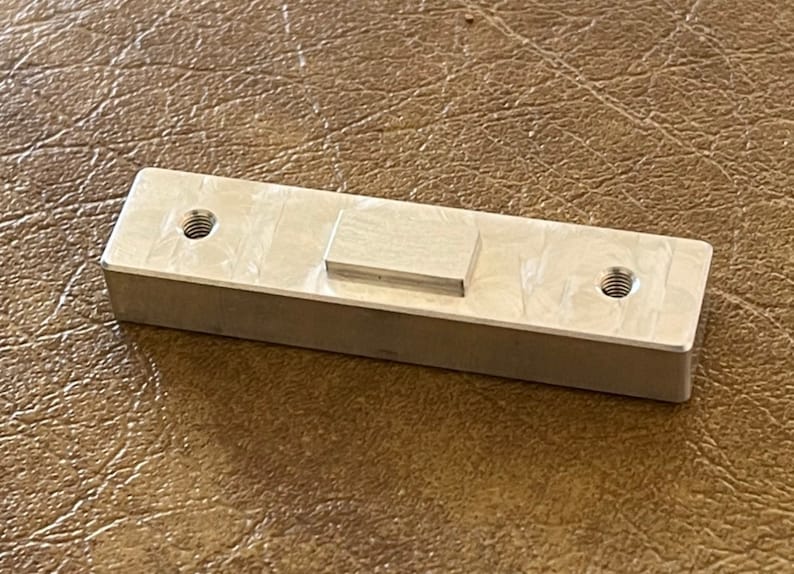
Heat Transfer Spacer for RTR TPA3255 Amp | Etsy
Heat Transfer Spacer for RTR TPA3255 Amp | Etsy
New review of LSA Warp-1 amp on SBAF just came out. The Warp -1 uses the RTR TPA3255 amp and BTSB as the core.
LSA "Discovery Warp One" Class D Power Amp Impressions | Super Best Audio Friends
LSA "Discovery Warp One" Class D Power Amp Impressions | Super Best Audio Friends

Hi X! Now that I see the 3255 amps are being shipped, is there a general startup/test guide associated with them? For instance, should we always make sure there is either a 4 or 8 ohm load attached to the outputs? Should we (at least) have your SE-to-Balanced output circuit in place on the balanced inputs? What LED sequence should we be seeing on test power up? 36 or 42-46V for the best output from your amp?
Thanks, Pete
Thanks, Pete
"The LSA has a really really great sense of plankton to the sound for a lack of a better word."New review of LSA Warp-1 amp on SBAF just came out. The Warp -1 uses the RTR TPA3255 amp and BTSB as the core.
LSA "Discovery Warp One" Class D Power Amp Impressions | Super Best Audio Friends
What in God's name is "plankton?" 🤣
Can this be considered a "Dual Mono" setup? What would be output power per channel of this configuration?Hi Folks,
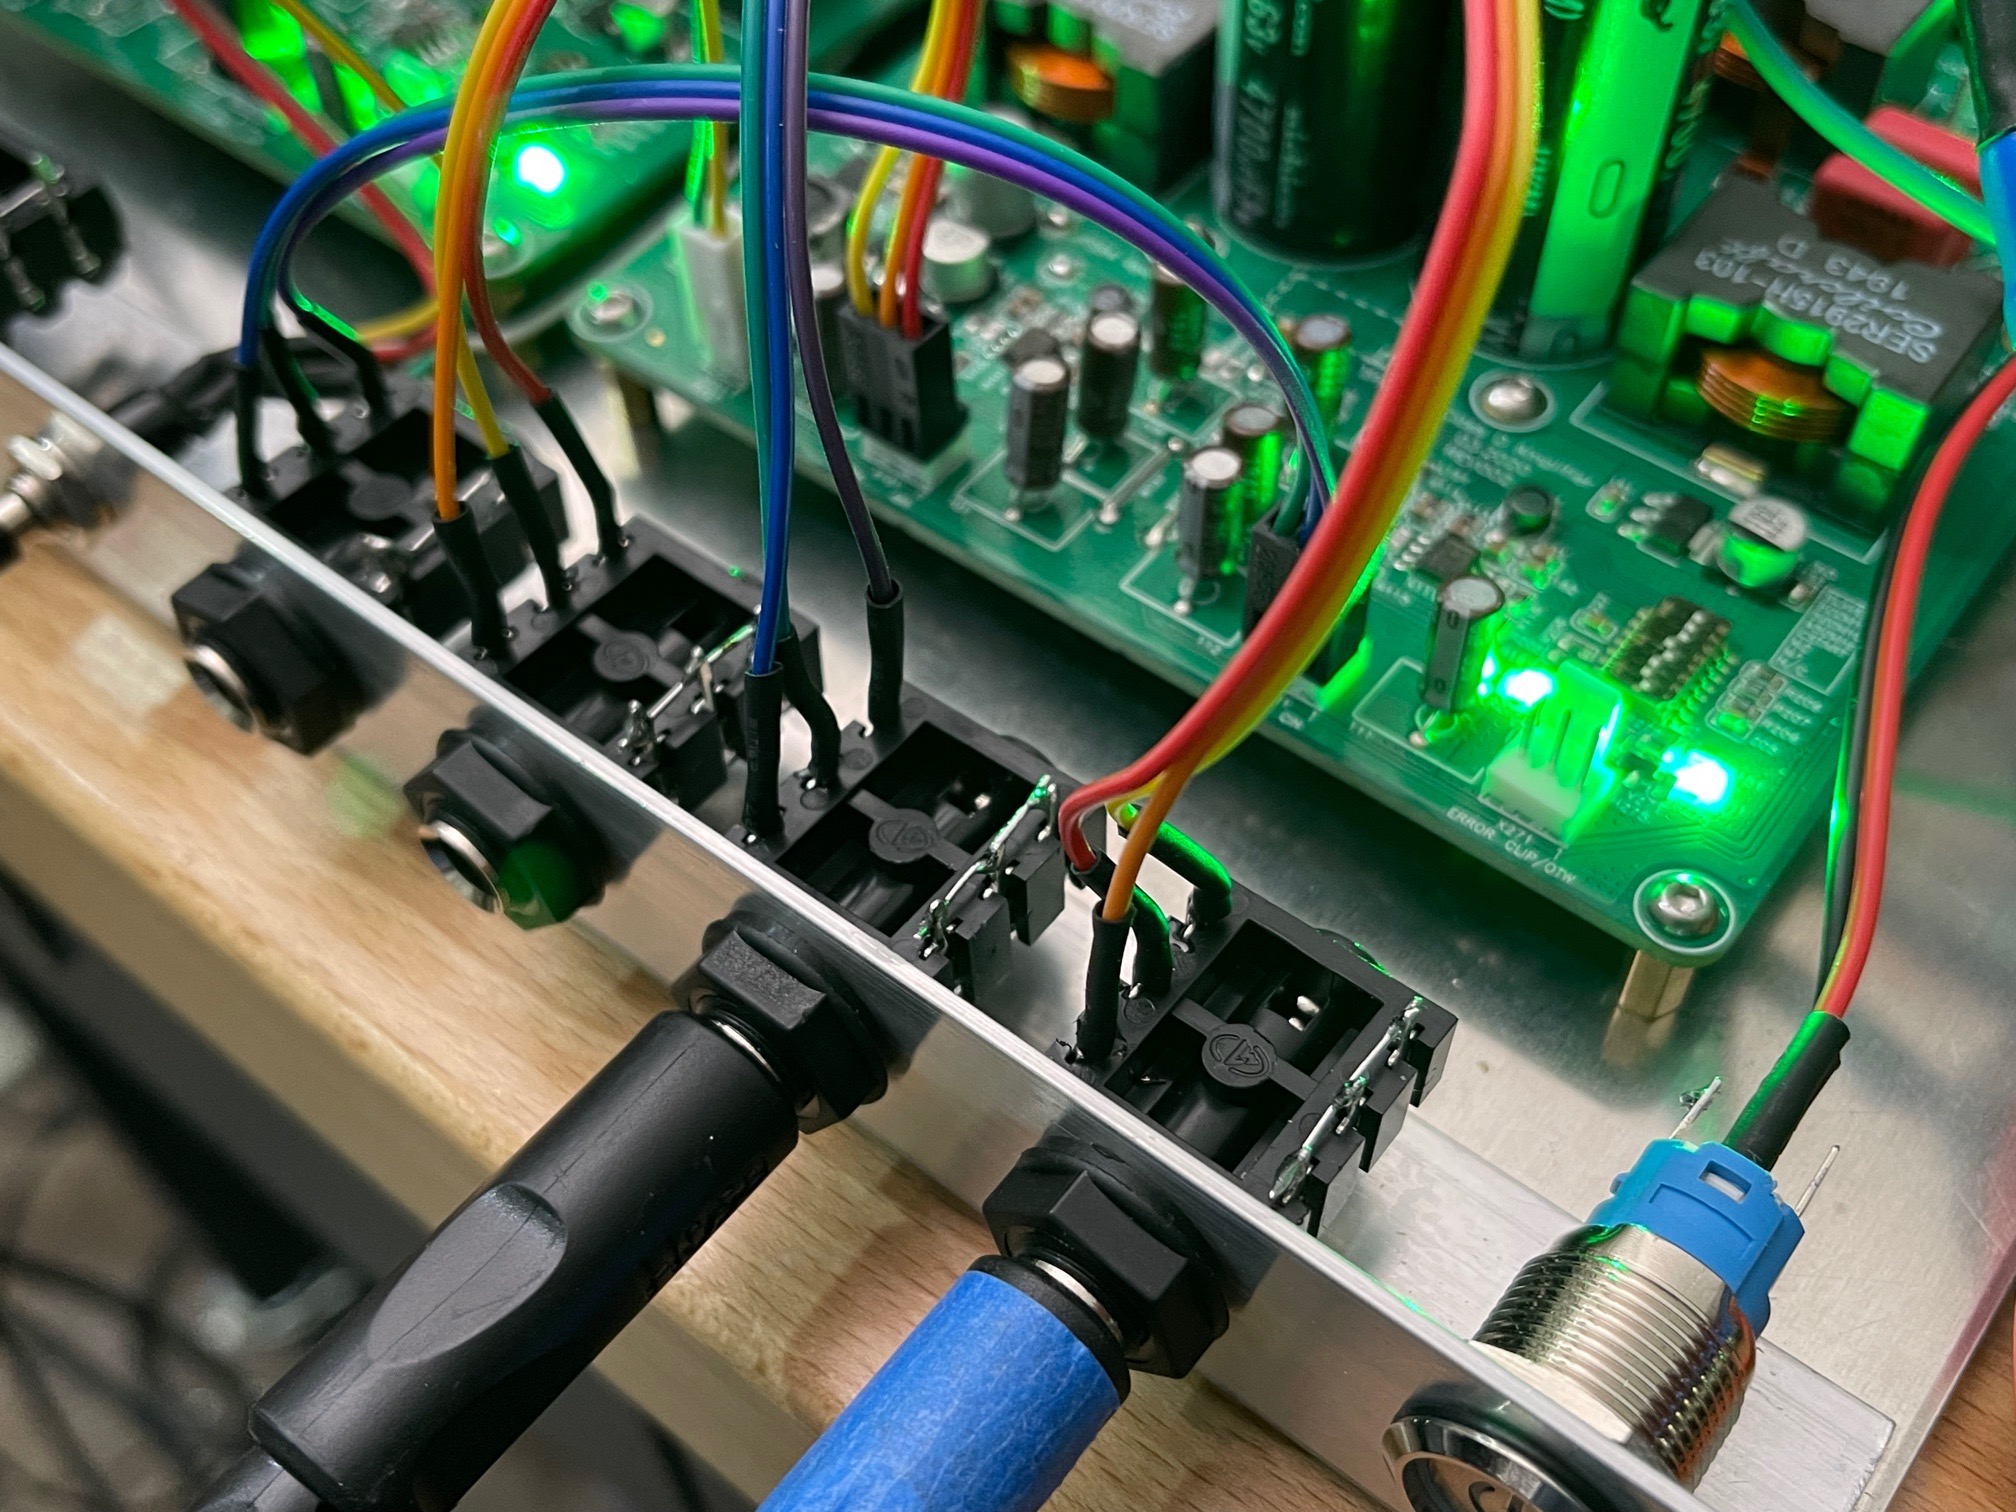
We are really close to being able to start this second GB production run. I do have some good technical news. I finally tested out the master/slave frequency sync feature designed to prevent beat-note noise when two amps are being driven together in the same box and psu. I bought pre-crimped leads for the tiny connectors and set one as master and other as slave using the DIP switches. It all works as expected. So, if you are looking to use this AN’s multi amp in an active setup (perhaps for LX521 etc) it can work very well.
You can see the black twisted pair cable between the two amps.
Attachments
- Home
- Group Buys
- XRK RTR TPA3255 Reference class D Amp GB2