looking at a simulation, simulating in corner does show gain. you get to xmax easly within the power of the amplifier you have. by the time you have added the lowpass filter at say 80 or a hundred that will diminish the spl in that 80-100hz region by 3 to 5 db, as part of the slope
then when you have added some boast to the lower notes all that happens is you lose headroom, it actually does simulate ok if you consider all things.
I am to tired to do better than this for now.
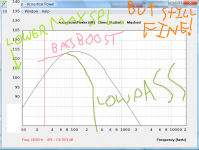
bassically if you low pass it right to get rid of the high output in the 75-120hz area, and add gain to the lower 30 40hz, etc.. you will flatten the response sufficiently
horn resp in corner. shows 117db at 28hz at xmax
that figure doesnt change. its the 128db at 100 that most see as offputting. as it looks like a steep slope.
once u add the lowpass... and eq up the bottom end, u will still be limited by ....horn resp in corner. shows 117db at 28hz at xmax
so its more about equalizing down the higher bass frequencys if you want to see it that way.
or equalising up the lower ones... and turning the volume down to match.
I am to tired to explain what I mean better but Im sure someone can elaborate, also inroom response will differ to horn resp, room peeks and nulls and dimensions
apologys for the messy diagram. perhaps someone will sim it properly with the lowpass filter slope and frequency of your amp and actually be helpfull. it looked like the Capacitor idea was sorta simuler to showing what bassboost would do.
however it is not needed to simulate a flaaat responce as in room it will differ anyway. a gentler slope for a sealed design with your corner placement will be fine.
all you need to do, is figure out how to equalise it sufficiently. so that 110db at 25hz is only 112db at 80................
may be worth running a active equalizer.


p.s: my messy diagram is only a approximation. like where I moved the spl metre is to demonstrate what happens if you boost the lower range and turn down the overall spl, so as to have a equalised flattish response.
very tired, appolagys.
then when you have added some boast to the lower notes all that happens is you lose headroom, it actually does simulate ok if you consider all things.
I am to tired to do better than this for now.
bassically if you low pass it right to get rid of the high output in the 75-120hz area, and add gain to the lower 30 40hz, etc.. you will flatten the response sufficiently
horn resp in corner. shows 117db at 28hz at xmax
that figure doesnt change. its the 128db at 100 that most see as offputting. as it looks like a steep slope.
once u add the lowpass... and eq up the bottom end, u will still be limited by ....horn resp in corner. shows 117db at 28hz at xmax
so its more about equalizing down the higher bass frequencys if you want to see it that way.
or equalising up the lower ones... and turning the volume down to match.
I am to tired to explain what I mean better but Im sure someone can elaborate, also inroom response will differ to horn resp, room peeks and nulls and dimensions
apologys for the messy diagram. perhaps someone will sim it properly with the lowpass filter slope and frequency of your amp and actually be helpfull. it looked like the Capacitor idea was sorta simuler to showing what bassboost would do.
however it is not needed to simulate a flaaat responce as in room it will differ anyway. a gentler slope for a sealed design with your corner placement will be fine.
all you need to do, is figure out how to equalise it sufficiently. so that 110db at 25hz is only 112db at 80................
may be worth running a active equalizer.
p.s: my messy diagram is only a approximation. like where I moved the spl metre is to demonstrate what happens if you boost the lower range and turn down the overall spl, so as to have a equalised flattish response.
very tired, appolagys.
Attachments
............room gain with some eq boost at the lower frequency should be fine for your wants. is it quite a large room?
Hello WaVeInFoRm, I have read your comments very quickly. It is very nice to find opinions that think that the creature is not dead before birth, thanks for that.
I also appreciate your good intention to write overcoming fatigue, please allow me to respond at a later time to all the points, I am also somewhat limited with my time, and I do not want to seem rude by summarizing.
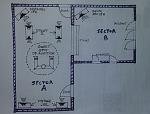
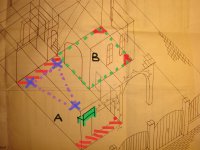
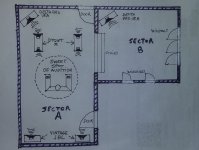
For now, an advance to your question about the size of the room, is an atypical room because they are not classic cube or rectangle dimensions, which favors (like what happens inside an acoustic cabinet) the extinction of the acoustic waves.
It behaves very well at low frequencies, despite having some node produced by the phase shift between the DTQWTII front speakers and the vintage JBL rear speakers used as subwoofers, - the plate amplifier I use has only 180 degrees of phase rotation, no dots intermediate, there are no audible differences in these two positions - I think this will be overcome by placing the Eminence in corners of different environments (communicated with each other) and in the same frontal plane as the main speakers. When I finish this project, I will use the rear speakers only for HT.
The total volume of the room is 88 M3.
Rolo
Attachments

I did notice it sky rockets the diagram displacement so It might be better left out.
I do not understand what you mean by this sentence, could you give me more details please ? :confuso:
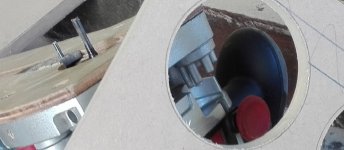
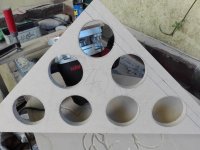
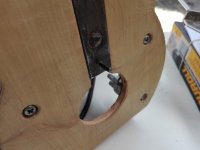
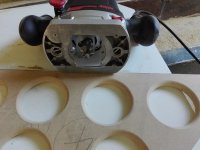
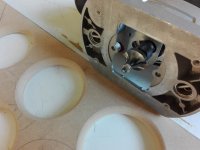
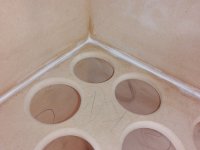
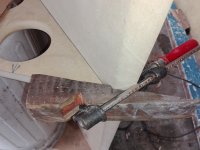
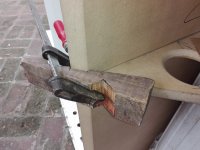
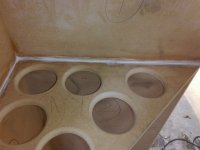
As you can see, the reinforcement holes are already made, the most appropriate cutter is the one with the smallest diameter, with a slightly larger one that would have reached the diameter marked with the compass, but it does not matter, they are only 2 mm less.
And so there was less waste and the work was faster. Tomorrow I'll do the chamfering.
")
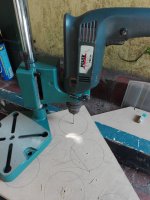
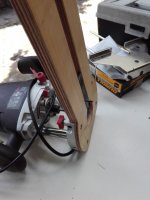
PS: These tools for amateurs are garbage! The adjustment of the cutting cutter is to the limit, it is very dangerous, it could escape and hurt !
So please, if there is not much experience, do not take risks and entrust the work to a professional of the wood....
And so there was less waste and the work was faster. Tomorrow I'll do the chamfering.
PS: These tools for amateurs are garbage!
The adjustment of the cutting cutter is to the limit, it is very dangerous, it could escape and hurt ! So please, if there is not much experience, do not take risks and entrust the work to a professional of the wood....
Attachments
-
 IMG_20190128_175756.jpg264.9 KB · Views: 43
 -
 IMG_20190128_175748.jpg617.4 KB · Views: 47
 -
 IMG_20190128_174113.jpg649.1 KB · Views: 41
 -
 IMG_20190128_123319.jpg914.1 KB · Views: 39
 -
 IMG_20190128_123131.jpg669.6 KB · Views: 43
 -
 IMG_20190128_123118.jpg305.2 KB · Views: 40
 -
 IMG_20190128_123106.jpg403.8 KB · Views: 44
 -
 IMG_20190128_123042.jpg473.6 KB · Views: 145
 -
 IMG_20190128_121844.jpg627.8 KB · Views: 156
Last edited:
btw...How Much does stuffing the box increase the size seeen to the woofer? I heard it lowers fs..
Good point.
It is not something that can be determined exactly, according to my conclusions, it would increase the virtual volume by 15 ~ 20%.
This will depend on the type of material used and how it is compressed when installed.
I have not read about your influence on FS, if you have information, it will be interesting to read it.
Vintage JBL for subwofer
Post 165
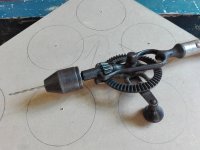
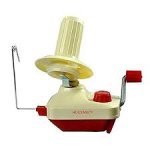
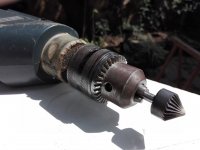
Very nice the hand driller. I have one very similar from my father, that I use as a kind of hand winding machine.
Yes, it is really old, but it still works. The handle is not original, I did it many years ago using a very common technique used in the helmets of wooden boats in the fastening ferrule (small to medium size) On the right you can see, a copper rivet, which to be permanently tightened, (taking advantage of the extraordinary expansion of copper without breaking and the tension originated, had a very special procedure and it was necessary to perform the task between two people, one inside the ship, and the other on the outside. ..... and screaming !
SI, es una antiguedad realmente, pero todavia funciona. El mango no es original, lo hice hace muchos años usando en la virola de fijacion una tecnica muy común empleada en los cascos de los barcos de madera ( chico a mediano porte ) A la derecha se alcanza a ver, un remache de cobre, que para que quedaran apretados en forma permanente, ( aprovechando la extraordinaria dilatacion del cobre sin romperse y la tension originada, tenía un procedimiento muy especial y era necesario ejecutar la tarea entre dos personas. Una por dentro de la nave, y la otra por fuera......y a los gritos !!!
Como maquinita de bobinar a mano. La pongo en una morsita agarrada del mango, una varilla roscada en el mandril y sobre ella, el carrete. A parte, un contador digital casero con un imancito pegado al mandril y un reed switch de alarma hogareña. Tenía una foto pero no la encuentro.I did not understand the use you give her ......
No entendi el uso que le das......
I use it as a small winding machine. I put it in a small window holding the handle, a threaded rod in the mandrel and on it, the reel. In addition, a digital home made counter with a magnet attached to the mandrel and a home alarm reed switch. I had a pic but I can not find it. Sorry :-D
Photos of the latest advances.
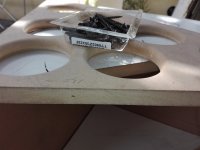
The screws are "self-drilling" ......
Do not believe it, that can only be applied to very soft panels, in wood, MDF, etc., that does not work...
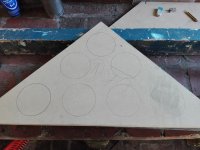
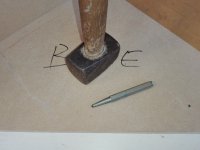
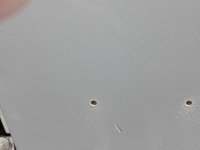
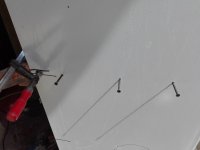
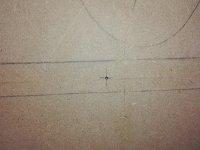
The first step seems silly but it is very important, it is necessary to mark with a point the exact place before boring, the wick will be placed in its correct place automatically.
You have to use a wick slightly smaller than the maximum diameter of the screw and "make way".
I also use a "special" wick so that the head of the screw sits flush with the surface without "dragging" the contour and being neat.
I had to make some wedges to be able to locate the reinforcements in their exact place before drilling the holes.
I think it was the least fun part ..... but when you work without helpers, you have to boost your imagination and resources ....
The screws are "self-drilling" ......
Do not believe it, that can only be applied to very soft panels, in wood, MDF, etc., that does not work...
The first step seems silly but it is very important, it is necessary to mark with a point the exact place before boring, the wick will be placed in its correct place automatically.
You have to use a wick slightly smaller than the maximum diameter of the screw and "make way".
I also use a "special" wick so that the head of the screw sits flush with the surface without "dragging" the contour and being neat.
I had to make some wedges to be able to locate the reinforcements in their exact place before drilling the holes.
I think it was the least fun part ..... but when you work without helpers, you have to boost your imagination and resources ....
Attachments
-
 IMG_20190130_172153.jpg108.6 KB · Views: 151
 -
 IMG_20190201_131335.jpg362 KB · Views: 47
 -
 IMG_20190201_131309.jpg575.9 KB · Views: 37
 -
 IMG_20190201_105927.jpg574.4 KB · Views: 40
 -
 IMG_20190201_105914.jpg88.8 KB · Views: 38
 -
 IMG_20190201_105137.jpg495.6 KB · Views: 146
 -
 IMG_20190201_104116.jpg487 KB · Views: 145
 -
 IMG_20190130_172220.jpg78 KB · Views: 152
Sorry, the photos do not correspond to the steps taken....
Attachments
Impressionant! Lots of tools!
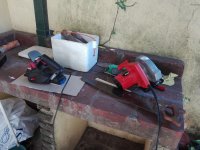
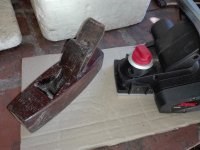
If Osvaldo, with time they have been accumulating ..... here you have, for example, a brush for classic manual wood (it is 50 years old) and a modern, electric brush.
Also a disk saw, these latest acquisitions save me a lot of physical effort and time, so they have been a good investment !
Si Osvaldo, con el tiempo se han ido acumulando.....aqui tienes, por ejemplo, un cepillo para madera clasico manual ( tiene 50 años ) y uno moderno, electrico.
Tambien una sierra de disco, estas últimas adquisiciones me ahorran mucho esfuerzo fisico y tiempo, así que han sido una buena inversión !
Attachments
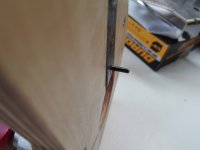
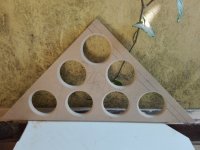
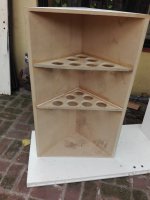
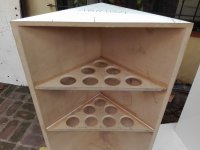
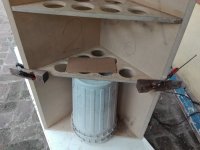
I have decided to reinforce the angle in the posterior vertex.
Attached photos of the process of cutting a square strip to the middle to obtain two triangular, and already installed the first reinforcement ....
Five more are still missing, WAF is asking very often:
A lot is missing ?
I have not decided the final color of the cabinets yet.
Being rinconeros, three faces will not be seen, so they will be painted with spray. White on white would be the most logical, I would save many hands of paint ....
The front and the top is the dilemma...
The upper part is of little surface and to my taste it would be very good to enchaparla it in natural wood, I have been some pieces of cedar ....
But the peneles of the fronts are very big and there is another dilemma here,
because they are already painted, on such large surfaces, the contact cement evaporates the solvents and forms balloons over time.
It has happened to me and plating on particle board (plywood) where the adhesion is superior, so I think they will also be painted white. With the loudspeaker protection grille in black fabric would be a good combination.
We will see, said a blind man !
- Status
- This old topic is closed. If you want to reopen this topic, contact a moderator using the "Report Post" button.
- Home
- Loudspeakers
- Subwoofers
- Eminence Delta Pro 18 A in prism sealed 150 liters