Now that I finally have some proper progress made on these, I want to share photos of the build as it continues toward completion. This is my first set of horn speakers, with past builds being 2- and 2.5-ways, as well as a 13Hz F3 ported subwoofer. The 2.5-ways are some Zaph ZRTs that I built almost a decade ago, and they have been so good that I have not really felt a need to build more speakers! They don't really even need the sub (which was built to augment my original self-designed Aurasound 2-ways), and I have it crossed over at 35Hz with my DCX2496 since the ZRTs are solid down to about there. ANYWAY, I got the itch again, and since many people rave about the sound produced by horns, I wanted to give them a go myself. My experience has certainly been that they have vastly better transient response than ported enclosures for snare drums and things like that. Who knows...maybe these FHXLs will take the place of the ZRTs!
As far as the driver configuration, I sourced some new Alpair 10p's from KJF Audio. Shipping to the US hurt a lot, but after I digitized and plotted various MarkAudio and Fostex drivers against one another, the 10p's looked like they would provide the more balanced high frequency response that I prefer. As part of the same order, I also got the recommended damping sheet and stuffing materials.
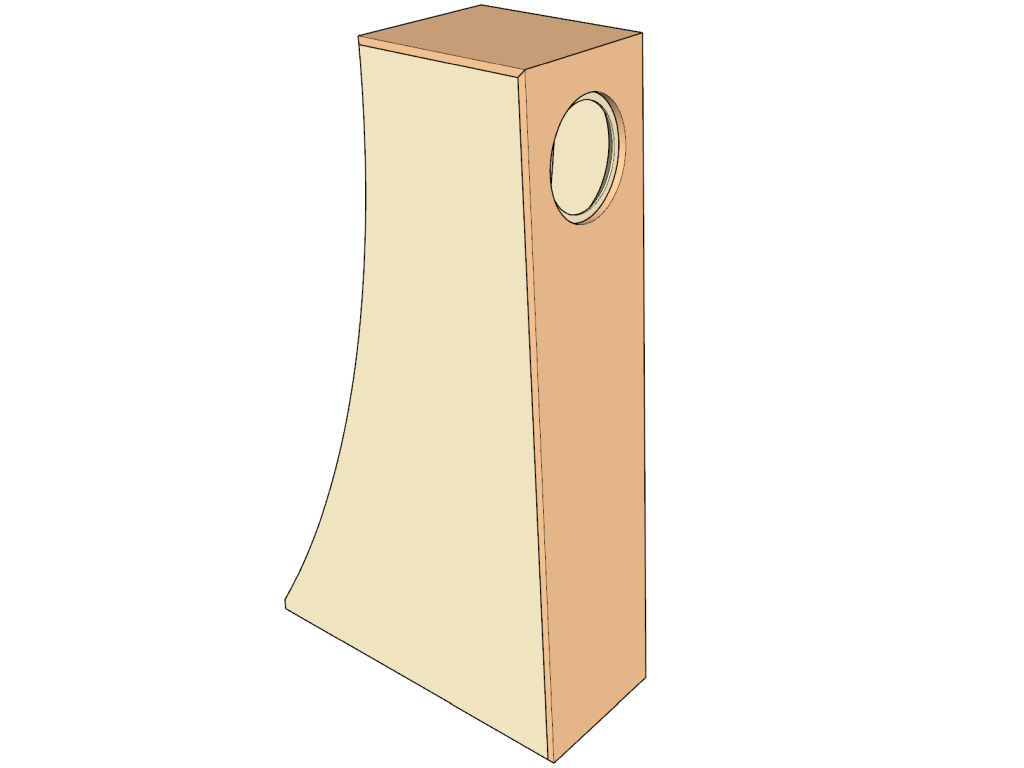
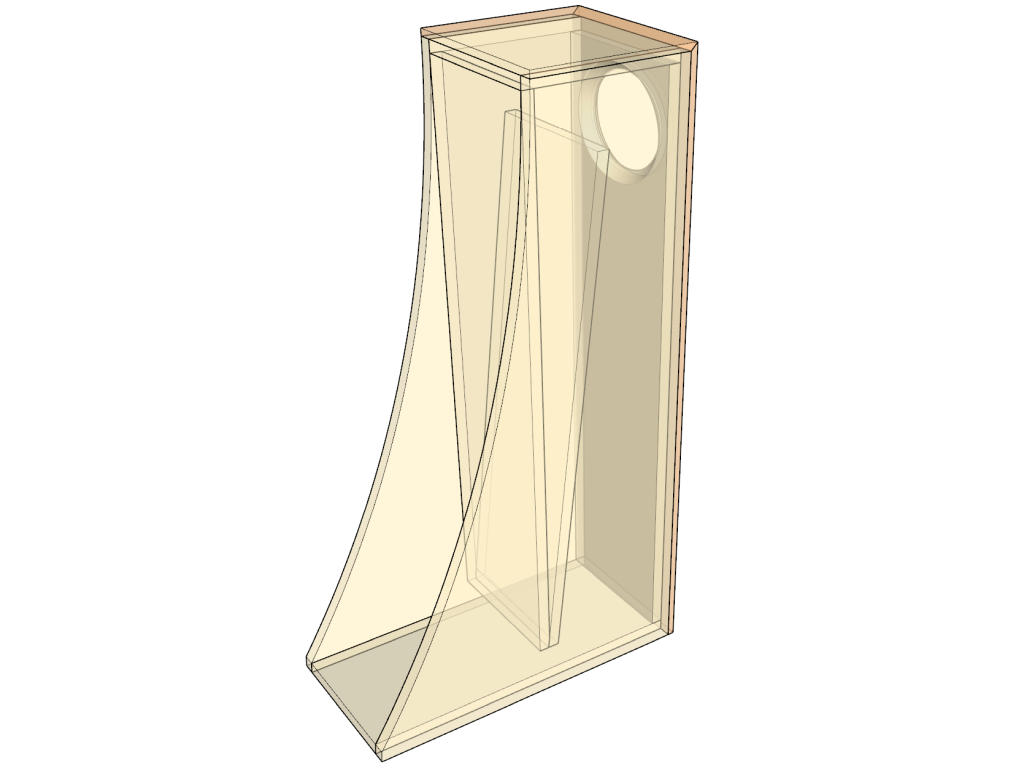
So, first off I donated to this fine forum and got my copy of the build plans. From there, I created my own model in SketchUp using the actual thickness of the ply sheet stock that I purchased. It came out to 18.4mm, and tiny adjustments were made here and there to both maintain the internal dimensions and ensure that everything fit nicely line-to-line.
http://www.e30tuner.com/speakerbuilding/images/fhxl_2021/fhxl_023.png
http://www.e30tuner.com/speakerbuilding/images/fhxl_2021/fhxl_024.png
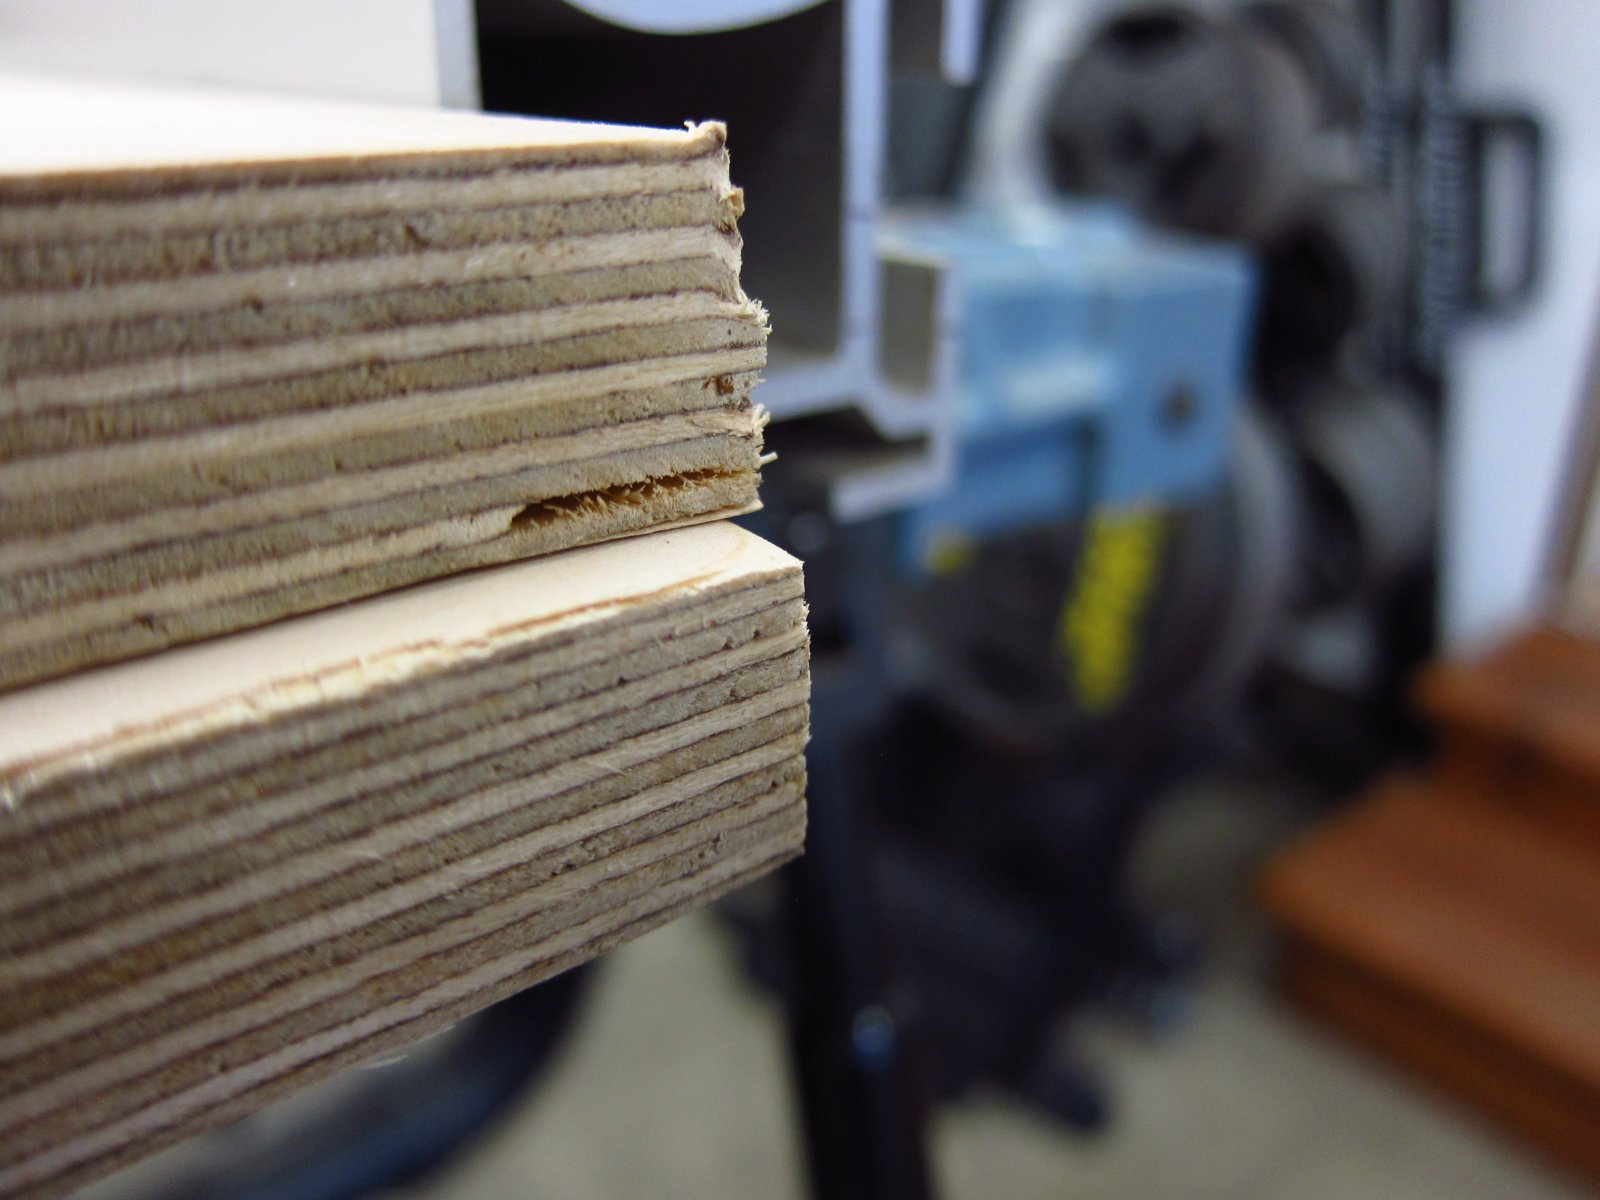
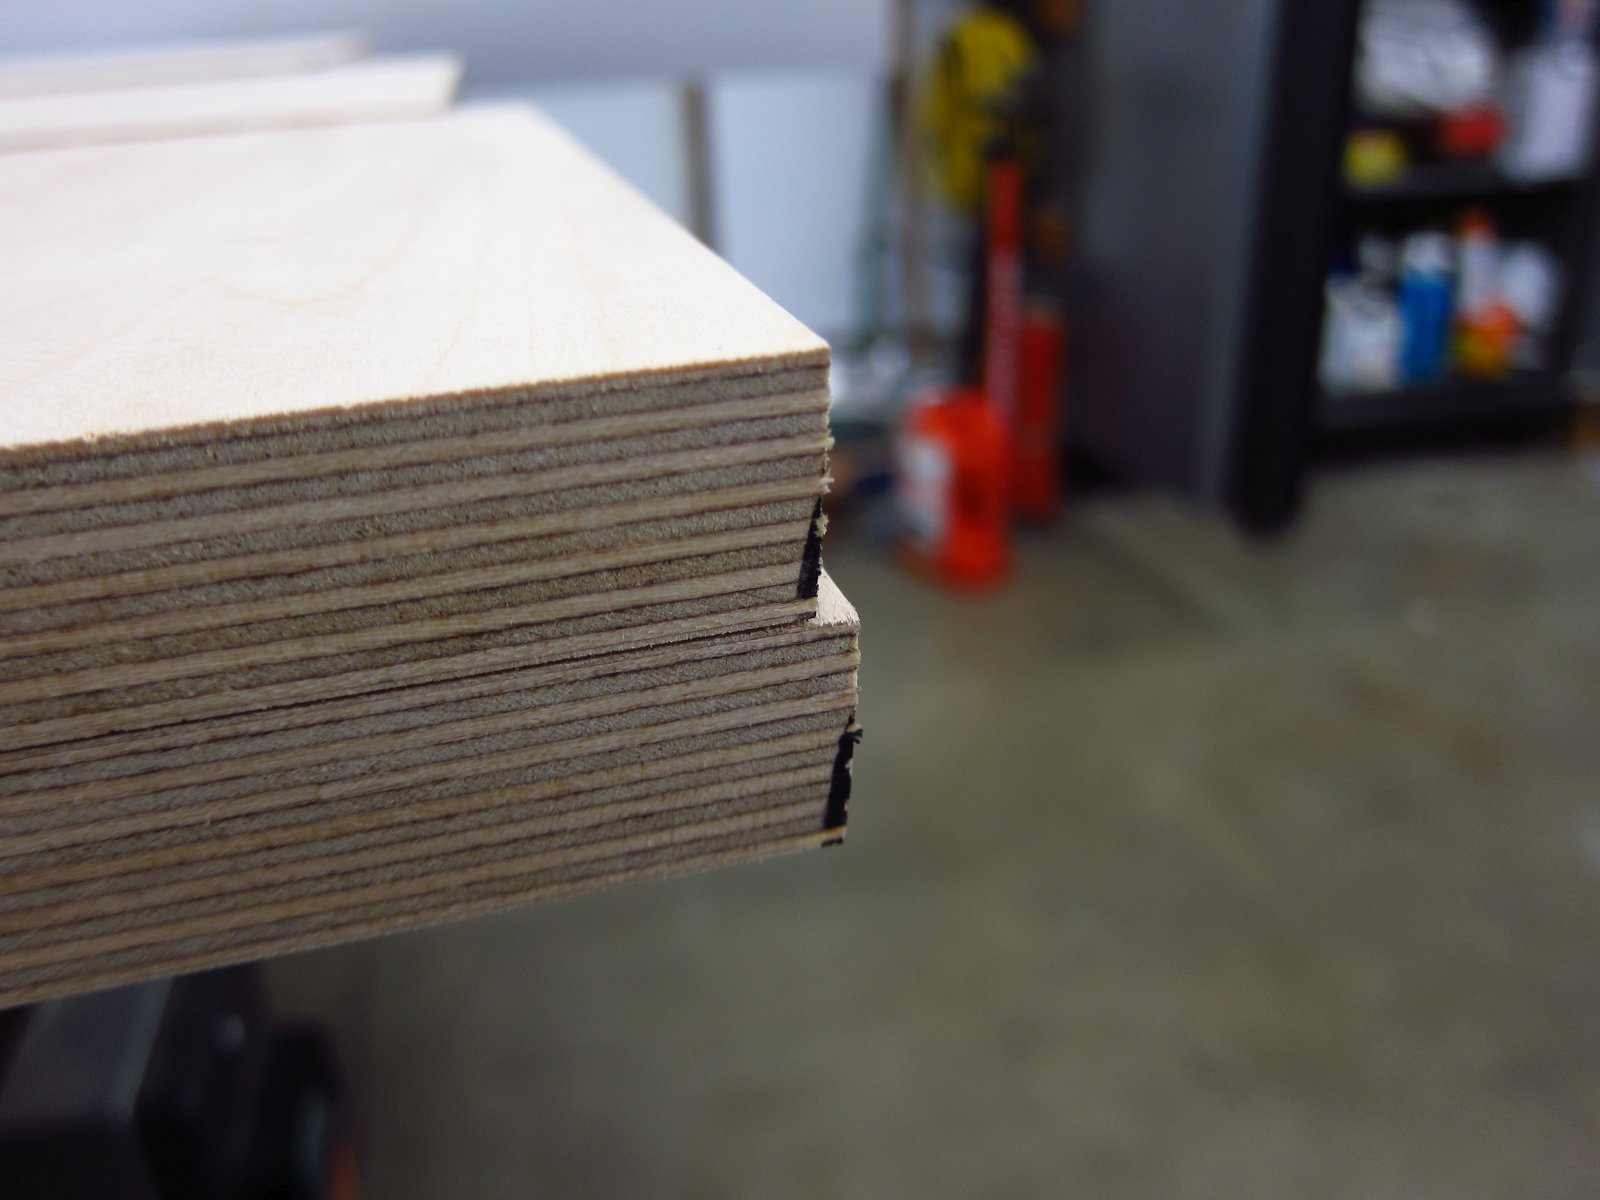
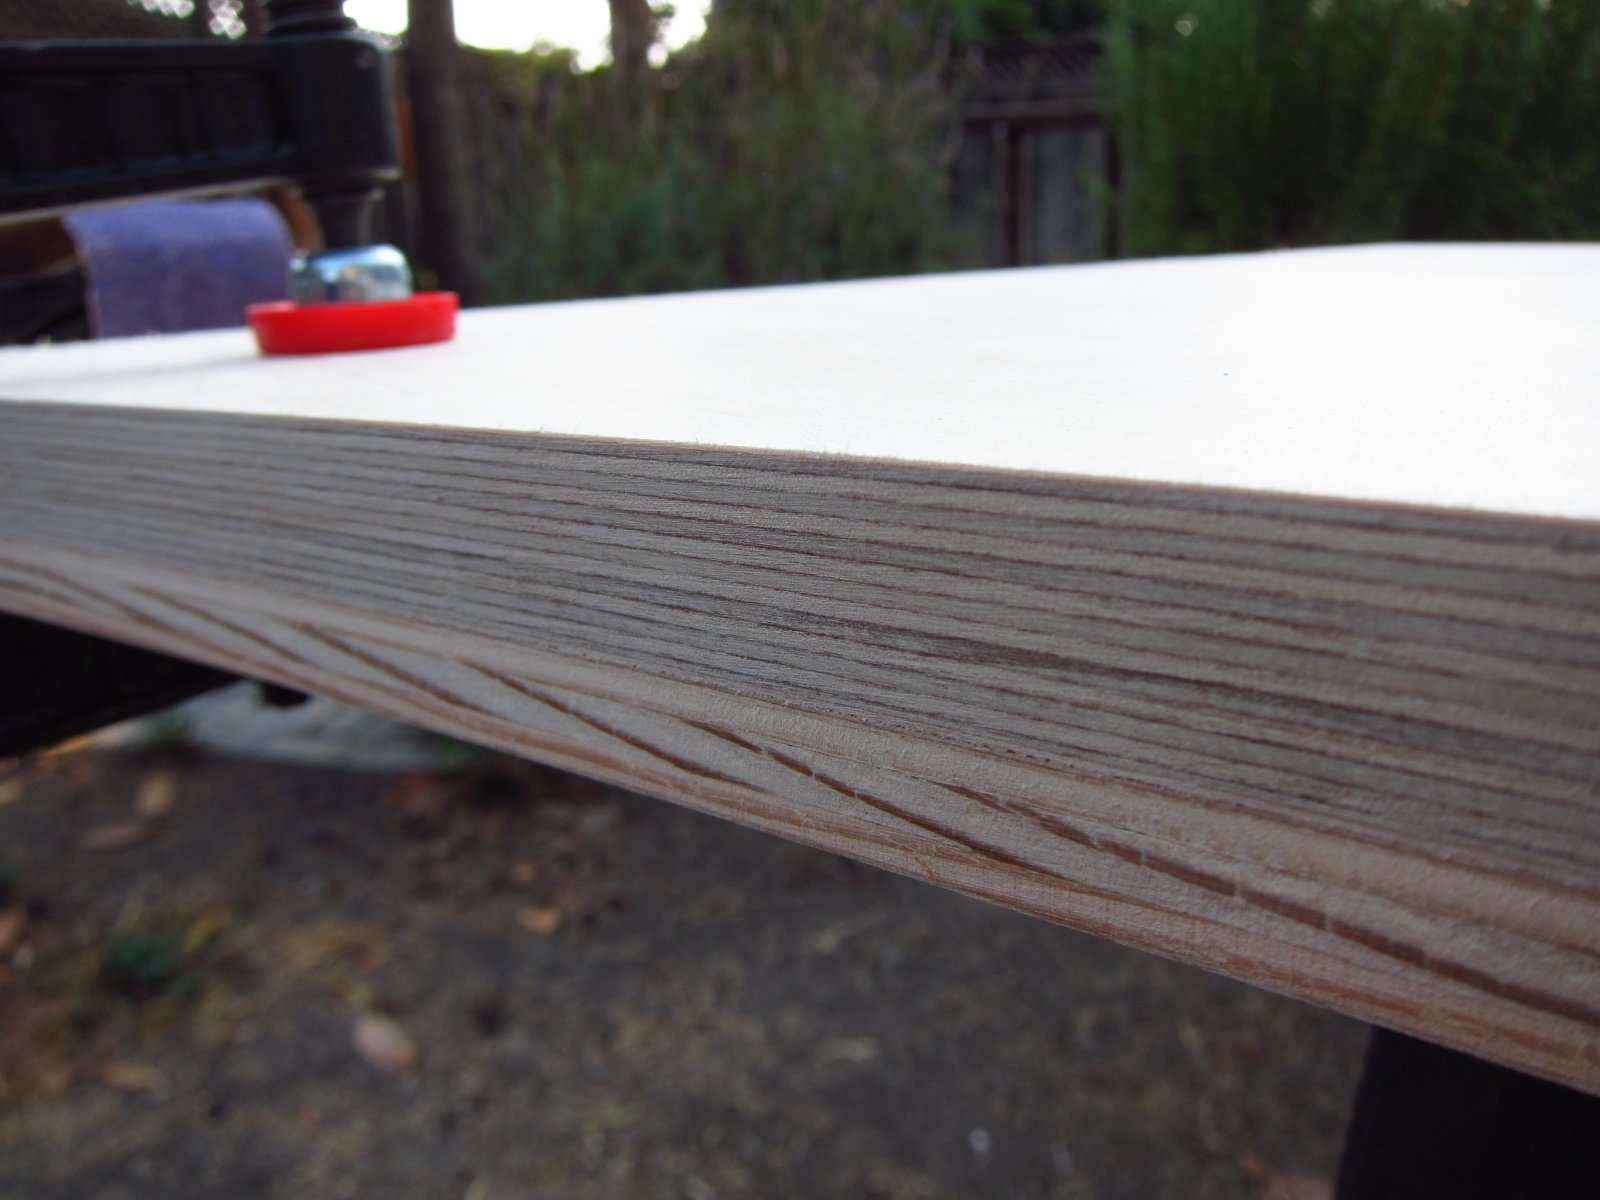
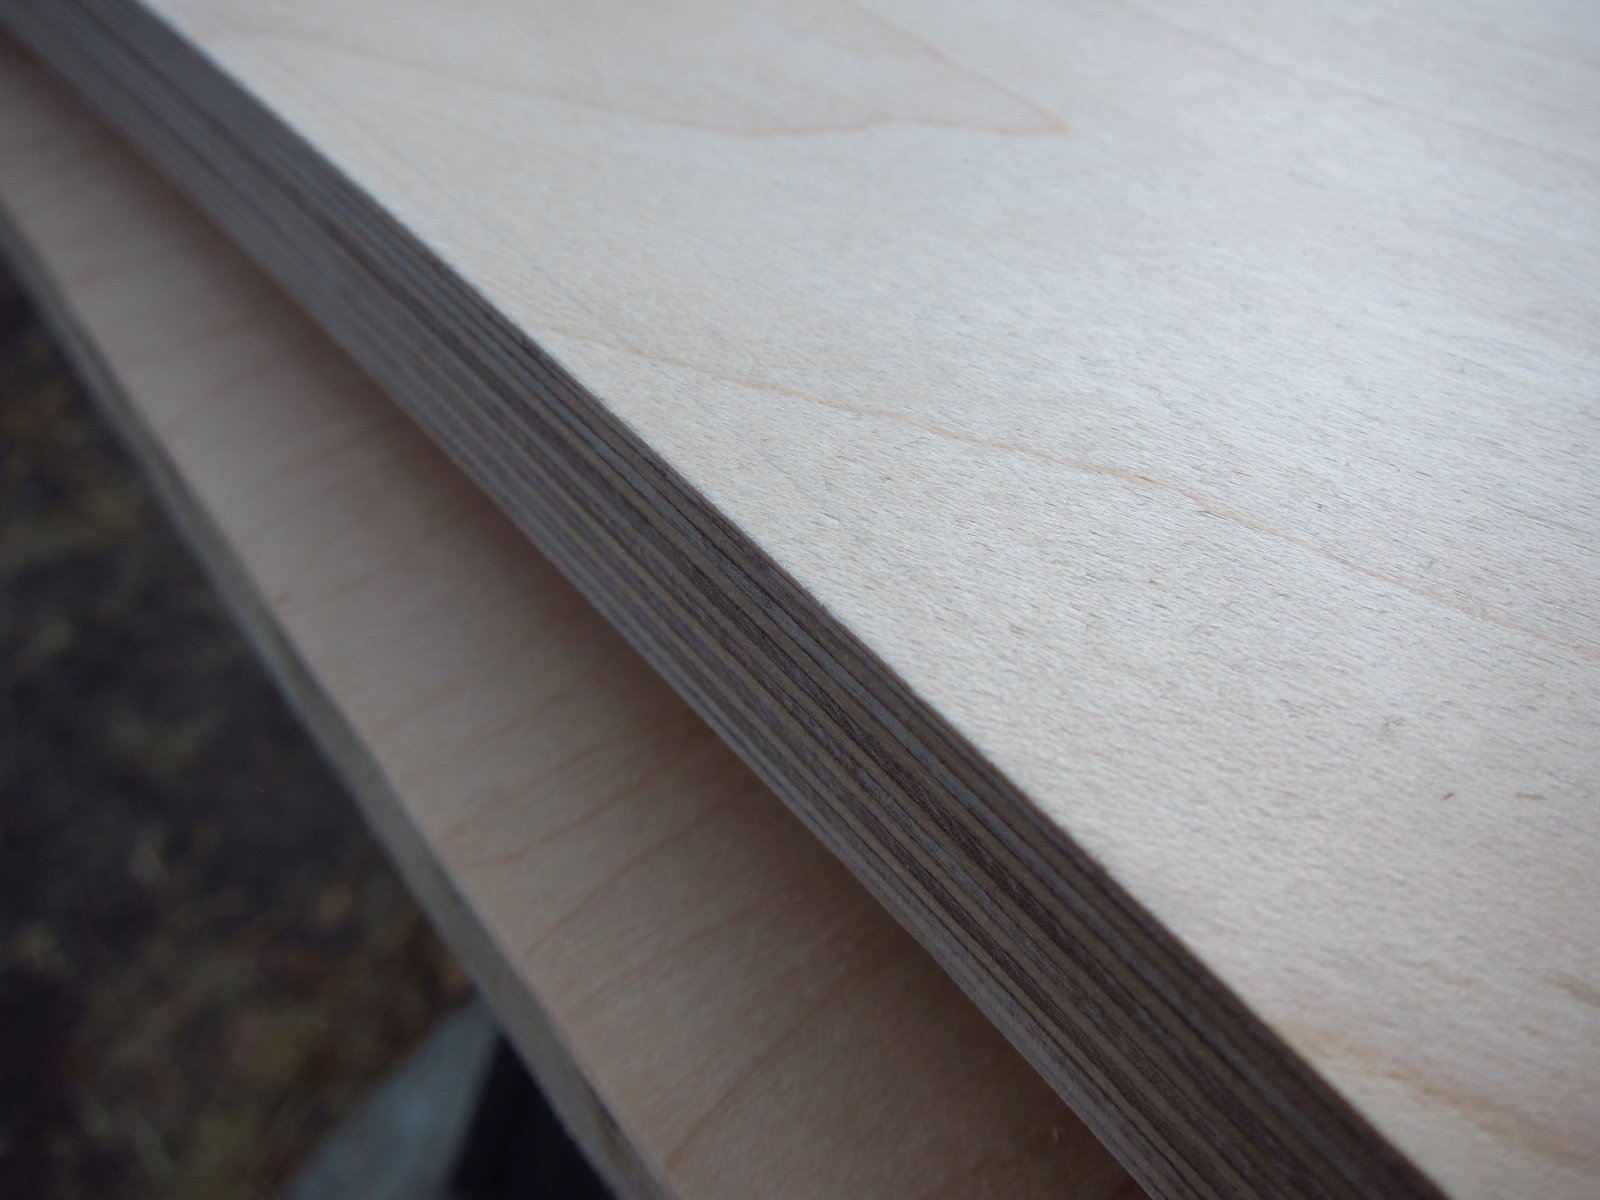
The plywood is maple-veneered Europly, and I will be accenting the baffle + top with some "mahogany." In reality, it is Light Red Meranti, which many stores call mahogany, but it is in fact not. Still, it is an attractive species and it also does not break the bank. A local supplier has a fantastic selection of fine plywoods, and I was lucky enough to catch this 13-ply birch material while it was a bit cheaper than usual. The "mahogany" was just some 1x12 stock from a local Home Depot. While I usually don't buy wood for anything more serious than a shed from that place, they happened to have some boards which were reasonably straight and not smashed up, so I grabbed the best looking one.
http://www.e30tuner.com/speakerbuilding/images/fhxl_2021/fhxl_001.jpg

http://www.e30tuner.com/speakerbuilding/images/fhxl_2021/fhxl_002.jpg
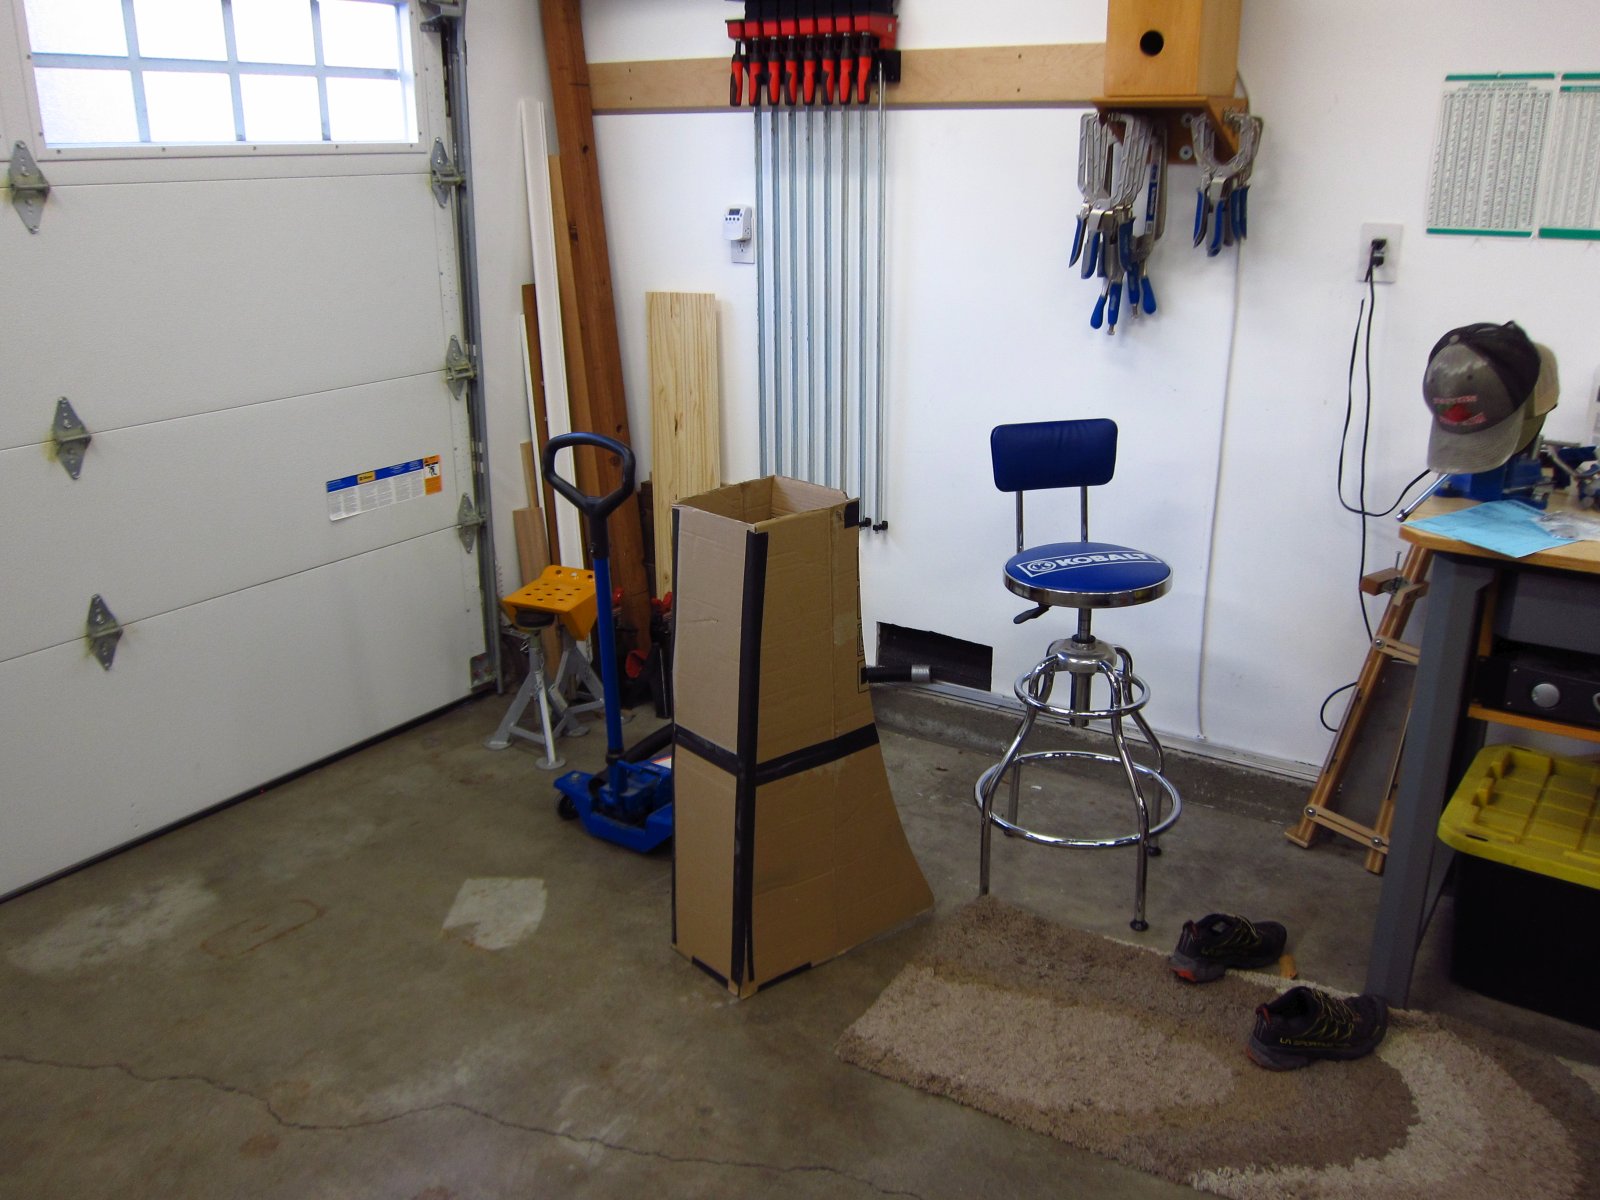
At one point, I took some scrap cardboard and made a mock-up of the FHXL to play around with placement ideas and get a general plan for where I would be able to experiment with them. This was prior to buying the wood...gotta make sure they can actually go somewhere! It has since become a hideout for one of my cats.
http://www.e30tuner.com/speakerbuilding/images/fhxl_2021/fhxl_003.jpg
Next, I cut out all of the smaller panels to their overall sizes. From there, I added the required angles to the ends.
http://www.e30tuner.com/speakerbuilding/images/fhxl_2021/fhxl_004.jpg
http://www.e30tuner.com/speakerbuilding/images/fhxl_2021/fhxl_005.jpg
My preferred way to set up angles is the same way that I tune up the saw...a nice digital inclinometer on a tool plate mounted to the arbor. I had bought this Unisaw used many years ago and it was very out of tune, so I had to invest a bit in dial indicators and other items to get everything properly square. Those of you who have used an improperly tuned table saw know how unpleasant (and DANGEROUS) it can be. The other key for ease & safety of use, in my opinion, is to regularly apply some floor wax (I like Johnson Paste Wax) to the top surfaces so that material moves smoothly and with minimal "grunt". The less force you need to move the workpiece, the less chance there is of you shoving a hand into the blade.
http://www.e30tuner.com/speakerbuilding/images/fhxl_2021/fhxl_006.jpg
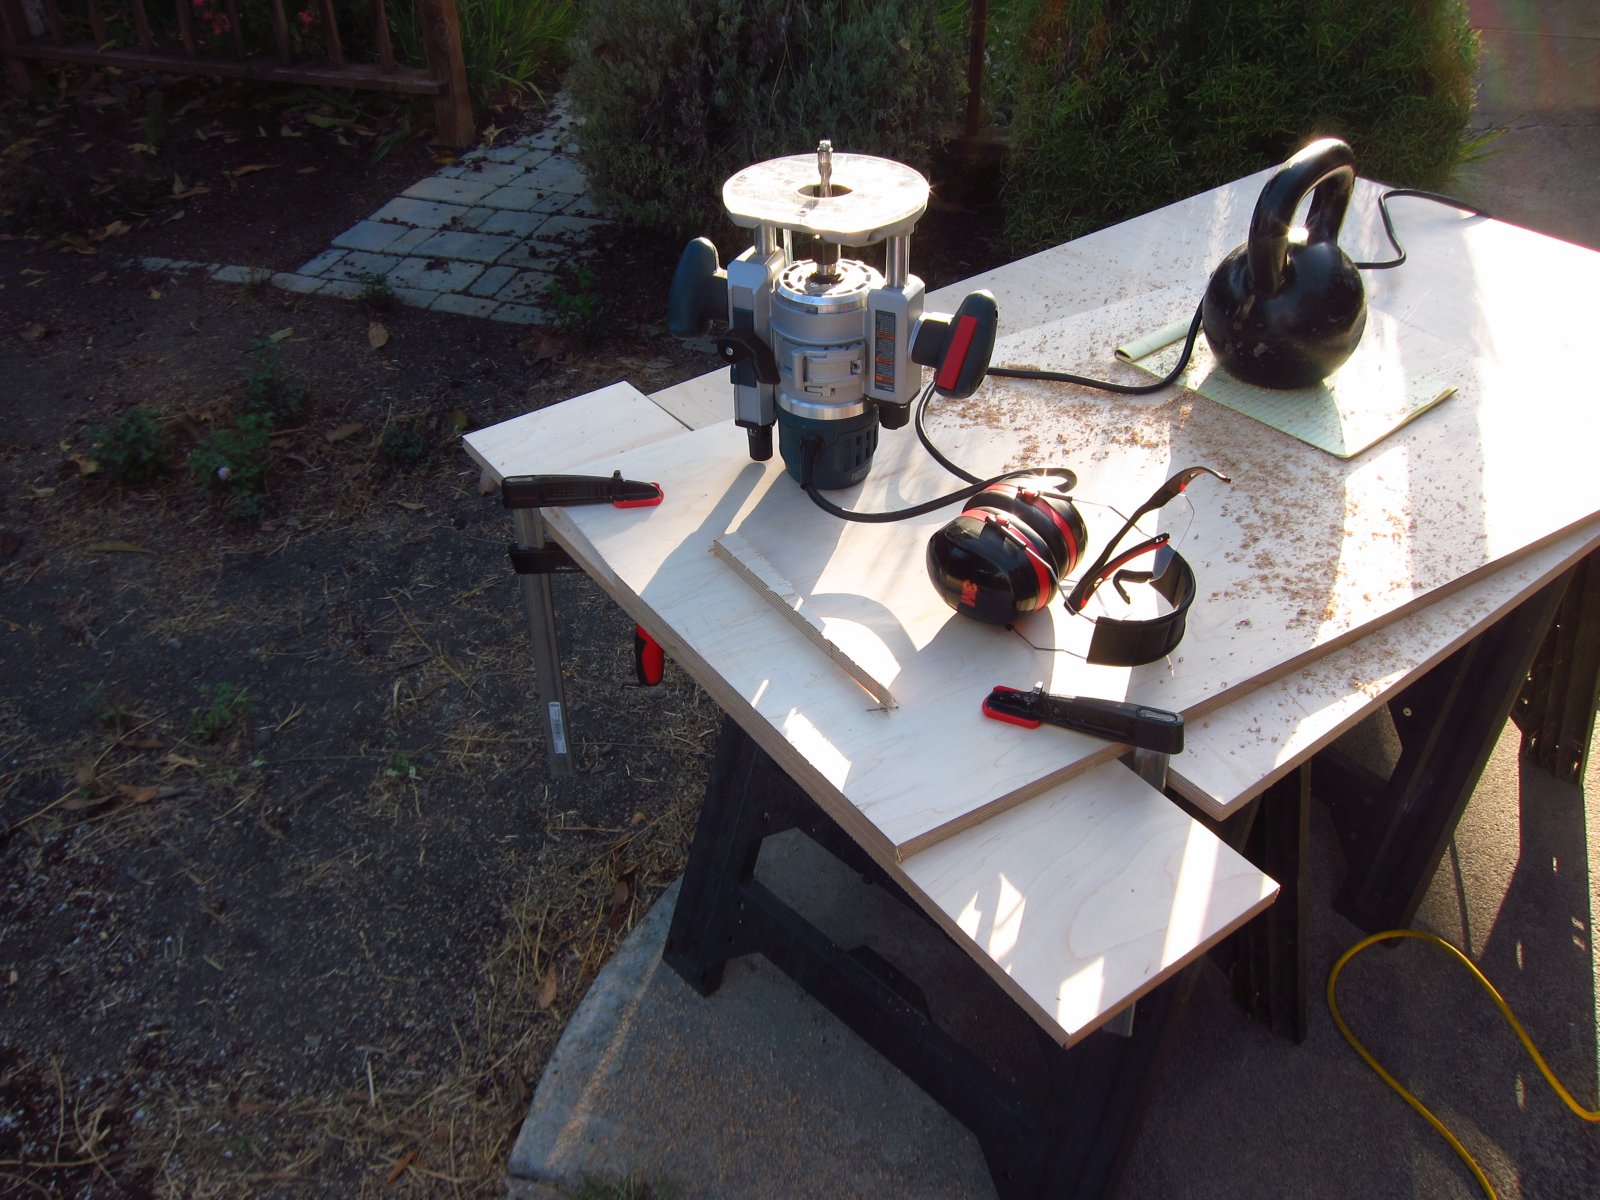
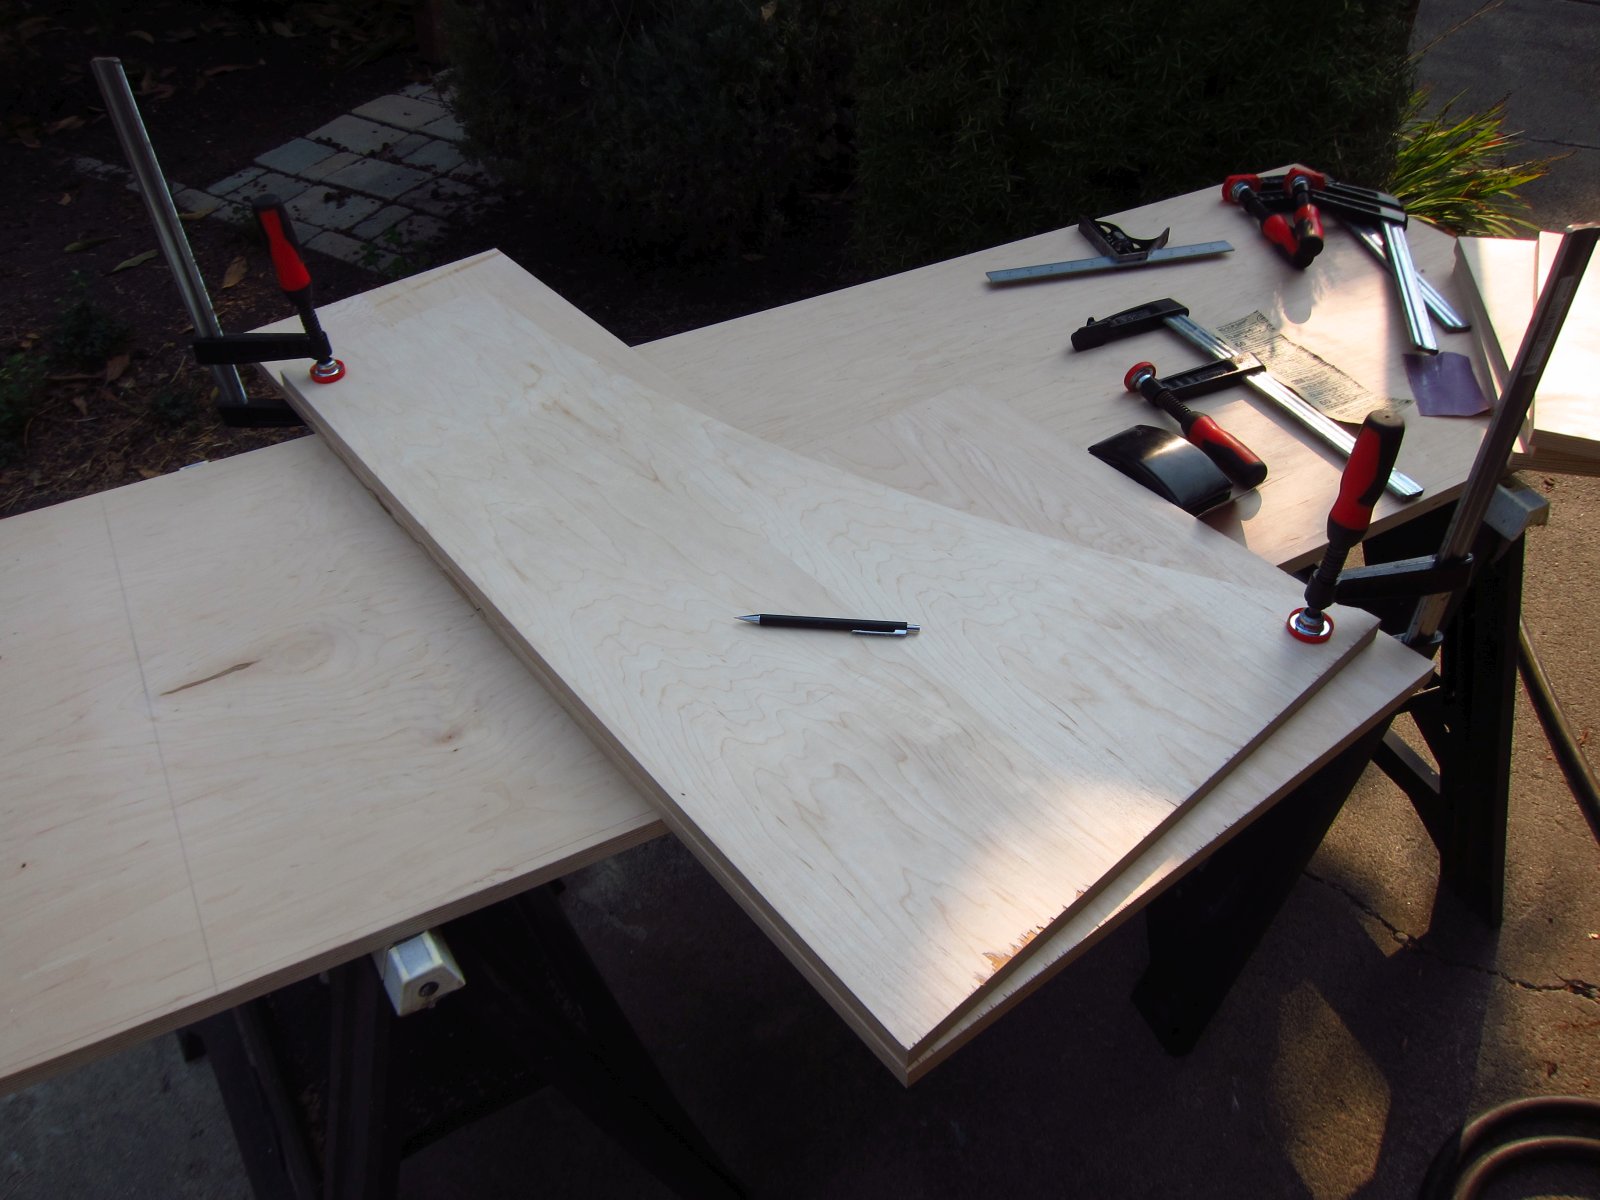
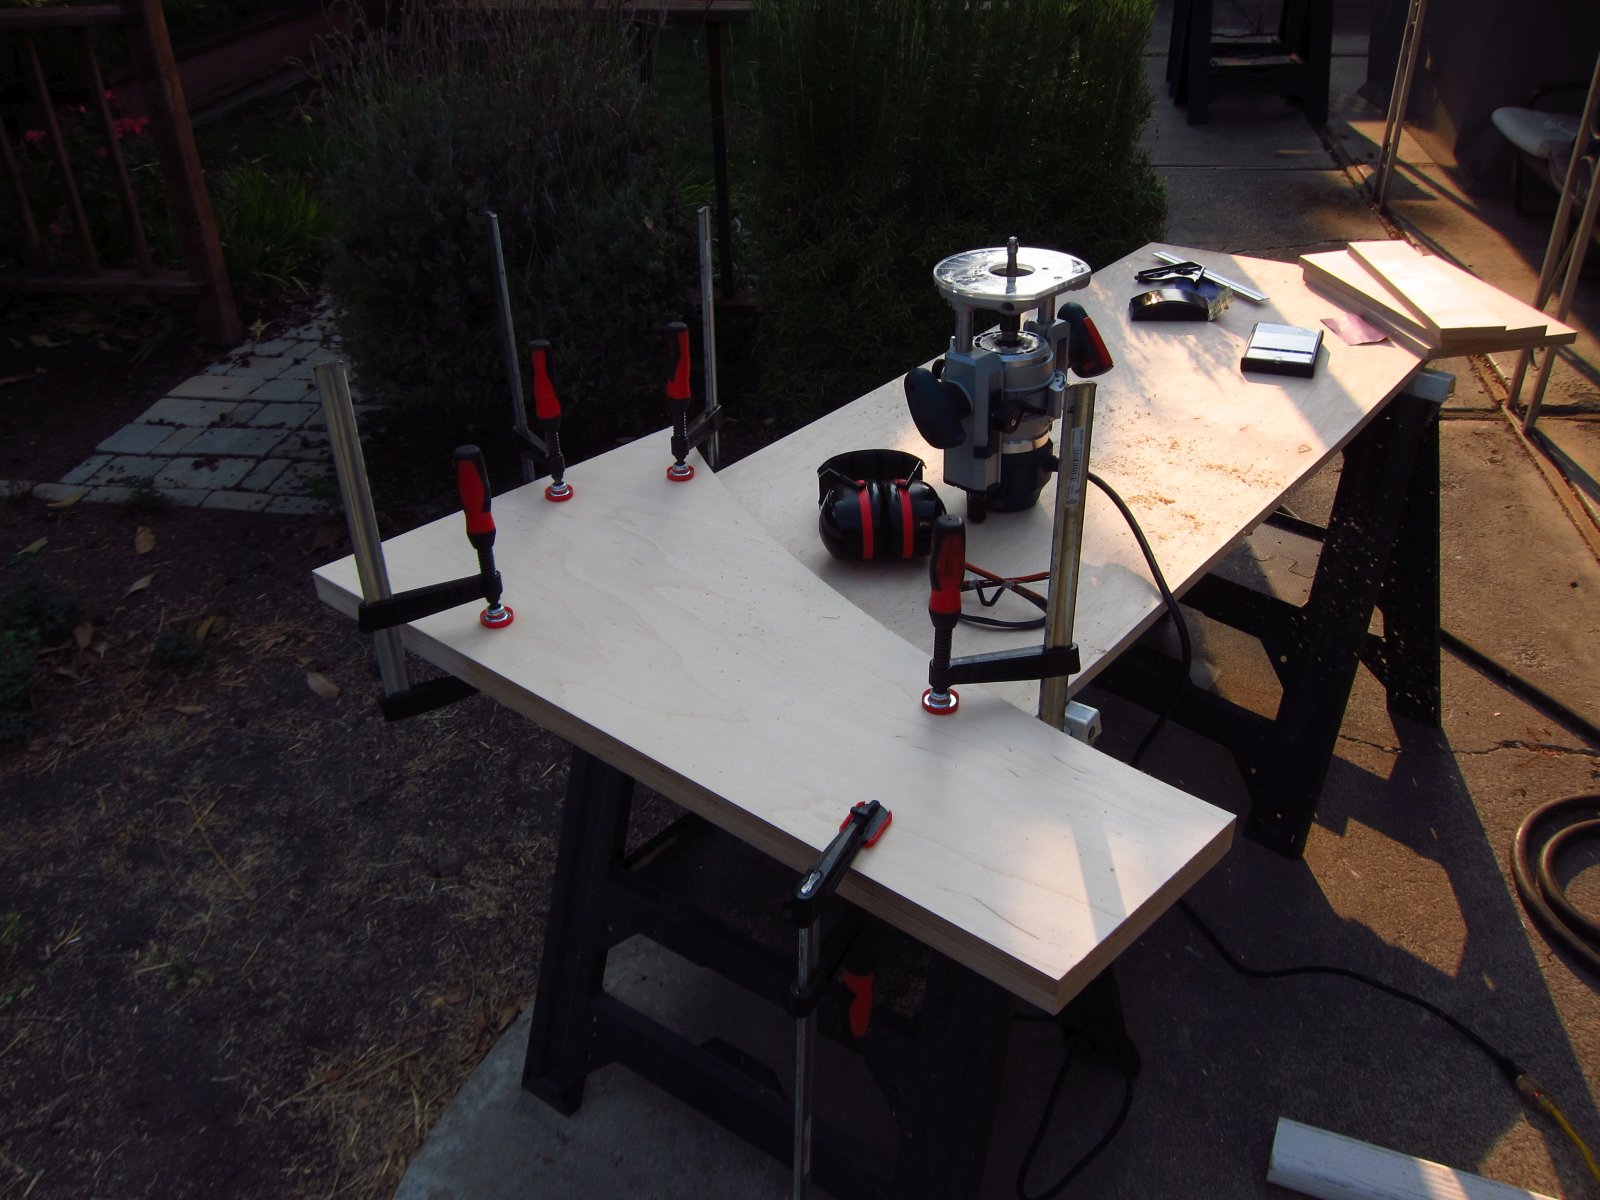
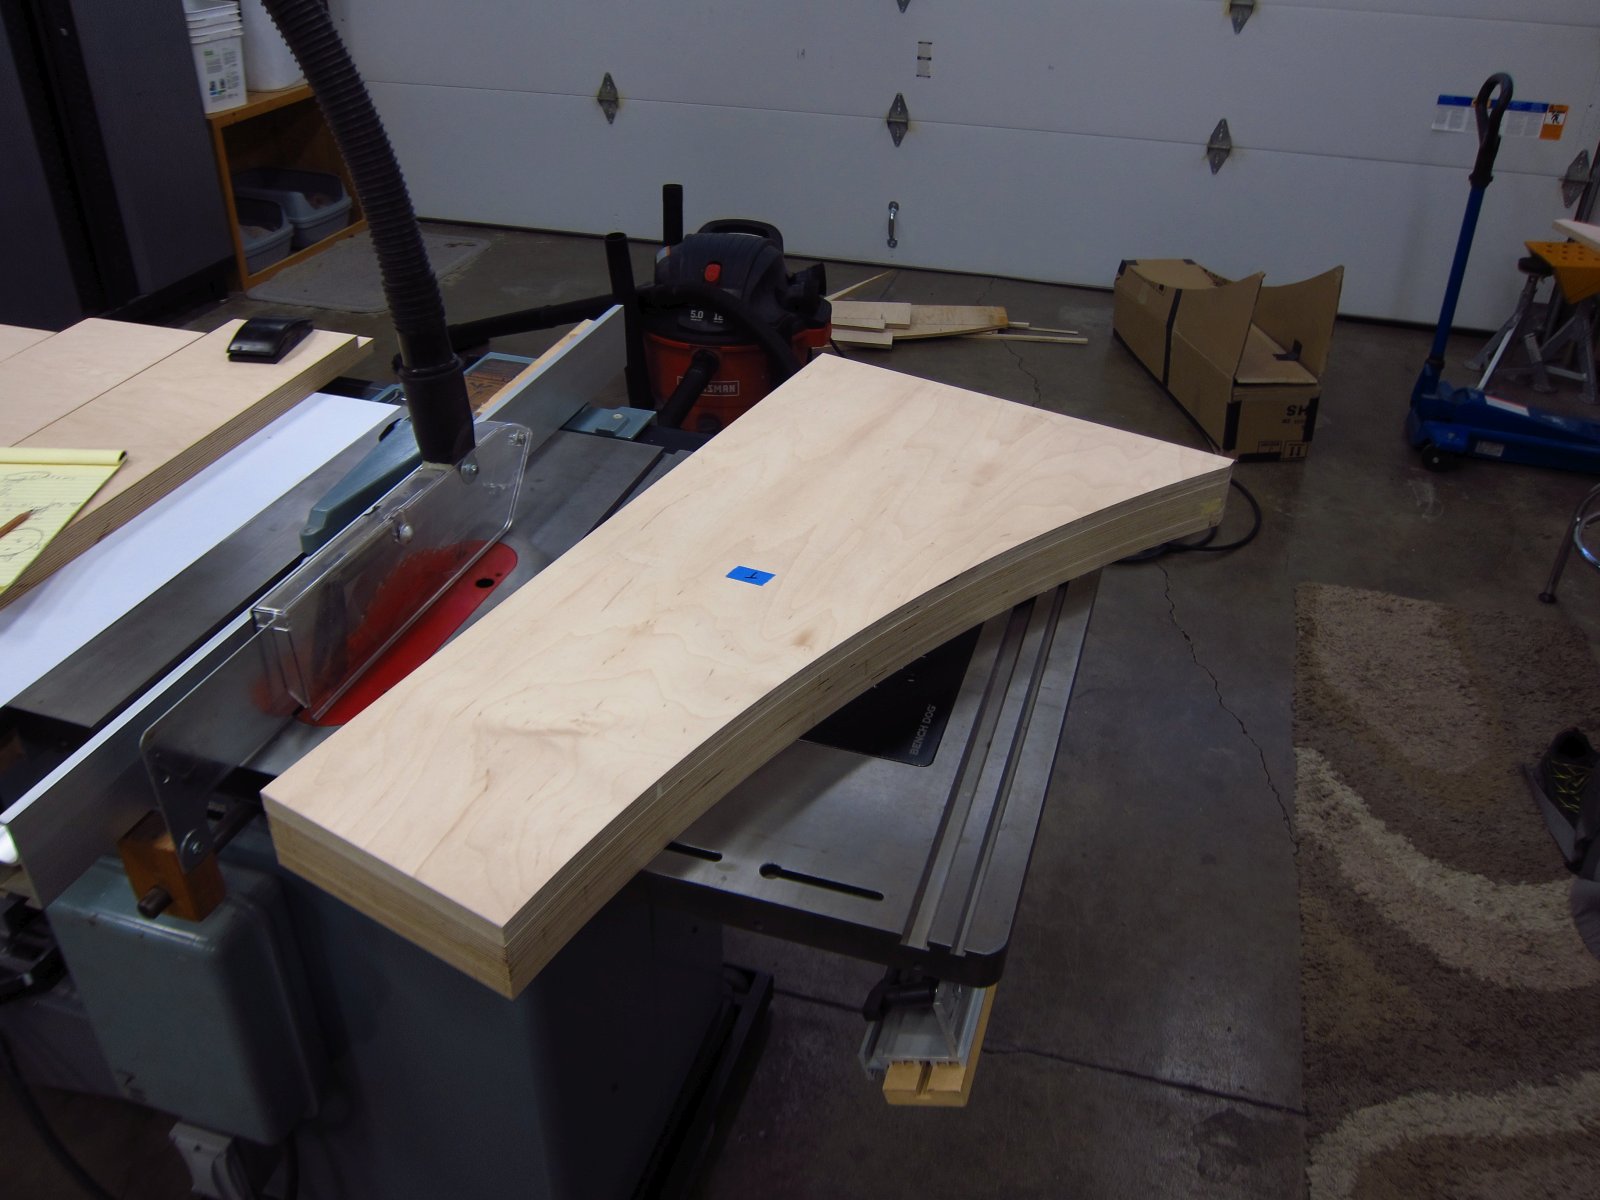
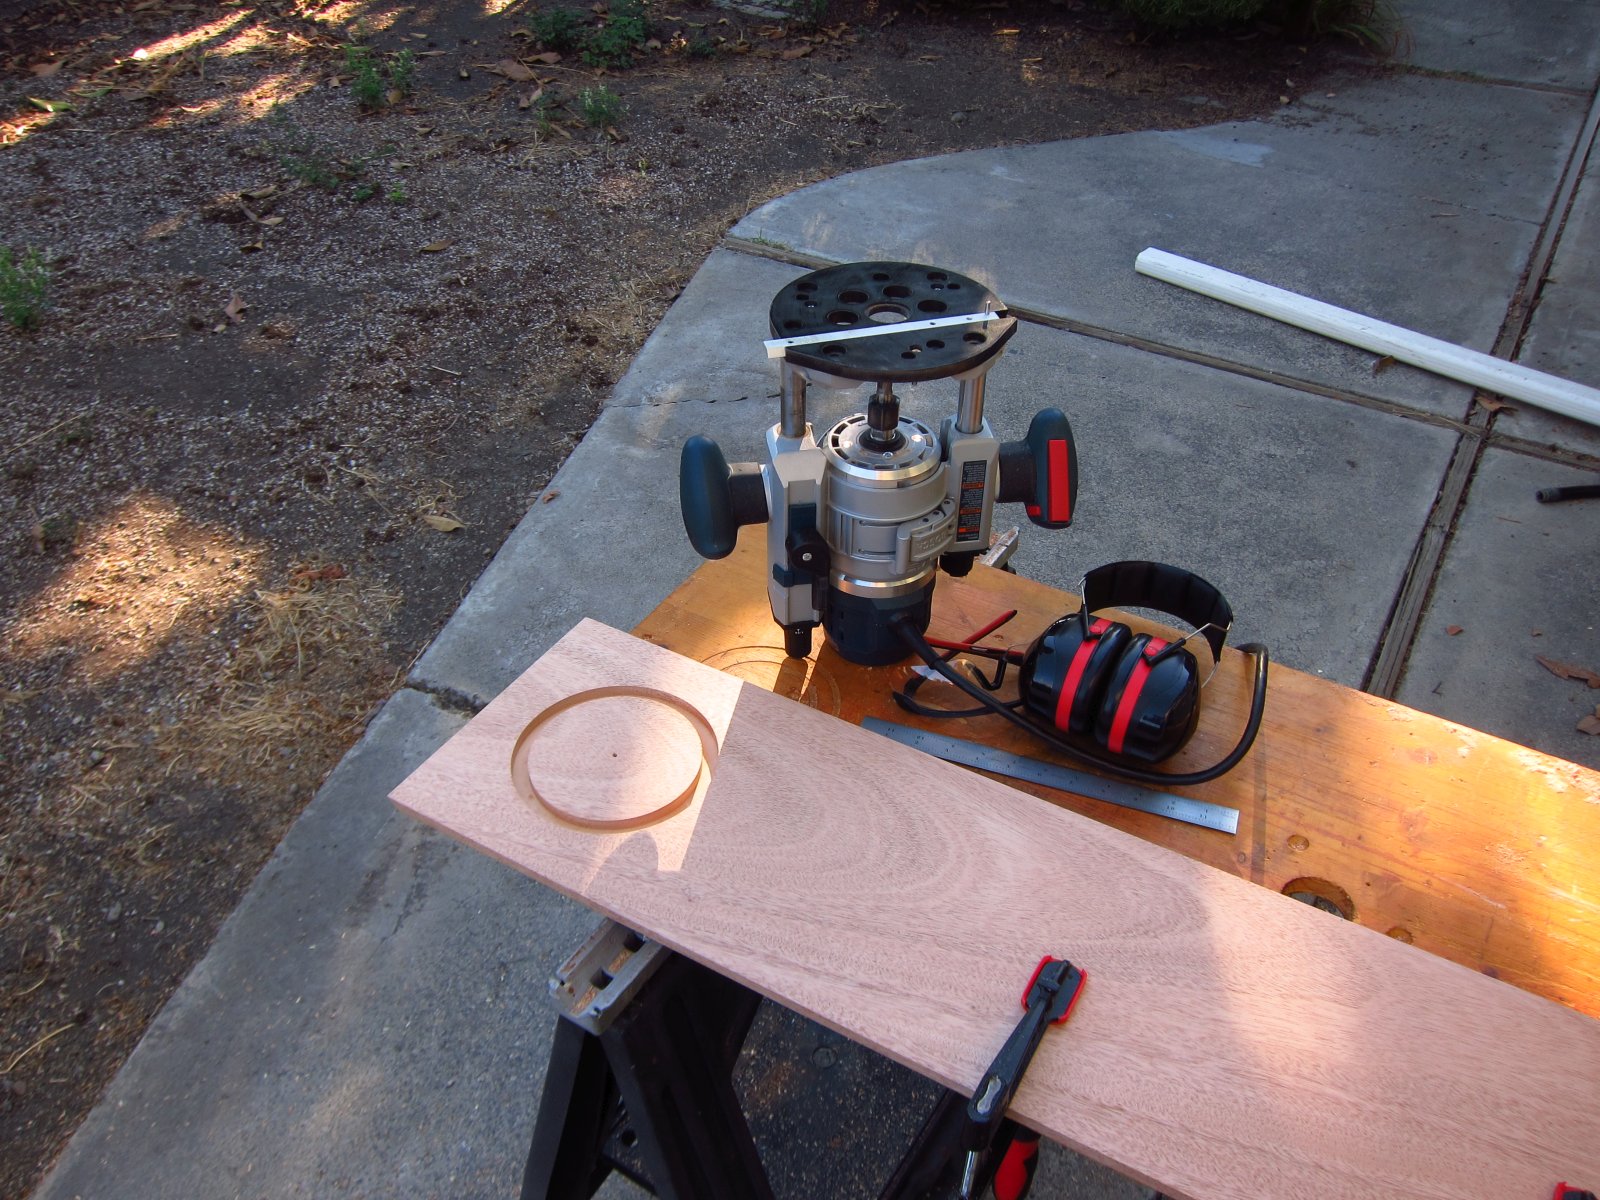
The large side panels were the most work, as I am sure that other FHXL builders have found. I wanted a perfect circular arc, so after marking things up and making some measurements, I decided to make a large format circle jig for my router and then used it to cut a guide piece from some old ply scrap.
http://www.e30tuner.com/speakerbuilding/images/fhxl_2021/fhxl_007.jpg
http://www.e30tuner.com/speakerbuilding/images/fhxl_2021/fhxl_008.jpg
http://www.e30tuner.com/speakerbuilding/images/fhxl_2021/fhxl_009.jpg
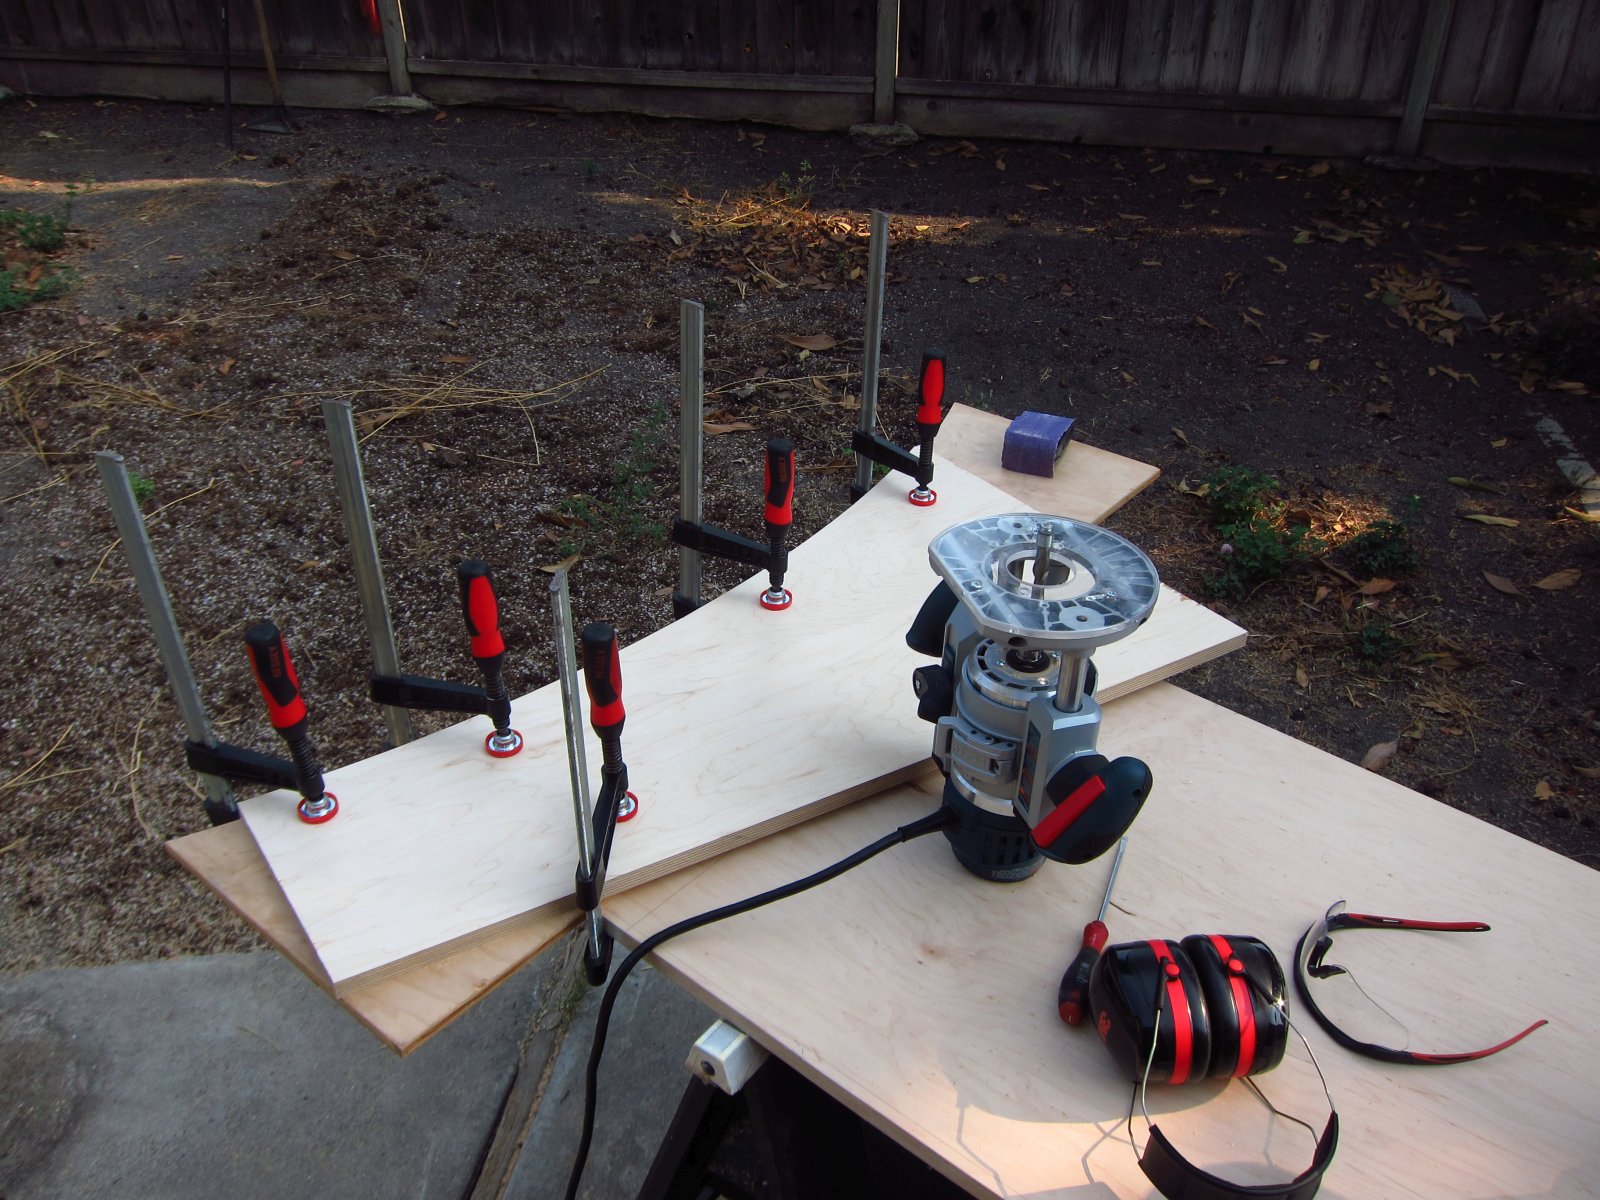
For the first side panel, I routed the arc in bits and pieces, leaving as many clamps in place as possible and removing them as needed to pass the router. Things have a tendency to wiggle and slip if you let them...so don't let them!
http://www.e30tuner.com/speakerbuilding/images/fhxl_2021/fhxl_010.jpg
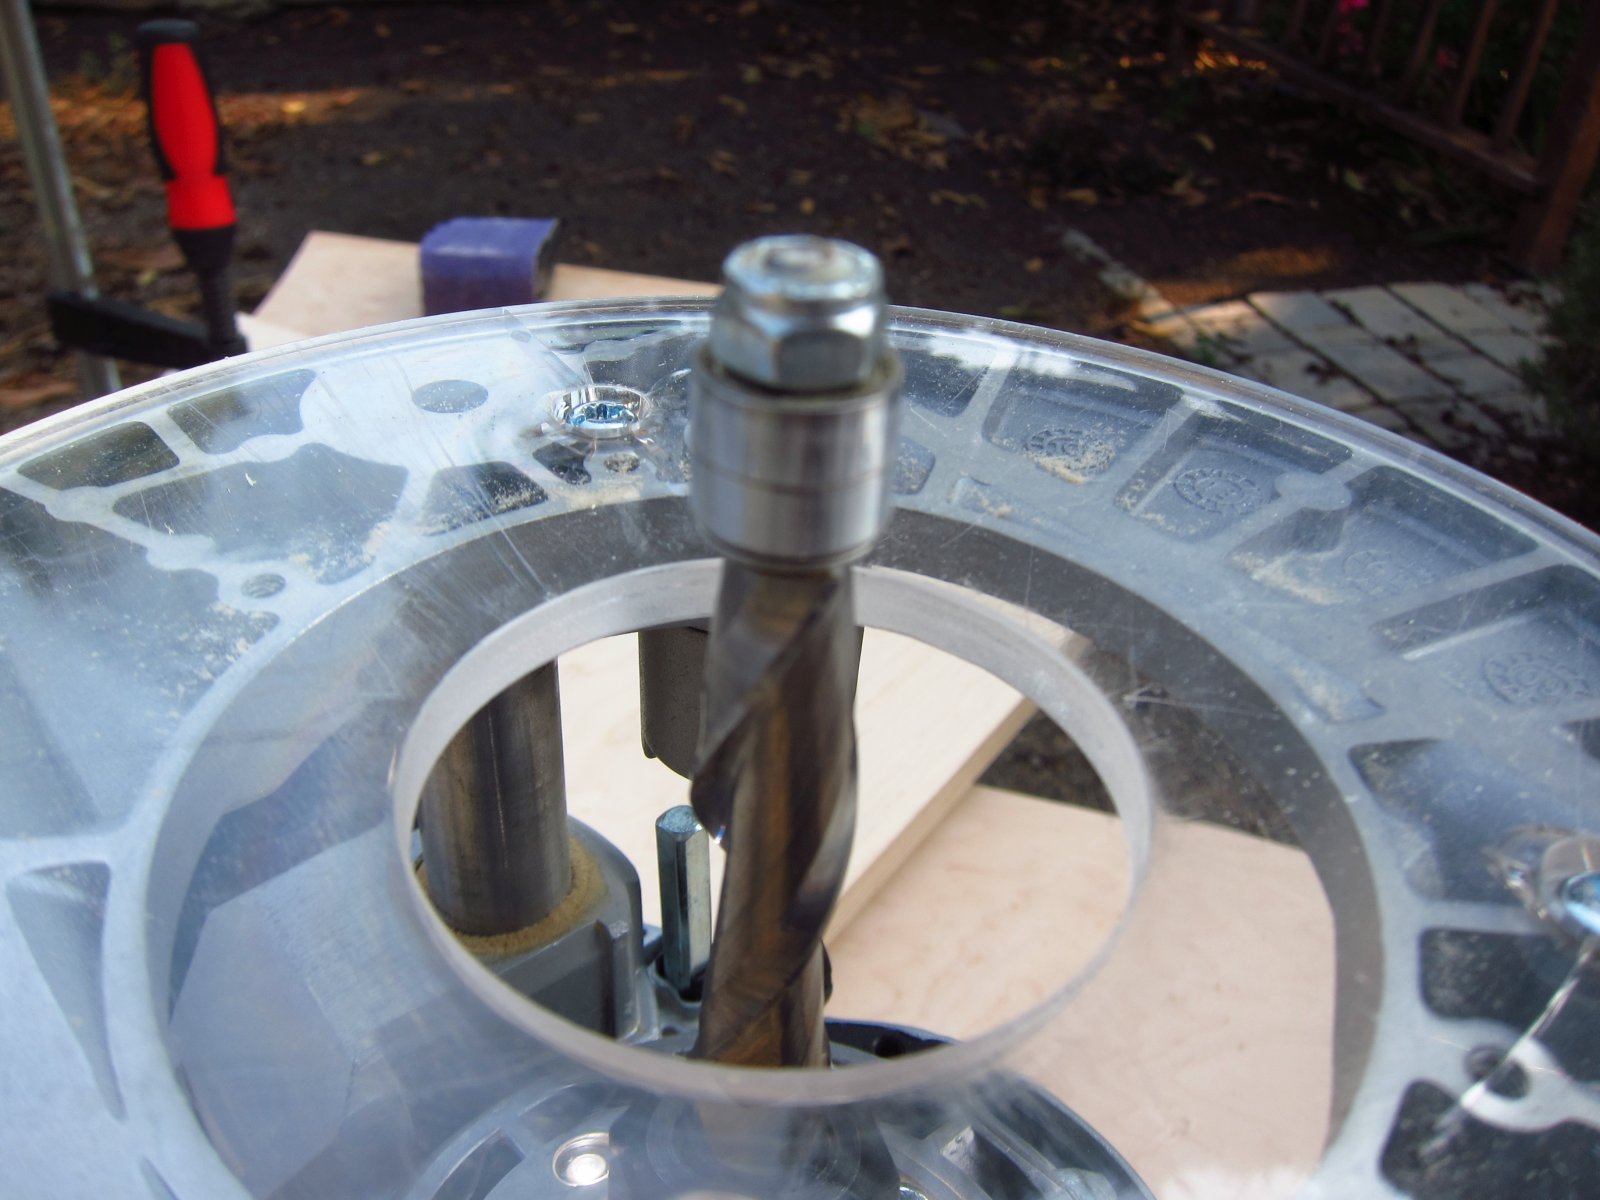
Personally, I am a big fan of down-cutting spiral bits for things like this. If you have your "A" side on top, there is zero chance of veneer tear-out, and if you have the bottom clamped against something, you won't tear there either. It is also nice to have the chips shoot away from your face. Check out Whiteside Machine Company router bits. They are not inexpensive, but they are SHARP and I have gotten many more hours of useful life from them than cheap bits (making the actual cost negligibly different).
http://www.e30tuner.com/speakerbuilding/images/fhxl_2021/fhxl_011.jpg
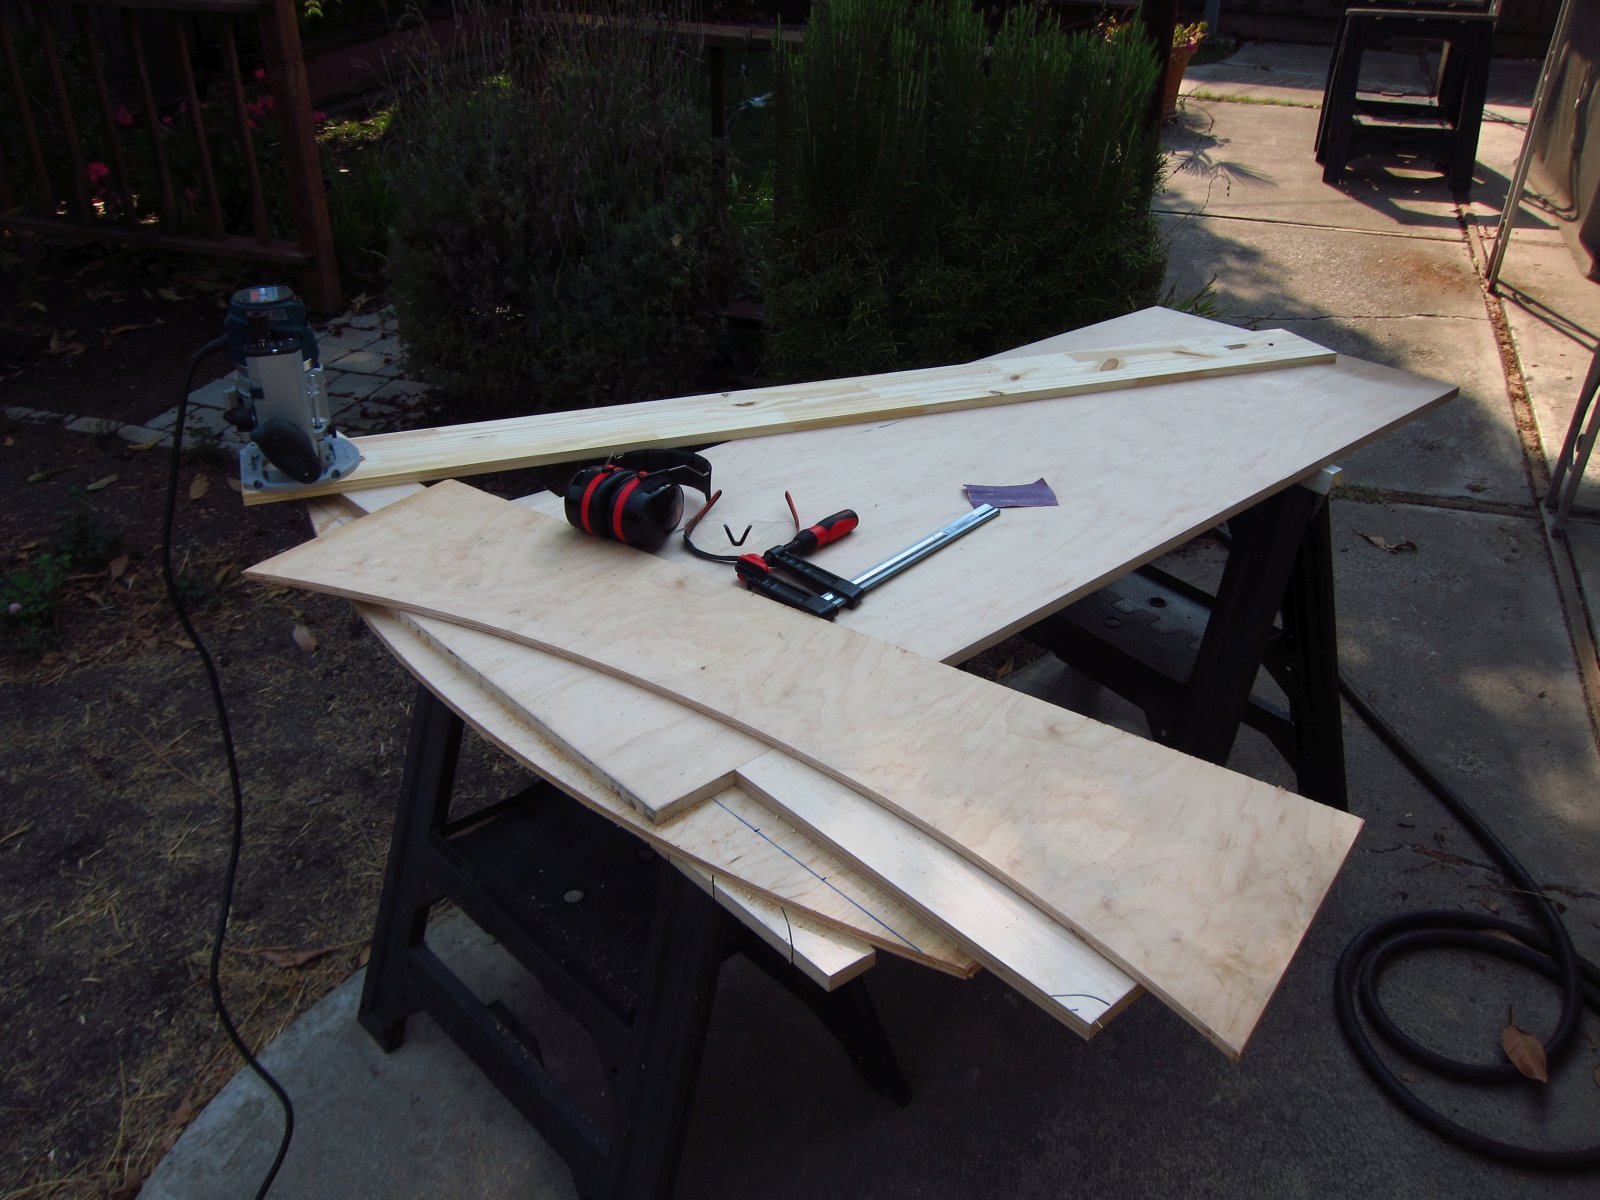
The first side panel's arc came out beautifully! As with all things, the seven P's of life should be minded (proper prior planning prevents p*ss poor performance). As far as the remaining straight sides were concerned, I also used the router and flush trim bit. Straight scraps were carefully aligned with markings for the straight sides and used as guides. Forget trying to cross-cut the angles on the saw...it is far easier to mark-up and clamp guide pieces very precisely.
http://www.e30tuner.com/speakerbuilding/images/fhxl_2021/fhxl_012.jpg
Once I had that first side done nearly perfectly, it was then used as my "golden" template for cutting the remaining three. Measure thrice, cut once, as the saying goes (measure half a dozen times is also something I am a fan of).
http://www.e30tuner.com/speakerbuilding/images/fhxl_2021/fhxl_014.jpg
http://www.e30tuner.com/speakerbuilding/images/fhxl_2021/fhxl_013.jpg
http://www.e30tuner.com/speakerbuilding/images/fhxl_2021/fhxl_015.jpg
And with that, the sides were done and approximately identical!
http://www.e30tuner.com/speakerbuilding/images/fhxl_2021/fhxl_016.jpg
The next challenge was to cut the mahogany panels for the baffles and tops. I wanted perfect miter joints, so I used some scrap ply to trial-and-error the exact angle that was needed to get a clean miter line. In theory, setting the blade to a 42.5° angle was ideal, but reality often demands a bit of tweaking to have things work out. Once the angle was set properly, I ran my oversized mahogany panels through. They have a bit of cupping in them, up to 1mm in a couple of spots, so the joint didn't look perfect along the length when just sitting as shown. The angles came out perfect though. These boards started out 19mm thick, and I planed them down to 10mm both to remove surface damage, and to be the same thickness as the Alpair 10p basket frames to get a flush mount.
http://www.e30tuner.com/speakerbuilding/images/fhxl_2021/fhxl_017.jpg
http://www.e30tuner.com/speakerbuilding/images/fhxl_2021/fhxl_018.jpg
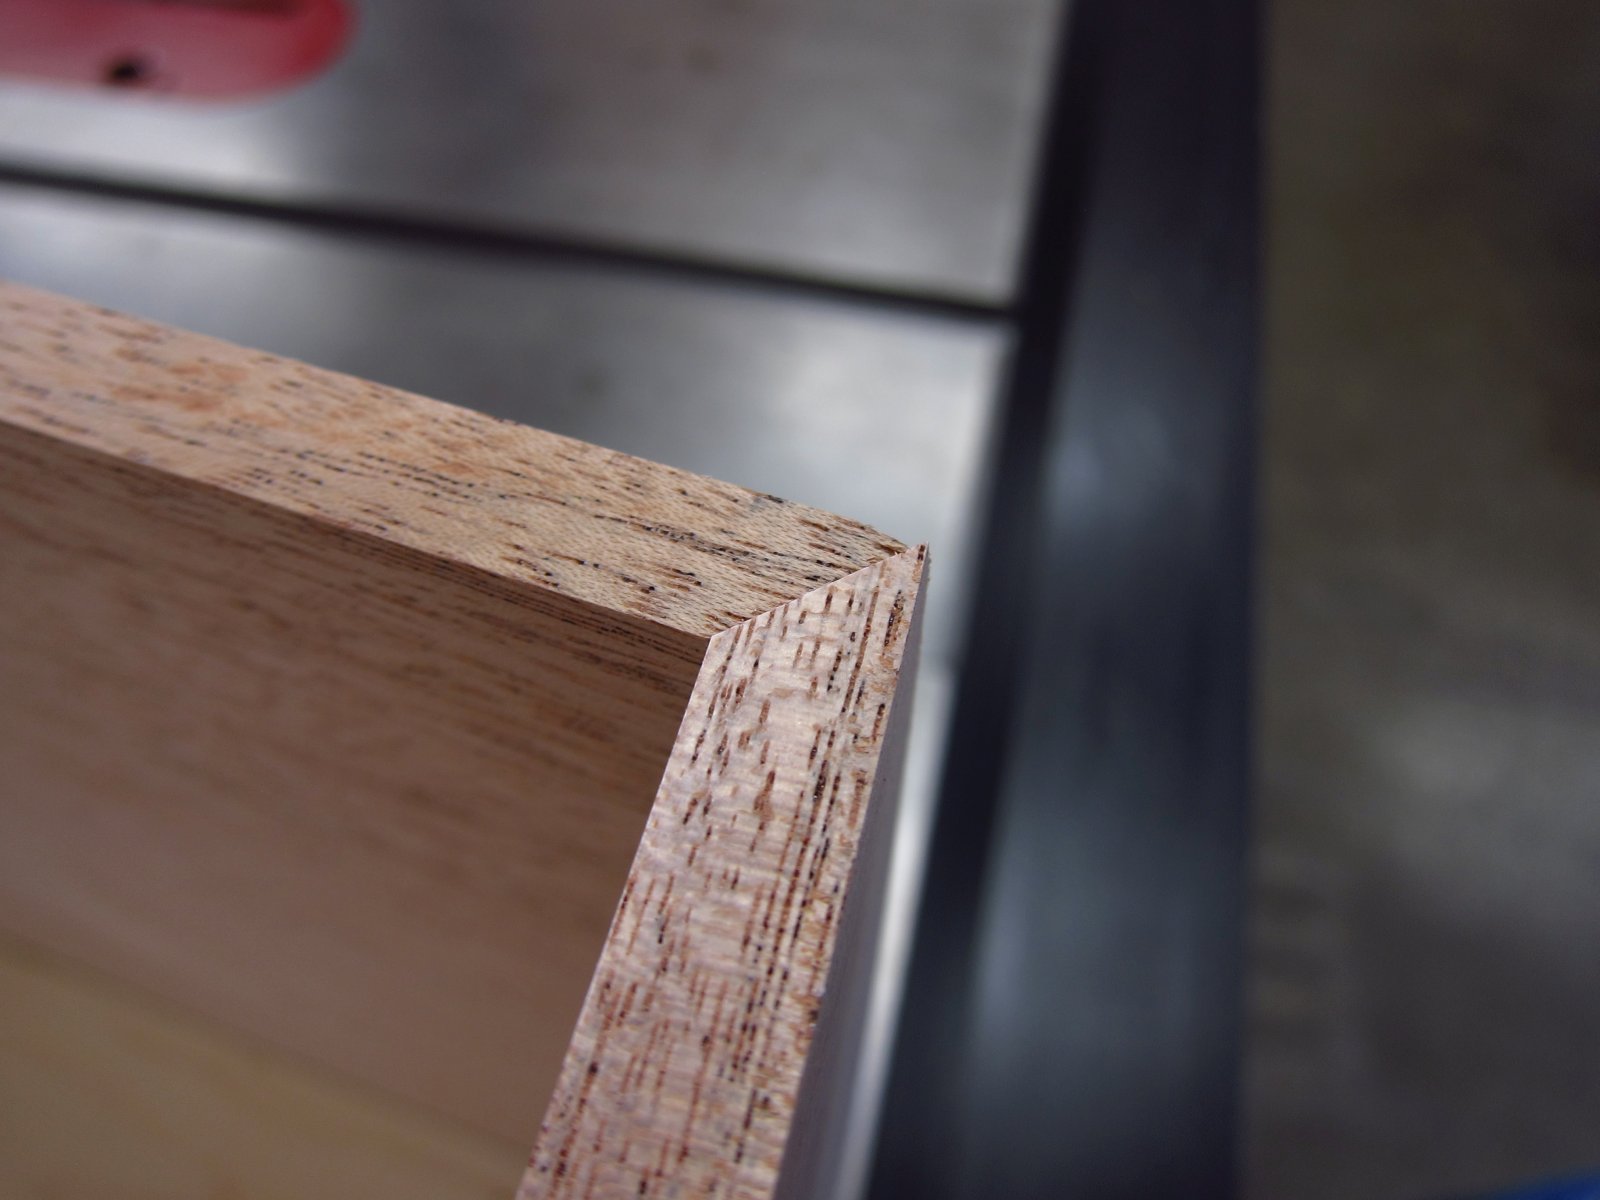
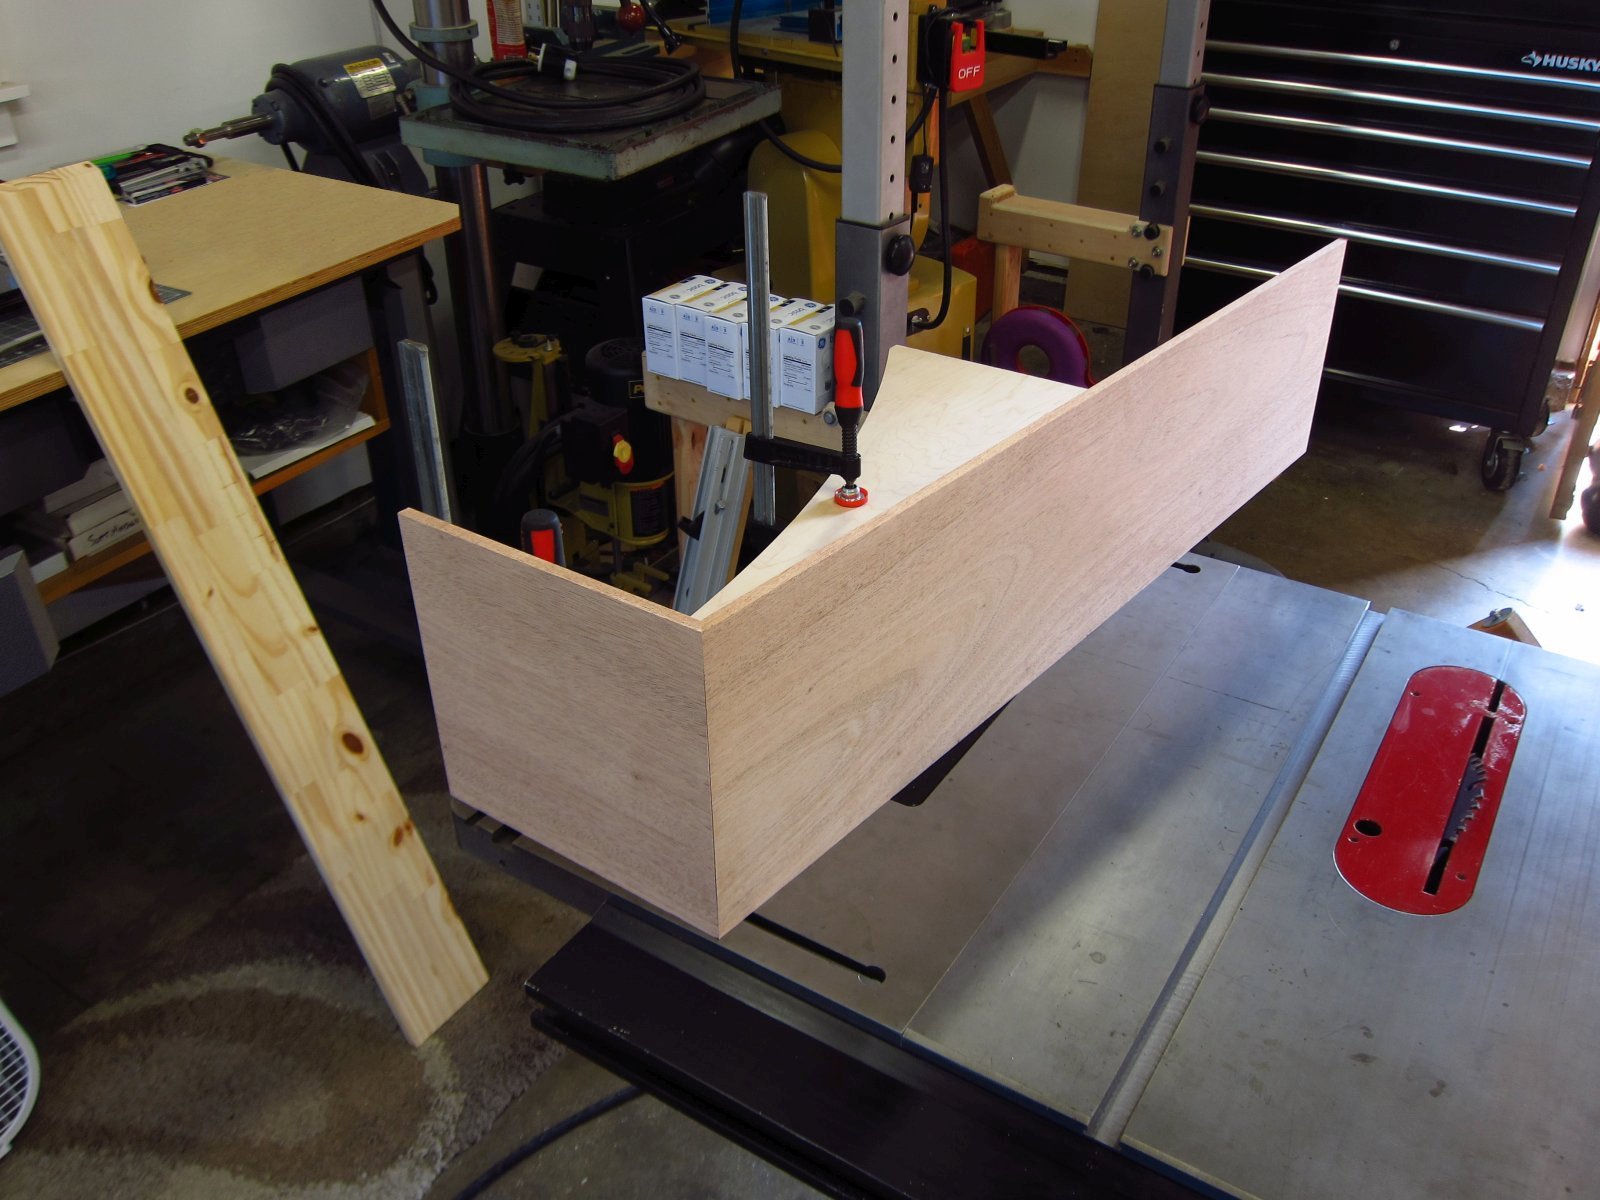
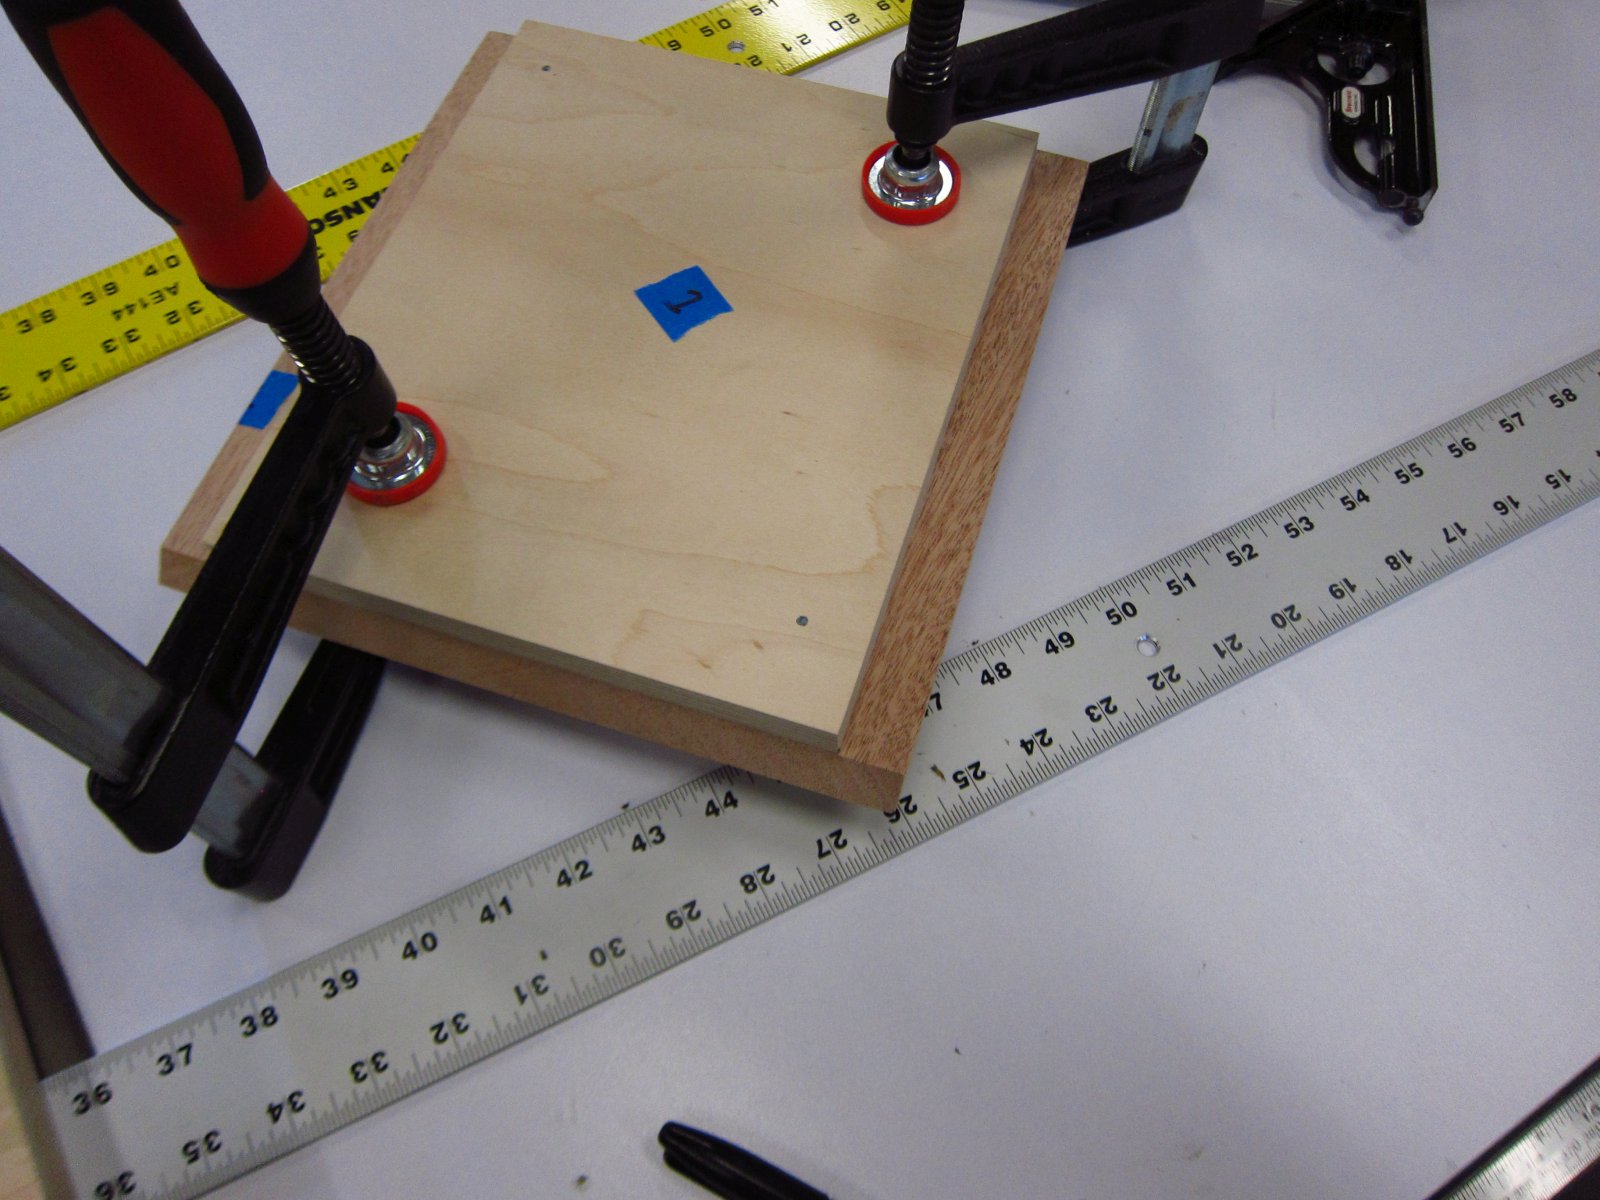
Since the miter cuts were set in stone now, I needed to work backwards a little to get the underlying ply panels placed correctly to produce a proper fit when everything is finally assembled. Lots of clamping, adjusting, re-clamping, re-adjusting, etc. Once the cupped boards were constrained up against the ply panels, the joint assumed the perfect profile that I had been aiming for.
http://www.e30tuner.com/speakerbuilding/images/fhxl_2021/fhxl_019.jpg
http://www.e30tuner.com/speakerbuilding/images/fhxl_2021/fhxl_020.jpg
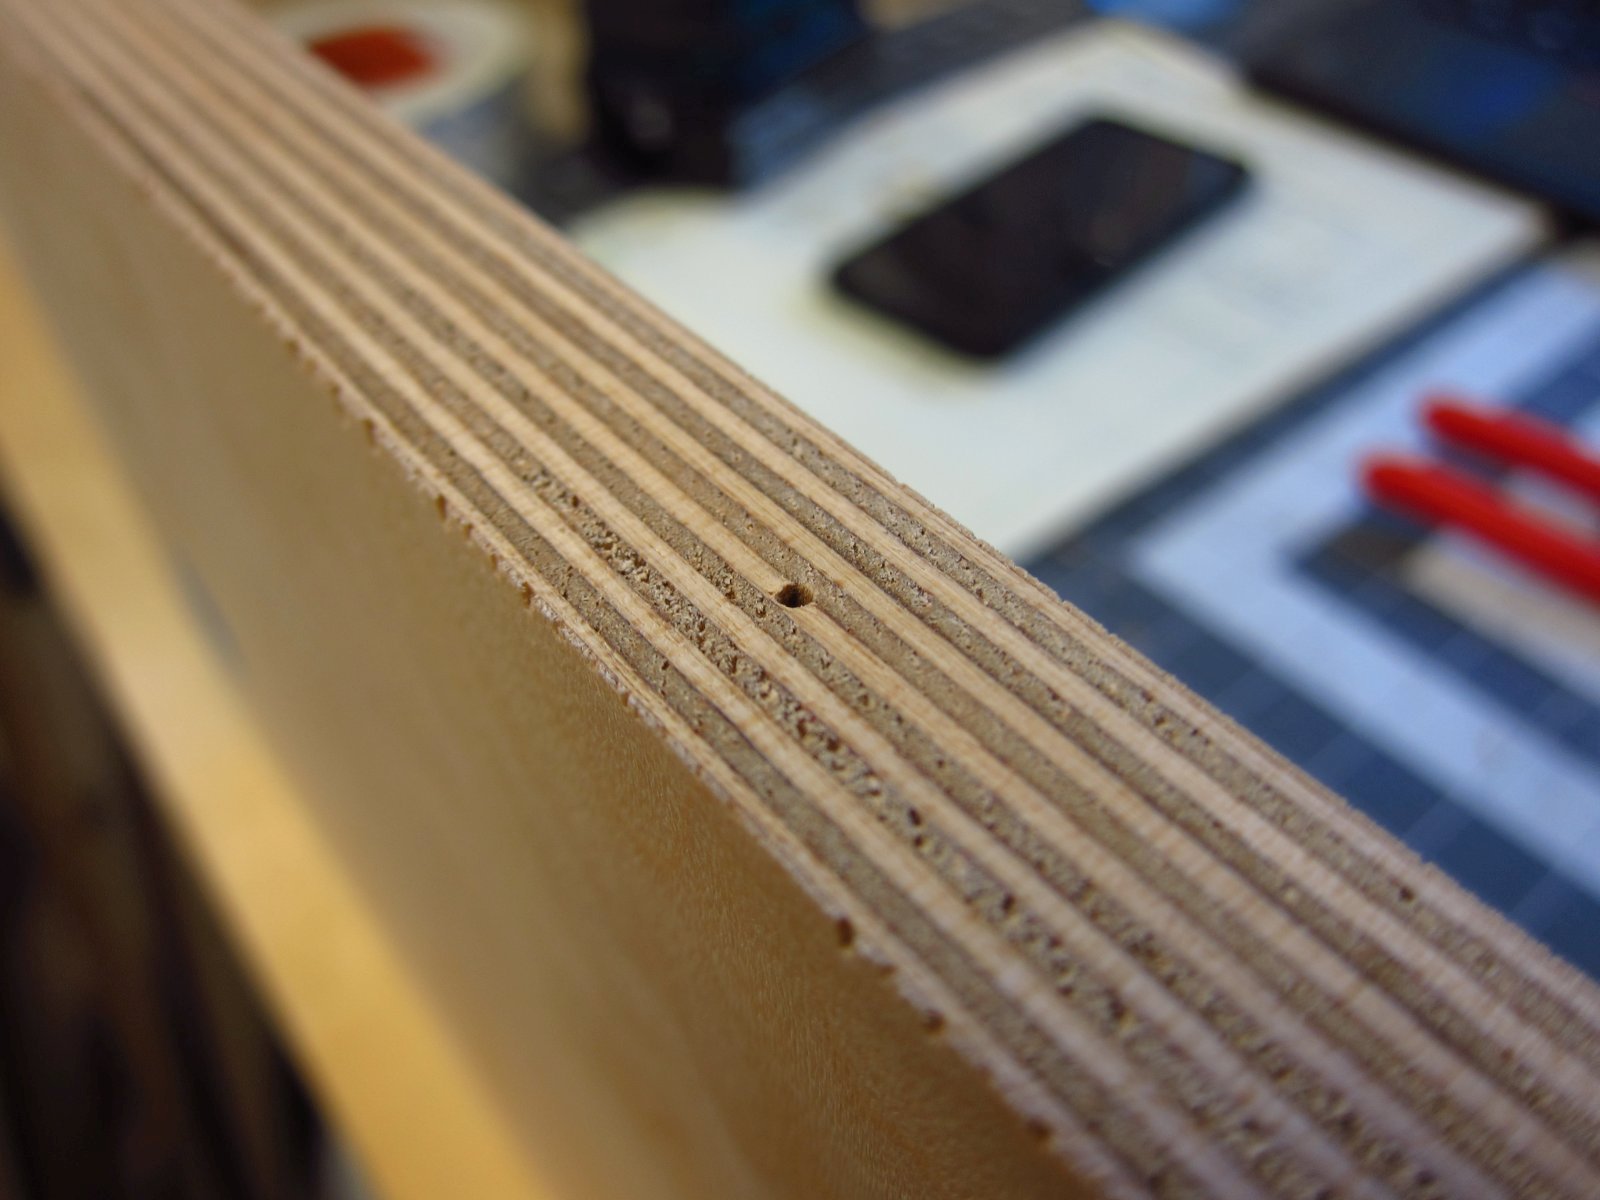
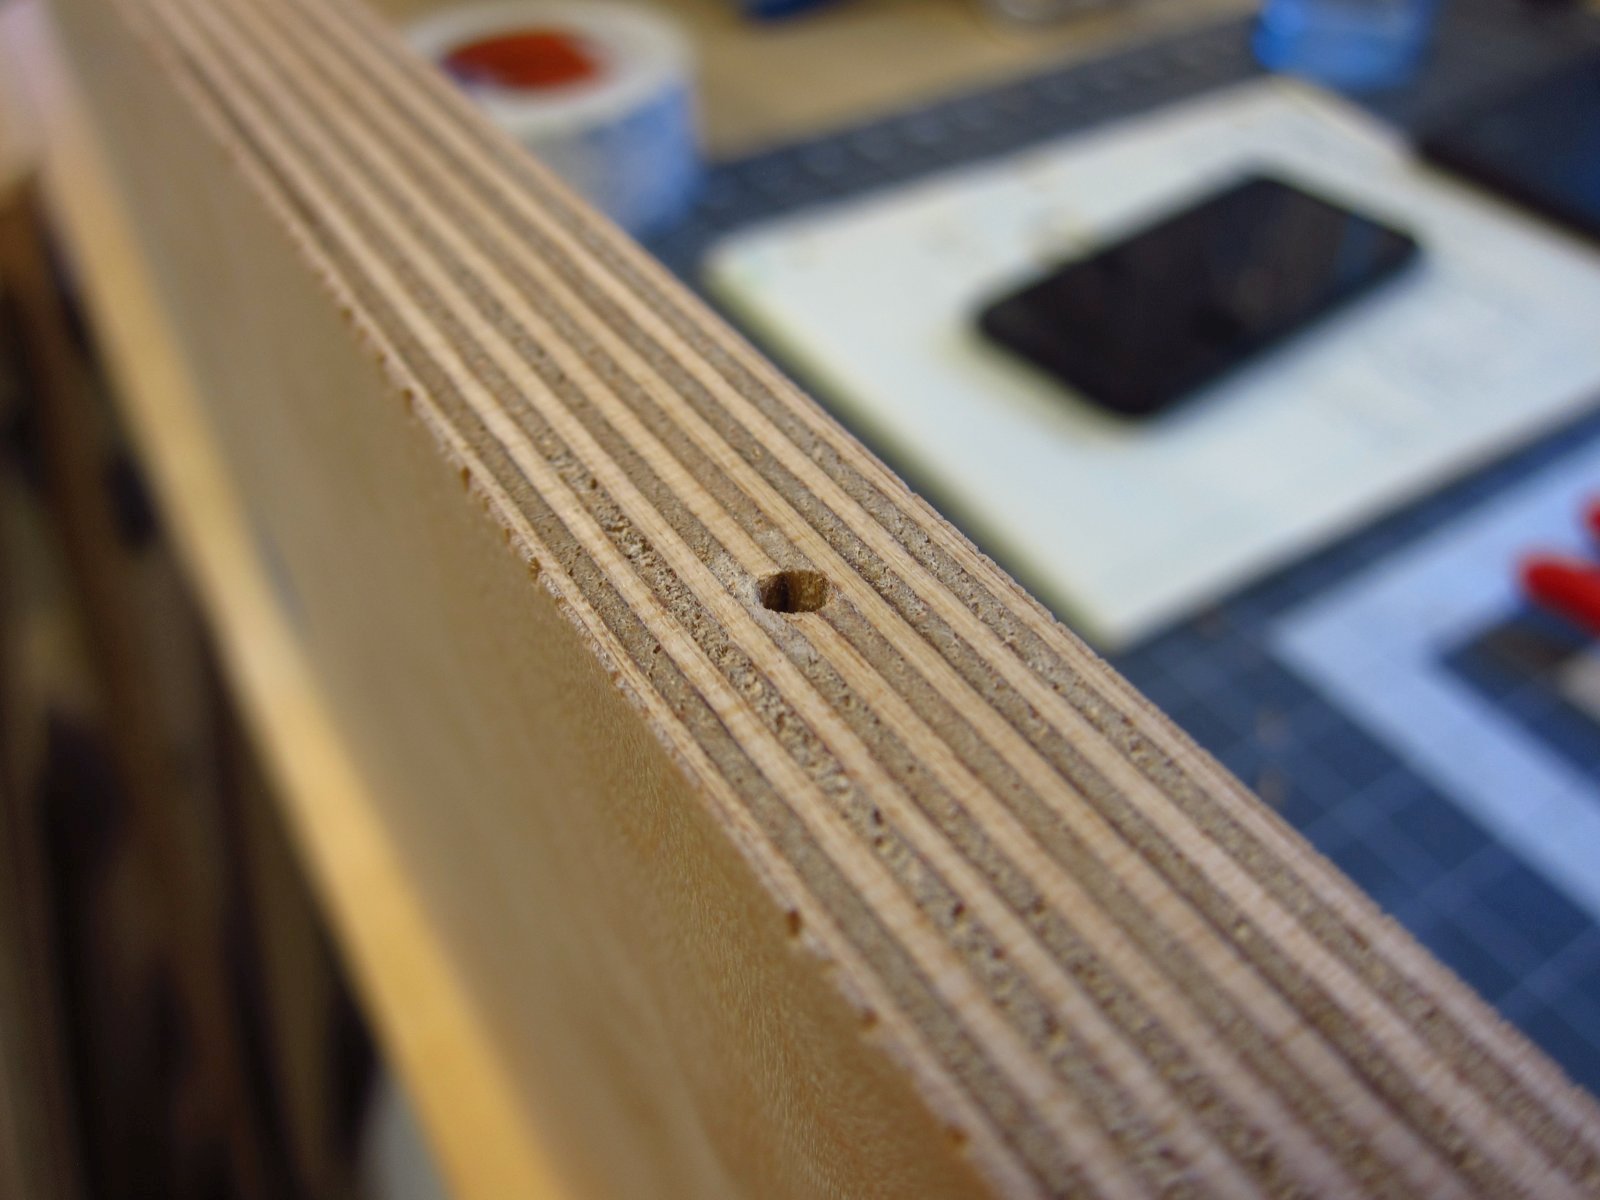
With things clamped together, I needed a strategy to be able to separate them, apply glue, and reassemble them. To ensure proper re-alignment, I drove in some small nails to serve as little datum pins. The nails end about 3mm from the front face of the panels, so there was no cosmetic fallout.
http://www.e30tuner.com/speakerbuilding/images/fhxl_2021/fhxl_021.jpg
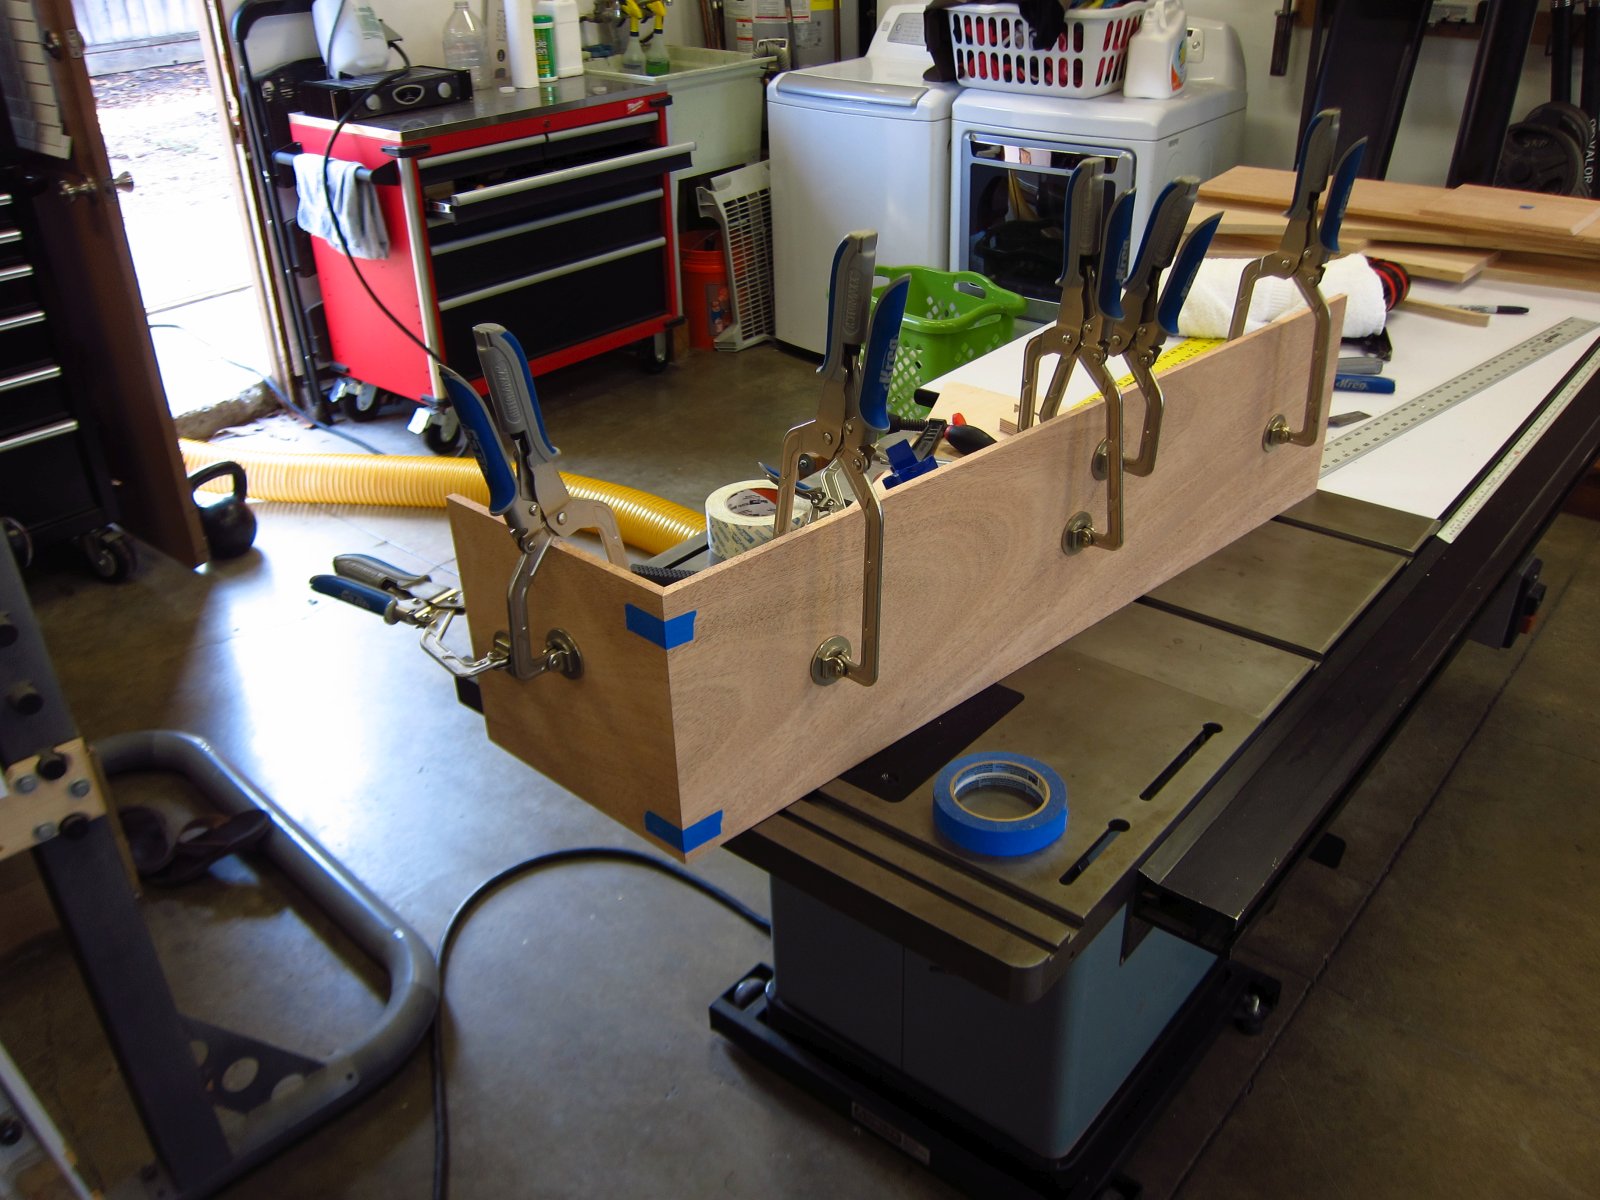
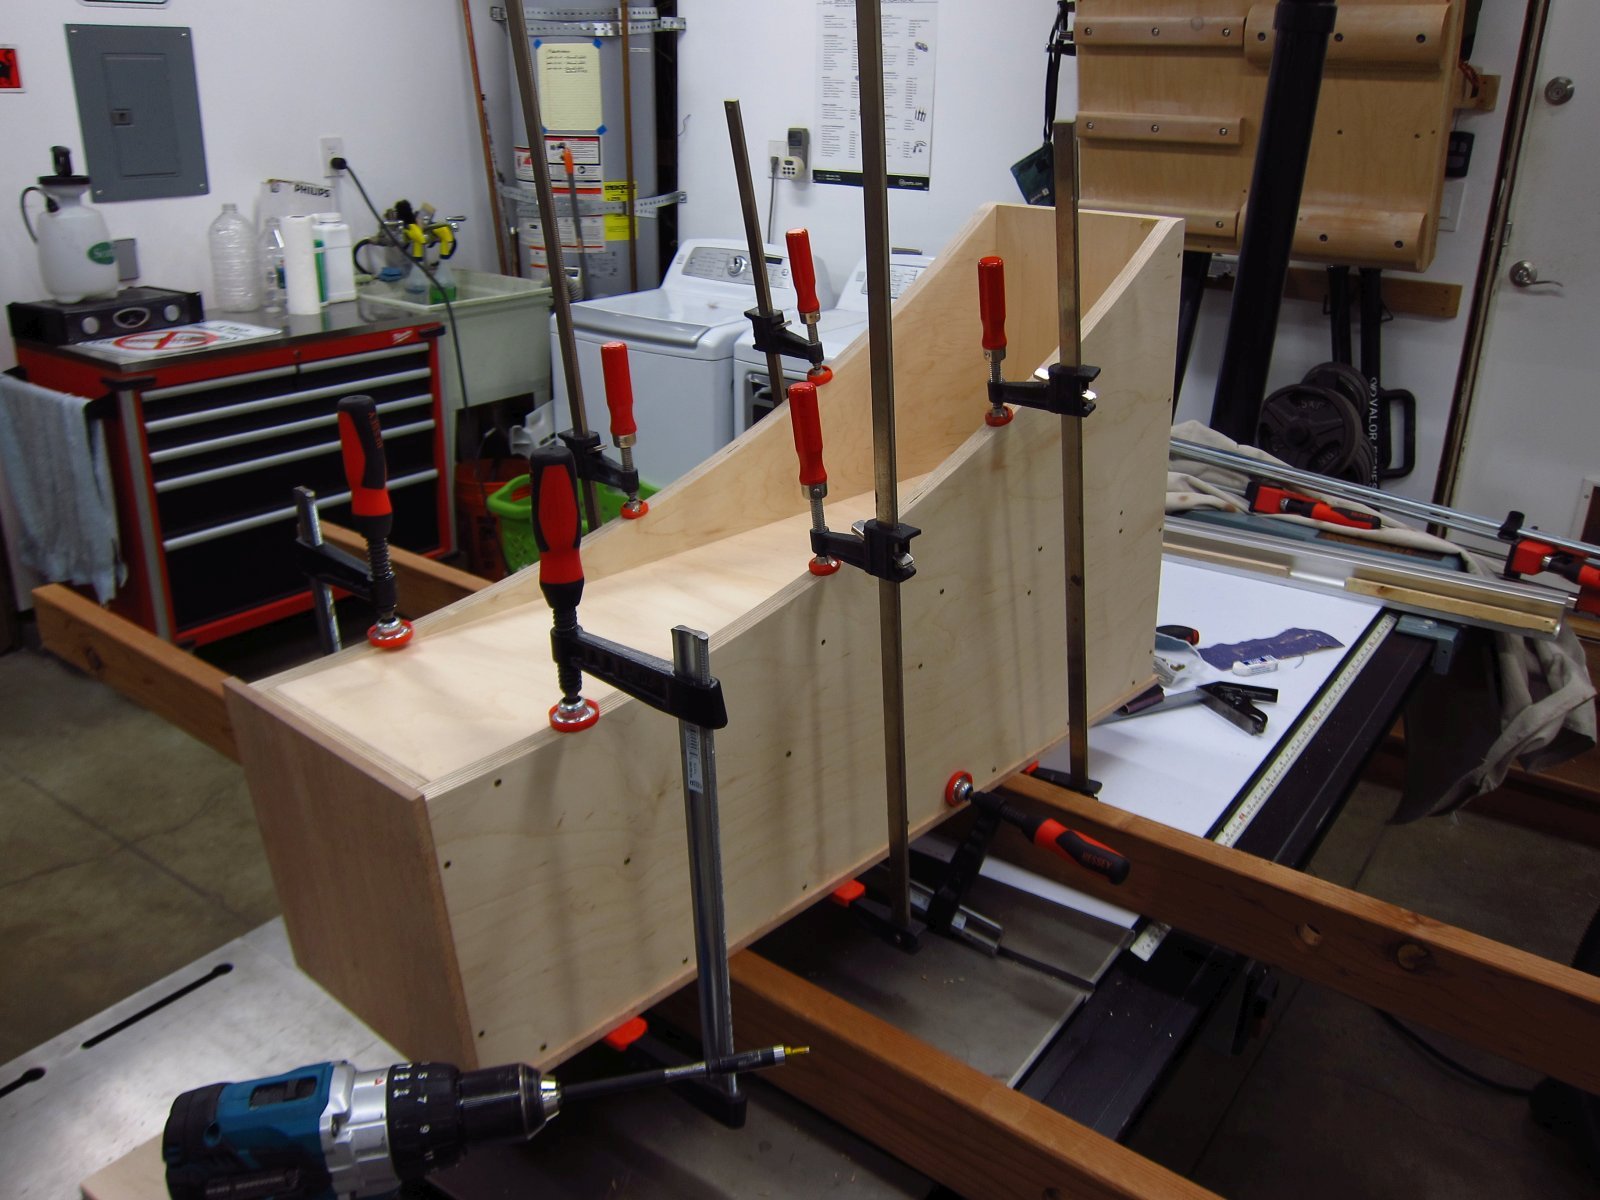
It has been said that if you can count how many clamps you have, you don't have enough. As I found, I think that I need more clamps. This took all but two of the ones I had in my shop! The glue-ups are sitting and drying now, and should be coming free of the clamps tomorrow after I get home from work. My fingers are crossed that my little nails-as-datums trick actually worked and the miter joints still fit together properly. I've done enough woodworking over the last decade to know that even the best-laid plans can end up failing, so I am prepared to see imperfect joints if things do not work out as planned.
http://www.e30tuner.com/speakerbuilding/images/fhxl_2021/fhxl_022.jpg

As far as the driver configuration, I sourced some new Alpair 10p's from KJF Audio. Shipping to the US hurt a lot, but after I digitized and plotted various MarkAudio and Fostex drivers against one another, the 10p's looked like they would provide the more balanced high frequency response that I prefer. As part of the same order, I also got the recommended damping sheet and stuffing materials.
So, first off I donated to this fine forum and got my copy of the build plans. From there, I created my own model in SketchUp using the actual thickness of the ply sheet stock that I purchased. It came out to 18.4mm, and tiny adjustments were made here and there to both maintain the internal dimensions and ensure that everything fit nicely line-to-line.
http://www.e30tuner.com/speakerbuilding/images/fhxl_2021/fhxl_023.png
http://www.e30tuner.com/speakerbuilding/images/fhxl_2021/fhxl_024.png
The plywood is maple-veneered Europly, and I will be accenting the baffle + top with some "mahogany." In reality, it is Light Red Meranti, which many stores call mahogany, but it is in fact not. Still, it is an attractive species and it also does not break the bank. A local supplier has a fantastic selection of fine plywoods, and I was lucky enough to catch this 13-ply birch material while it was a bit cheaper than usual. The "mahogany" was just some 1x12 stock from a local Home Depot. While I usually don't buy wood for anything more serious than a shed from that place, they happened to have some boards which were reasonably straight and not smashed up, so I grabbed the best looking one.
http://www.e30tuner.com/speakerbuilding/images/fhxl_2021/fhxl_001.jpg
http://www.e30tuner.com/speakerbuilding/images/fhxl_2021/fhxl_002.jpg
At one point, I took some scrap cardboard and made a mock-up of the FHXL to play around with placement ideas and get a general plan for where I would be able to experiment with them. This was prior to buying the wood...gotta make sure they can actually go somewhere! It has since become a hideout for one of my cats.
http://www.e30tuner.com/speakerbuilding/images/fhxl_2021/fhxl_003.jpg
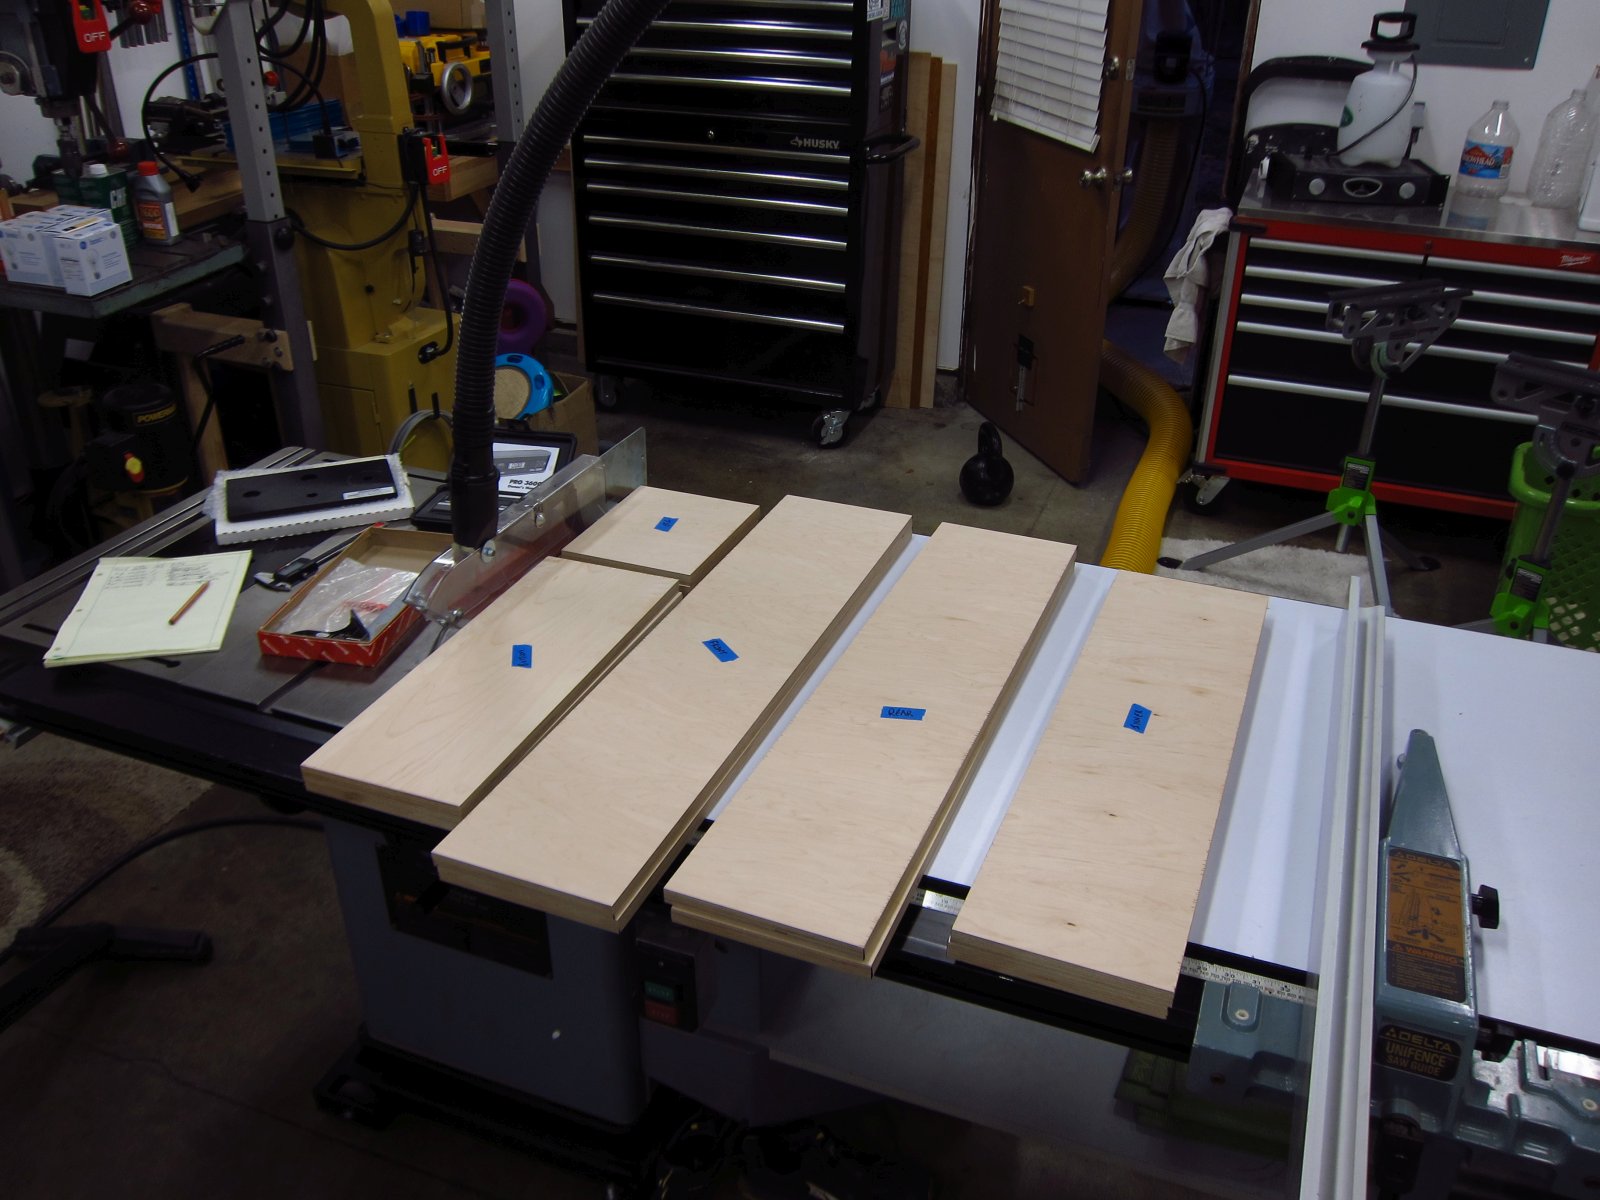
Next, I cut out all of the smaller panels to their overall sizes. From there, I added the required angles to the ends.
http://www.e30tuner.com/speakerbuilding/images/fhxl_2021/fhxl_004.jpg
http://www.e30tuner.com/speakerbuilding/images/fhxl_2021/fhxl_005.jpg
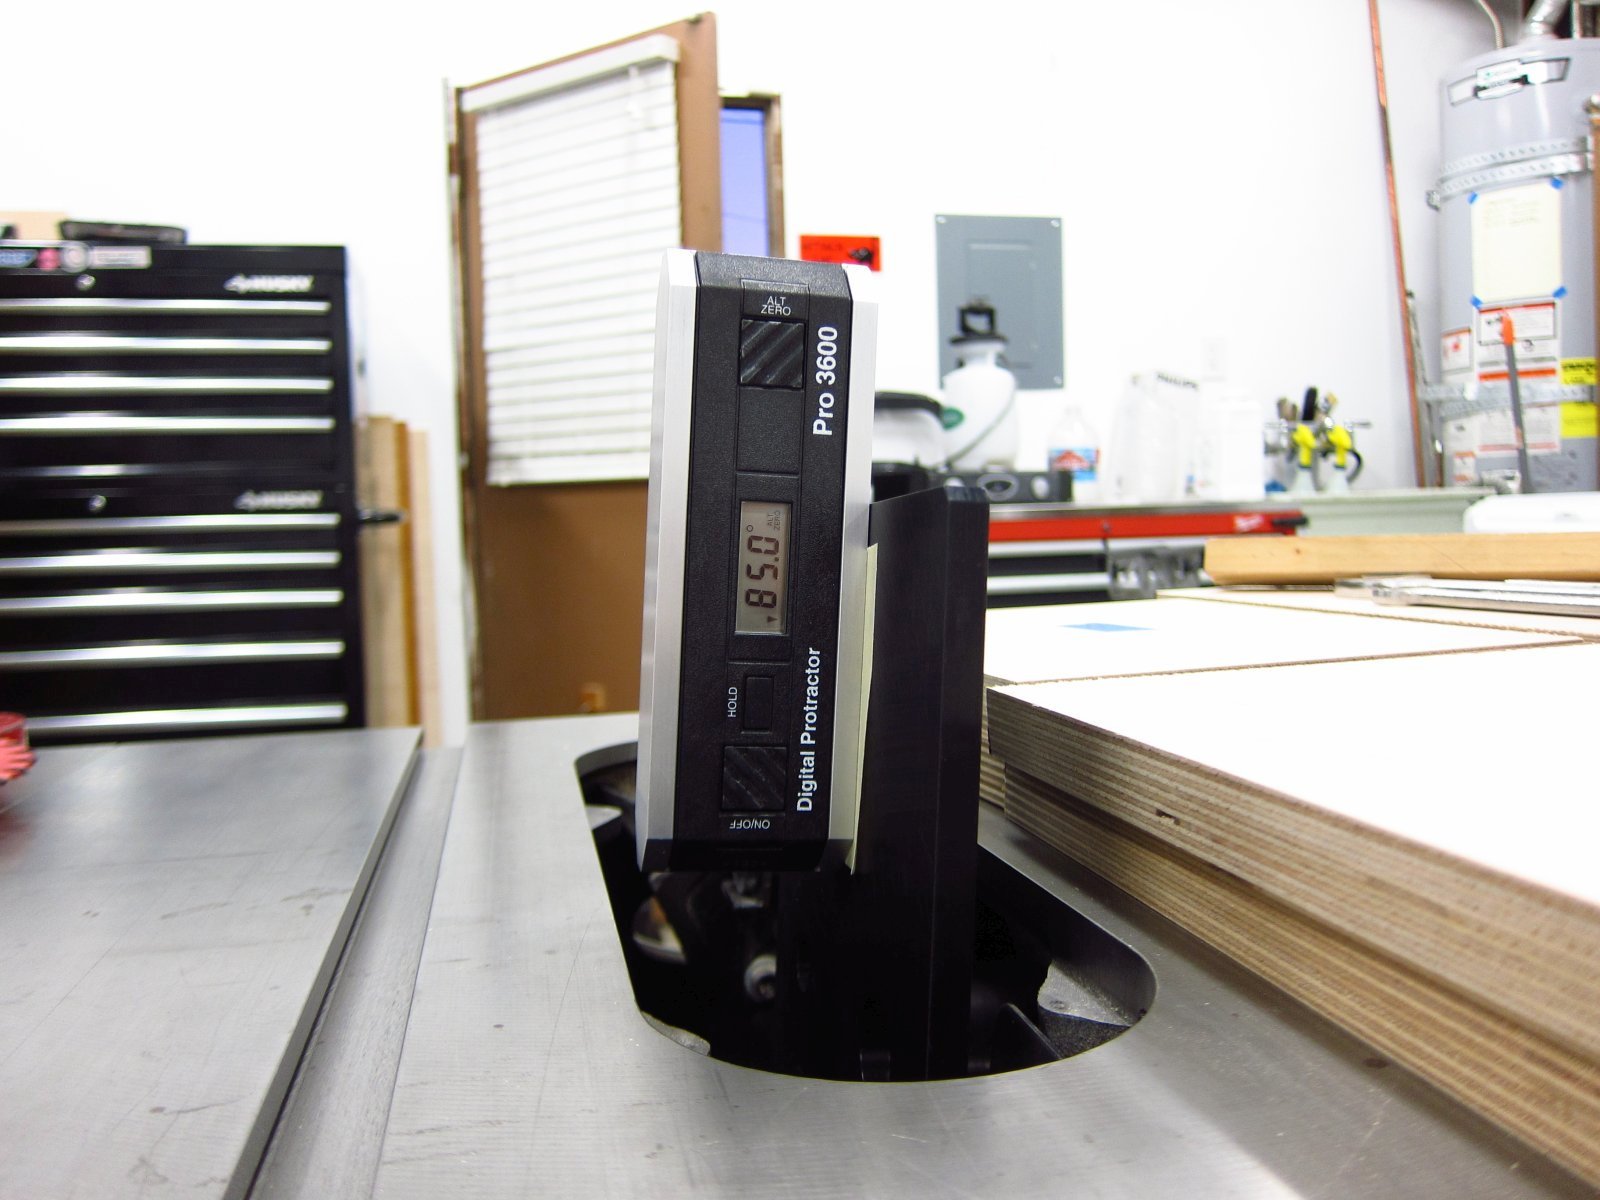
My preferred way to set up angles is the same way that I tune up the saw...a nice digital inclinometer on a tool plate mounted to the arbor. I had bought this Unisaw used many years ago and it was very out of tune, so I had to invest a bit in dial indicators and other items to get everything properly square. Those of you who have used an improperly tuned table saw know how unpleasant (and DANGEROUS) it can be. The other key for ease & safety of use, in my opinion, is to regularly apply some floor wax (I like Johnson Paste Wax) to the top surfaces so that material moves smoothly and with minimal "grunt". The less force you need to move the workpiece, the less chance there is of you shoving a hand into the blade.
http://www.e30tuner.com/speakerbuilding/images/fhxl_2021/fhxl_006.jpg
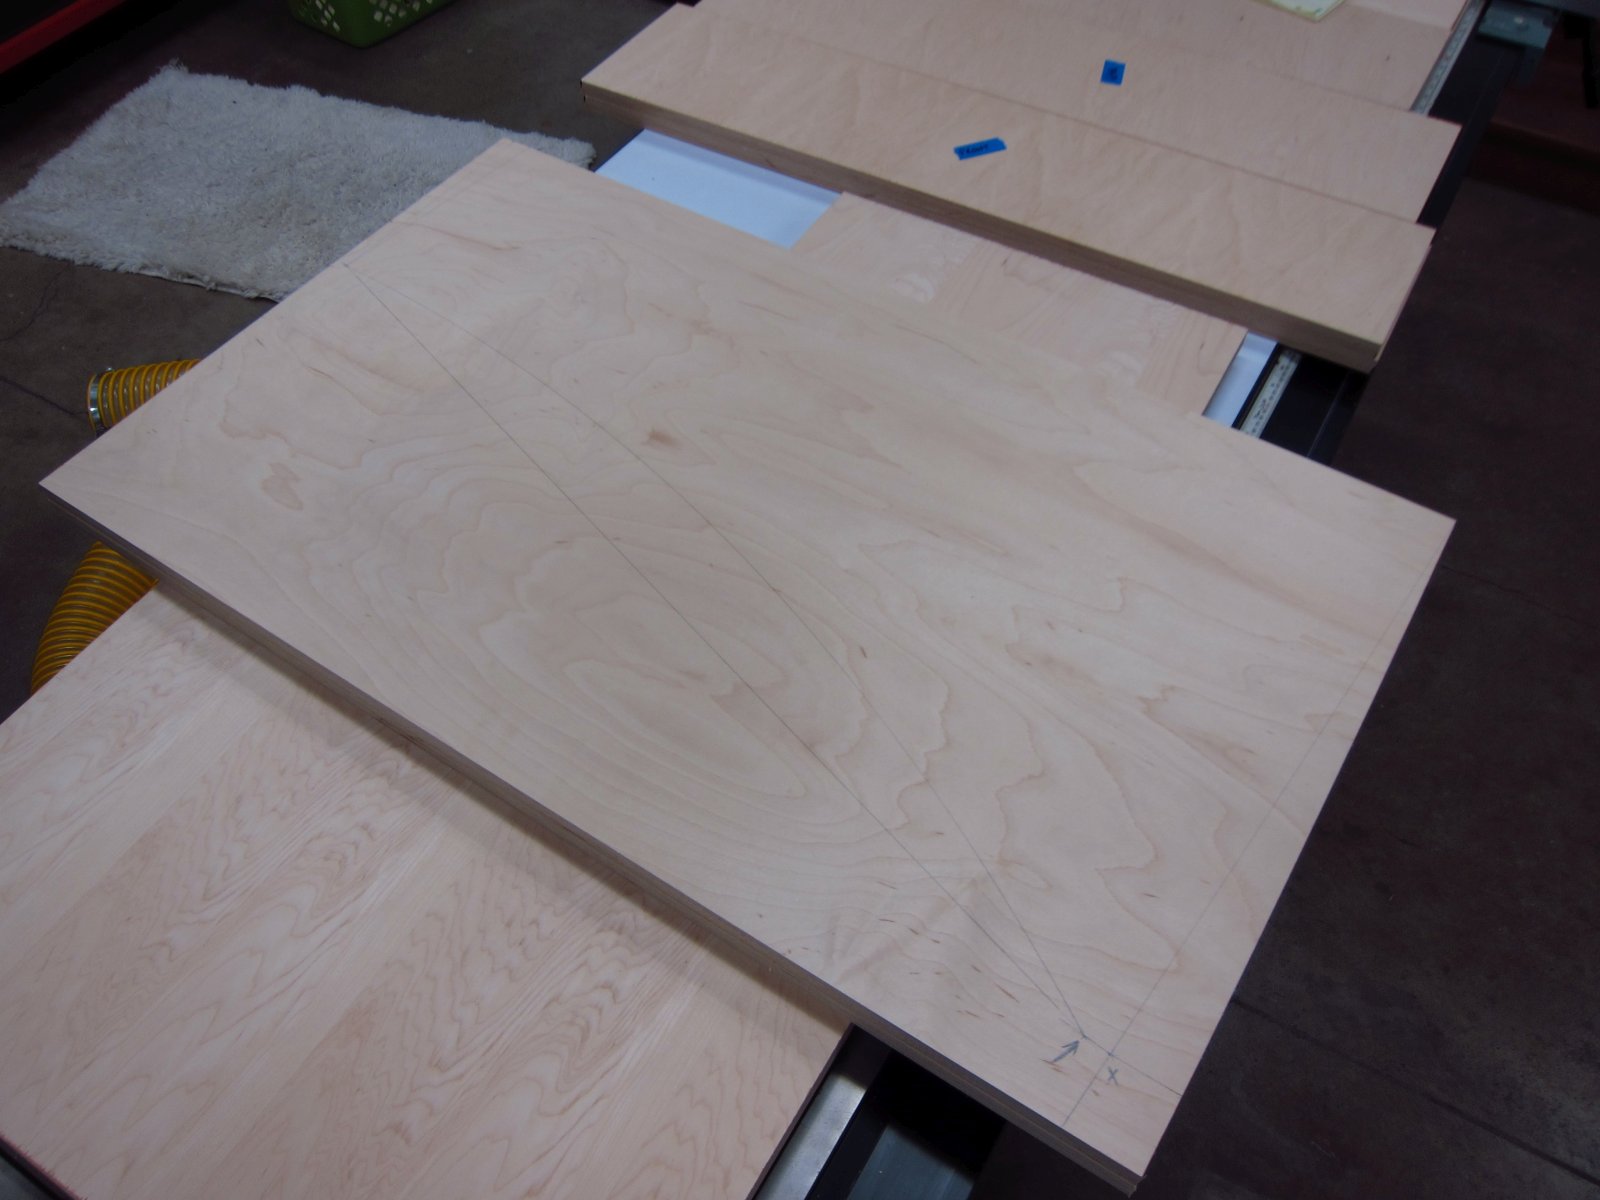
The large side panels were the most work, as I am sure that other FHXL builders have found. I wanted a perfect circular arc, so after marking things up and making some measurements, I decided to make a large format circle jig for my router and then used it to cut a guide piece from some old ply scrap.
http://www.e30tuner.com/speakerbuilding/images/fhxl_2021/fhxl_007.jpg
http://www.e30tuner.com/speakerbuilding/images/fhxl_2021/fhxl_008.jpg
http://www.e30tuner.com/speakerbuilding/images/fhxl_2021/fhxl_009.jpg
For the first side panel, I routed the arc in bits and pieces, leaving as many clamps in place as possible and removing them as needed to pass the router. Things have a tendency to wiggle and slip if you let them...so don't let them!
http://www.e30tuner.com/speakerbuilding/images/fhxl_2021/fhxl_010.jpg
Personally, I am a big fan of down-cutting spiral bits for things like this. If you have your "A" side on top, there is zero chance of veneer tear-out, and if you have the bottom clamped against something, you won't tear there either. It is also nice to have the chips shoot away from your face. Check out Whiteside Machine Company router bits. They are not inexpensive, but they are SHARP and I have gotten many more hours of useful life from them than cheap bits (making the actual cost negligibly different).
http://www.e30tuner.com/speakerbuilding/images/fhxl_2021/fhxl_011.jpg
The first side panel's arc came out beautifully! As with all things, the seven P's of life should be minded (proper prior planning prevents p*ss poor performance). As far as the remaining straight sides were concerned, I also used the router and flush trim bit. Straight scraps were carefully aligned with markings for the straight sides and used as guides. Forget trying to cross-cut the angles on the saw...it is far easier to mark-up and clamp guide pieces very precisely.
http://www.e30tuner.com/speakerbuilding/images/fhxl_2021/fhxl_012.jpg
Once I had that first side done nearly perfectly, it was then used as my "golden" template for cutting the remaining three. Measure thrice, cut once, as the saying goes (measure half a dozen times is also something I am a fan of).
http://www.e30tuner.com/speakerbuilding/images/fhxl_2021/fhxl_014.jpg
http://www.e30tuner.com/speakerbuilding/images/fhxl_2021/fhxl_013.jpg
http://www.e30tuner.com/speakerbuilding/images/fhxl_2021/fhxl_015.jpg
And with that, the sides were done and approximately identical!
http://www.e30tuner.com/speakerbuilding/images/fhxl_2021/fhxl_016.jpg
The next challenge was to cut the mahogany panels for the baffles and tops. I wanted perfect miter joints, so I used some scrap ply to trial-and-error the exact angle that was needed to get a clean miter line. In theory, setting the blade to a 42.5° angle was ideal, but reality often demands a bit of tweaking to have things work out. Once the angle was set properly, I ran my oversized mahogany panels through. They have a bit of cupping in them, up to 1mm in a couple of spots, so the joint didn't look perfect along the length when just sitting as shown. The angles came out perfect though. These boards started out 19mm thick, and I planed them down to 10mm both to remove surface damage, and to be the same thickness as the Alpair 10p basket frames to get a flush mount.
http://www.e30tuner.com/speakerbuilding/images/fhxl_2021/fhxl_017.jpg
http://www.e30tuner.com/speakerbuilding/images/fhxl_2021/fhxl_018.jpg
Since the miter cuts were set in stone now, I needed to work backwards a little to get the underlying ply panels placed correctly to produce a proper fit when everything is finally assembled. Lots of clamping, adjusting, re-clamping, re-adjusting, etc. Once the cupped boards were constrained up against the ply panels, the joint assumed the perfect profile that I had been aiming for.
http://www.e30tuner.com/speakerbuilding/images/fhxl_2021/fhxl_019.jpg
http://www.e30tuner.com/speakerbuilding/images/fhxl_2021/fhxl_020.jpg
With things clamped together, I needed a strategy to be able to separate them, apply glue, and reassemble them. To ensure proper re-alignment, I drove in some small nails to serve as little datum pins. The nails end about 3mm from the front face of the panels, so there was no cosmetic fallout.
http://www.e30tuner.com/speakerbuilding/images/fhxl_2021/fhxl_021.jpg
It has been said that if you can count how many clamps you have, you don't have enough. As I found, I think that I need more clamps. This took all but two of the ones I had in my shop! The glue-ups are sitting and drying now, and should be coming free of the clamps tomorrow after I get home from work. My fingers are crossed that my little nails-as-datums trick actually worked and the miter joints still fit together properly. I've done enough woodworking over the last decade to know that even the best-laid plans can end up failing, so I am prepared to see imperfect joints if things do not work out as planned.
http://www.e30tuner.com/speakerbuilding/images/fhxl_2021/fhxl_022.jpg
Last edited:
More progress was made today. Now that the weather has finally decided to cool off a little, I can work without sweating all over the wood pieces.
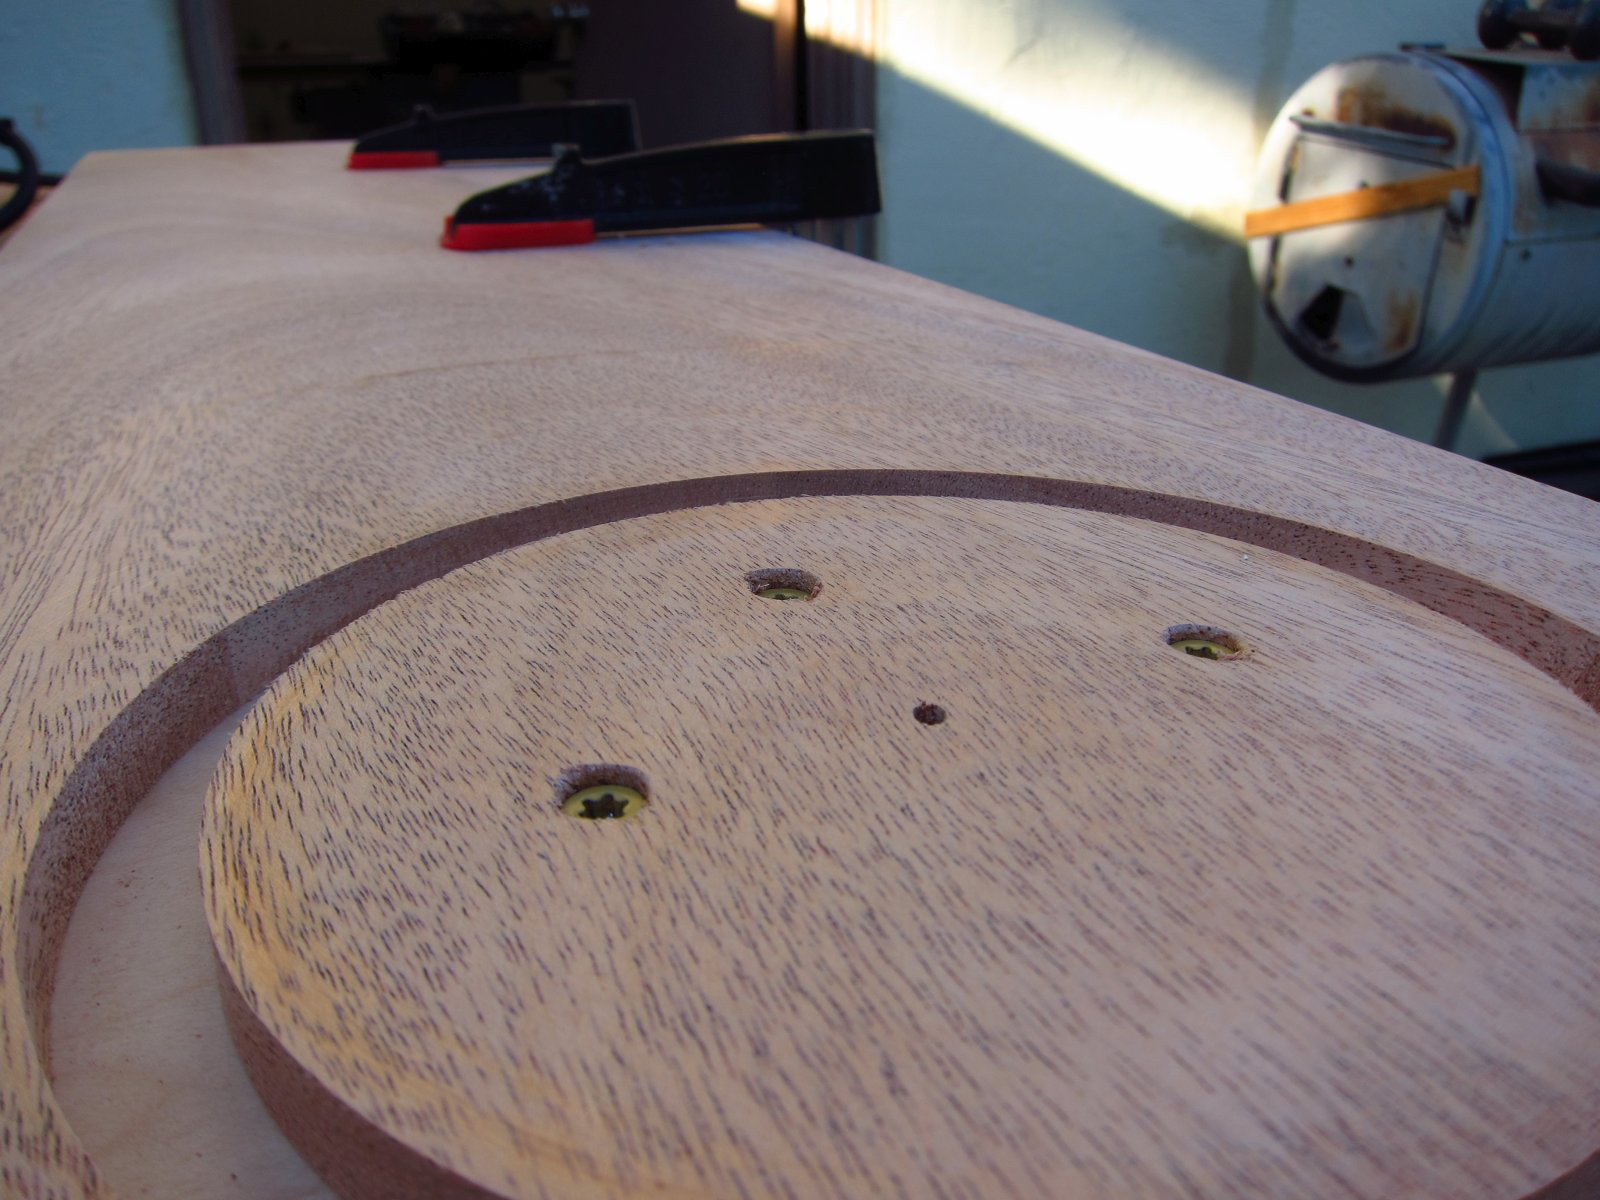
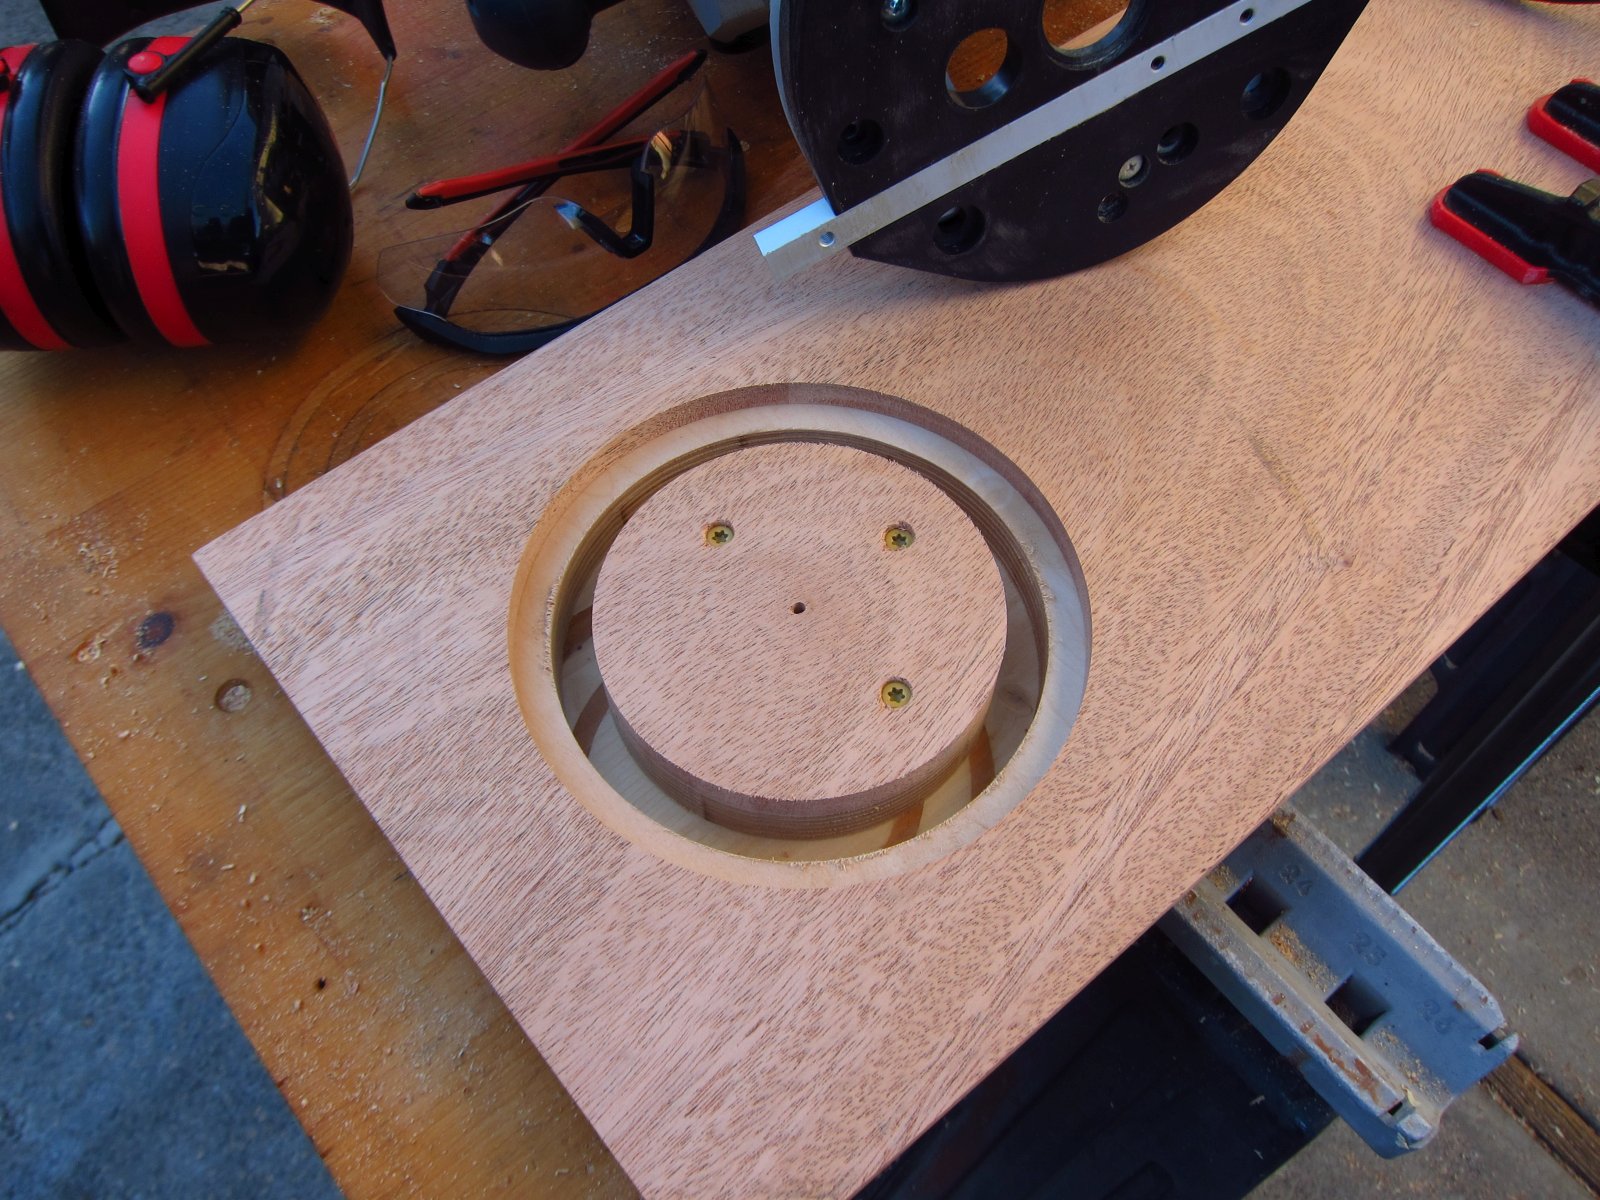
The main item I wanted to take care of was finishing the baffles. With the glue having had a day to dry, the panel assemblies were all ready to be handled and routed. I got out my router's circle cutting jig and set it to do a 160.5mm OD x 10mm deep groove for the mounting flange of the 10p's. The cuts went smoothly and I did not experience chipping or burns.
http://www.e30tuner.com/speakerbuilding/images/fhxl_2021/fhxl_025.jpg
http://www.e30tuner.com/speakerbuilding/images/fhxl_2021/fhxl_026.jpg

The next step was to route the 139.5mm OD through-cuts. I did these in 2 passes so as to not overload the cutter and cause burns or chatter. Another thing that helps is to under-size the pivot hole a little so that the pivot pin in the jig is pressed tightly into the wood. The pin is 3.3mm in diameter, and I drilled 3.175mm holes. The other KEY thing to remember to do is to secure the inner circle which will be cut loose from the larger part, since the router pivot point is in the inner part...that is a mistake I made once and learned the hard way.
http://www.e30tuner.com/speakerbuilding/images/fhxl_2021/fhxl_027.jpg
http://www.e30tuner.com/speakerbuilding/images/fhxl_2021/fhxl_028.jpg
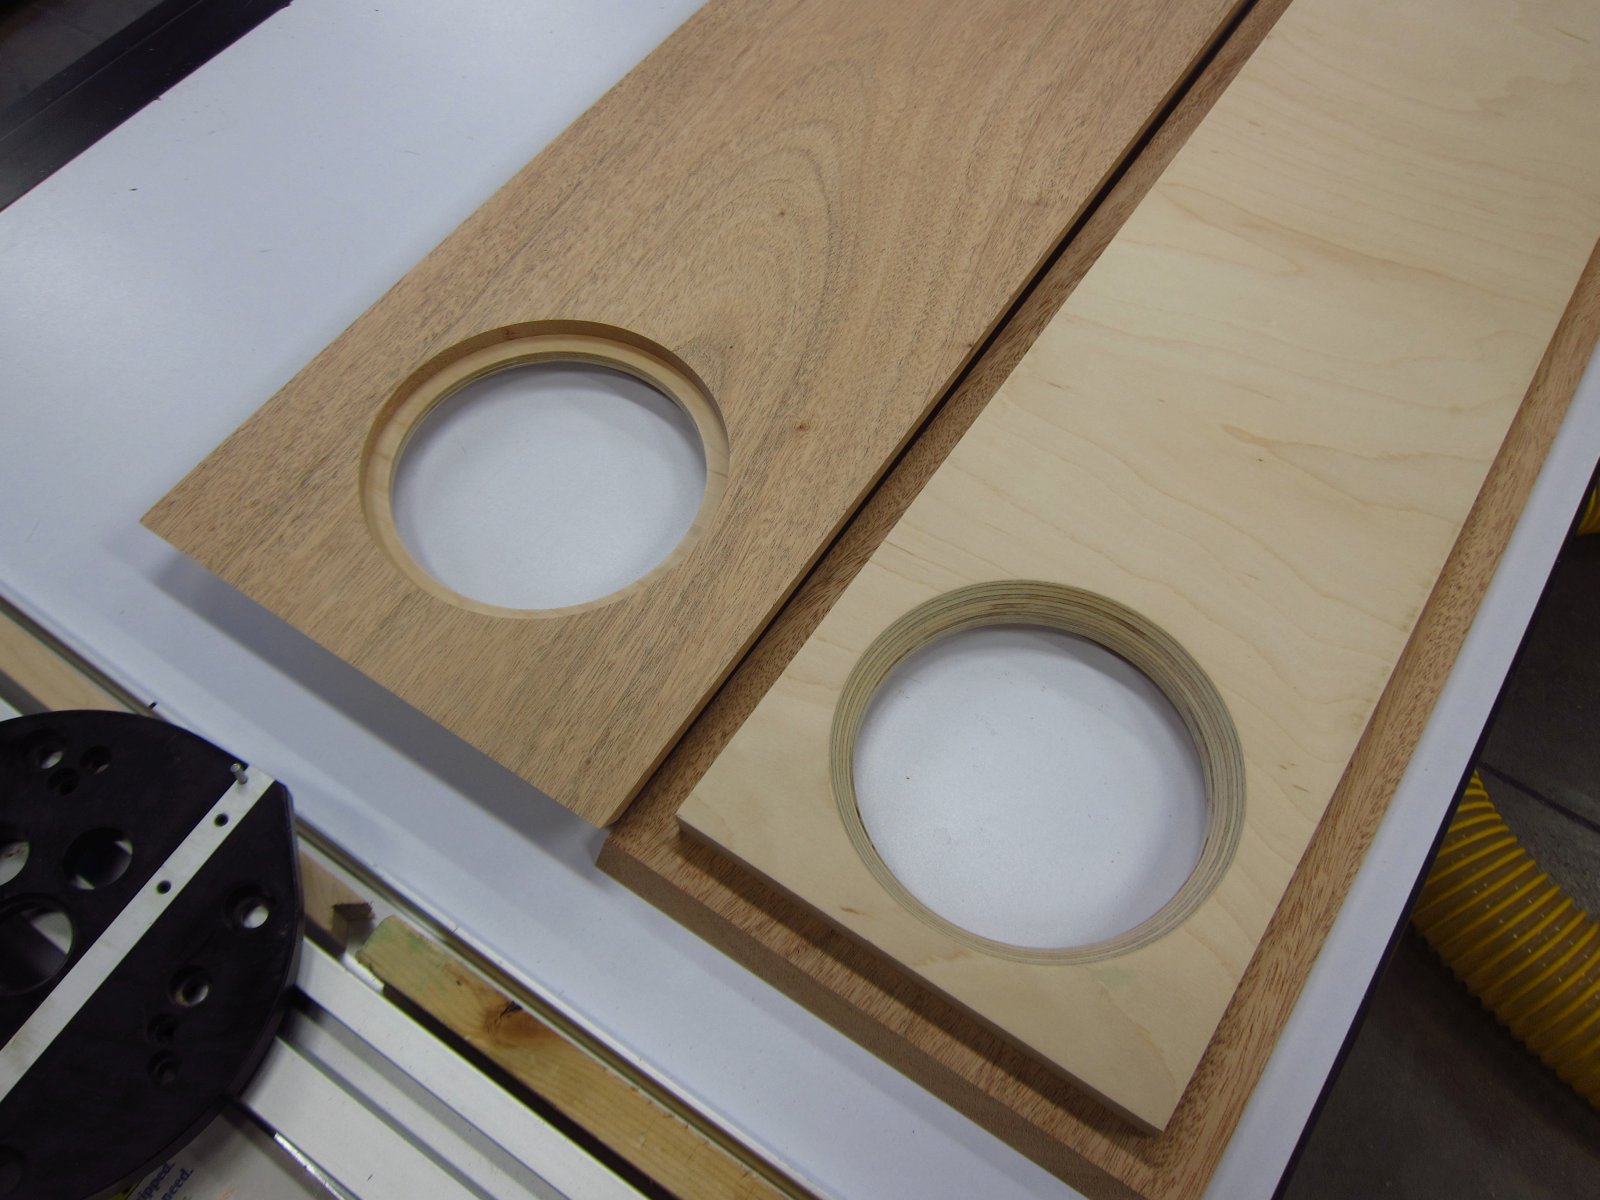
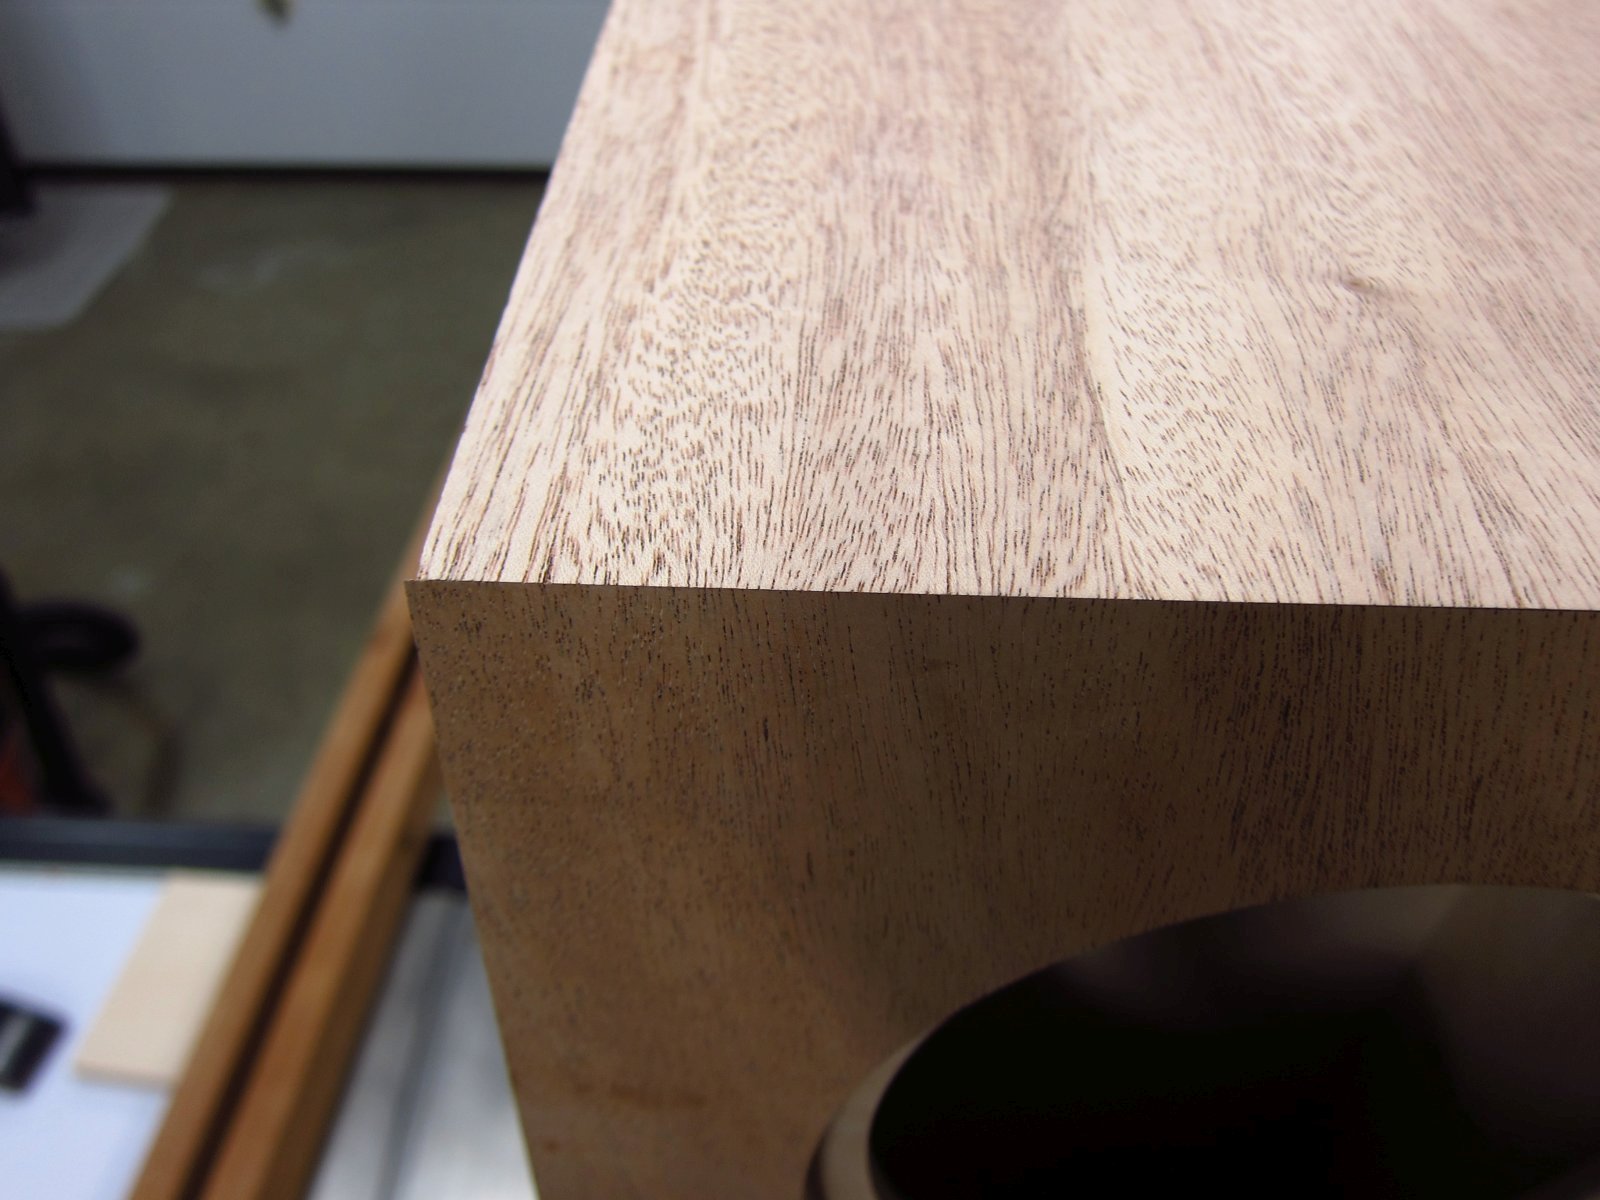
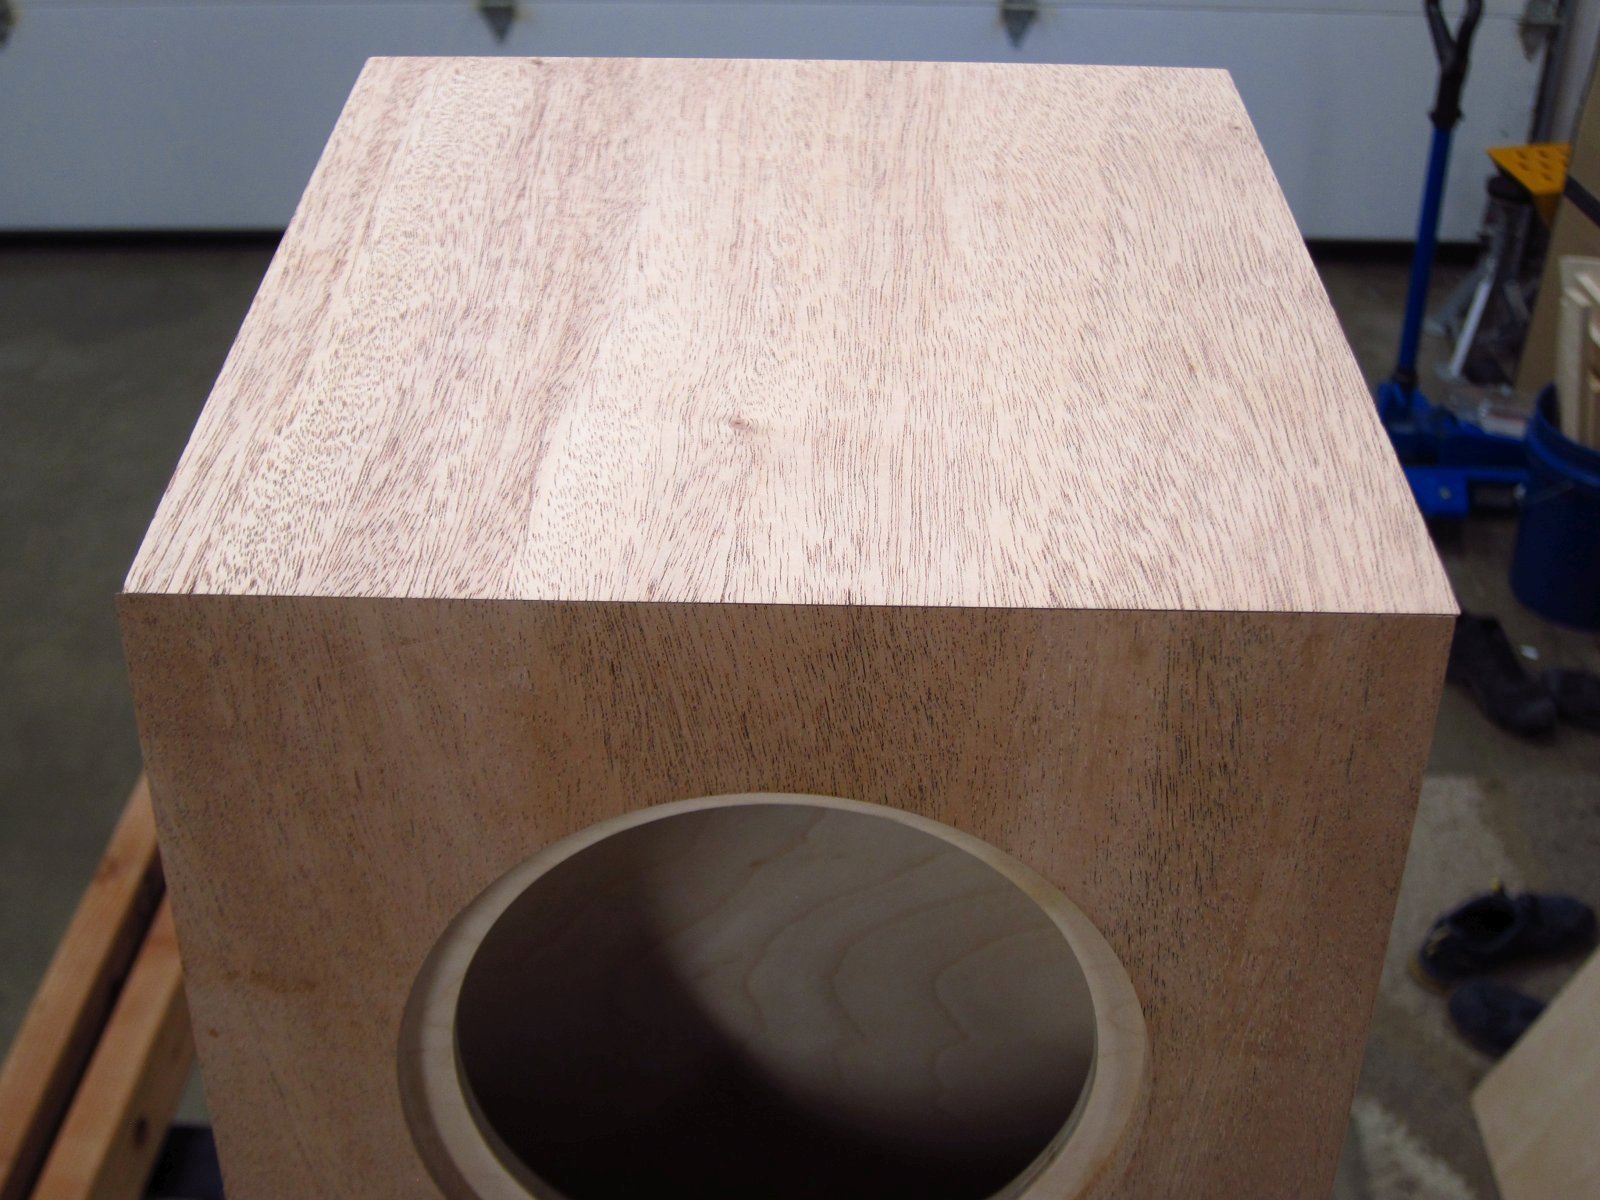
After completing the circle cuts, I added a 45° x 15mm chamfer to the back side to help reduce near-field effects around the driver, sanded a little, and called them good.
http://www.e30tuner.com/speakerbuilding/images/fhxl_2021/fhxl_029.jpg
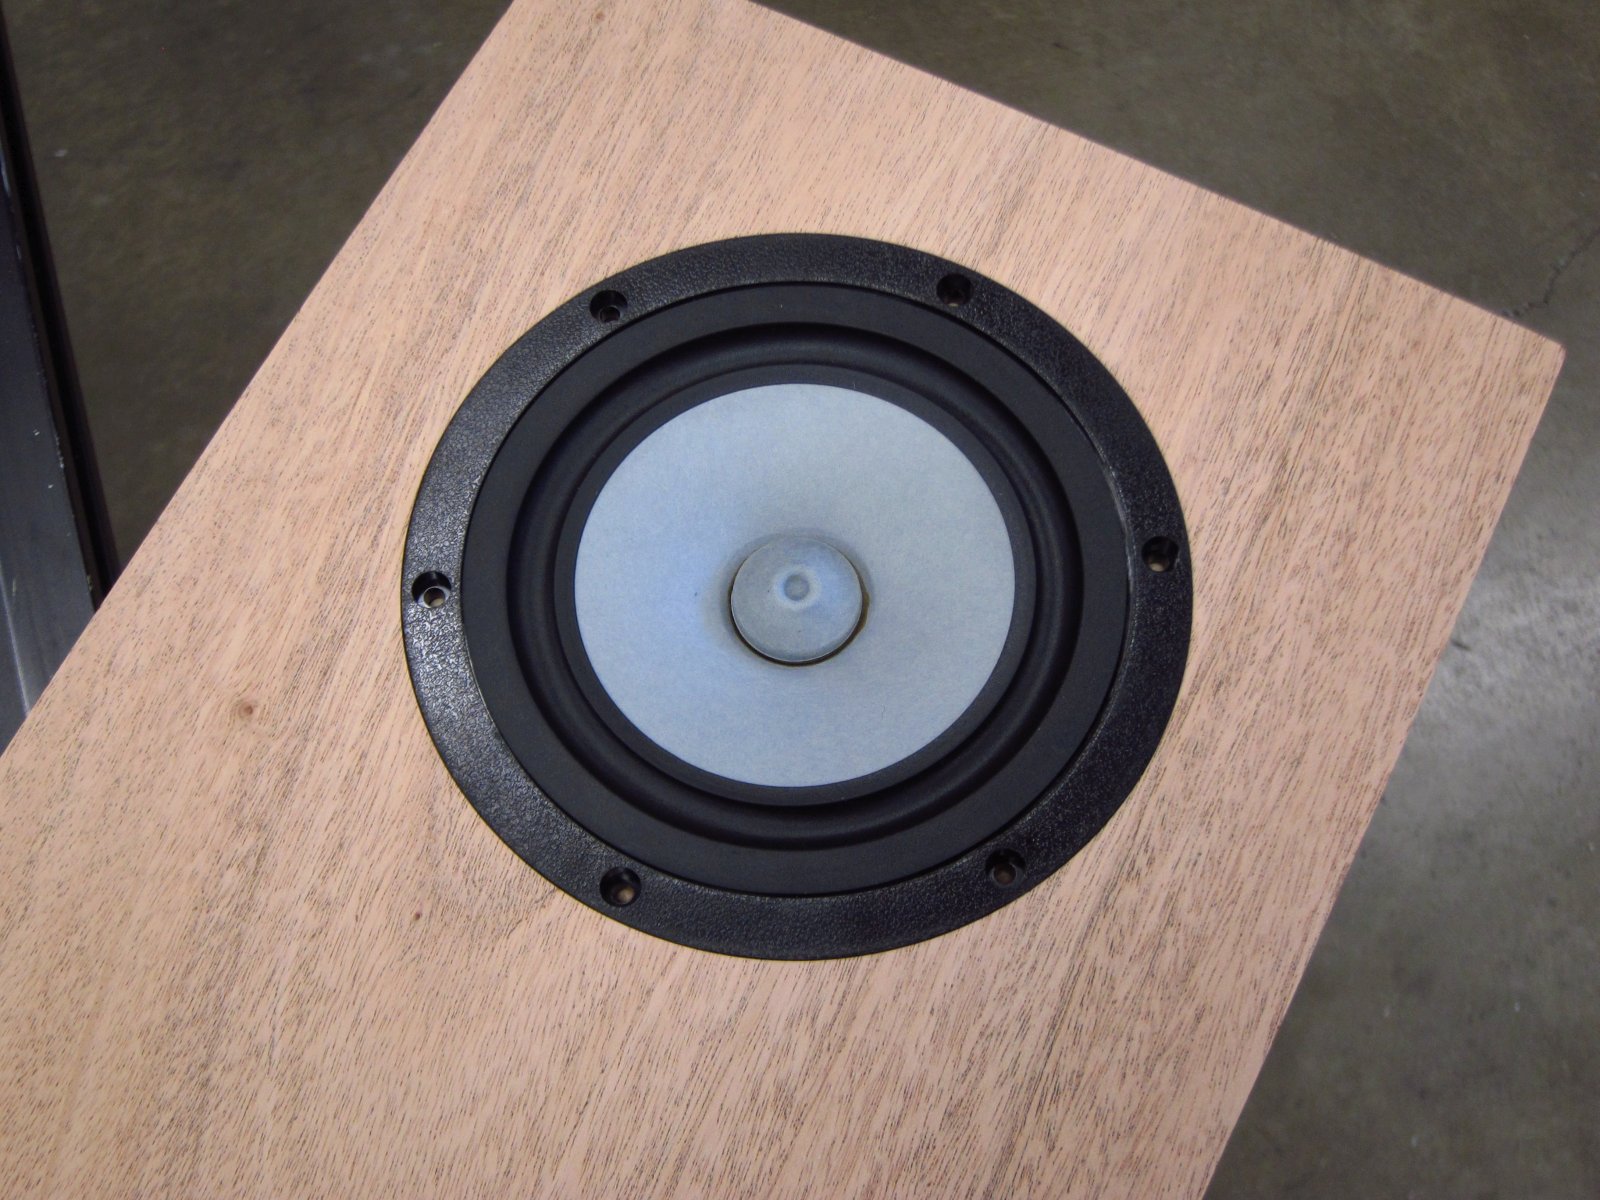
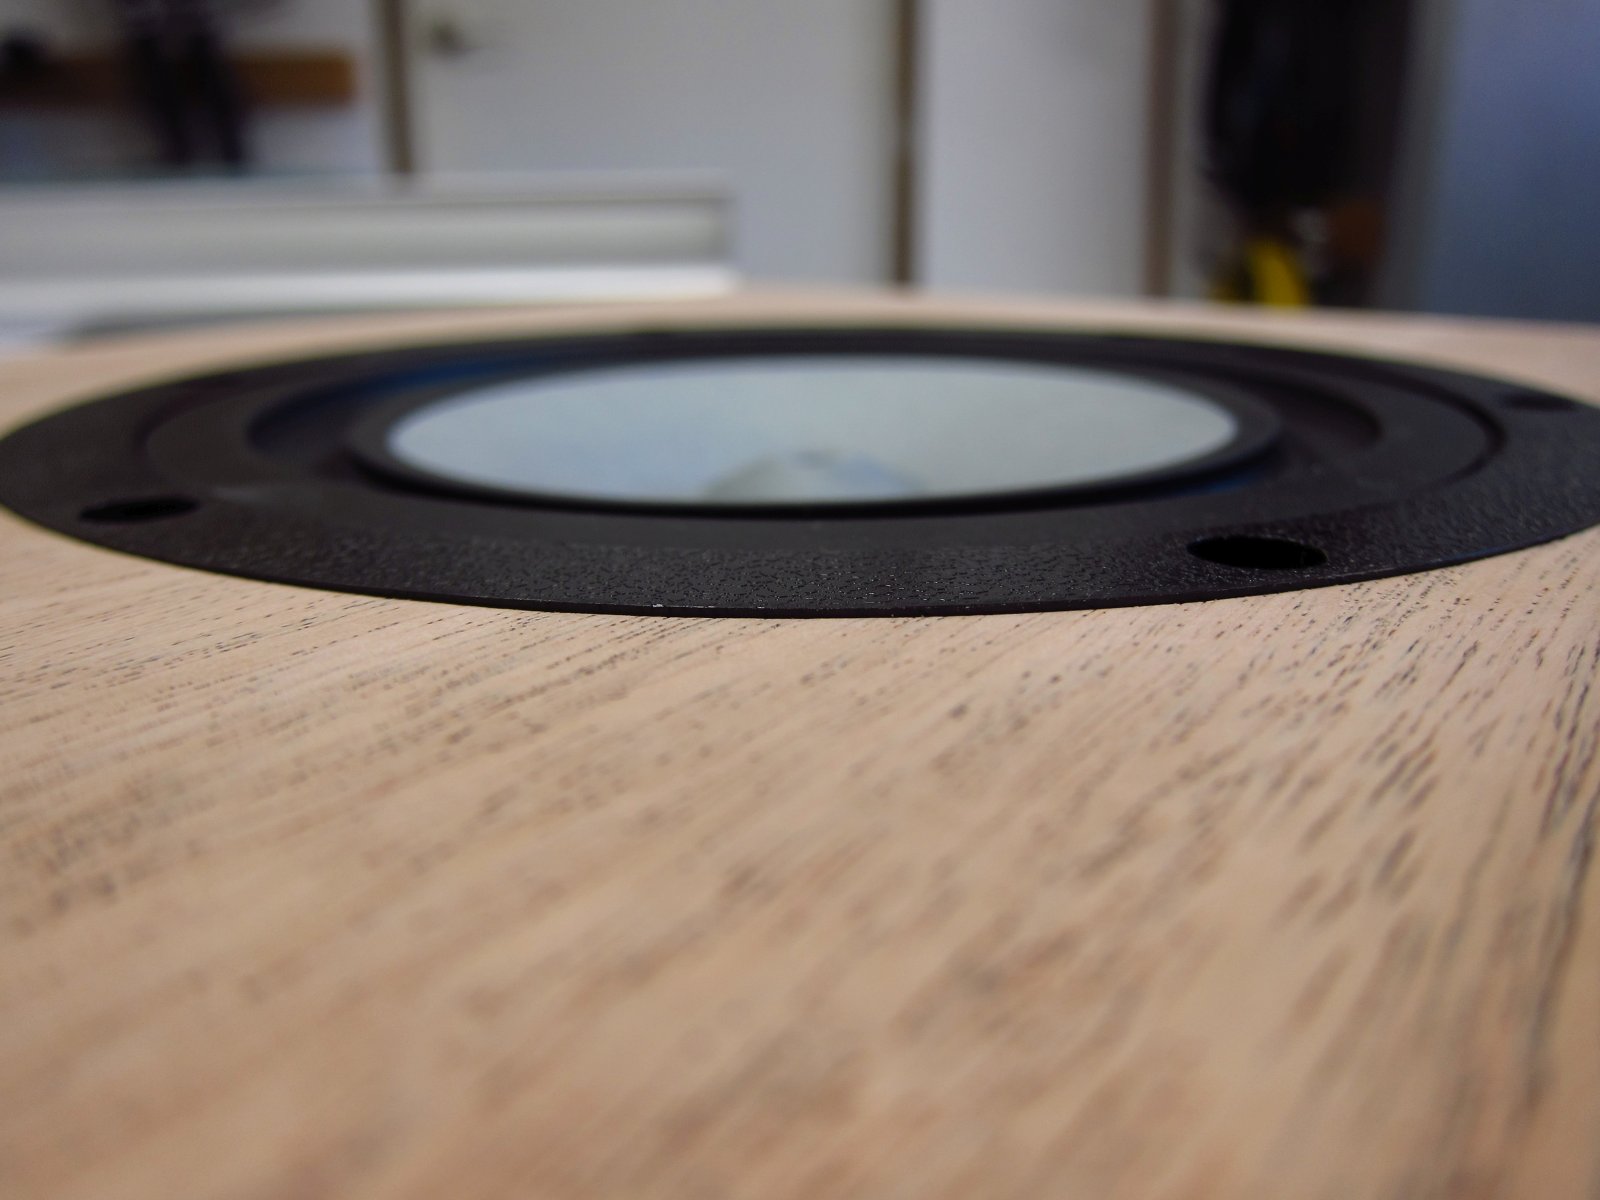
Here is the 10p being test-fitted. There is ~0.5mm clearance around the perimeter, which is a little looser than I'd like, but when I go to match-drill the screw holes I will use 3 pieces of 0.5mm shim stock to pin the driver in a perfect central position. The driver also sits about 0.25mm proud of the front surface, which is perfect since there is a thin rubber gasket behind it which will be compressed when screws are added, making it perfectly flush.
http://www.e30tuner.com/speakerbuilding/images/fhxl_2021/fhxl_030.jpg
http://www.e30tuner.com/speakerbuilding/images/fhxl_2021/fhxl_031.jpg
The last thing I did before wrapping it up for the night was experiment with various clamping arrangements to get everything tightly butted together. I will be using a glue-and-screw strategy for the final assembly, but since the screws are biting into the ends of the plies, I need to pre-drill them to avoid splitting. The side pieces have 1.6mm holes in them now, which will be used as guides for pre-drilling the inner panels. Once that is done, I will follow the inner panels' 1.6mm holes with a 3.2mm drill since that will guarantee no splitting with the screws I have selected. Glue will be providing the bulk of the strength here, and the screws are really just surrogates for clamps, but they will also be a part of the finished aesthetic that I want.
This seemed to be the "winning" assembly strategy in the end.
http://www.e30tuner.com/speakerbuilding/images/fhxl_2021/fhxl_032.jpg
The main item I wanted to take care of was finishing the baffles. With the glue having had a day to dry, the panel assemblies were all ready to be handled and routed. I got out my router's circle cutting jig and set it to do a 160.5mm OD x 10mm deep groove for the mounting flange of the 10p's. The cuts went smoothly and I did not experience chipping or burns.
http://www.e30tuner.com/speakerbuilding/images/fhxl_2021/fhxl_025.jpg
http://www.e30tuner.com/speakerbuilding/images/fhxl_2021/fhxl_026.jpg
The next step was to route the 139.5mm OD through-cuts. I did these in 2 passes so as to not overload the cutter and cause burns or chatter. Another thing that helps is to under-size the pivot hole a little so that the pivot pin in the jig is pressed tightly into the wood. The pin is 3.3mm in diameter, and I drilled 3.175mm holes. The other KEY thing to remember to do is to secure the inner circle which will be cut loose from the larger part, since the router pivot point is in the inner part...that is a mistake I made once and learned the hard way.
http://www.e30tuner.com/speakerbuilding/images/fhxl_2021/fhxl_027.jpg
http://www.e30tuner.com/speakerbuilding/images/fhxl_2021/fhxl_028.jpg
After completing the circle cuts, I added a 45° x 15mm chamfer to the back side to help reduce near-field effects around the driver, sanded a little, and called them good.
http://www.e30tuner.com/speakerbuilding/images/fhxl_2021/fhxl_029.jpg
Here is the 10p being test-fitted. There is ~0.5mm clearance around the perimeter, which is a little looser than I'd like, but when I go to match-drill the screw holes I will use 3 pieces of 0.5mm shim stock to pin the driver in a perfect central position. The driver also sits about 0.25mm proud of the front surface, which is perfect since there is a thin rubber gasket behind it which will be compressed when screws are added, making it perfectly flush.
http://www.e30tuner.com/speakerbuilding/images/fhxl_2021/fhxl_030.jpg
http://www.e30tuner.com/speakerbuilding/images/fhxl_2021/fhxl_031.jpg
The last thing I did before wrapping it up for the night was experiment with various clamping arrangements to get everything tightly butted together. I will be using a glue-and-screw strategy for the final assembly, but since the screws are biting into the ends of the plies, I need to pre-drill them to avoid splitting. The side pieces have 1.6mm holes in them now, which will be used as guides for pre-drilling the inner panels. Once that is done, I will follow the inner panels' 1.6mm holes with a 3.2mm drill since that will guarantee no splitting with the screws I have selected. Glue will be providing the bulk of the strength here, and the screws are really just surrogates for clamps, but they will also be a part of the finished aesthetic that I want.
This seemed to be the "winning" assembly strategy in the end.
http://www.e30tuner.com/speakerbuilding/images/fhxl_2021/fhxl_032.jpg
Massive project!
Really good job on the woodworking. This is impressive, very precise and clean cuts. Your miter joints are perfect!
Good idea to add screws to your board before using the circle jig, I will steal that for my project hehe.
Thanks for the kind words. I am admittedly much more of a woodworker/fabricator than an audio expert! Thankfully, DIYAudio has always been a place where much more knowledgeable people are present and happy to share. I'll do my best to return the favor with tips for how to build stuff.
One immensely useful technique for holding pieces in place, particularly when you do not want to drill holes in them, is to use double-sided mounting tape. I don't recommend the clear stuff you find at craft stores since it is thin and has weak adhesive. The stuff I have had the best results with so far is this:
McMaster-Carr
It does not leave residue, it holds strongly, and I can usually re-stick a workpiece 2-3 times before it won't hold anymore. If properly applied, it could probably be used instead of screws to hold the center part of a speaker cut-out. I originally learned that this stuff works well from some of the guys in the prototyping shop at work. They routinely use the tape to hold down aluminum parts for CNC milling in cases where holding them in a vise is not ideal. You do want to avoid getting it into your cutters though, as it would make a bit of a gummy mess, although it cleans off easily with isopropanol or acetone.
The other instance where I use the tape a lot is when I am running my random orbital sander. If I stick the piece down to my work table, the sander has full access to the top face (which would not be the case if clamping it).
Yes I am the same as you, I was attracted to this craft 75% for the woodworking and 25% for the audio. I know what I like in sound quality but have a hard time describing it hehe.
I was about to get some 2-sided tape as you suggested but since I don't need to keep the center circle I will use screws. Thanks for the McMaster-Carr link!
I was about to get some 2-sided tape as you suggested but since I don't need to keep the center circle I will use screws. Thanks for the McMaster-Carr link!
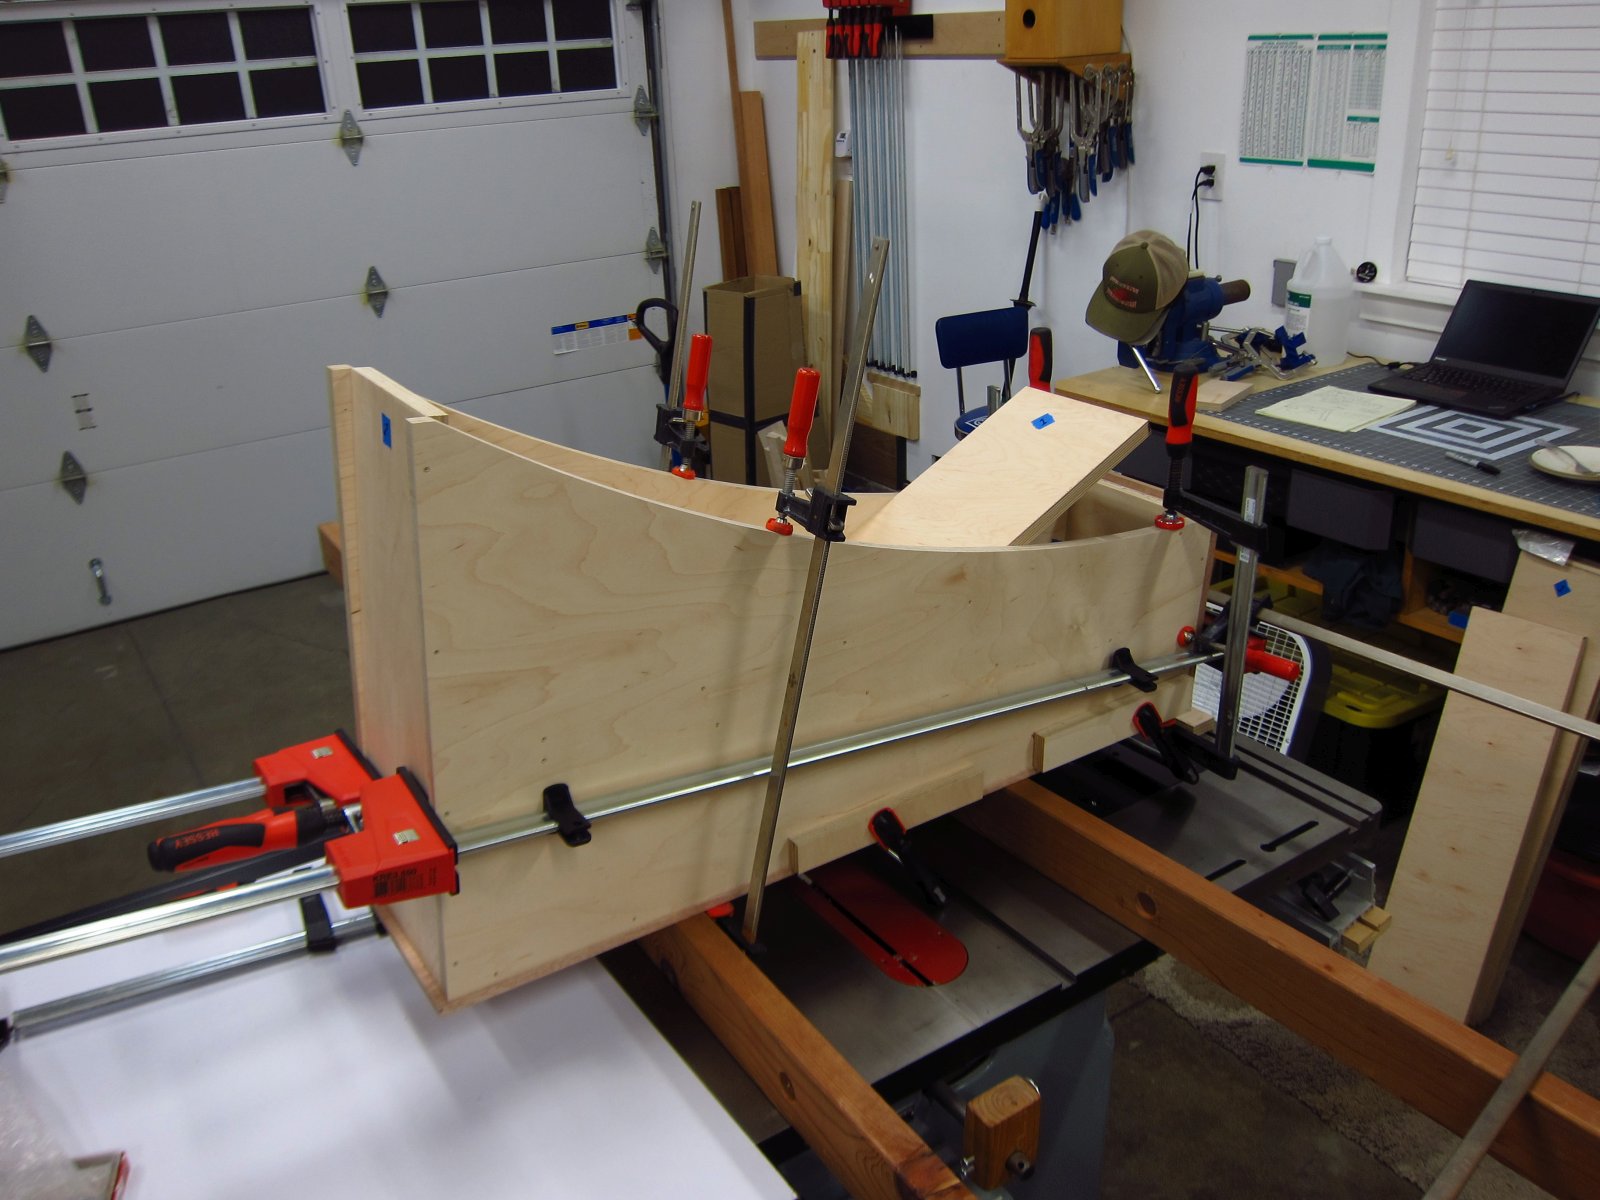
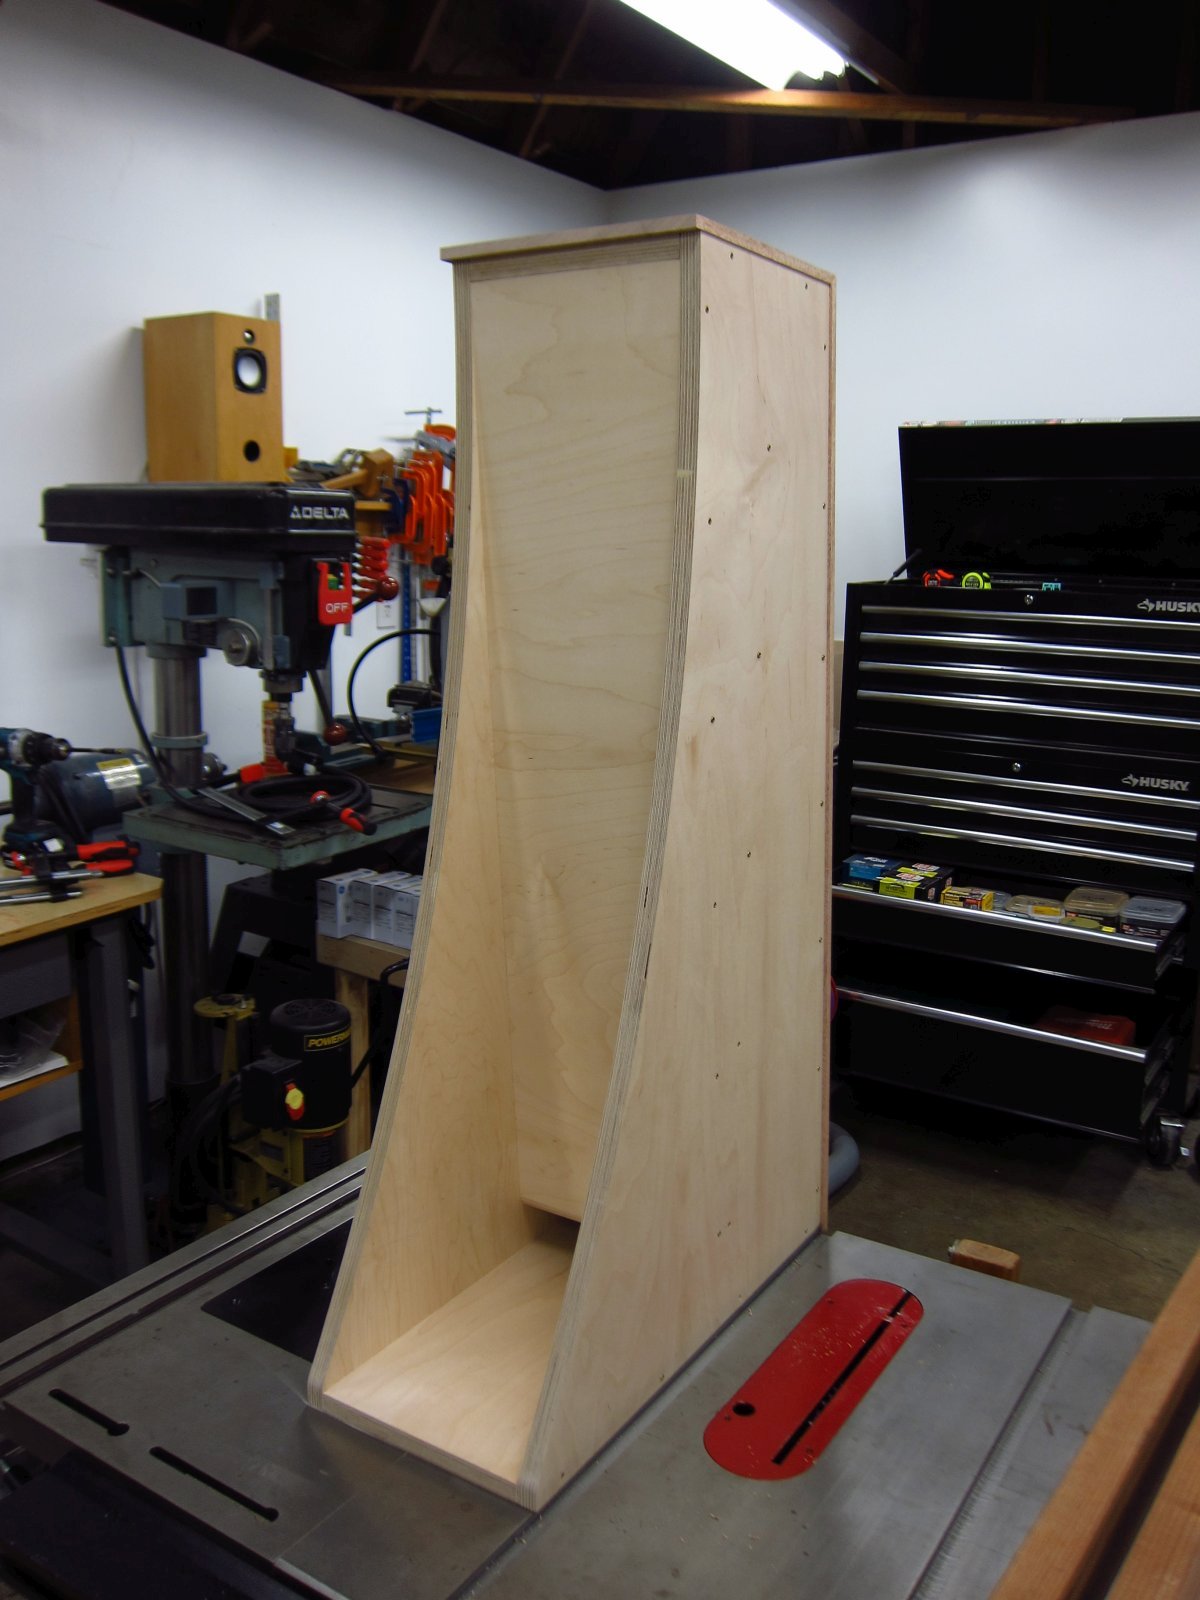
Time to wind-down for the day and post up a little more progress. I had ~2.5 hours free after work to get one of the FHXL's fully dry-assembled with screws. The plan is to take one of the side panels off, apply sealant to the butt joints where the 8" width panels meet, run beads of glue on the exposed ends and then reinstall the side with screws to give good clamping for the glue joints. After that, I will remove the other side and install the damping materials, as well as drilling holes for the binding posts + running wire, and then similarly glue the second side on.
Once that is all cured, it's mostly cosmetic stuff thereafter; flush-trimming the mahogany faces to the sides + top-rear + bottom-front, sinking the screws heads below the sides' surfaces, puttying over the screw heads (am thinking of using a reddish / mahogany colored putty for a little visual interest), doing a final pass of finish sanding and then applying a Watco Teak Oil finish to all visible surfaces. Oil finishes are my favorite due to their ease of application, ease of refinishing and the fact that they accent the wood's natural figuring rather than heavily modifying it.
Another thing I did early on was countersink all of the screw holes on the side panels on my drill press, with a depth stop set. This ensured a consistent outer diameter so that after filling they will be uniform looking (I hope). The other trick was to run the countersink bit with an absolutely minimal pilot hole (1.6mm) since countersink bits are notorious for chatter and tearing veneer. Running a countersink with no pilot, or a very small one, eliminates the chatter since the point is able to really bite into the workpiece.
Anyway, now that today's digression is done, here's what the progress looked like.
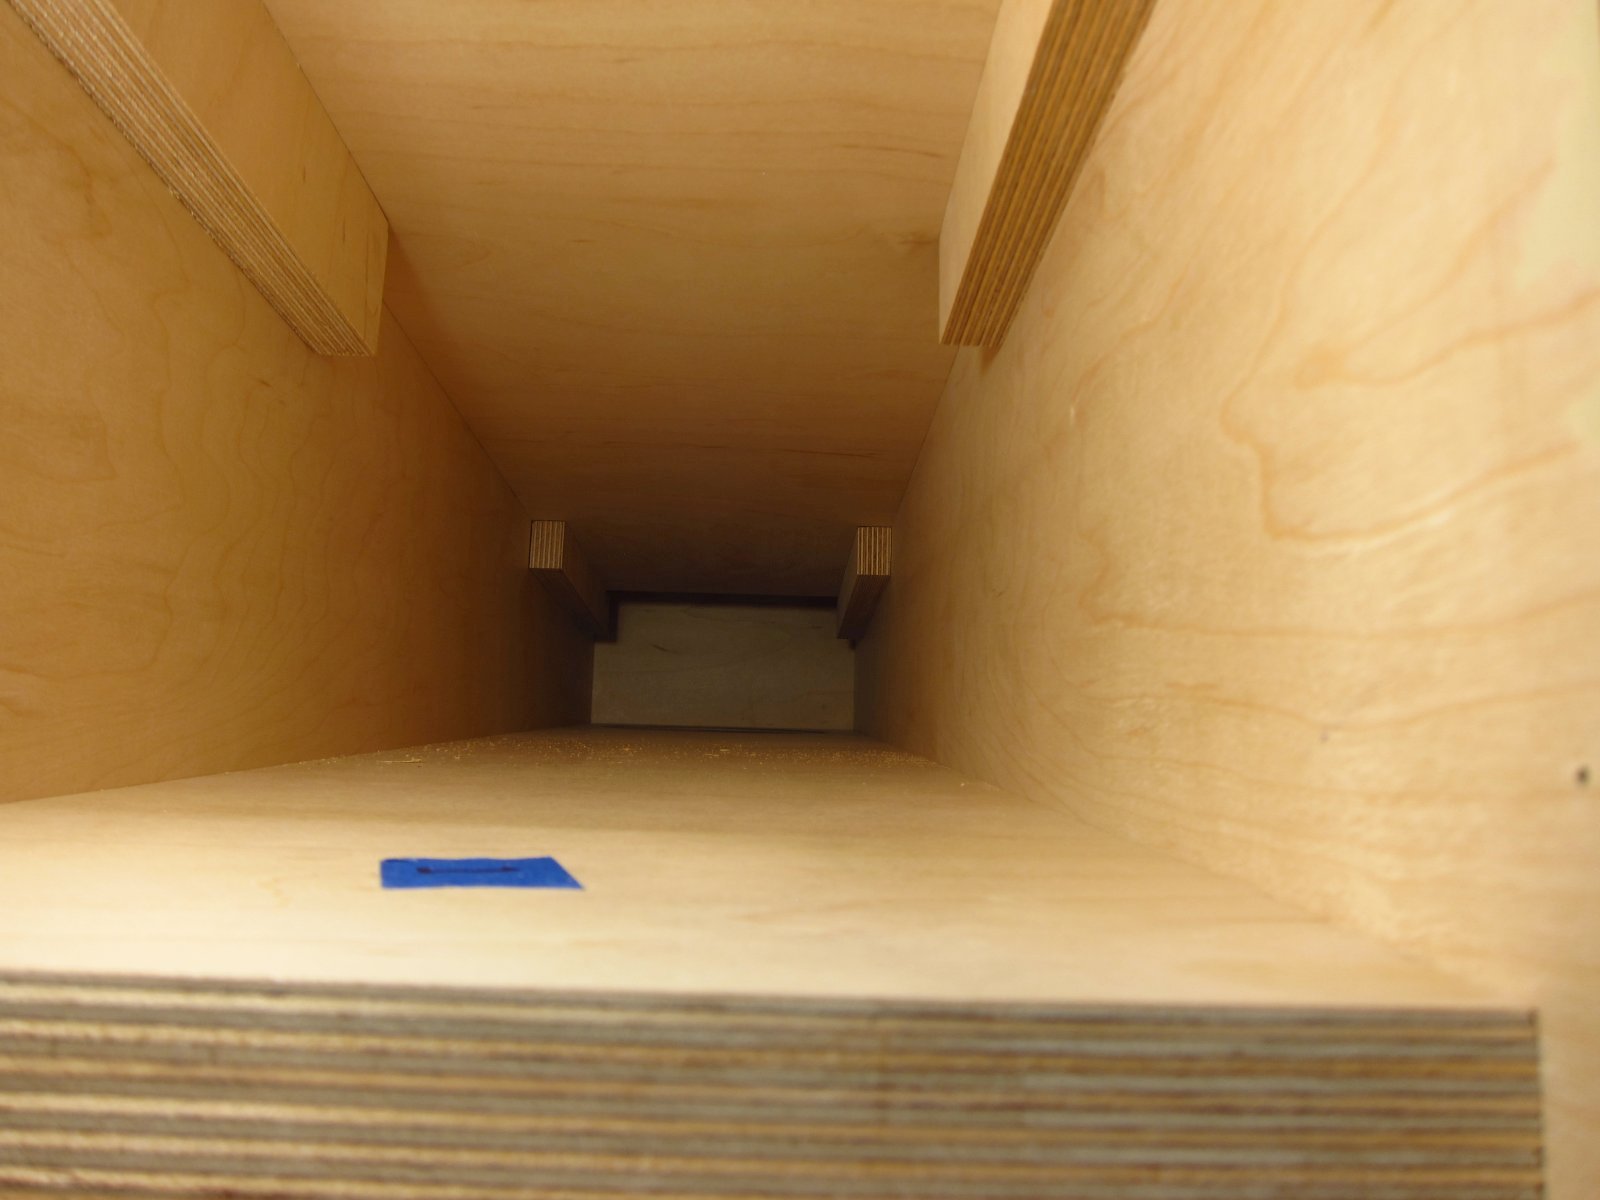
One of the trickier assembly aspects was getting the internal panel positioned properly. I wanted a perfect fit at the bottom of the rear panel, but the inner one really can't be adjusted much with the rear in place. Ultimately, I did some back and forth, and the old double sided tape came to the rescue again. Once I got the inner panel's centerline aligned with the holes in the sides, I stuck some cleats to the insides of the sides so that it would easily be slid along its length to align with the bottom of the rear panel.
http://www.e30tuner.com/speakerbuilding/images/fhxl_2021/fhxl_033.jpg
http://www.e30tuner.com/speakerbuilding/images/fhxl_2021/fhxl_034.jpg
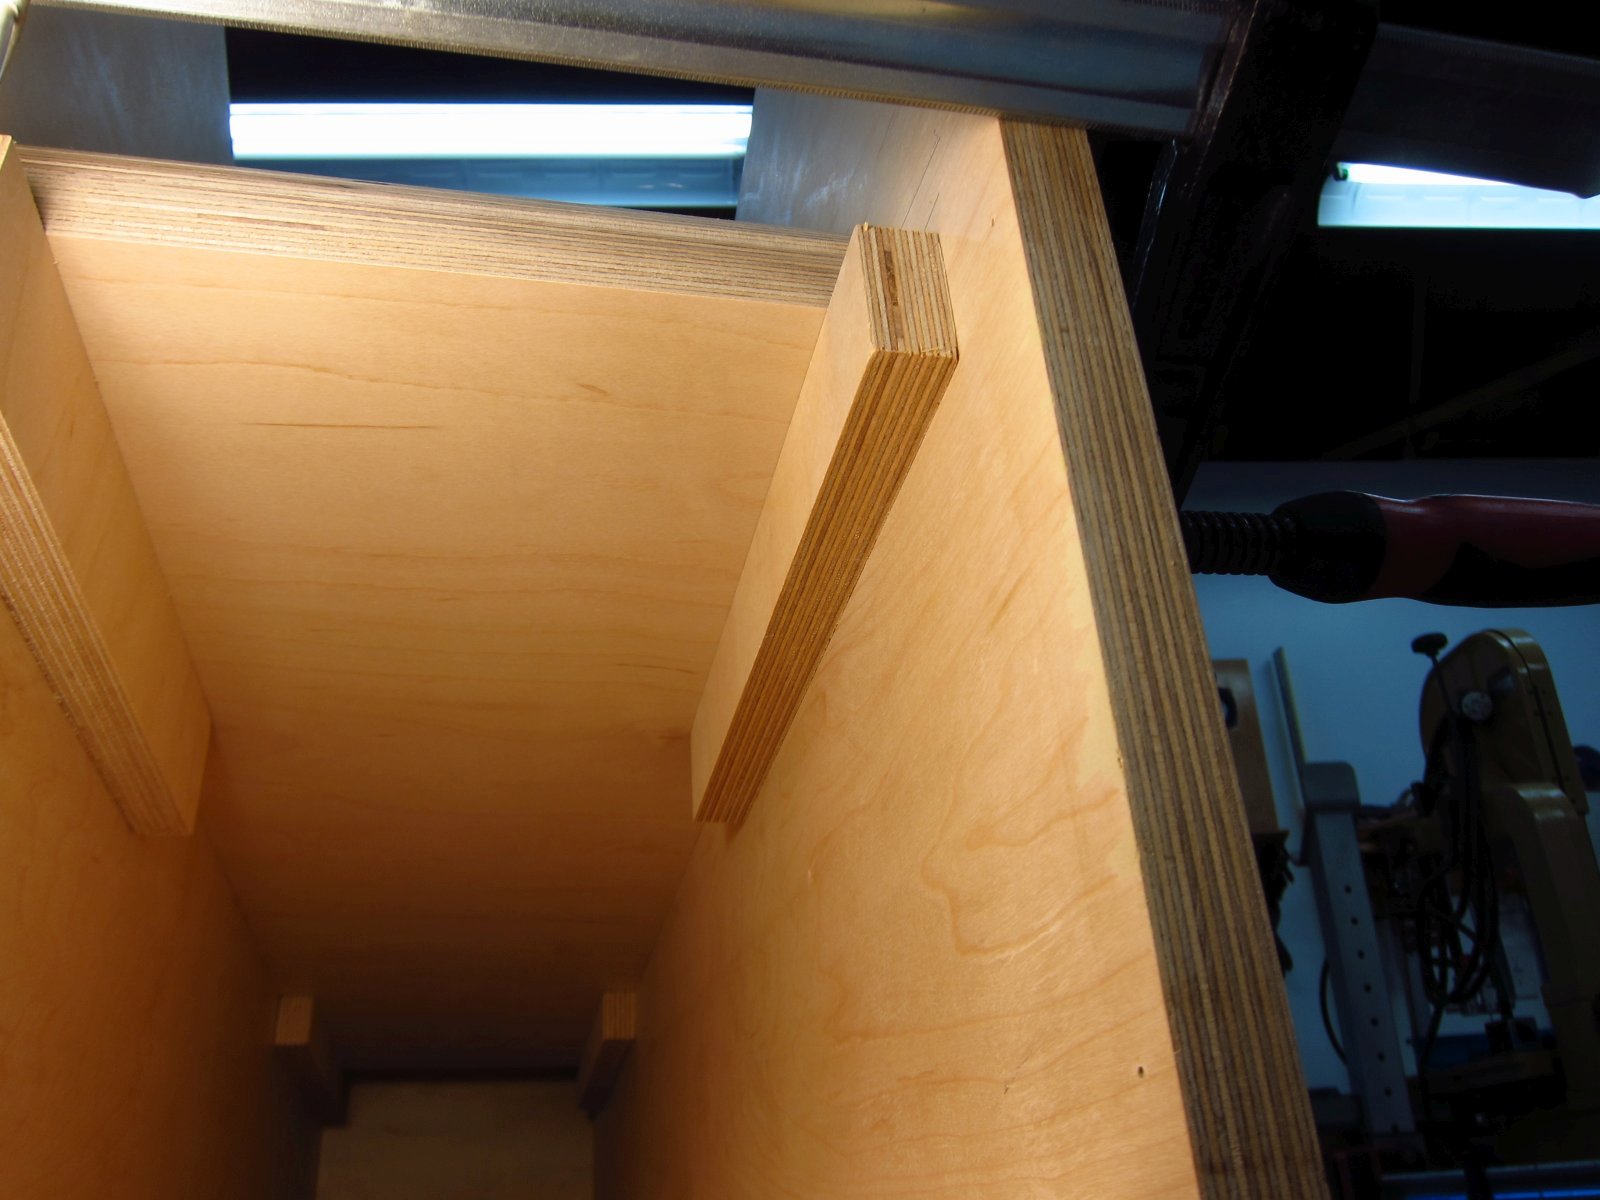
With a little love from a deadblow mallet and some clamps, I got both panels right where I wanted them.
http://www.e30tuner.com/speakerbuilding/images/fhxl_2021/fhxl_035.jpg
I went in stages with various panels, clamping them into nice tight fits, then chasing the existing 1.6mm holes in the sides to produce concentric pilot holes in the side edges of the internal panels.
http://www.e30tuner.com/speakerbuilding/images/fhxl_2021/fhxl_036.jpg

http://www.e30tuner.com/speakerbuilding/images/fhxl_2021/fhxl_037.jpg
With all of the 1.6mm pilots done, I broke things apart and followed them with a 3.2mm drill bit. It is potentially very easy to mess it up if you try to jam the larger drill into the small pilot holes. What works well is to run the cordless drill at max speed and lightly engage the point of the larger drill with the pilot until it is able to gently self-center and then draw itself in concentrically with the pilot. Not all of my holes came out perfectly, but I did my best to be careful. The technique I described works better on isotropic materials (MDF, metal, plastic). Wood can be tricky because there can be large local density variations, especially when drilling into the plies of plywood, and this can easily make the drill bit wander as it gets going. Also, it is better to do this step with a cordless drill than a drill press as it is easier to let the drill bit "find" center by hand...the drill press will, in most cases, not pull the workpiece into alignment for you.
http://www.e30tuner.com/speakerbuilding/images/fhxl_2021/fhxl_038.jpg
Anyway, after all the drilling was finished, I got it all back together and ran all of the screws. For now the heads are 1-2mm proud of the surface since I will be removing them (one side at a time) for the gluing step, and I only want to drive them to full sub-flush depth once at the final reassembly. The side panels were not drilled out to 3.2mm since the screws I am using have extra small heads, and I wanted as much "meat" in there as possible for the heads to stop against. The 1.6mm pilots were more than enough to get the screws going in perfectly straight. The screws themselves also have a ~20mm unthreaded section up near the head, so they won't do the annoying thing where they engage both pieces and force them apart.
http://www.e30tuner.com/speakerbuilding/images/fhxl_2021/fhxl_039.jpg
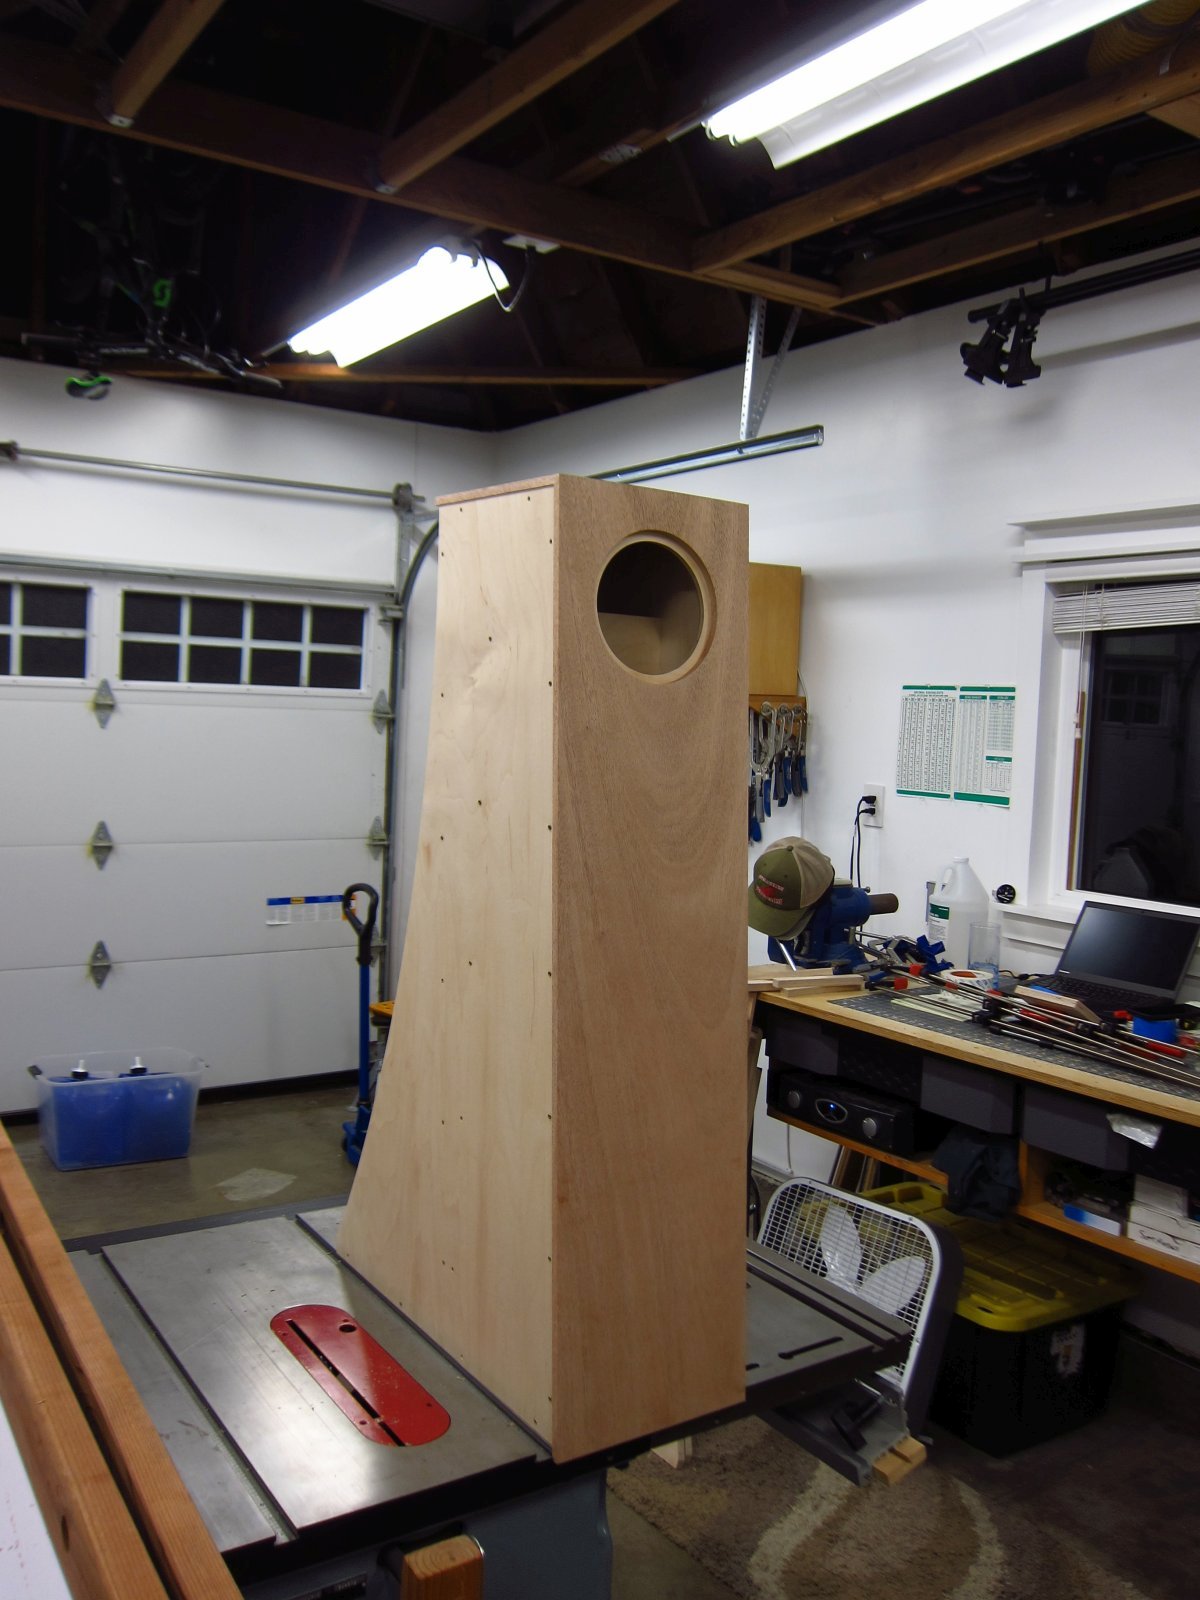
Clamps off. It's shaping-up to be a nice looking speaker! Even with a TON of finishing work yet to do, they are starting to resemble what I want. I've been a fan of multi-species aesthetics for a while, although usually I go with more contrast (white oak + black walnut is my other favorite). In this case, I like the maple + mahogany combo, even if it does not carry as much of a visual contrast punch. It instead seems (to me) to have a more soft, easy-going aesthetic, which is good because I like to relax when listening.
http://www.e30tuner.com/speakerbuilding/images/fhxl_2021/fhxl_040.jpg
http://www.e30tuner.com/speakerbuilding/images/fhxl_2021/fhxl_041.jpg
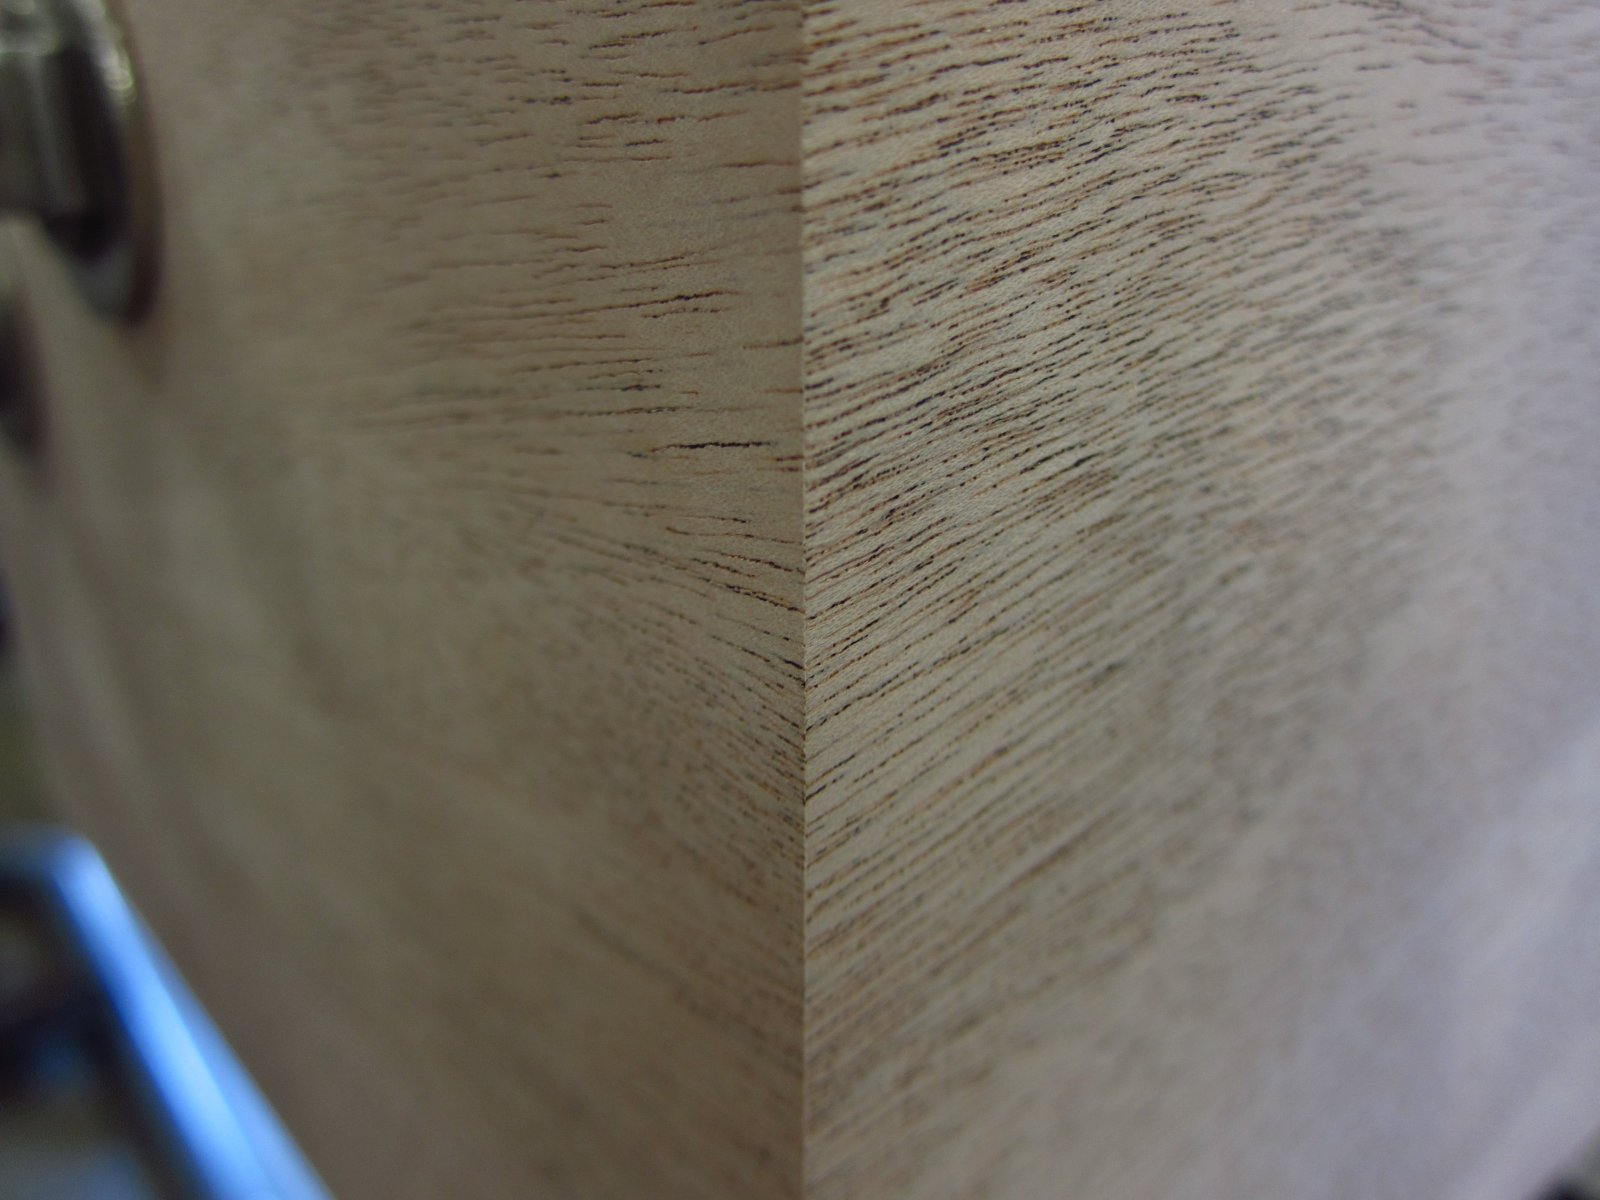
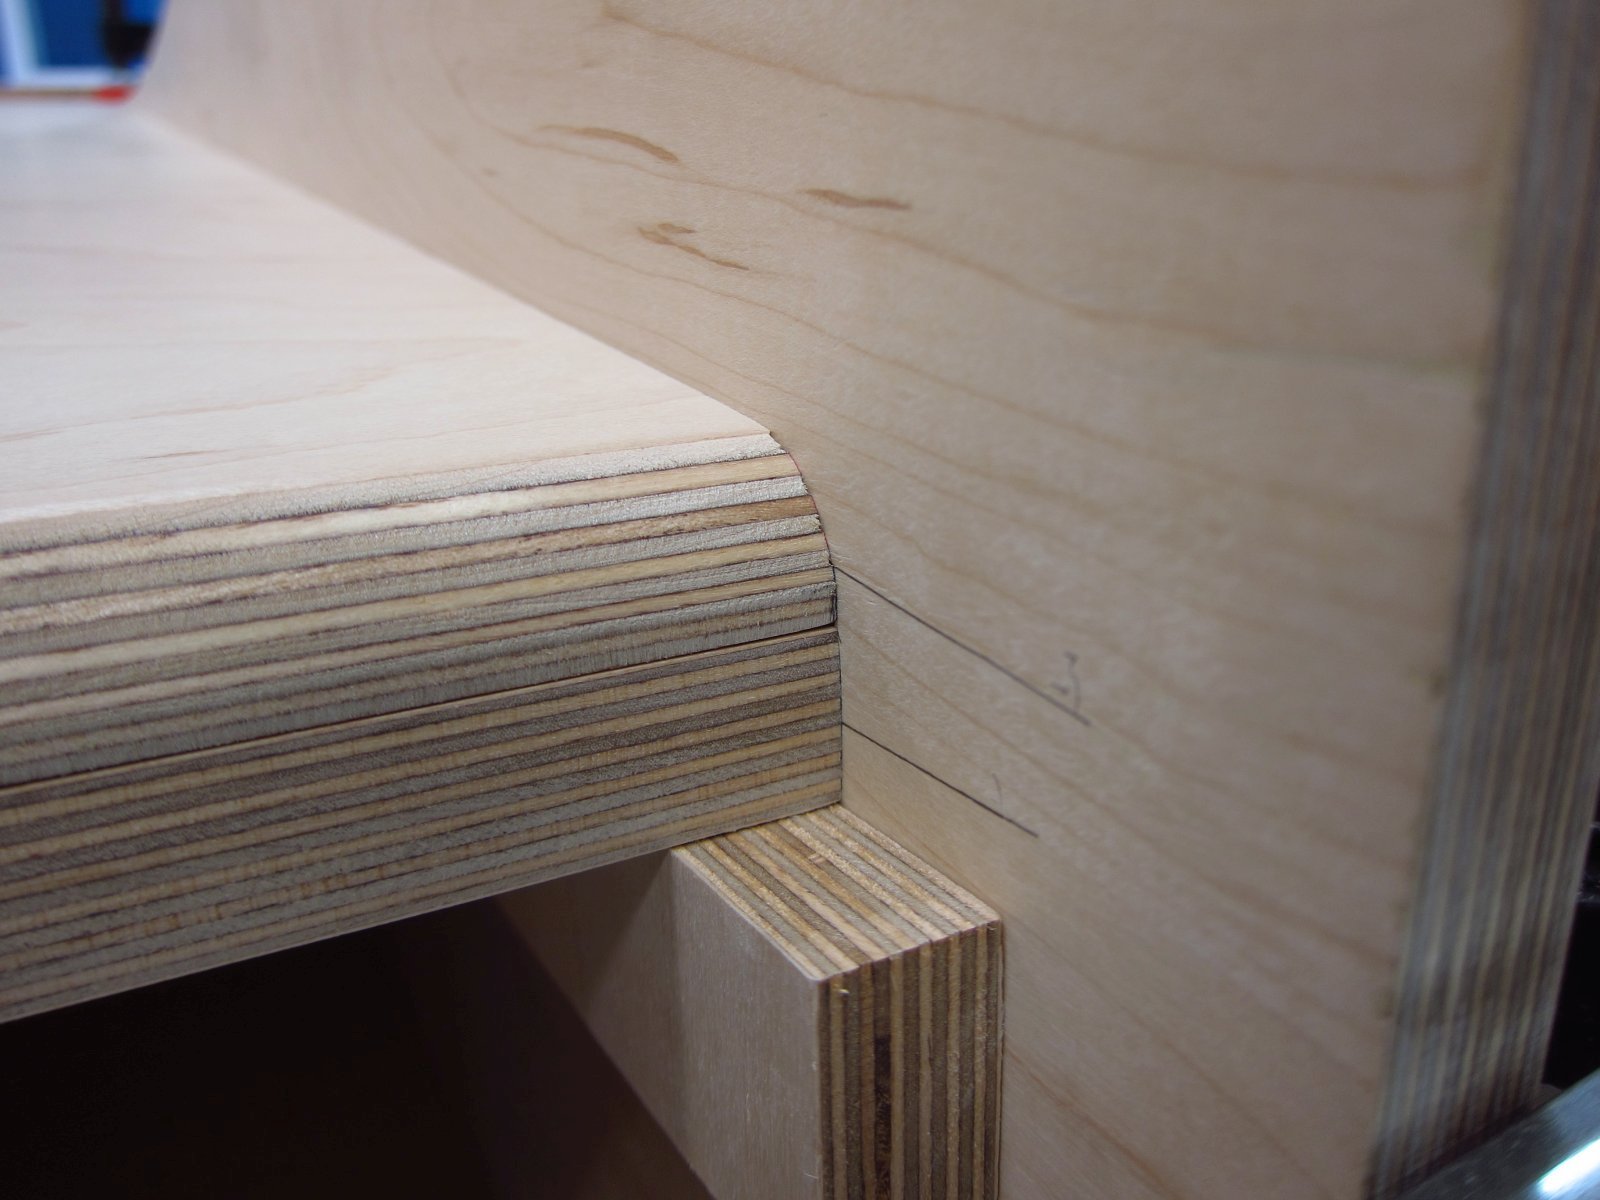
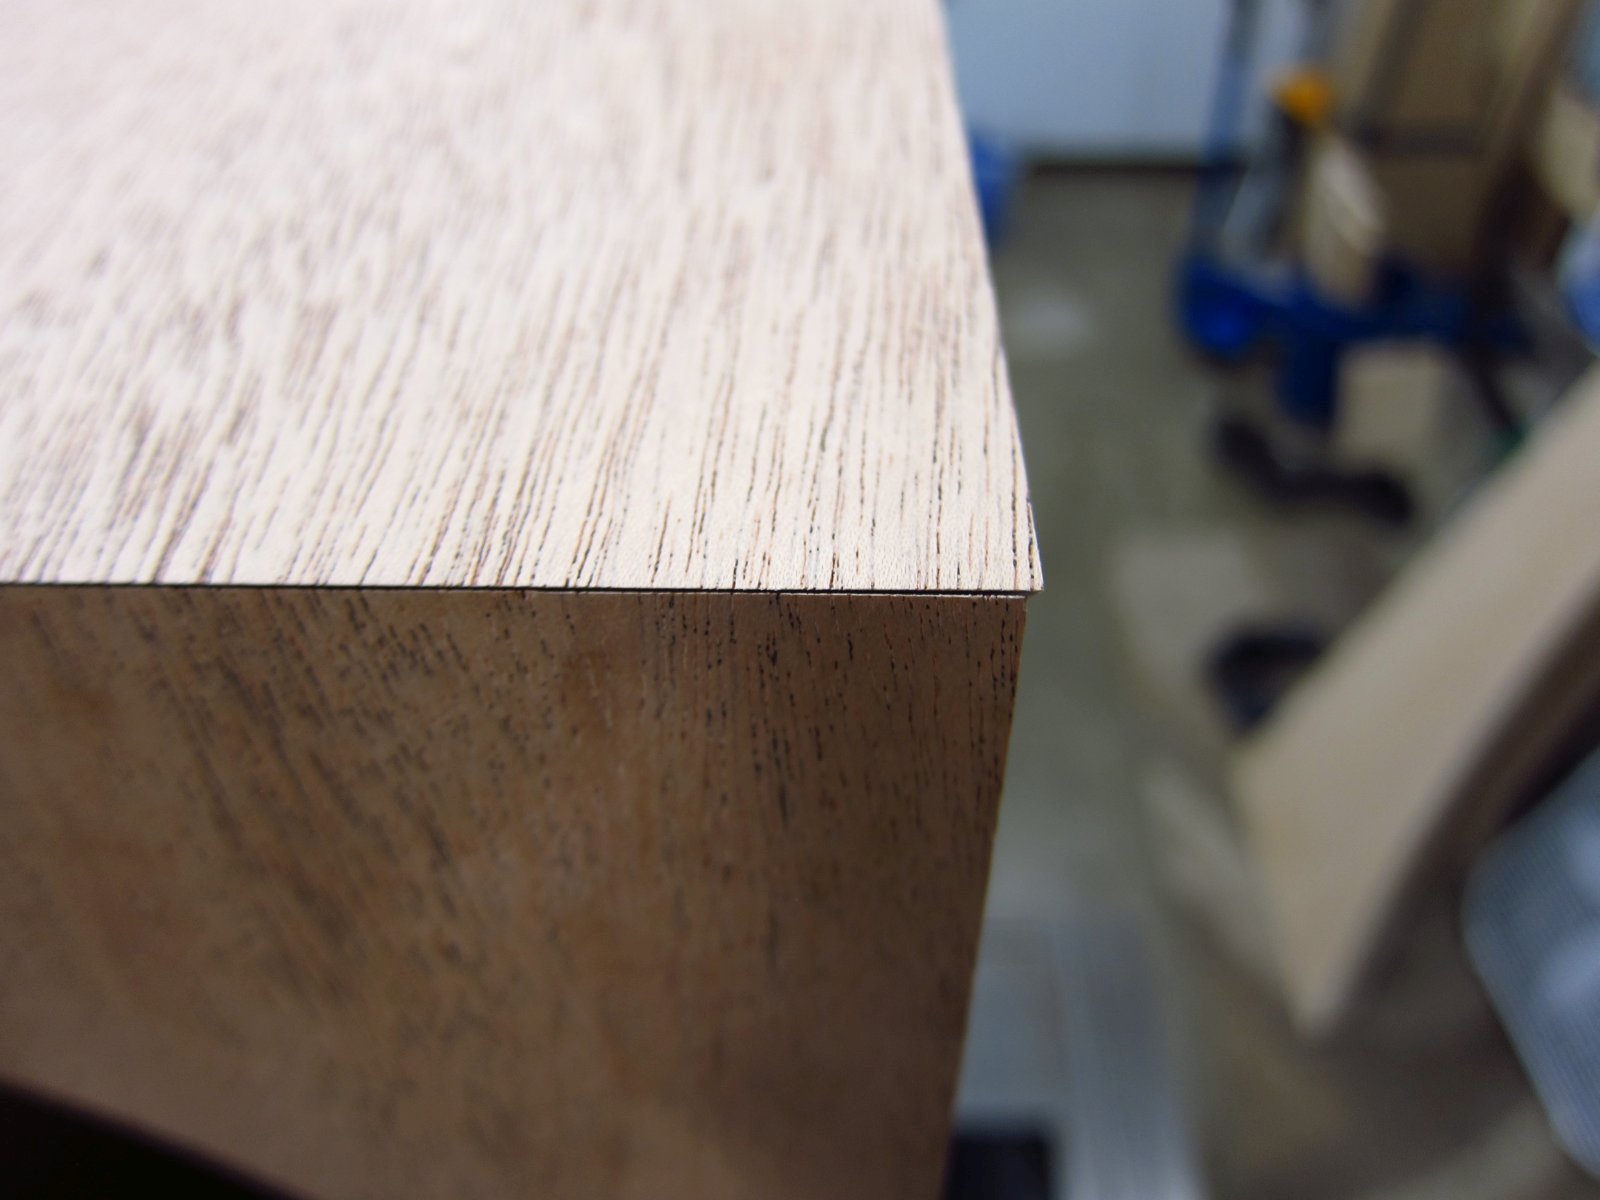
And of course, I had to see what the miter joint ended up looking like. Was it still perfect? Nope! Between the panel glue-up and assembly with screws, things moved ever so slightly on one side.
http://www.e30tuner.com/speakerbuilding/images/fhxl_2021/fhxl_042.jpg
http://www.e30tuner.com/speakerbuilding/images/fhxl_2021/fhxl_043.jpg
http://www.e30tuner.com/speakerbuilding/images/fhxl_2021/fhxl_044.jpg
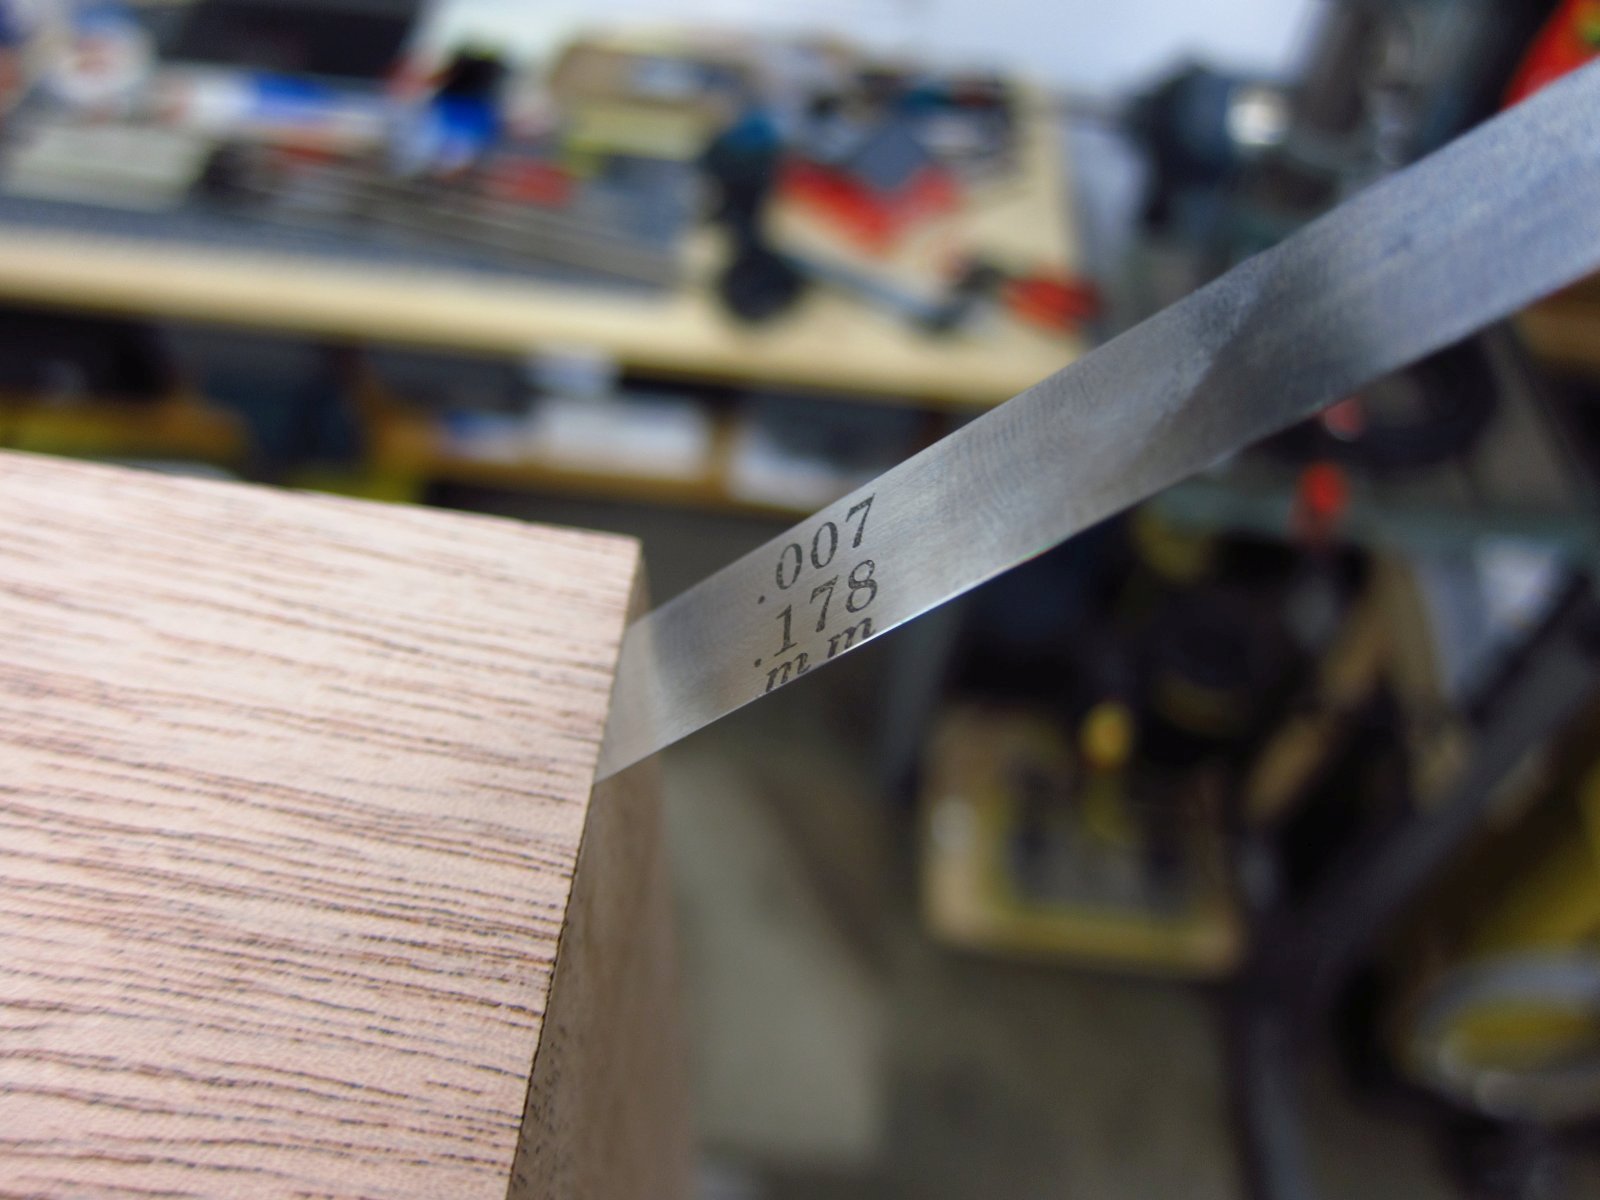
Per my feeler gauges, the gap opened to 0.007" / 0.18mm. With some extra clamping during the glue steps, I will be able to get it down to around half of that. Some VERY careful sanding to eliminate some tiny overhangs will also provide some fine mahogany dust which I can work into the glue joint when it is still wet, which will probably make any lingering gaps nearly invisible. This is "one of those things" where I will be the only person on earth who knows or cares about the "imperfection", but half of the fun of a hobby is to strive for perfection. The trick is knowing where to draw the line, or at least not let imperfection ruin the fun.
http://www.e30tuner.com/speakerbuilding/images/fhxl_2021/fhxl_045.jpg
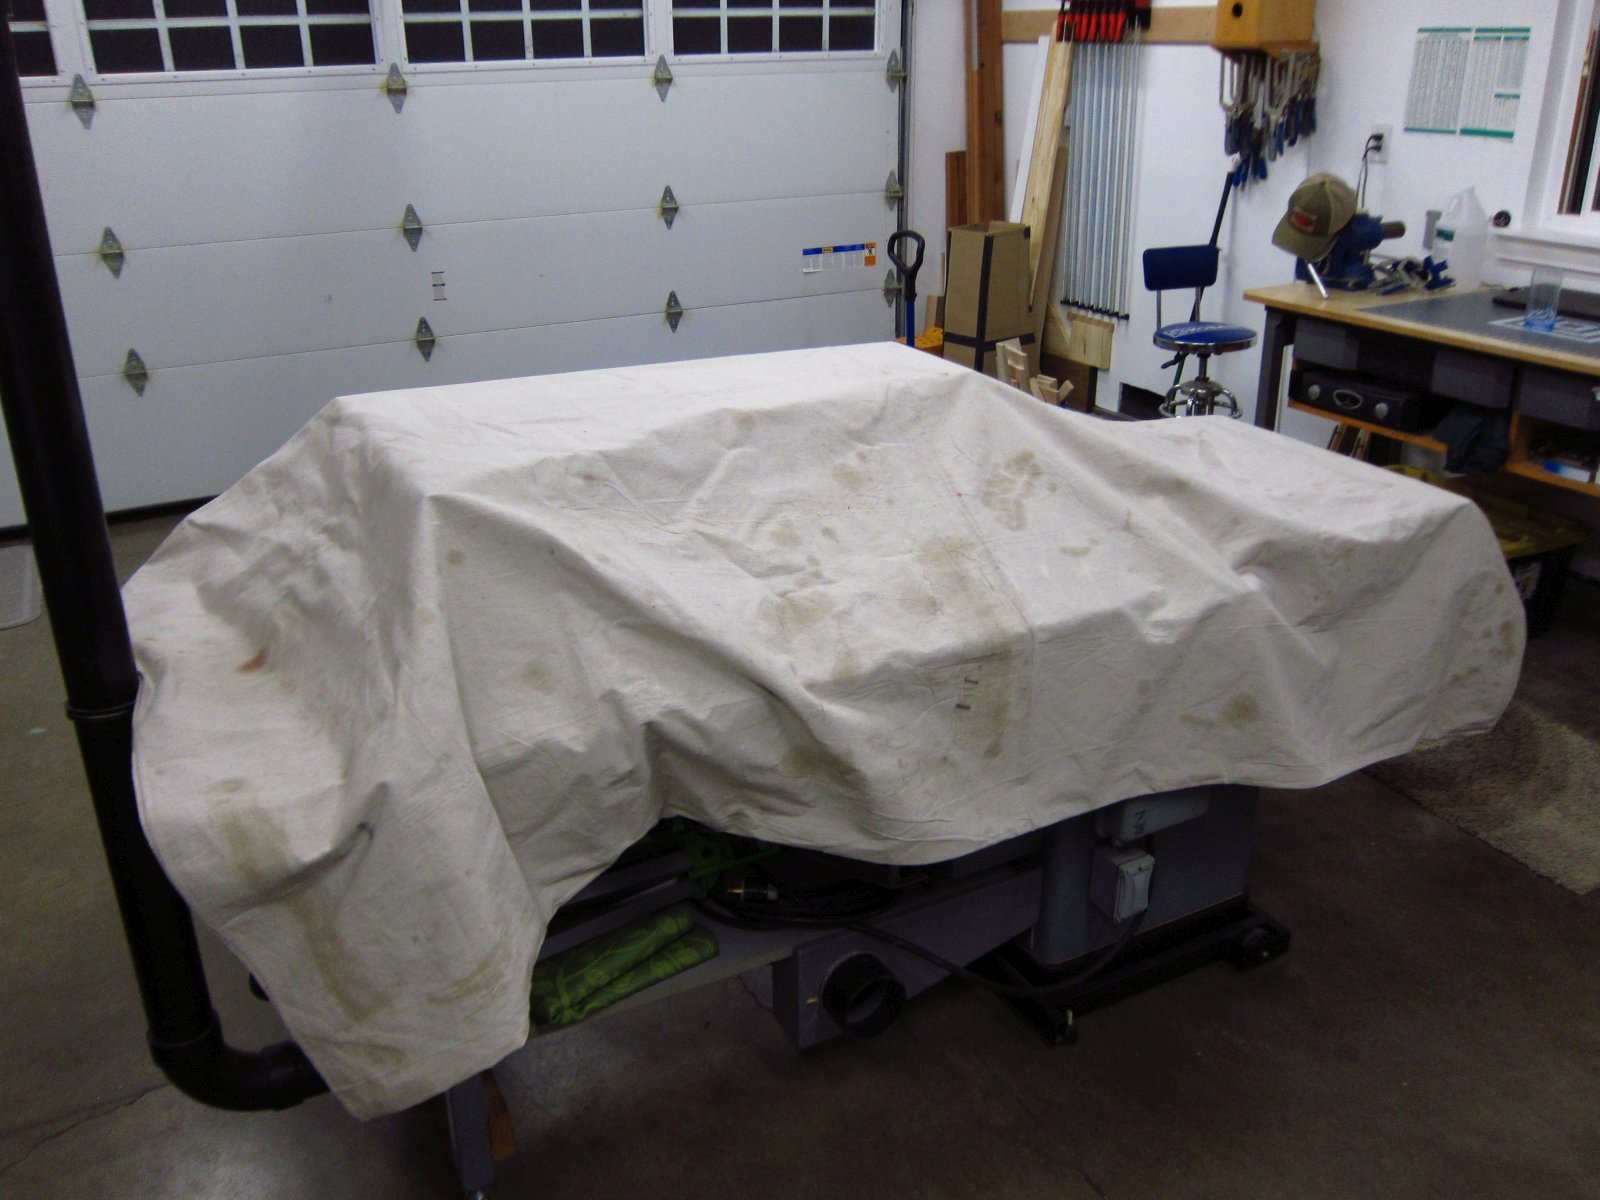
After cleaning up for the night, I covered up all of the pieces. My garage seems to get a surprising amount of sunlight / UV coming in during the day, and as many of you know, UV will darken most wood species. It is unavoidable, but I want to keep all of the freshly-sanded panels looking the same until final assembly, at which point the finished enclosures can darken uniformly in my house.
http://www.e30tuner.com/speakerbuilding/images/fhxl_2021/fhxl_046.jpg
Once that is all cured, it's mostly cosmetic stuff thereafter; flush-trimming the mahogany faces to the sides + top-rear + bottom-front, sinking the screws heads below the sides' surfaces, puttying over the screw heads (am thinking of using a reddish / mahogany colored putty for a little visual interest), doing a final pass of finish sanding and then applying a Watco Teak Oil finish to all visible surfaces. Oil finishes are my favorite due to their ease of application, ease of refinishing and the fact that they accent the wood's natural figuring rather than heavily modifying it.
Another thing I did early on was countersink all of the screw holes on the side panels on my drill press, with a depth stop set. This ensured a consistent outer diameter so that after filling they will be uniform looking (I hope). The other trick was to run the countersink bit with an absolutely minimal pilot hole (1.6mm) since countersink bits are notorious for chatter and tearing veneer. Running a countersink with no pilot, or a very small one, eliminates the chatter since the point is able to really bite into the workpiece.
Anyway, now that today's digression is done, here's what the progress looked like.
One of the trickier assembly aspects was getting the internal panel positioned properly. I wanted a perfect fit at the bottom of the rear panel, but the inner one really can't be adjusted much with the rear in place. Ultimately, I did some back and forth, and the old double sided tape came to the rescue again. Once I got the inner panel's centerline aligned with the holes in the sides, I stuck some cleats to the insides of the sides so that it would easily be slid along its length to align with the bottom of the rear panel.
http://www.e30tuner.com/speakerbuilding/images/fhxl_2021/fhxl_033.jpg
http://www.e30tuner.com/speakerbuilding/images/fhxl_2021/fhxl_034.jpg
With a little love from a deadblow mallet and some clamps, I got both panels right where I wanted them.
http://www.e30tuner.com/speakerbuilding/images/fhxl_2021/fhxl_035.jpg
I went in stages with various panels, clamping them into nice tight fits, then chasing the existing 1.6mm holes in the sides to produce concentric pilot holes in the side edges of the internal panels.
http://www.e30tuner.com/speakerbuilding/images/fhxl_2021/fhxl_036.jpg
http://www.e30tuner.com/speakerbuilding/images/fhxl_2021/fhxl_037.jpg
With all of the 1.6mm pilots done, I broke things apart and followed them with a 3.2mm drill bit. It is potentially very easy to mess it up if you try to jam the larger drill into the small pilot holes. What works well is to run the cordless drill at max speed and lightly engage the point of the larger drill with the pilot until it is able to gently self-center and then draw itself in concentrically with the pilot. Not all of my holes came out perfectly, but I did my best to be careful. The technique I described works better on isotropic materials (MDF, metal, plastic). Wood can be tricky because there can be large local density variations, especially when drilling into the plies of plywood, and this can easily make the drill bit wander as it gets going. Also, it is better to do this step with a cordless drill than a drill press as it is easier to let the drill bit "find" center by hand...the drill press will, in most cases, not pull the workpiece into alignment for you.
http://www.e30tuner.com/speakerbuilding/images/fhxl_2021/fhxl_038.jpg
Anyway, after all the drilling was finished, I got it all back together and ran all of the screws. For now the heads are 1-2mm proud of the surface since I will be removing them (one side at a time) for the gluing step, and I only want to drive them to full sub-flush depth once at the final reassembly. The side panels were not drilled out to 3.2mm since the screws I am using have extra small heads, and I wanted as much "meat" in there as possible for the heads to stop against. The 1.6mm pilots were more than enough to get the screws going in perfectly straight. The screws themselves also have a ~20mm unthreaded section up near the head, so they won't do the annoying thing where they engage both pieces and force them apart.
http://www.e30tuner.com/speakerbuilding/images/fhxl_2021/fhxl_039.jpg
Clamps off. It's shaping-up to be a nice looking speaker! Even with a TON of finishing work yet to do, they are starting to resemble what I want. I've been a fan of multi-species aesthetics for a while, although usually I go with more contrast (white oak + black walnut is my other favorite). In this case, I like the maple + mahogany combo, even if it does not carry as much of a visual contrast punch. It instead seems (to me) to have a more soft, easy-going aesthetic, which is good because I like to relax when listening.
http://www.e30tuner.com/speakerbuilding/images/fhxl_2021/fhxl_040.jpg
http://www.e30tuner.com/speakerbuilding/images/fhxl_2021/fhxl_041.jpg
And of course, I had to see what the miter joint ended up looking like. Was it still perfect? Nope! Between the panel glue-up and assembly with screws, things moved ever so slightly on one side.
http://www.e30tuner.com/speakerbuilding/images/fhxl_2021/fhxl_042.jpg
http://www.e30tuner.com/speakerbuilding/images/fhxl_2021/fhxl_043.jpg
http://www.e30tuner.com/speakerbuilding/images/fhxl_2021/fhxl_044.jpg
Per my feeler gauges, the gap opened to 0.007" / 0.18mm. With some extra clamping during the glue steps, I will be able to get it down to around half of that. Some VERY careful sanding to eliminate some tiny overhangs will also provide some fine mahogany dust which I can work into the glue joint when it is still wet, which will probably make any lingering gaps nearly invisible. This is "one of those things" where I will be the only person on earth who knows or cares about the "imperfection", but half of the fun of a hobby is to strive for perfection. The trick is knowing where to draw the line, or at least not let imperfection ruin the fun.
http://www.e30tuner.com/speakerbuilding/images/fhxl_2021/fhxl_045.jpg
After cleaning up for the night, I covered up all of the pieces. My garage seems to get a surprising amount of sunlight / UV coming in during the day, and as many of you know, UV will darken most wood species. It is unavoidable, but I want to keep all of the freshly-sanded panels looking the same until final assembly, at which point the finished enclosures can darken uniformly in my house.
http://www.e30tuner.com/speakerbuilding/images/fhxl_2021/fhxl_046.jpg
Last edited:
Per my feeler gauges, the gap opened to 0.007" / 0.18mm. With some extra clamping during the glue steps, I will be able to get it down to around half of that. Some VERY careful sanding to eliminate some tiny overhangs will also provide some fine mahogany dust which I can work into the glue joint when it is still wet, which will probably make any lingering gaps nearly invisible. This is "one of those things" where I will be the only person on earth who knows or cares about the "imperfection", but half of the fun of a hobby is to strive for perfection. The trick is knowing where to draw the line, or at least not let imperfection ruin the fun.
I have seen this method a couple times, mixing saw dust with glue to fill the gaps. I never tried it myself. How does it react to finish?
Those speakers must weight a ton!
Wow... I mean, WOW!
Great job!
Do you have some pictures for the stuffing and felt placement too?
I have not started in on the damping sheets and stuffing yet, but I will be sure to take some photos!
I have seen this method a couple times, mixing saw dust with glue to fill the gaps. I never tried it myself. How does it react to finish?
Those speakers must weight a ton!
I am pretty sure that a sawdust+glue filler mix won't take finish very well. So I will need to experiment a little with some scraps to see if it is the right choice. Worst-case, I just leave well enough alone and have a little sliver of a gap that is only visible from less than 25cm away.
And yes, the speaker is HEAVY!
bmwman91,
Very nice work there and great build pics too.
The pics will be helpful for DIYers undertaking a FHXL or FH3 build.
Thanks. Yes, I hope that this will be a helpful thread for others who want to build these designs, or any other really.
Nightly update time.
I am 25% done with the gluing (1 of 4 side panels is fully glued into place), which is probably the most stressful part of any build. You have limited time to work, and you need to get things right the first time. Although I have done countless glue-ups, there is always a mix of excitement and trepidation that accompanies the activity. Of course, getting the parts placed and clamped is only part of it. Cleaning up all of the squeeze-out before it fully dries is the other task that is time sensitive, although much less so than setting the parts into their correct places. Wood glue is easy to clean up with a wet sponge, at least. Between applying the glue, placing the panels and being "done" cleaning up the excess I would estimate that I took about an hour. The useful working time for placing/moving pieces is 5 minutes or less, so most of my effort was spent cleaning up. Leaving the excess is not necessarily a problem since it can be chiseled off, but that runs a risk of gouging the veneer. It is much easier to scrape the still-wet excess off with a putty knife and then thoroughly wipe things in a few passes with a wet sponge.
Tomorrow I will finish drilling the holes for the other enclosure, dry-fit everything and (possibly, time permitting) glue one of its sides as well. Once both are half-glued together I will pull the unglued sides and install the sound deadening.
OPEN QUESTION: How much stuffing is recommended for Alpair 10p's? It looks like the sheet material and rear stuffing is a "fixed' value for all drivers, but the quantity to be used in the front/throat seems to be variable. Can Dave or someone in the know provide a known good starting value for it? I generally like a nice flat response, with maybe a 3dB bump in the bass for a "warmer" sound.
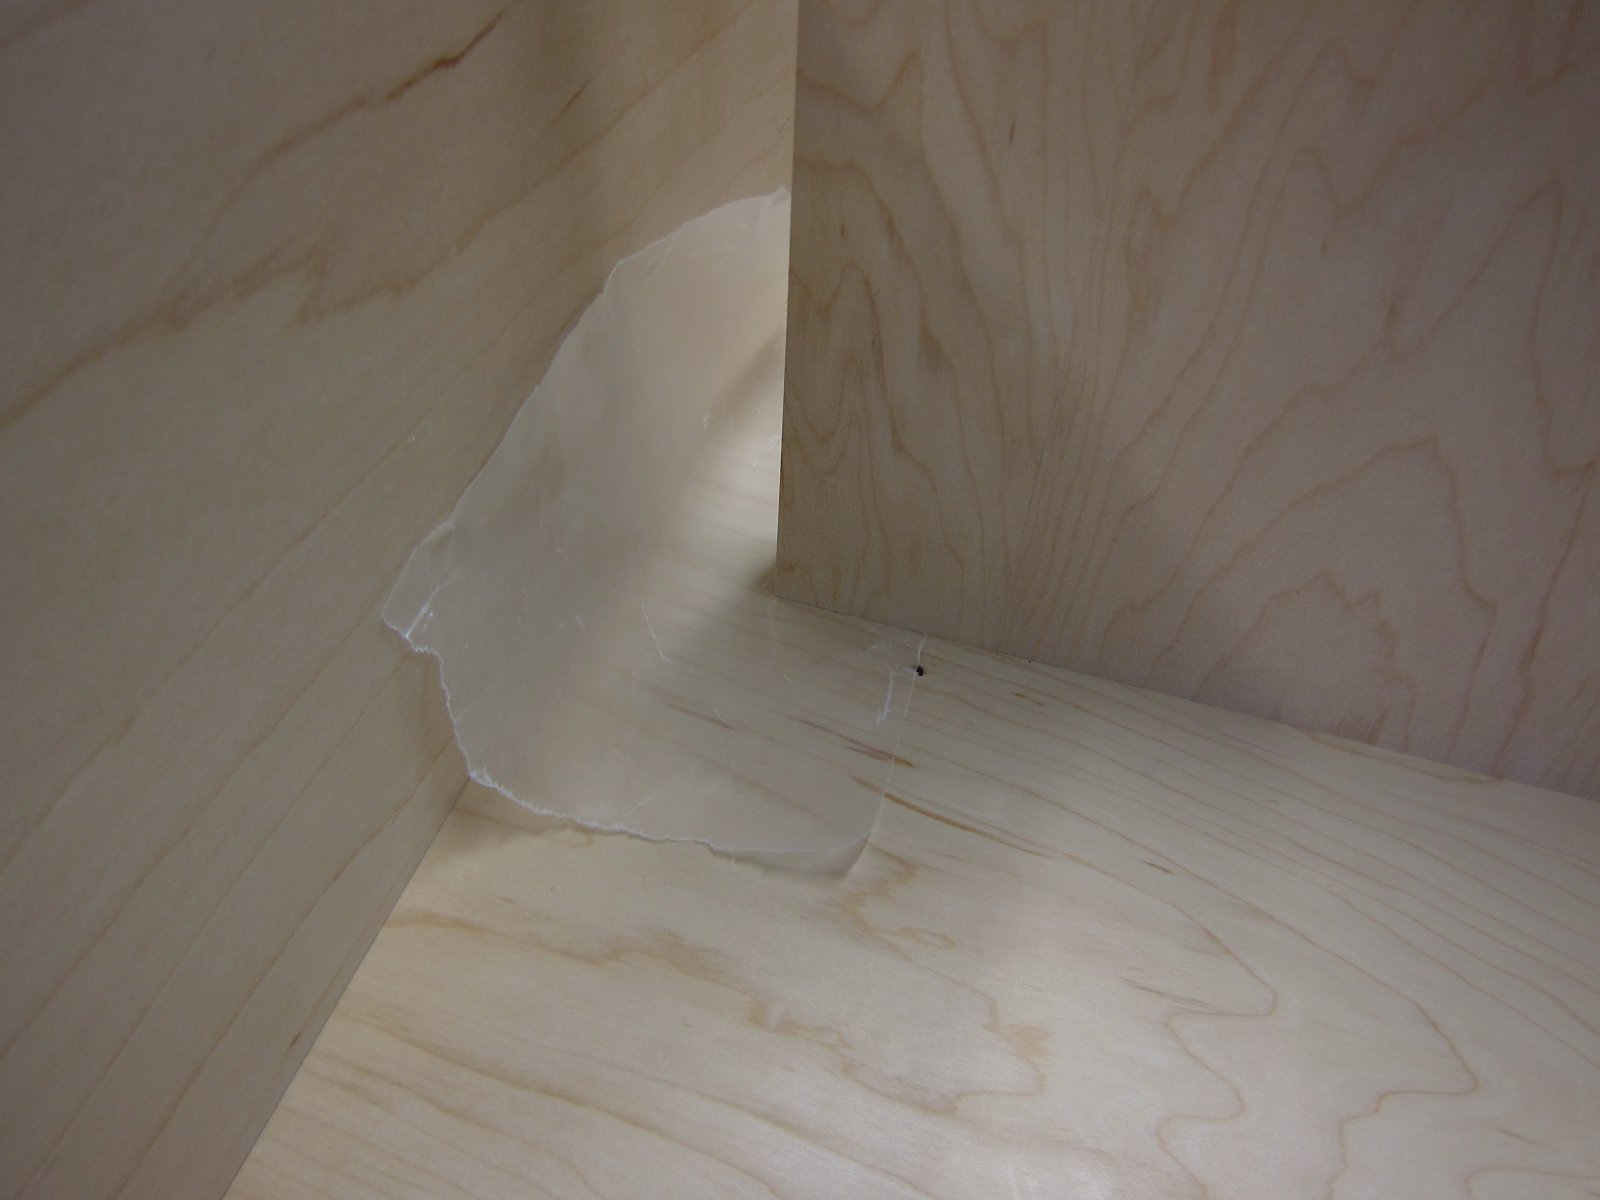
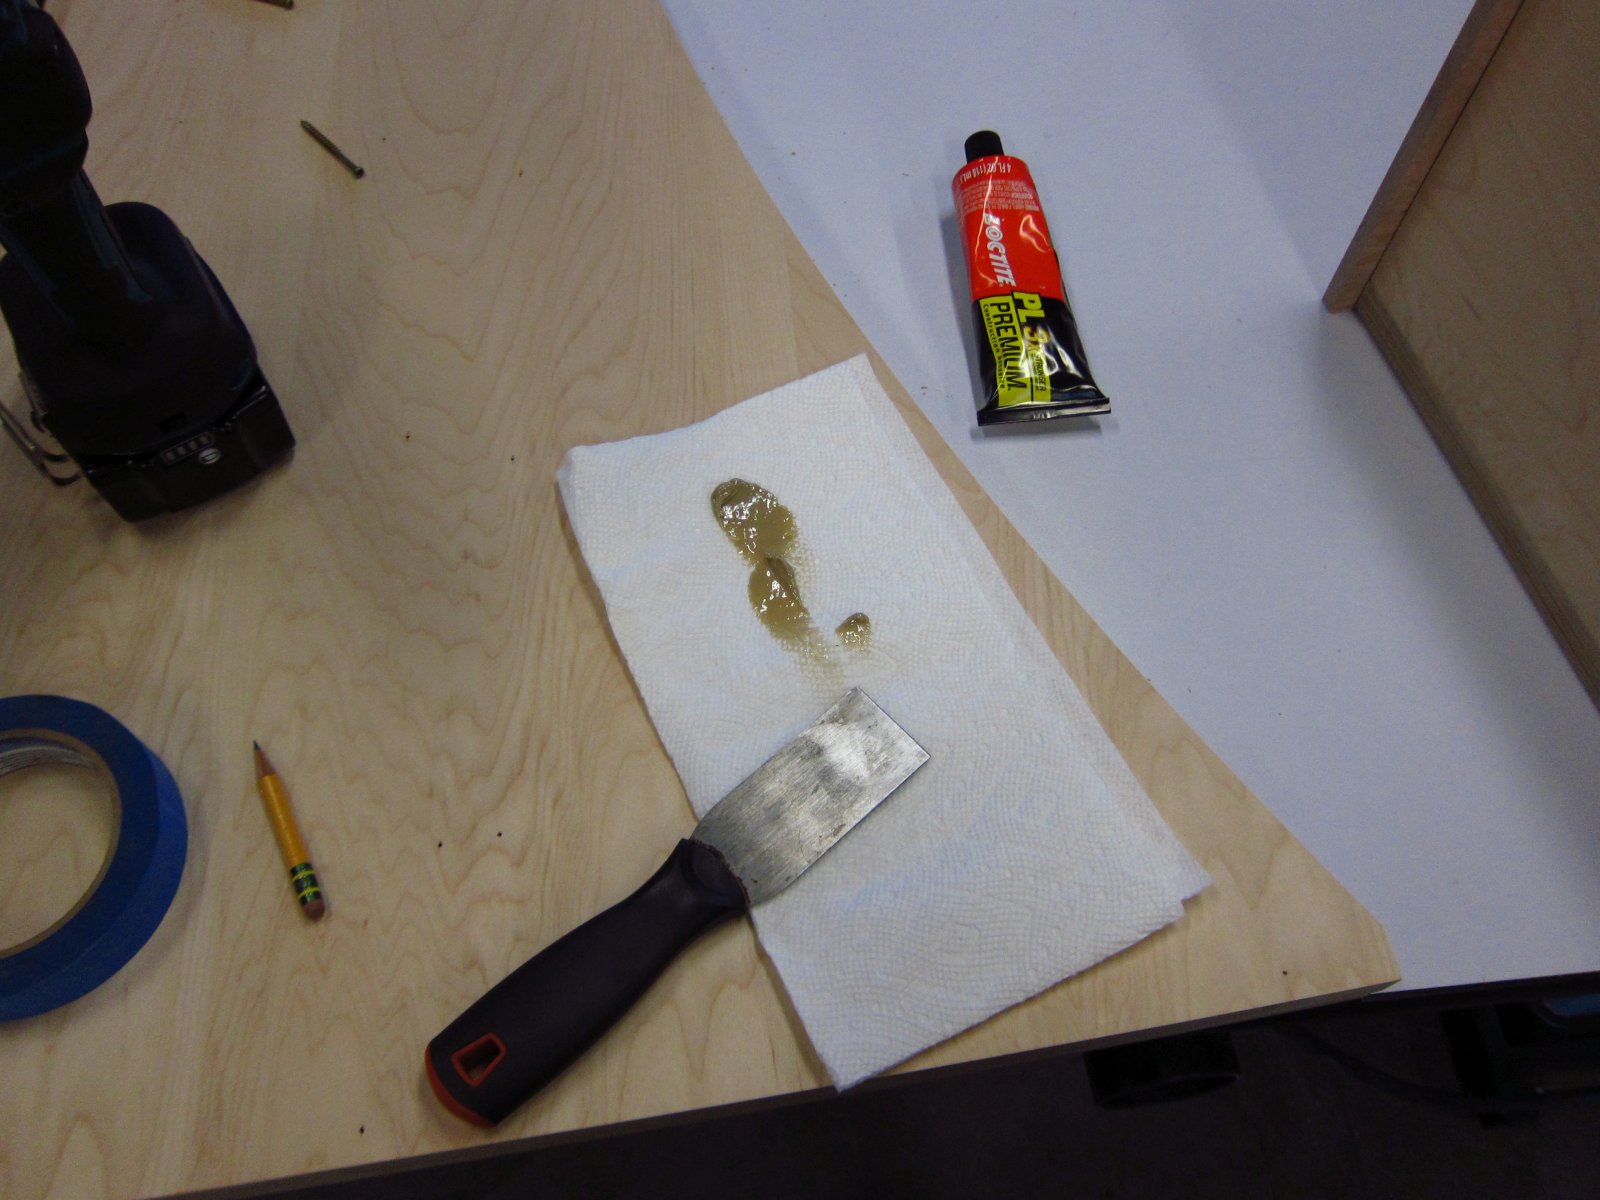
Anyway, prior to gluing one side on, I removed the back panel since I wanted to apply some construction adhesive to the small chamfer at the bottom where it mates to the inner panel. This is to form an air-tight seal so that the rear chamber does not "leak". To avoid having the adhesive squeeze onto the other side panel (which is not being glued yet), I slid some wax paper in under the end of the inner panel.
http://www.e30tuner.com/speakerbuilding/images/fhxl_2021/fhxl_047.jpg
There was a fair amount of squeeze-out.
http://www.e30tuner.com/speakerbuilding/images/fhxl_2021/fhxl_048.jpg
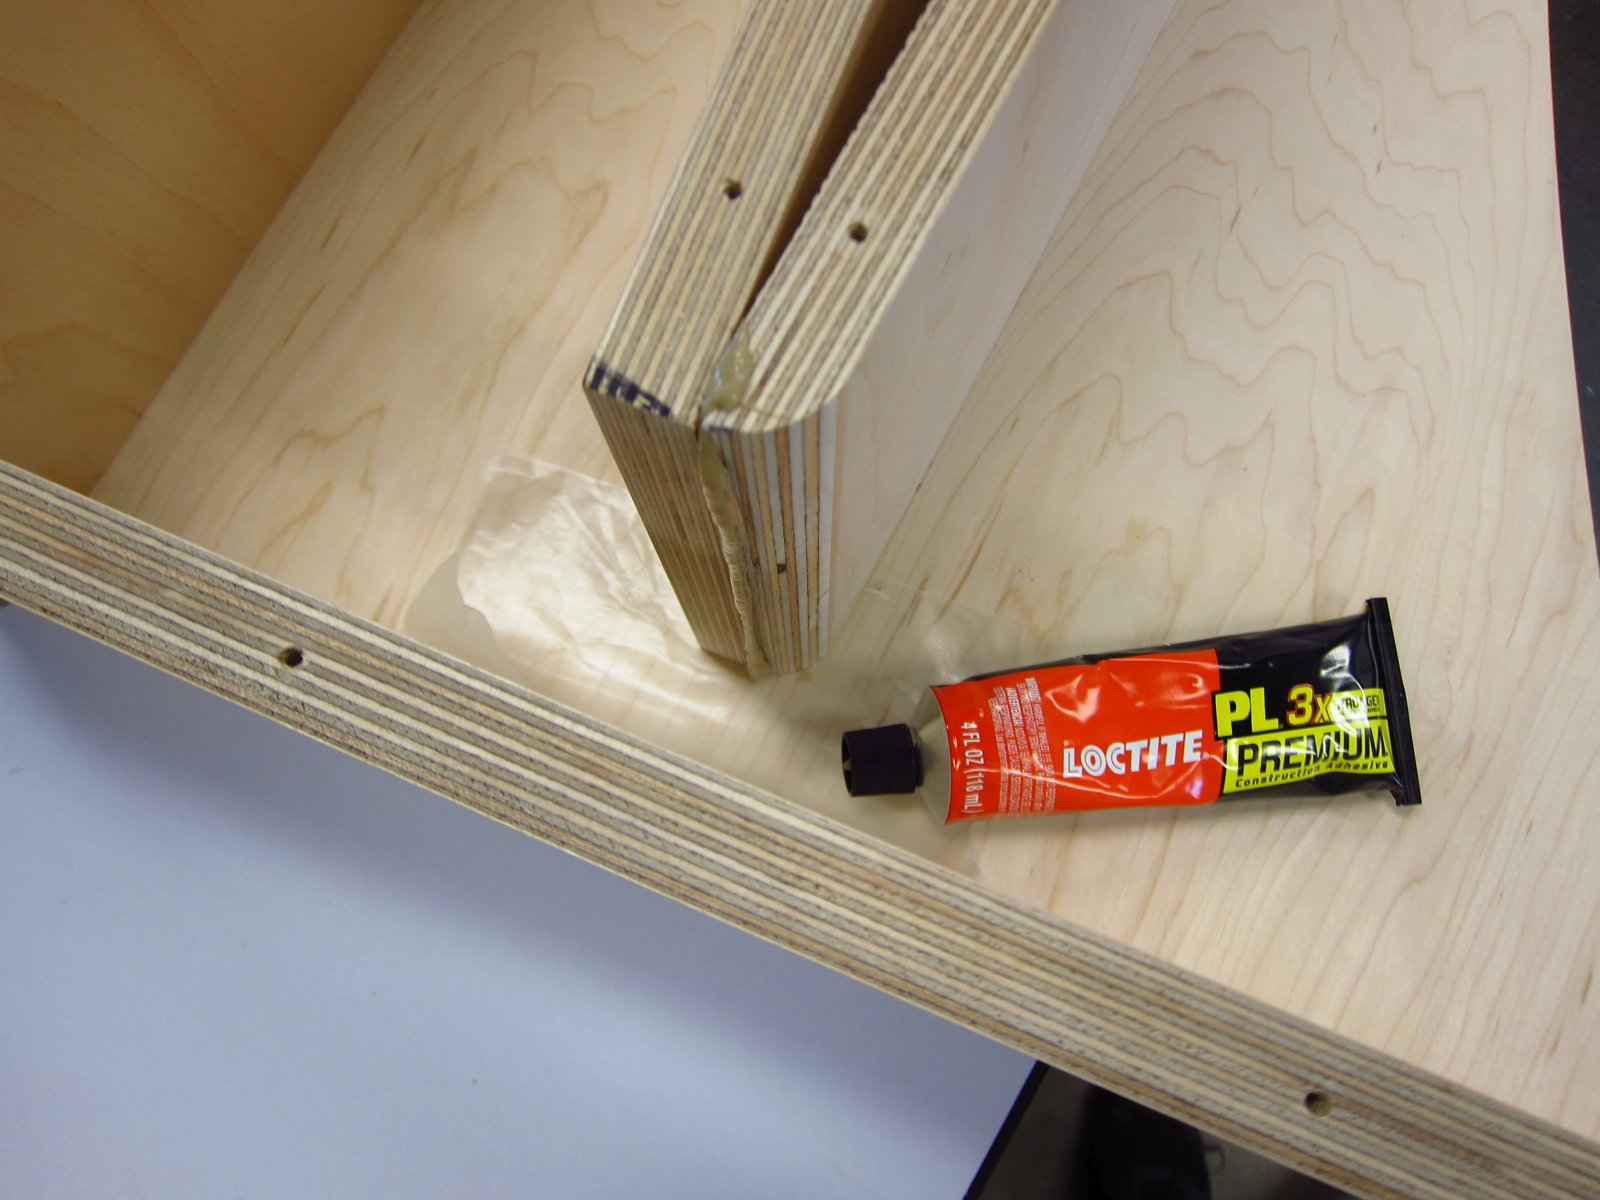
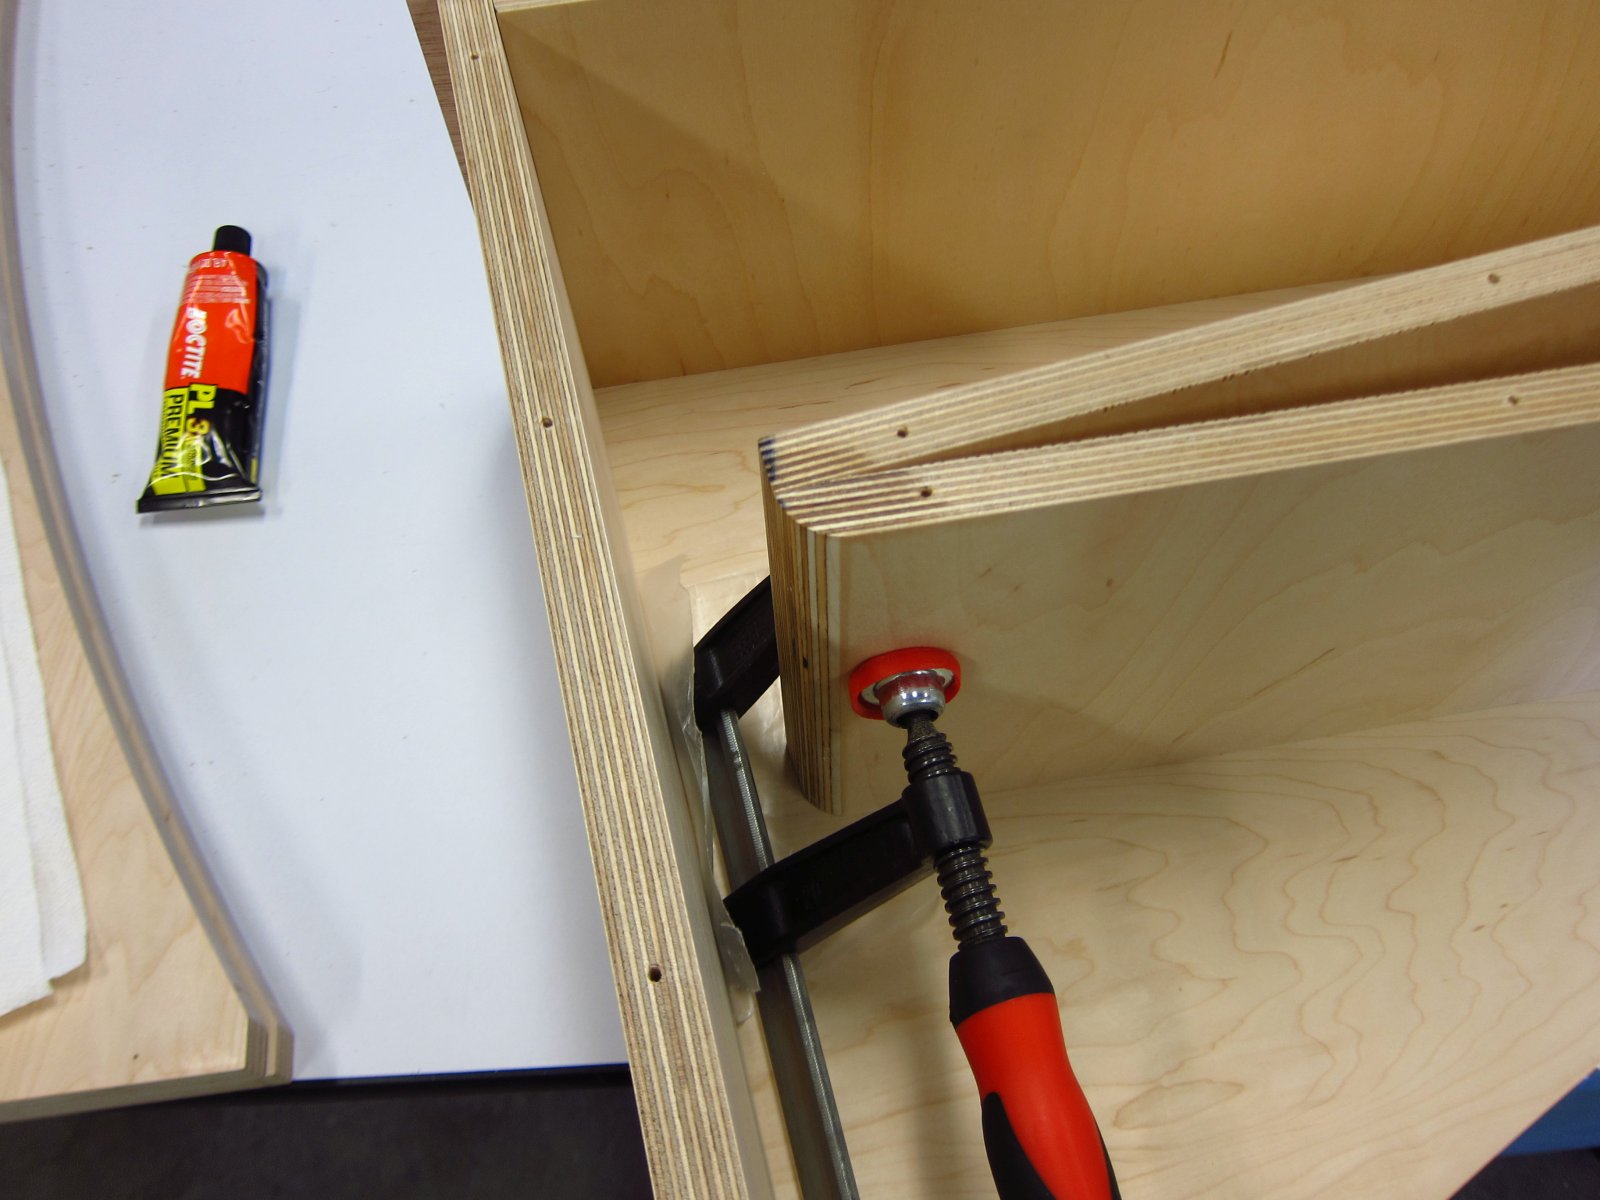
Next, a clamp was installed to ensure a nice tight fit. Then I scraped off most of the extra with a putty knife, and then cleaned the remainder with some acetone on a rag.
http://www.e30tuner.com/speakerbuilding/images/fhxl_2021/fhxl_050.jpg
http://www.e30tuner.com/speakerbuilding/images/fhxl_2021/fhxl_049.jpg
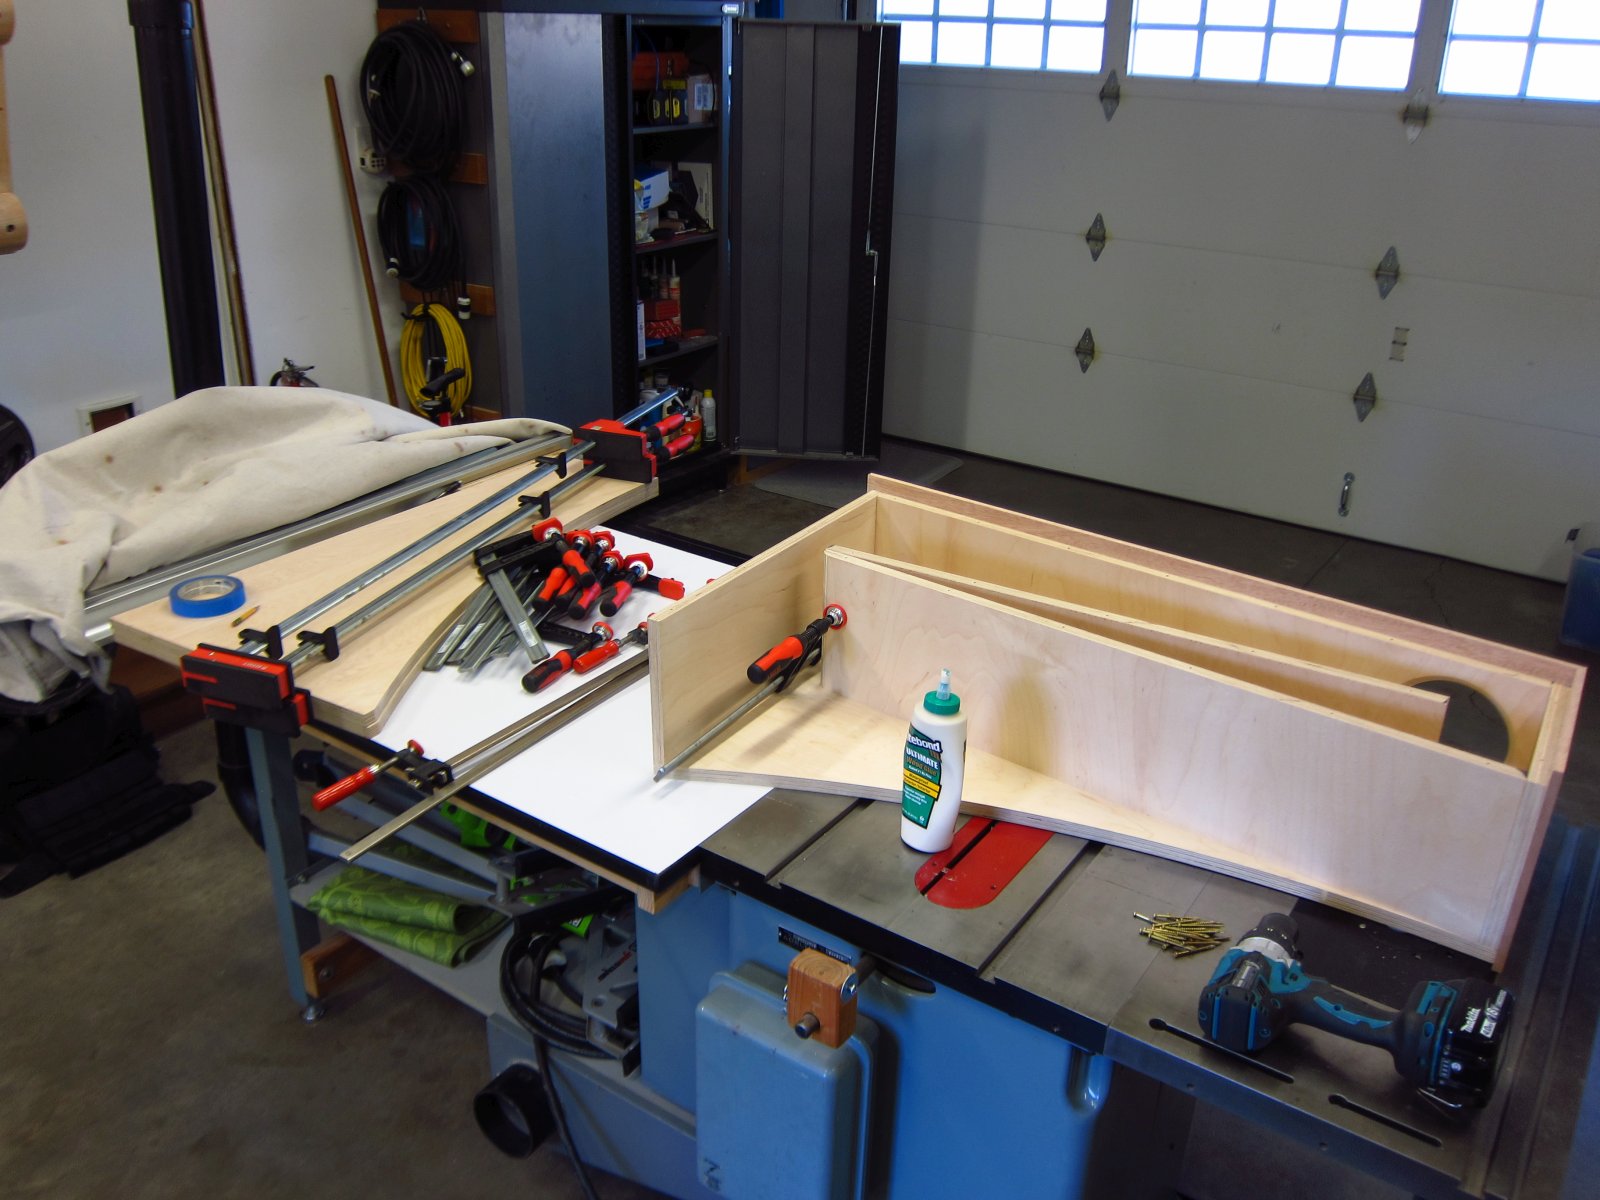
With that taken care of, I prepared everything I knew that I would need to secure the side panel into place during gluing. This is why I like to run a couple of passes of dry-fitting everything, so that I don't have to "think" too hard with the clock ticking on wet glue...it's all been rehearsed!
http://www.e30tuner.com/speakerbuilding/images/fhxl_2021/fhxl_051.jpg
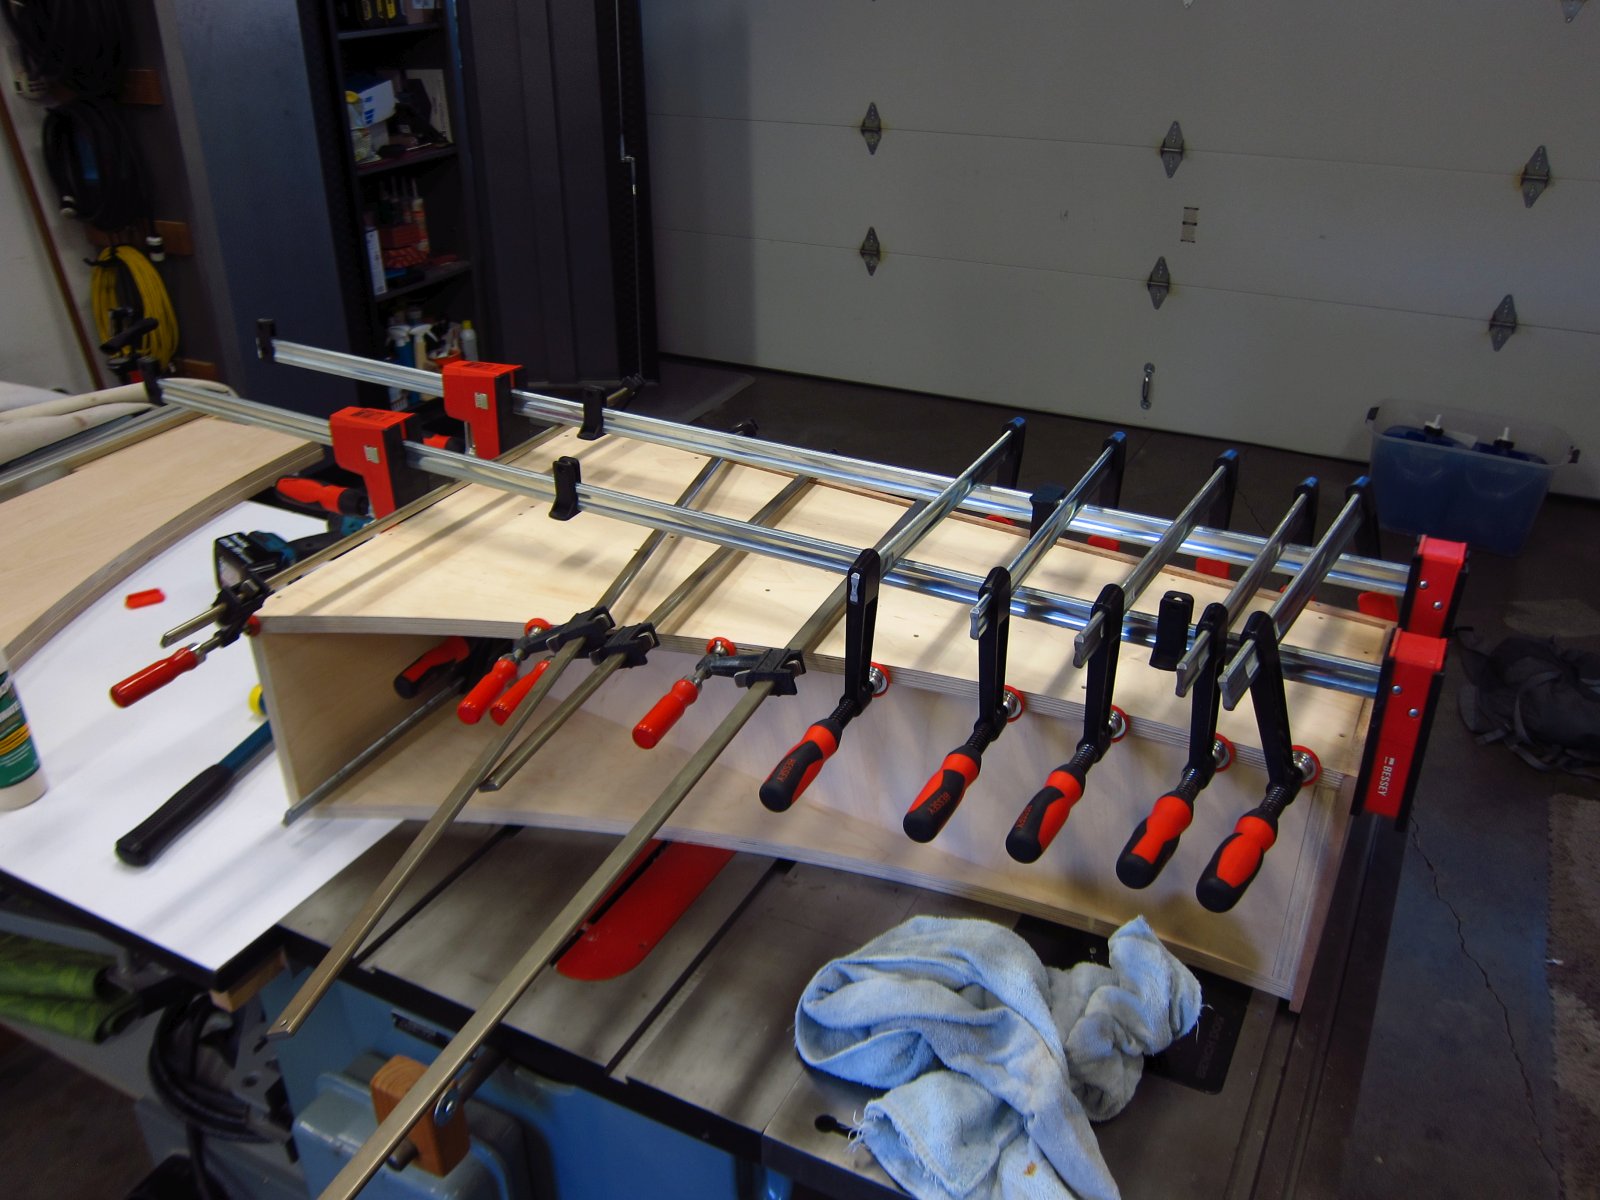
Here's how it will sit for the next 24 hours. About an hour elapsed between the previous photo and this one. Most of that time was cleaning up the excess glue. I applied a bit too much and got some nasty drips. The next 3 sides that I glue will go more smoothly since I have a better idea of how much glue to apply (or not to, rather).
http://www.e30tuner.com/speakerbuilding/images/fhxl_2021/fhxl_052.jpg
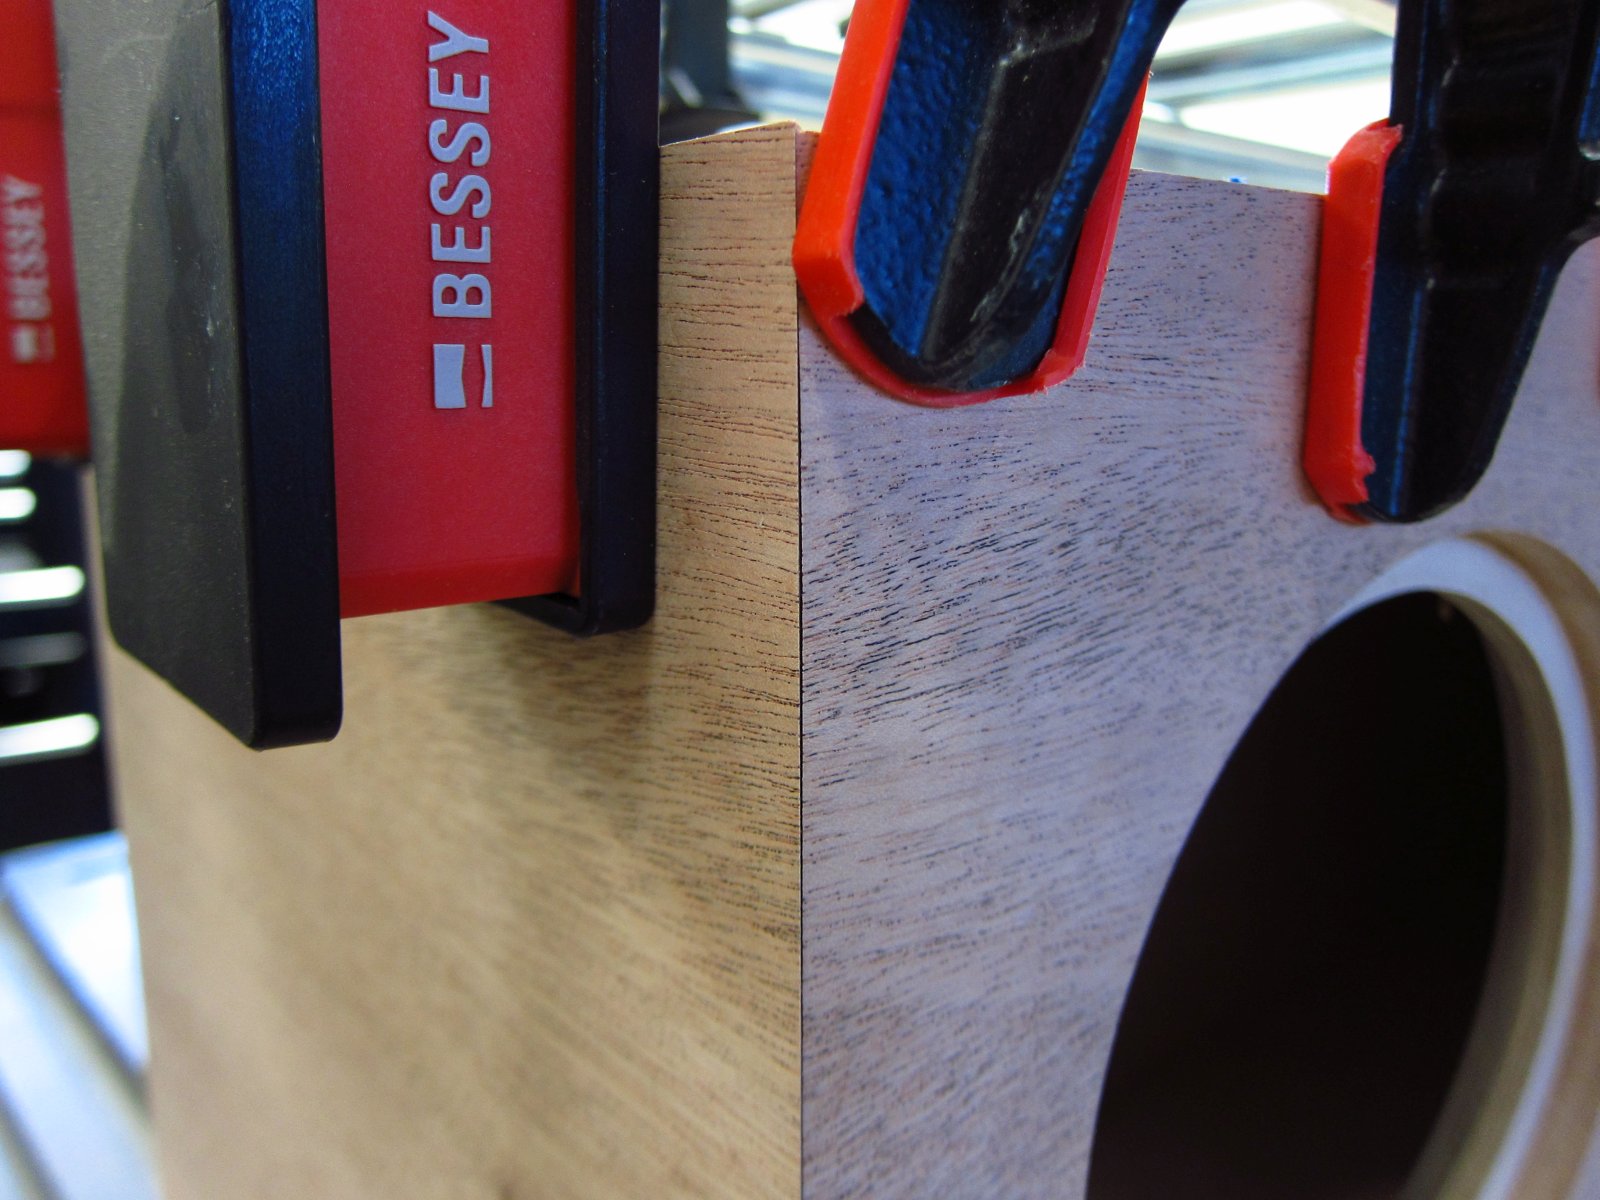
Here's how that miter gap turned out. It still looks huge, but that's more a function of the camera being in macro mode less than 10cm away. Some careful sanding and (MAYBE) filling will take care of it. Or, I can just leave it alone and never see it since I will sit multiple meters away from them while listening.
http://www.e30tuner.com/speakerbuilding/images/fhxl_2021/fhxl_053.jpg
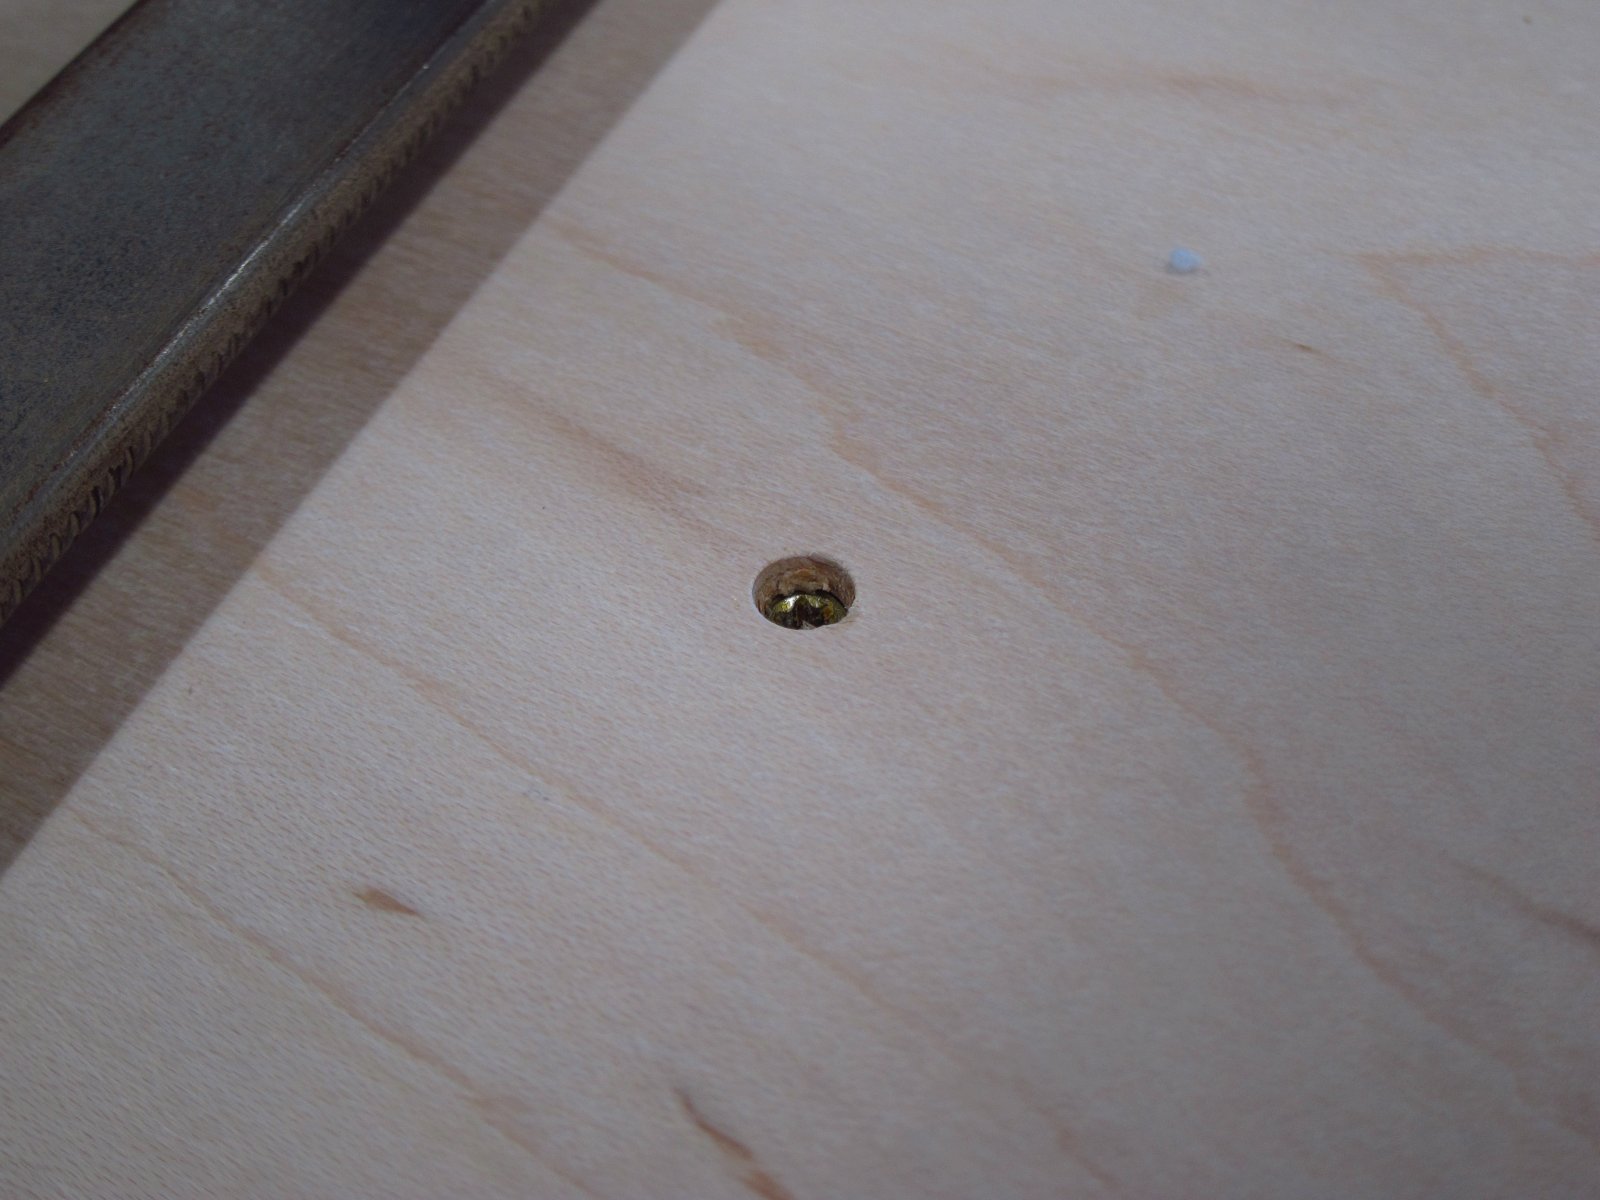
This is how the screw heads were driven in for their final installation. All of the holes will be filled with wood putty prior to final sanding and finish application.
http://www.e30tuner.com/speakerbuilding/images/fhxl_2021/fhxl_054.jpg
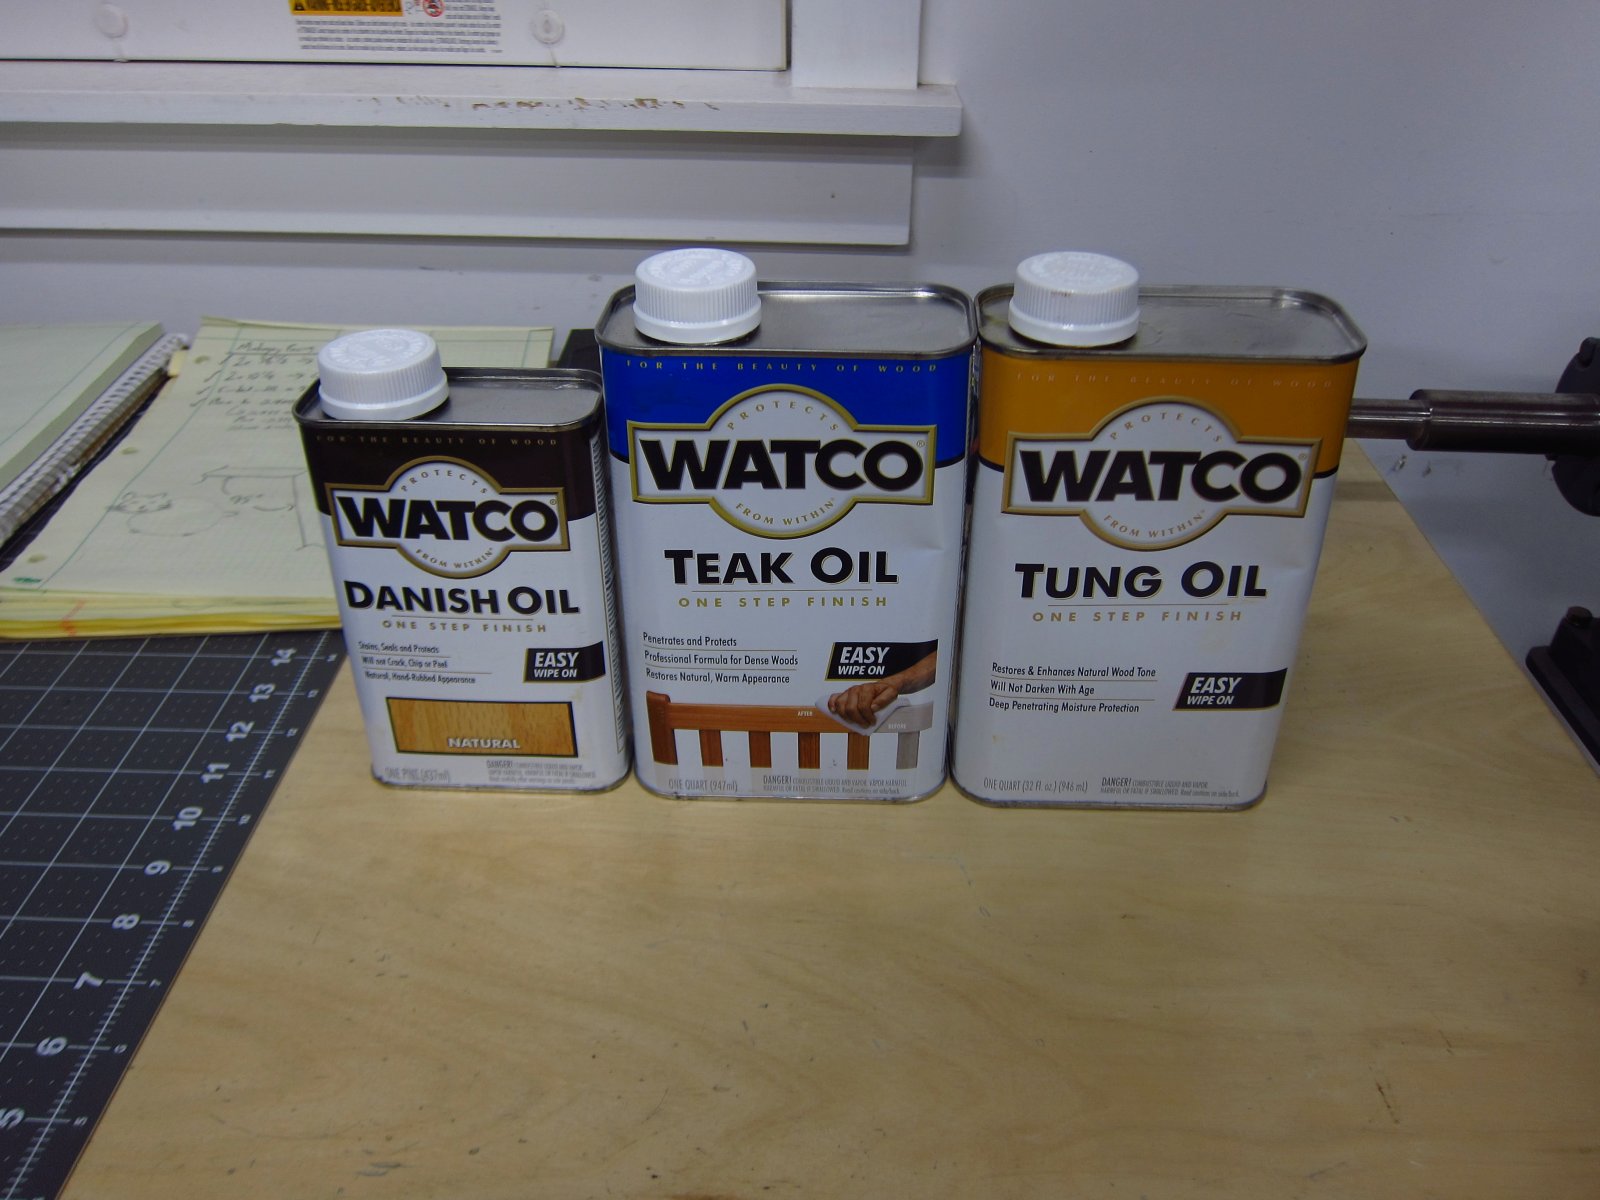
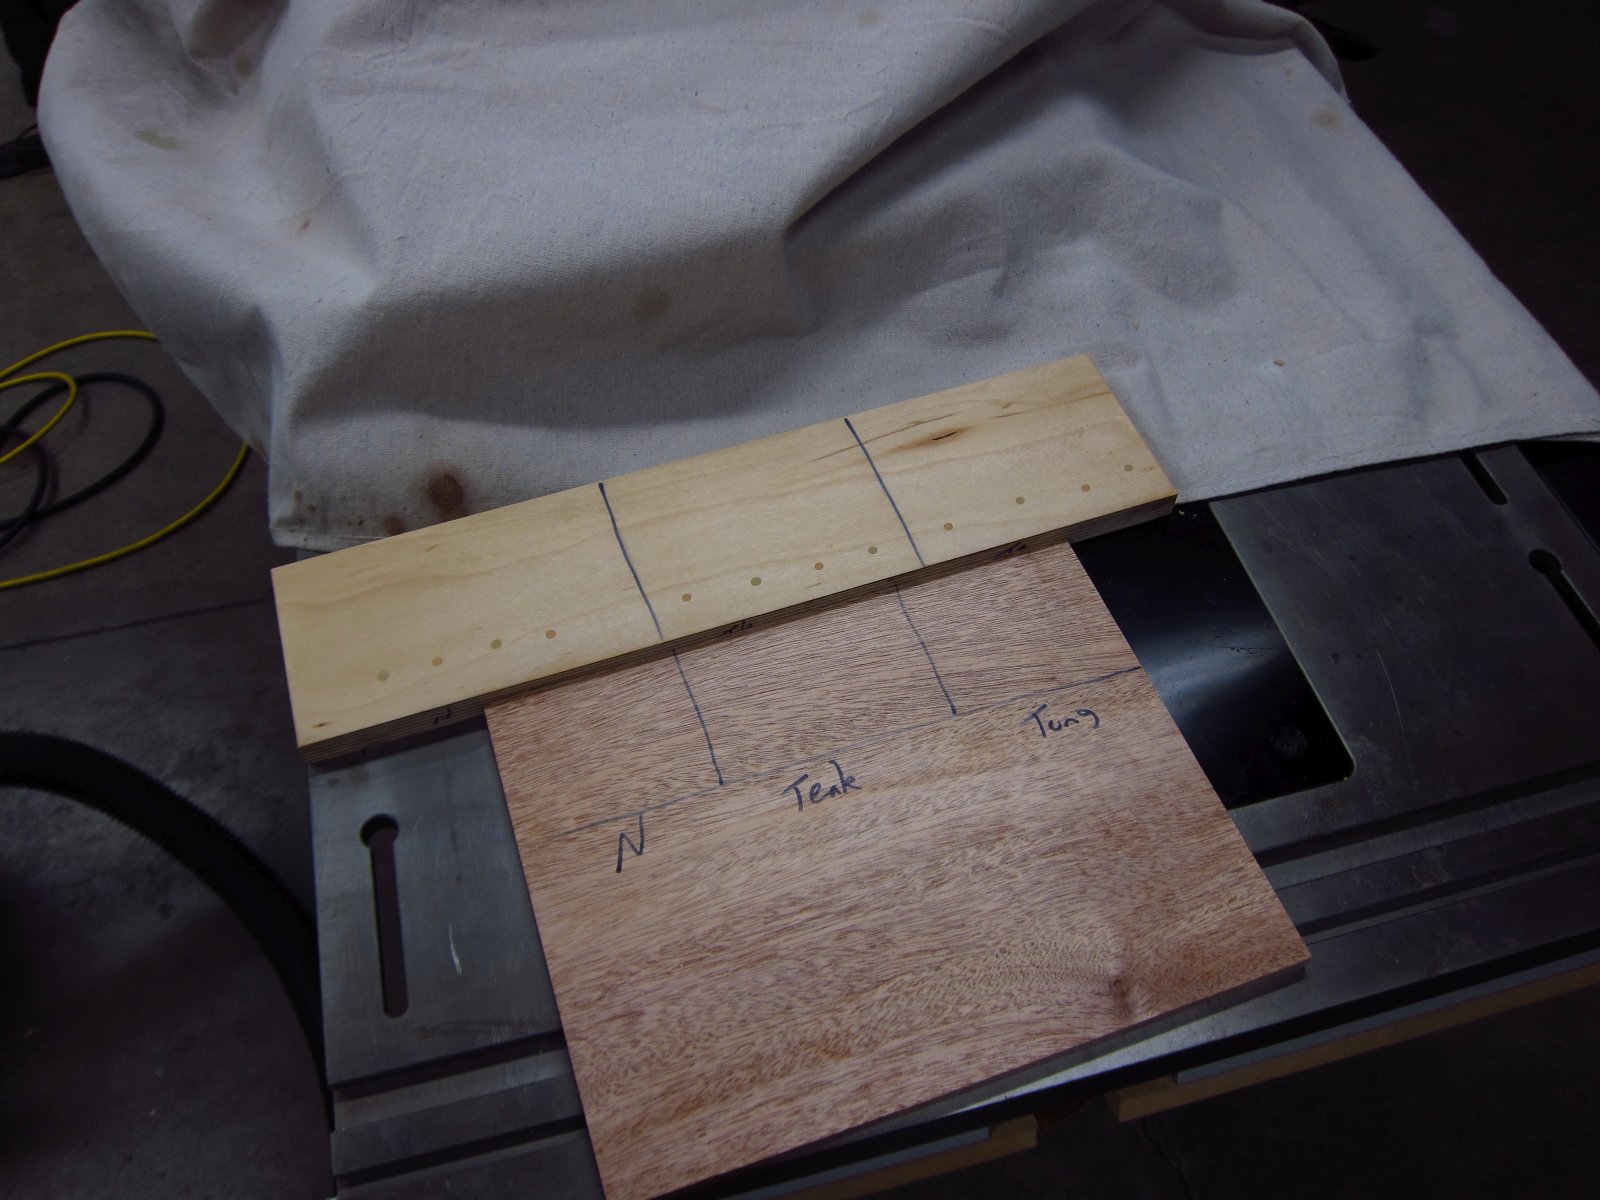
Speaking of finishes, I tried out 3 different options on some scraps. The camera does no justice and they all look identical in the photo. To the eye, they are subtly different.
- Natural Danish Oil deepens the grain contrast a little with a very slight yellow tint.
- Teak oil has a more pronounced yellow tint, and draws out a little grain contrast, but less than the Natural Danish Oil.
- Tung Oil adds the most richness to the wood grain and does not look to add any yellow tint. If anything, it might give the wood a very very slight brown tint.
Overall, I am probably going to use the Tung Oil since I think that it looks the most pleasing. Unfortunately, none of the wood fillers that I used on the plywood match well at at all with the finishes applied. Granted, maybe the difference will lessen in a day or two once the finish cures. The two putties in the photo are "natural" colored (the more yellow one) and "maple" colored (the more orange one). I used a lot of the natural colored one to fill imperfections here and there in the ply pieces, but for the screw holes I think that I will go with the maple colored one. If anything, it looks closer to the mahogany wood's color. Since I don't think that I will be able to find a filler that will effectively hide the holes, I figure that I might as well embrace the situation and fill things such that the holes provide some visual accents without being too "busy" to the eye.
http://www.e30tuner.com/speakerbuilding/images/fhxl_2021/fhxl_056.jpg
http://www.e30tuner.com/speakerbuilding/images/fhxl_2021/fhxl_055.jpg
So, there it is for the evening folks! It has been a while since I did much woodworking, but it is always great fun when I get to the point in a project where it feels like real progress is occurring. In this case, I am also eagerly awaiting the functional tests and listening!
I am 25% done with the gluing (1 of 4 side panels is fully glued into place), which is probably the most stressful part of any build. You have limited time to work, and you need to get things right the first time. Although I have done countless glue-ups, there is always a mix of excitement and trepidation that accompanies the activity. Of course, getting the parts placed and clamped is only part of it. Cleaning up all of the squeeze-out before it fully dries is the other task that is time sensitive, although much less so than setting the parts into their correct places. Wood glue is easy to clean up with a wet sponge, at least. Between applying the glue, placing the panels and being "done" cleaning up the excess I would estimate that I took about an hour. The useful working time for placing/moving pieces is 5 minutes or less, so most of my effort was spent cleaning up. Leaving the excess is not necessarily a problem since it can be chiseled off, but that runs a risk of gouging the veneer. It is much easier to scrape the still-wet excess off with a putty knife and then thoroughly wipe things in a few passes with a wet sponge.
Tomorrow I will finish drilling the holes for the other enclosure, dry-fit everything and (possibly, time permitting) glue one of its sides as well. Once both are half-glued together I will pull the unglued sides and install the sound deadening.
OPEN QUESTION: How much stuffing is recommended for Alpair 10p's? It looks like the sheet material and rear stuffing is a "fixed' value for all drivers, but the quantity to be used in the front/throat seems to be variable. Can Dave or someone in the know provide a known good starting value for it? I generally like a nice flat response, with maybe a 3dB bump in the bass for a "warmer" sound.
Anyway, prior to gluing one side on, I removed the back panel since I wanted to apply some construction adhesive to the small chamfer at the bottom where it mates to the inner panel. This is to form an air-tight seal so that the rear chamber does not "leak". To avoid having the adhesive squeeze onto the other side panel (which is not being glued yet), I slid some wax paper in under the end of the inner panel.
http://www.e30tuner.com/speakerbuilding/images/fhxl_2021/fhxl_047.jpg
There was a fair amount of squeeze-out.
http://www.e30tuner.com/speakerbuilding/images/fhxl_2021/fhxl_048.jpg
Next, a clamp was installed to ensure a nice tight fit. Then I scraped off most of the extra with a putty knife, and then cleaned the remainder with some acetone on a rag.
http://www.e30tuner.com/speakerbuilding/images/fhxl_2021/fhxl_050.jpg
http://www.e30tuner.com/speakerbuilding/images/fhxl_2021/fhxl_049.jpg
With that taken care of, I prepared everything I knew that I would need to secure the side panel into place during gluing. This is why I like to run a couple of passes of dry-fitting everything, so that I don't have to "think" too hard with the clock ticking on wet glue...it's all been rehearsed!
http://www.e30tuner.com/speakerbuilding/images/fhxl_2021/fhxl_051.jpg
Here's how it will sit for the next 24 hours. About an hour elapsed between the previous photo and this one. Most of that time was cleaning up the excess glue. I applied a bit too much and got some nasty drips. The next 3 sides that I glue will go more smoothly since I have a better idea of how much glue to apply (or not to, rather).
http://www.e30tuner.com/speakerbuilding/images/fhxl_2021/fhxl_052.jpg
Here's how that miter gap turned out. It still looks huge, but that's more a function of the camera being in macro mode less than 10cm away. Some careful sanding and (MAYBE) filling will take care of it. Or, I can just leave it alone and never see it since I will sit multiple meters away from them while listening.
http://www.e30tuner.com/speakerbuilding/images/fhxl_2021/fhxl_053.jpg
This is how the screw heads were driven in for their final installation. All of the holes will be filled with wood putty prior to final sanding and finish application.
http://www.e30tuner.com/speakerbuilding/images/fhxl_2021/fhxl_054.jpg
Speaking of finishes, I tried out 3 different options on some scraps. The camera does no justice and they all look identical in the photo. To the eye, they are subtly different.
- Natural Danish Oil deepens the grain contrast a little with a very slight yellow tint.
- Teak oil has a more pronounced yellow tint, and draws out a little grain contrast, but less than the Natural Danish Oil.
- Tung Oil adds the most richness to the wood grain and does not look to add any yellow tint. If anything, it might give the wood a very very slight brown tint.
Overall, I am probably going to use the Tung Oil since I think that it looks the most pleasing. Unfortunately, none of the wood fillers that I used on the plywood match well at at all with the finishes applied. Granted, maybe the difference will lessen in a day or two once the finish cures. The two putties in the photo are "natural" colored (the more yellow one) and "maple" colored (the more orange one). I used a lot of the natural colored one to fill imperfections here and there in the ply pieces, but for the screw holes I think that I will go with the maple colored one. If anything, it looks closer to the mahogany wood's color. Since I don't think that I will be able to find a filler that will effectively hide the holes, I figure that I might as well embrace the situation and fill things such that the holes provide some visual accents without being too "busy" to the eye.
http://www.e30tuner.com/speakerbuilding/images/fhxl_2021/fhxl_056.jpg
http://www.e30tuner.com/speakerbuilding/images/fhxl_2021/fhxl_055.jpg
So, there it is for the evening folks! It has been a while since I did much woodworking, but it is always great fun when I get to the point in a project where it feels like real progress is occurring. In this case, I am also eagerly awaiting the functional tests and listening!
Last edited:
I have thought about trying to chase the holes with a forstner bit to make a perfectly clean counterbore, filing with dowels and flush-trimming. It would be the cleanest solution although it also caries the most risk of "oops" haha. It would have been best if I had planned it in the first place and counterbored the holes before gluing anything (I suppose that I still can since 3 of 4 sides are still not glued). There are some small maple tapered plugs out there...
1/4" (inch) Maple Wood Plugs - Face/Side Grain | WidgetCo
I have a lot of ply scraps laying around, so I will try some experiments tonight. Thanks for the suggestion.
Worst-case, I use filler and it just adds a little bit of visual interest. Or, I keep searching for other fillers that have a better color match (seriously, there MUST be something out there).
The maple plugs you showed are nice since the grain is sideways!
Not sure it would really be visible though, as long as the color kinda matches.
I don't know where you live but there's plenty of choice around here. I'm lucky to live close to this store :
Dowels, caps & biscuits - Wood
Not sure it would really be visible though, as long as the color kinda matches.
I don't know where you live but there's plenty of choice around here. I'm lucky to live close to this store :
Dowels, caps & biscuits - Wood
For covering screw heads only, there are real wood veneer PSA caps made by Fastcap in a wide range of species - both raw and pre-finished - but I was thinking more of veneering the entire side panels. As best as I can recall from my several builds a few years ago, due to the curved shape of those panels, you’ll need a full 4x8 sheet of paper backed veneer for a pair of FHXL.
- Home
- Loudspeakers
- Full Range
- My FHXL Build Thread