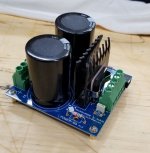
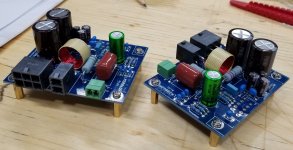
Started on my LM3886DR build.
Hello,
I opened a bunch of boxes tonight and started on my Neurochrome LM3886 Done Right build.
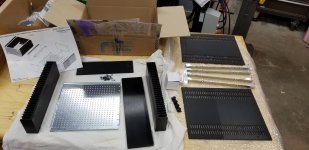
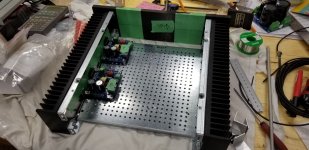
First thing, putting the Mini Dissipante 2U 330mm x 300mm case together.
Now I have to decide on a layout.
Parts were rather arbitrarily placed in the case and laid out around it.
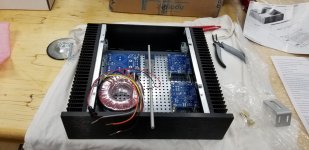
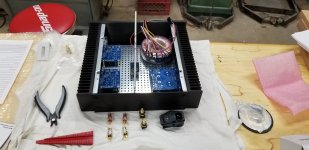
I have not seen any pictures of the LR3886DR with a toroidal power supply and a volume knob.
If I could, I would like to have the Alps volume control at the back and more to the right, or maybe between the two amp boards, but I would like to keep it centered vertically on the case front, and I don't know the clearance to the boards yet.
Otherwise, I would place it in the middle (as shown), but I am worried about it being too close to the power supply.
Any suggestions for layout?
Thank you,
David.
Hello,
I opened a bunch of boxes tonight and started on my Neurochrome LM3886 Done Right build.
First thing, putting the Mini Dissipante 2U 330mm x 300mm case together.

Now I have to decide on a layout.
Parts were rather arbitrarily placed in the case and laid out around it.


I have not seen any pictures of the LR3886DR with a toroidal power supply and a volume knob.
If I could, I would like to have the Alps volume control at the back and more to the right, or maybe between the two amp boards, but I would like to keep it centered vertically on the case front, and I don't know the clearance to the boards yet.
Otherwise, I would place it in the middle (as shown), but I am worried about it being too close to the power supply.
Any suggestions for layout?
Thank you,
David.
Last edited:
Hi David
PSU. well done. better would be a thermale past but your soludtion will work. check after the first hour operation if the temp is not bigger then 50-55°C.
layout:
yes you are right the volume knob must be in the middle -ok. i propose to give the transformer and the psu pcb the the front panel and let the axle go through that. then you should have place for both amps at the right and left heat sinks as closed as possible to the back panel. now you achieve to get short wiring between input-amp and amp- output terminals.
chris
The Keratherm strip between the rectifier and the heat sink should be fine. The rectifier doesn't get all that hot so the thermal goop is more of a precaution.
With a shaft extender you should be able to place the volume pot at the rear of the chassis. I seem to recall the height of the LM3886DR being about 35 mm, so it should be possible for the pot shaft to clear the LM3886DR. The tall boys on the board are the two supply bypass caps.
Tom
With a shaft extender you should be able to place the volume pot at the rear of the chassis. I seem to recall the height of the LM3886DR being about 35 mm, so it should be possible for the pot shaft to clear the LM3886DR. The tall boys on the board are the two supply bypass caps.
Tom
Last edited:
Substituting Hammond 1182N22 for Antek AN-2222 or AS-2222 Power-86
Hello Tom,
I purchased the Hammond 1182N22 toroidal transformer rather than the Antek AN-2222 or AS-2222 (in Canada Eh) and want to double check the wiring as the Power-86 instructions are for the Antek.
Does this look correct?
(I wrote the Hammond colours overtop the Antek ones.)
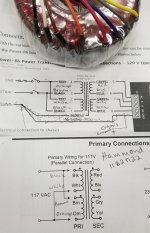
Also, note where I have the chassis ground for the Power-86.
If I do that, do I still need to ground J5 to the chassis?
Thank you,
David.
Hello Tom,
I purchased the Hammond 1182N22 toroidal transformer rather than the Antek AN-2222 or AS-2222 (in Canada Eh) and want to double check the wiring as the Power-86 instructions are for the Antek.
Does this look correct?
(I wrote the Hammond colours overtop the Antek ones.)

Also, note where I have the chassis ground for the Power-86.
If I do that, do I still need to ground J5 to the chassis?
Thank you,
David.
Is it just the five Electrolytic capacitors that are polarized?
And there is no polarity for the other 9 caps?
Thank you,
David.
Before soldering the chip to the board, I screwed the board and the chip to a piece of plywood so they would all lay flat on the side of the heatsink.
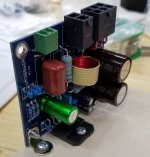
Soldering the boards is the easy part compared to putting it all in the case.
Lots of put the case together/take the case apart, rinse/repeat...
Doesn't help that I have not built any other amp before and don't really know what I am doing.
I marked/drilled/tapped all the mounting holes in the heatsink to mount the boards, chips and a couple of brackets to hold some wires.
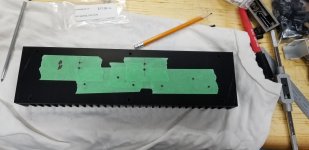
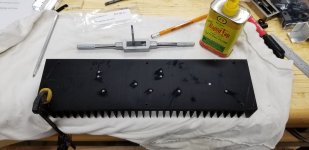

Soldering the boards is the easy part compared to putting it all in the case.
Lots of put the case together/take the case apart, rinse/repeat...

Doesn't help that I have not built any other amp before and don't really know what I am doing.
I marked/drilled/tapped all the mounting holes in the heatsink to mount the boards, chips and a couple of brackets to hold some wires.


Looks very good, one thing I would do different ....instead of mounting the chip and the board on a piece of plywood I would use a piece of aluminum flat bar or the actual heatsink.
Can you share with us what brand of the Drill Tap you are using, looks like you did a great job with that.
Can you share with us what brand of the Drill Tap you are using, looks like you did a great job with that.
Can you share with us what brand of the Drill Tap you are using, looks like you did a great job with that.
I am using USA made Champion tap and drill bit.
What made the biggest difference was the tapping fluid/oil, it went from hard to turn/lots of torque required/I can see the tap twisting/OMG will this snap? to, easy to turn with massively lower resistance.
Yeah. I think step 5 should have been:
5. Electrolytic capacitors: C2, C3, C11, C13, C14, and C15.
Typo on my end. My bad.
Tom
Why do you use a clip to hold the chip against the heatsink rather than directly attaching it with a screw?
Not Tom, but one reason is that you'll never lose screw tension through heating and cooling cycles. You also get a bit more wiggle room if the screw is improperly located.Why do you use a clip to hold the chip against the heatsink rather than directly attaching it with a screw?
You also get a bit more wiggle room if the screw is improperly located.
The wiggle room is the biggest reason.
What made the biggest difference was the tapping fluid/oil, it went from hard to turn/lots of torque required/I can see the tap twisting/OMG will this snap? to, easy to turn with massively lower resistance.
Always, always use cutting fluid when cutting threads. I use Relton A-9 Aluminum Cutting Fluid (not to be confused with A-1 Steak Sauce
Tom
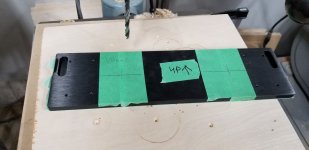
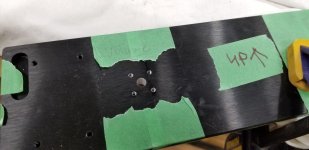
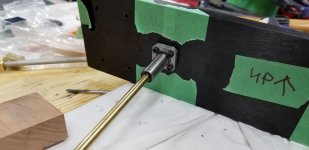
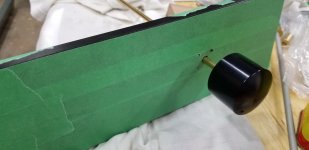
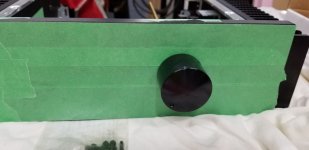
I added the volume knob to the front plate tonight.
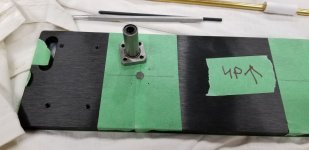
There is a very common volume knob extension available online and I bought one, but I didn't like how much play there was between the bushing the the shaft.
So instead, I bought a linear bearing from a 3D printer that rode on a 6mm shaft and mounted it to the front plate from behind. The picky me wanted to tap blind holes for the screws that held it, but the practical me won and I did through tapped holes knowing the front knob would hide the holes.
Much less play with this set up.


- Home
- Amplifiers
- Chip Amps
- Neurochrome LM3886DR Build
