Mine says pending too. Since the website says “in stock” it looks like they made a few extras for anyone wishing to take part.
Modushop update: Yarra cases shipping 6/26/19
Hello Yarra builders,
The remaining cases will ship out tomorrow. Yahoo!
...And if you missed the Group buy, there will be cases available to purchase on the Modushop website 😀 (quantities will be updated after tomorrow)
Hello Yarra builders,
The remaining cases will ship out tomorrow. Yahoo!
...And if you missed the Group buy, there will be cases available to purchase on the Modushop website 😀 (quantities will be updated after tomorrow)
I ordered mine on the modushop website and it arrived yesterday. LIPPO DI CALDERARA Italy, Memphis, Spokane then Clarkston. Fast shipping.
Received mine today in Alaska. It shipped Thursday, in state on Saturday, here this morning before 8am. That’s fast!
Dankeschon JPS64 und Ehefrau!
Dankeschon JPS64 und Ehefrau!
I realize these are 90 degree. With a little elbow grease you can switch the positioning pins and bend the leads back straight. I've done it with success on my AKSA Lender Preamp board.
How did you switch the positioning pins?
Can they be pulled out, an jammed into the other posttion?
How did you switch the positioning pins?
Can they be pulled out, an jammed into the other posttion?
... Yes they can, just make sure you buy the ones with holes in the back for the positioning pins.
I see you answered your own question there, Henrik! That’s correct, I took the pins out with a needle nose pliers and put them back into the existing holes in the bottom. You have to be careful not to crack the plastic when putting them back in though. It’s quite brittle. Good luck!
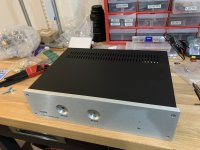
I opened my box of Yarra cases today. I have to say, I am utterly impressed with the quality of the work. I was not prepared for the sheer size of the box. It looks more like a Class AB power amp case. The front panel is thick thick thick machined aluminum. The lettering paint is so thick it raised. Anyhow, thank you to JPS64 and his wife for making such an incredible professional case available to us.

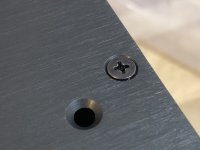
Some dryfit tests... the case fits together very nicely and countersunk screws are nicely flush.

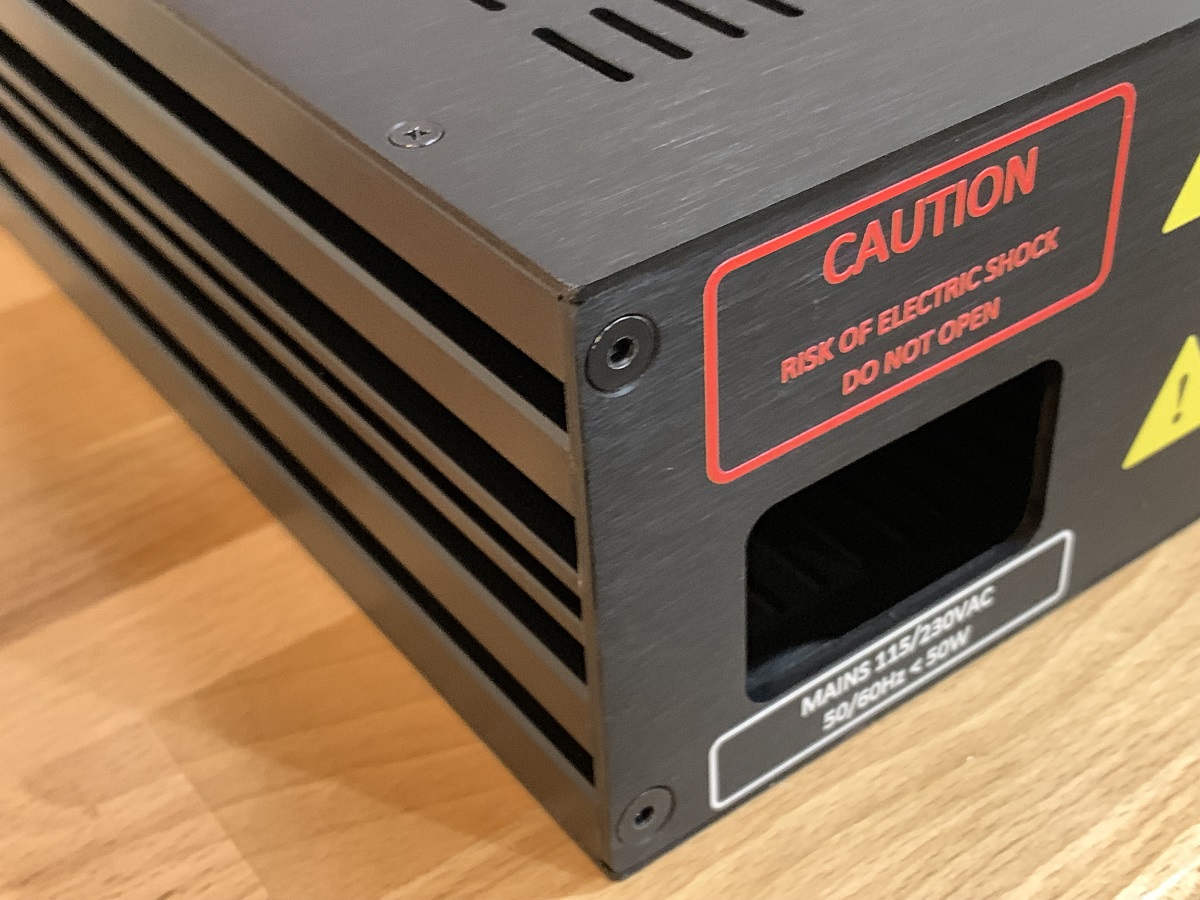


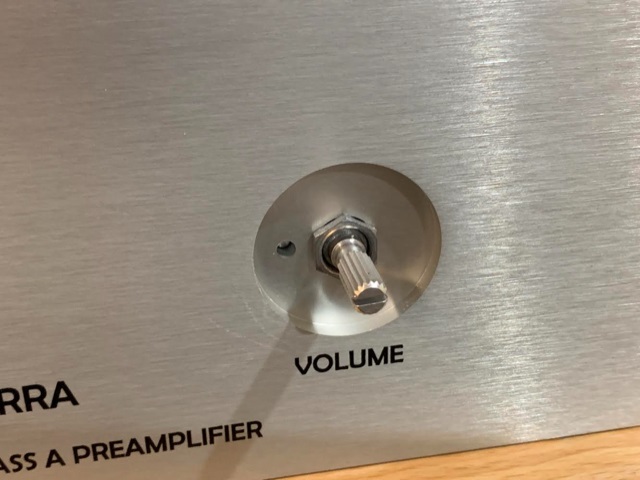

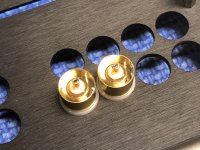
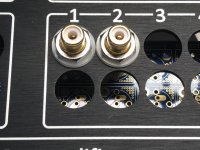
The front panel is very thick 10 mm aluminum and has a countersink for the volume pot knob. However, the countersink depth may not be deep enough for some pots.
The RK09 that I usually use does not fit, but the Alps RH2702 stepped attenuator does have about 2 threads to work with. If you have a pot with a long threaded shaft collar,
that will work out better.
Attachments


Last edited:
Looking good X, the Oz contingent including Hugh should all get their Yarra chassis delivered next week.
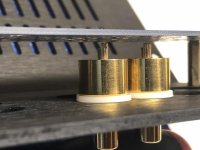
I wasn't able to get the Alps or the TKD pot threaded to the front panel after mounting the pots to the PCB adapter. Ideally the panel would be countersunk even more, etc. For now my shaft is floating and I'll count on the inset knob to stabilize further. I have the little pot boards on headers to facilitate swapping (i.e., not soldered to the main board).
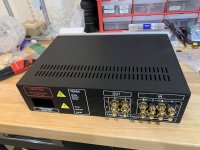
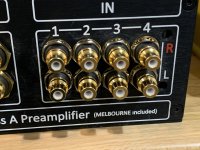
The rear I/O board will also need some center support to avoid flexing when attaching/removing tight connectors. The RCA spacing is too close to fit all the nuts.
Not complaining, just pointing out for upcoming assemblers....
BK
The rear I/O board will also need some center support to avoid flexing when attaching/removing tight connectors. The RCA spacing is too close to fit all the nuts.
Not complaining, just pointing out for upcoming assemblers....
BK
I am ordering these to try, they might help since they are skinnier.
1-329631-2 TE Connectivity / AMP | Mouser
But if you have not bought the RCA jacks on the BOM, these made by Manley are very low profile.
1-329631-2 TE Connectivity / AMP | Mouser
But if you have not bought the RCA jacks on the BOM, these made by Manley are very low profile.
I am ordering these to try, they might help since they are skinnier.
1-329631-2 TE Connectivity / AMP | Mouser
But if you have not bought the RCA jacks on the BOM, these made by Manley are very low profile.
Low-profile jam nut is a potentially great solution for the rear!
I was thinking of a pair of round nylon standoffs midway along the I/O pcb with a notch to secure the pcb edge. Or a purpose-built pcb edge holder.
BK
The Manley RCA jacks fit the rear panel with the mounting nut. Since they are individually mounted the pcb is not stressed when attachment/removal of interconnects is done. They need to be soldered to the pcb with short lengths of small gauge solid core wire for signal and ground.
MANLEY RCA Gold-plated & Teflon phono jack Brand NEW! | eBay
MANLEY RCA Gold-plated & Teflon phono jack Brand NEW! | eBay
Attachments
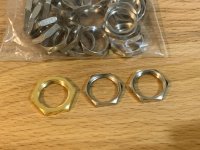
Good news about the those skinny RCA nuts - they fit (almost exactly). You need to screw them on before the connectors are soldered in place to allow a bit of wiggle room.
I ended up getting these:
1/2-28 HEX TRIM NUTS NICKEL - 50 pcs | eBay
I ended up getting these:
1/2-28 HEX TRIM NUTS NICKEL - 50 pcs | eBay
Attachments
Last edited:
1 question, how do you fit the lid once the unit is built up? It slides in from front or rear, but with both panels on you can't do that.
- Home
- Group Buys
- YARRA Preamplifier Custom Case at Modushop