Over in the FH9HVX thread, I proposed a $10, 10lb cast iron griddle for use as a heatsink for a budget conscious amp build. I think folks were thinking that I was kidding... I know, cast iron is not very thermally conductive like aluminum or copper. However, for modest heat loads of a Class AB amp, it might be perfectly acceptable. We all know that the heatsink and chassis is one of the most expensive parts of an amplifier. The FH9HVX amp has a basic BOM that is about $32, the boards are another $40/pair. Depending on what you use for the PSU, you could use a $20 Abeltec SMPS (a buyout from years ago), or perhaps a $32 toroidal trafo and some bulk caps. But when it comes to the heatsink, a typical one from Heatsinksusa will set you back about $70 a pair, cut and shipped. Sure, they are aluminum and look like real heatsinks. But we are talking about a buget conscious amp here. One that still sounds great and can belt out 100w into 8ohms with 0.003% THD with only a pair of Fairchild FQA MOSFETs.
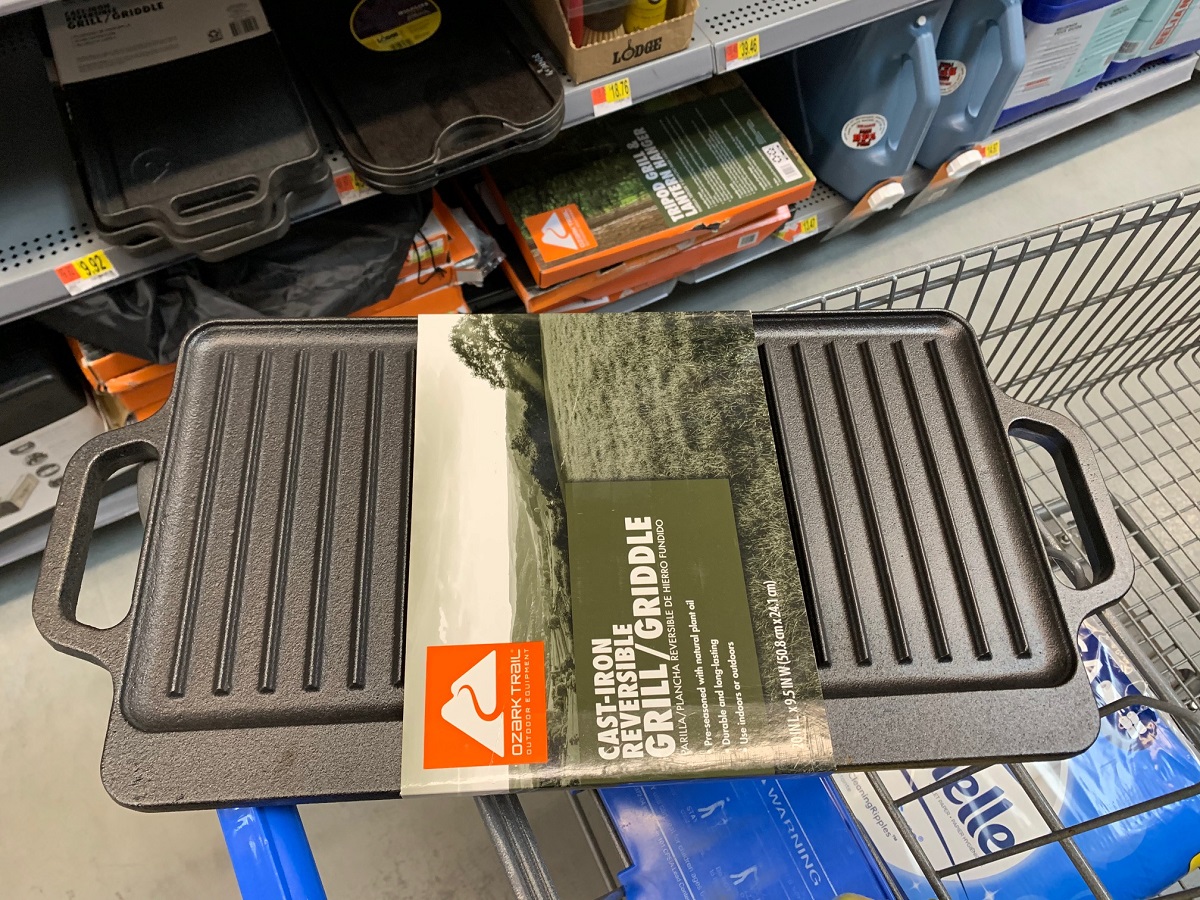
So I went to my local Walmart (or you can look for one at secondhand store, an Army/Navy surplus store, etc). If you can find an old cast aluminum griddle even better. This one is available from Walmart for under $10.
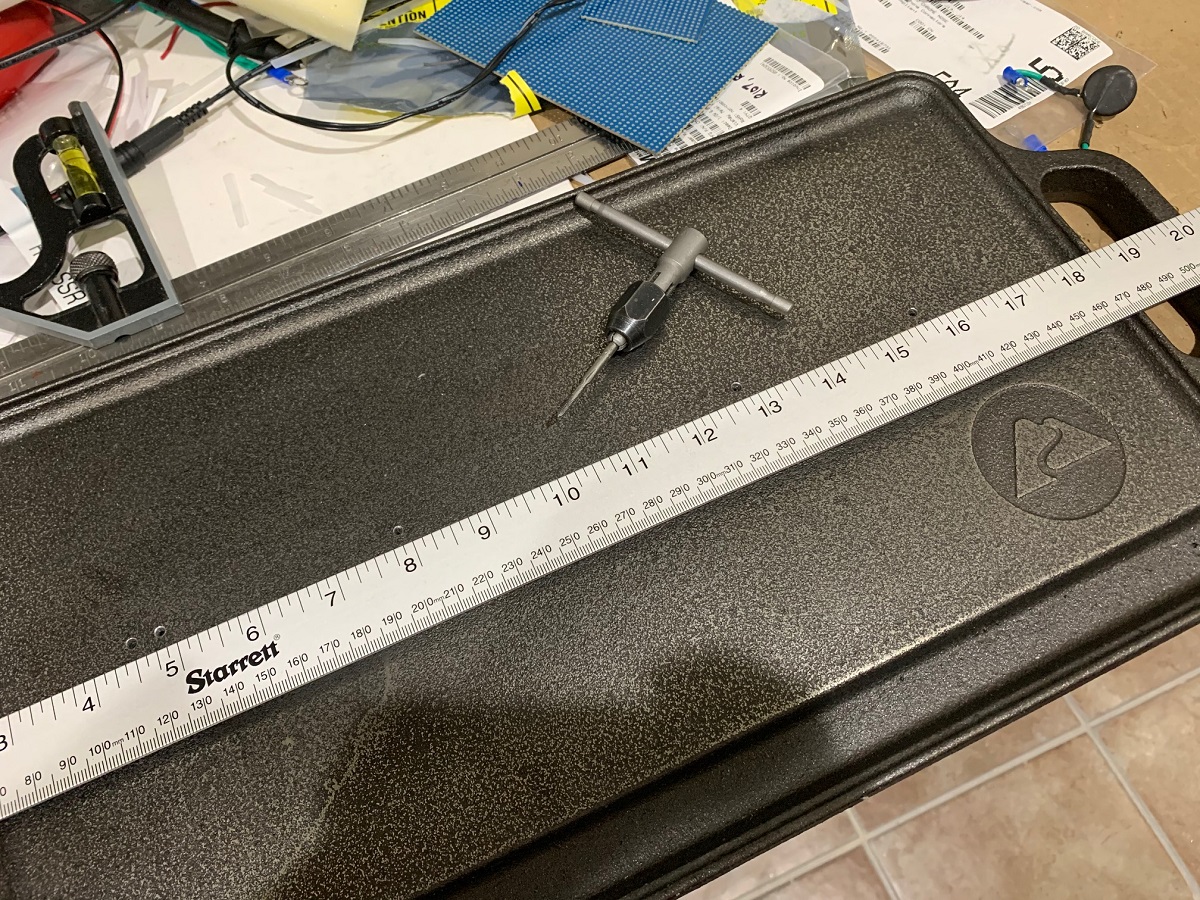
I had to do a little bit of sanding to get the surface smoother and more likely to transfer heat better. The drill and tap 4-40 or M3 tapped holes where you want to put the MOSFETs (I spaced them out evenly). Cast iron is very soft and drill and tap operation is like butter:
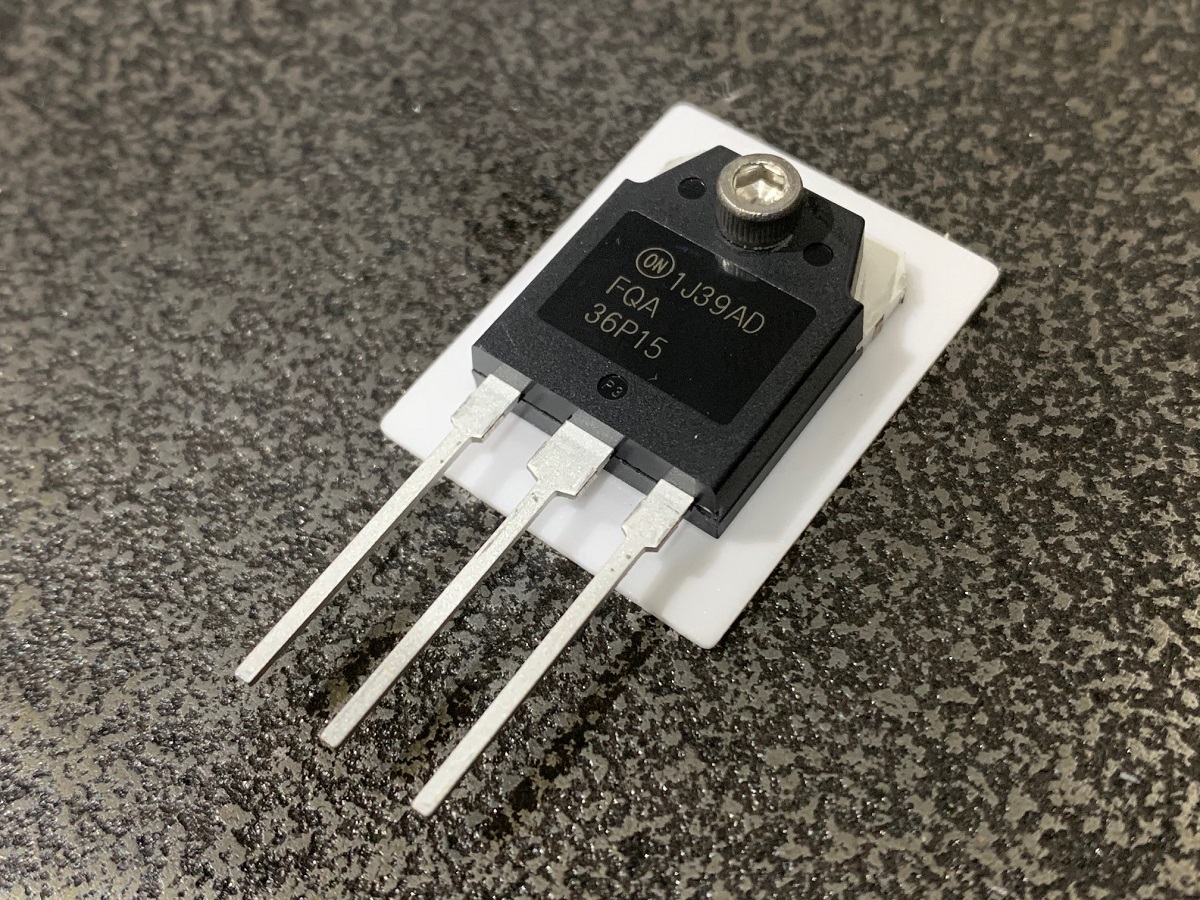
Here is a MOSFET mounted with a ceramic spacer (thermal paste will be required):
For the FH9HVX, I decided to use silicone insulators since the heat load was not that great and I think the silicone will conform to the texture of the cast iron better:
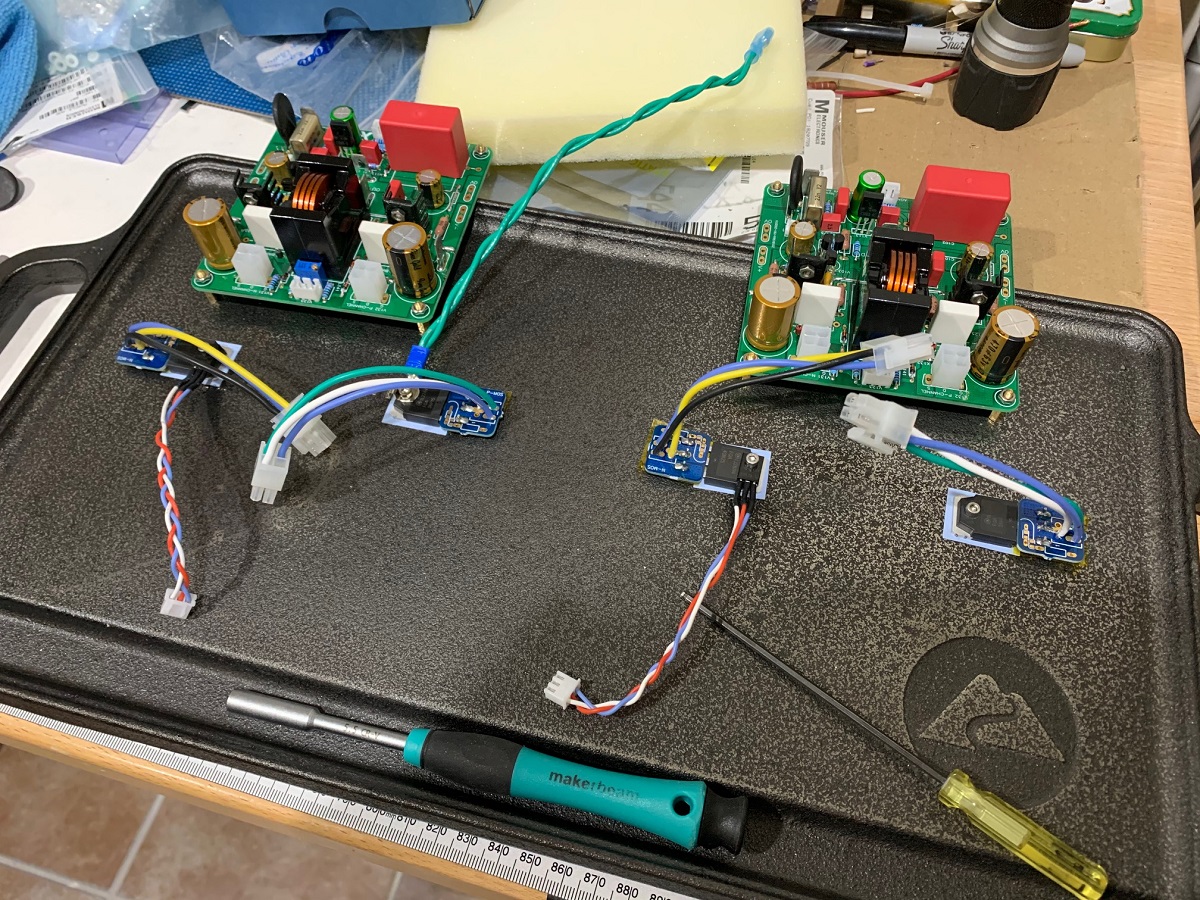
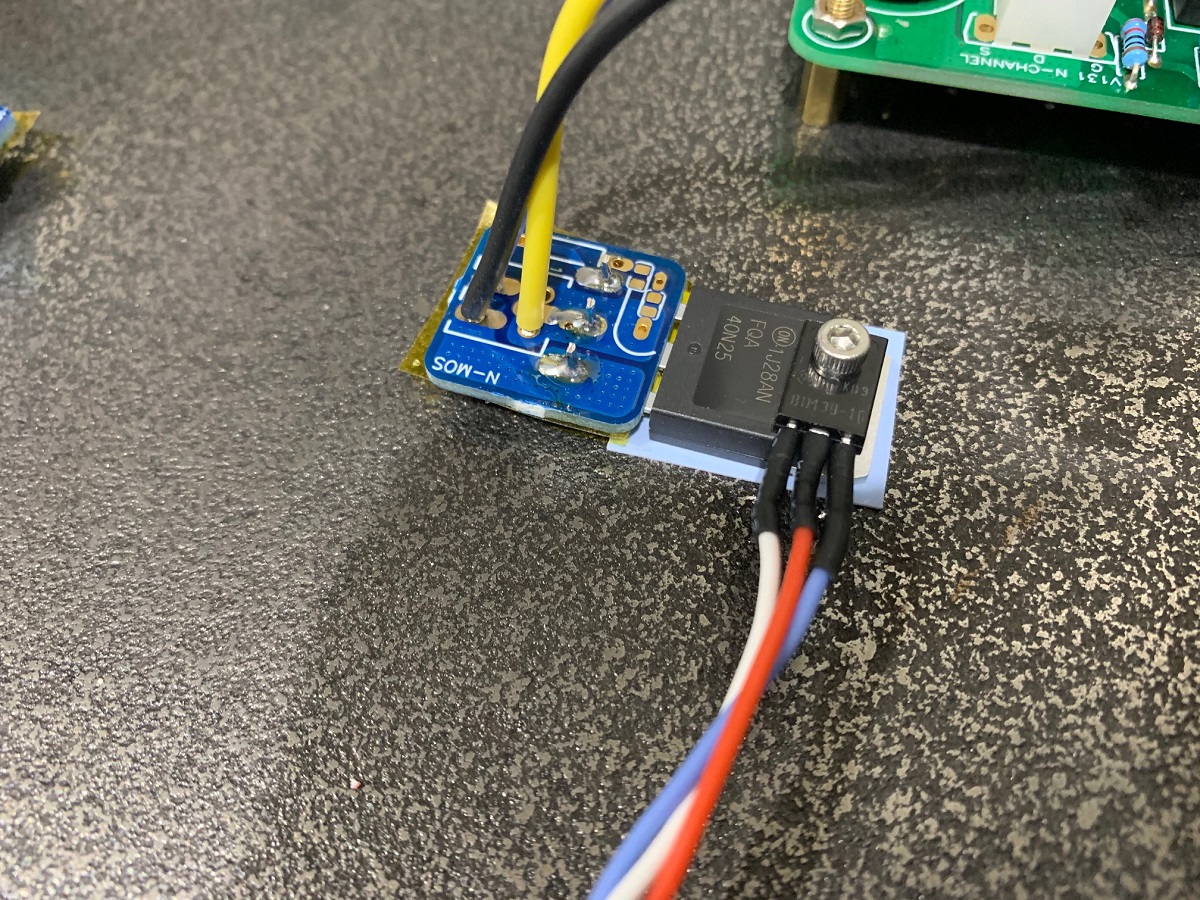
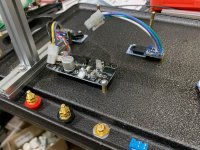
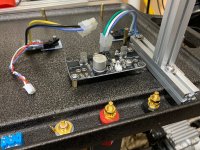
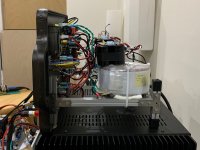
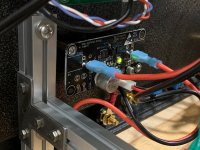
I am using little helper "snubber" boards to allow remote mounting of the MOSFETs which really simplifies the installation of the amp. The boards have built-in RC "snubbers" in case we run into oscillation issues. The snubber boards help to reduce the mechanical stress on the pins and the wires. I use ultrasoft silicone insulation, supple and soft high strand count RC race car wires for the wiring harnesses between the MOSFETs and the PCB. We used Molex Minifit Jr locking connectors for the MOSFETs. This lets me remove an amp in under 2 minutes. Thi s is the N-ch with a Vbe multiplier temp compensation sensor:
Here is the P-channel mounting:

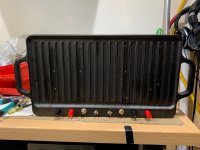
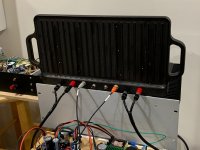
Here is the amp being tested using the griddle:
Here is the first sound of the FH9HVX amp - all went smoothly and the amp sounds great. The amp is running +/-35v at present and 150mA current. Playing music at normal listening levels, the griddle is about 39C near the MOSFET and barely warm 5 inches away. MOSFET body temp is about 52C.
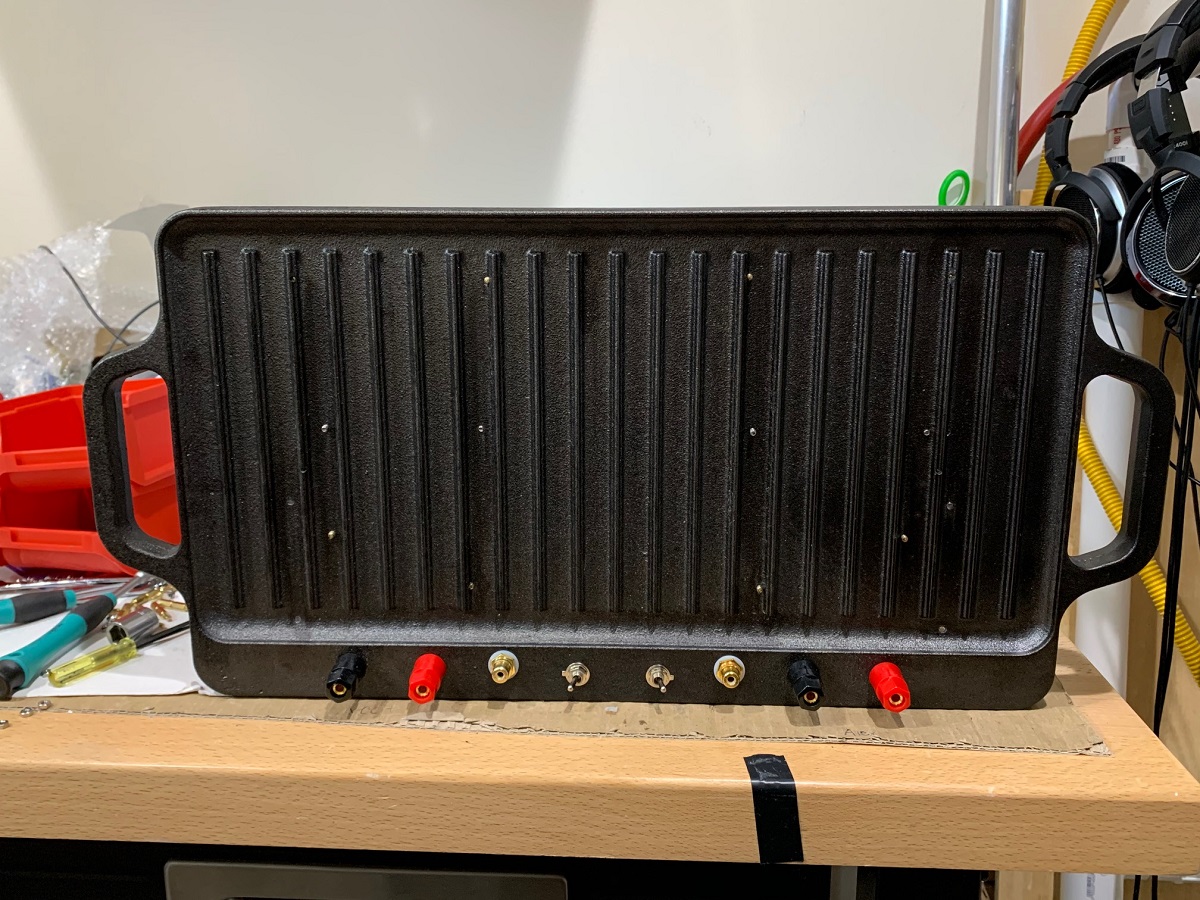
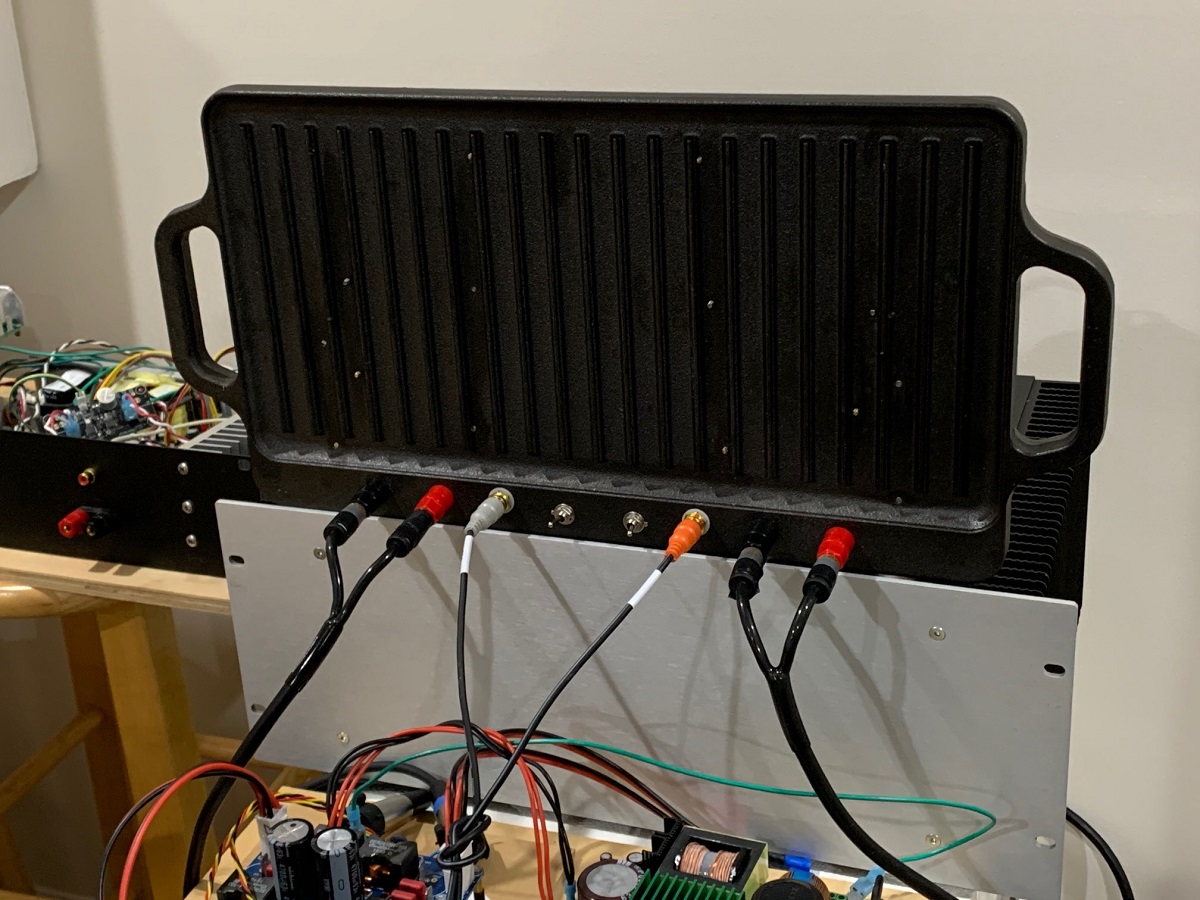
So far this is working out real well. I will install RCA jacks and binding posts for speaker out in the horizontal "grease well" as it provides a flat bulkhead. I will install a MakerBeam frame on the back for the trafos and PSU's, and the griddle will sit up vertically rather than flat and horizontal. That should help the natural convection cooling somewhat. It mught be fun to try this on a Class A like the Alpha Nirvana.
The Griddle Amp works well for a budget heat sink solution. It is really tough to find a heatsink for a 100w+ capable Class AB amp for under $10.
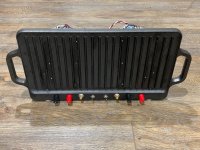
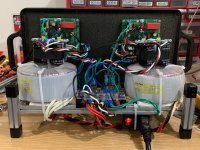
Here is the completed amp:

So I went to my local Walmart (or you can look for one at secondhand store, an Army/Navy surplus store, etc). If you can find an old cast aluminum griddle even better. This one is available from Walmart for under $10.
I had to do a little bit of sanding to get the surface smoother and more likely to transfer heat better. The drill and tap 4-40 or M3 tapped holes where you want to put the MOSFETs (I spaced them out evenly). Cast iron is very soft and drill and tap operation is like butter:
Here is a MOSFET mounted with a ceramic spacer (thermal paste will be required):
For the FH9HVX, I decided to use silicone insulators since the heat load was not that great and I think the silicone will conform to the texture of the cast iron better:
I am using little helper "snubber" boards to allow remote mounting of the MOSFETs which really simplifies the installation of the amp. The boards have built-in RC "snubbers" in case we run into oscillation issues. The snubber boards help to reduce the mechanical stress on the pins and the wires. I use ultrasoft silicone insulation, supple and soft high strand count RC race car wires for the wiring harnesses between the MOSFETs and the PCB. We used Molex Minifit Jr locking connectors for the MOSFETs. This lets me remove an amp in under 2 minutes. Thi s is the N-ch with a Vbe multiplier temp compensation sensor:
Here is the P-channel mounting:
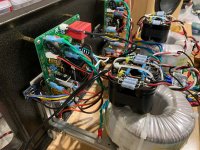
Here is the amp being tested using the griddle:
Here is the first sound of the FH9HVX amp - all went smoothly and the amp sounds great. The amp is running +/-35v at present and 150mA current. Playing music at normal listening levels, the griddle is about 39C near the MOSFET and barely warm 5 inches away. MOSFET body temp is about 52C.
So far this is working out real well. I will install RCA jacks and binding posts for speaker out in the horizontal "grease well" as it provides a flat bulkhead. I will install a MakerBeam frame on the back for the trafos and PSU's, and the griddle will sit up vertically rather than flat and horizontal. That should help the natural convection cooling somewhat. It mught be fun to try this on a Class A like the Alpha Nirvana.
The Griddle Amp works well for a budget heat sink solution. It is really tough to find a heatsink for a 100w+ capable Class AB amp for under $10.
Here is the completed amp:
Last edited:

Or with a cheap frying pan cook eggs!
One temporary technique I've used when testing amp designs is to mount output devices on a small flat slab of Al, which I then rest a diecast box on using thermal paste. Half-fill the diecast box with water for cheap thermal mass 🙂
The box can subsequently be used in some other project as its not modified.
For extended testing at power you can remove/replace the water with a turkey-baster or similar, which is also a good test of thermal stability if you monitor idle current during the temperature drop.
Yes, old fry pans work too. Round ones are a bit harder to stand up on their edges though. A lot of water is a good way to sink Class A loads too.
I prefer to rely on fast dissipation. i.e. high conductivity materials, to shift the heat quickly from the chips, then worry about dissipating that heat to the air etc. by attaching whatever makeshift thick and flat metal materials are at hand, to the slab - perhaps like those you're using already.
It doesn't matter what metals you attach to the slab, as long as it distributes the heat efficiently such that it doesn't get close to the max. case temperature limit of the semis. We should be careful though, that temperatures which rise slowly because of poor thermal conductance, don't continue to rise unchecked when we aren't watching.
If you wouldn't know what was too hot or just fine, get an inexpensive K type pyrometer probe or bare thermocouple and lead for your DMM if one didn't come with it. Otherwise buy a separate, hand-held budget instrument. Mine cost all of $15 delivered and is good for 1.5% accuracy or better, over 2 ranges.
Yes, perhaps a 1/4in thick aluminum heat spreader bolted to the griddle and spreading the heat from the MOSFET to a wider area would be good for Class A. For the 100w Class AB amp, I measure 52C on the MOSFET body (IR thermometer). I have also made OLED display thermometers with logic for sensing thresholds and acting on it using a $2 ATTiny85 MCU and small NTC themistor. That will not be needed for the FH9HVX, but perhaps the Alpha Nirvana could be helpful. About 1% accuracy from -50C to 150C.
Nice work to keep the project moving ahead regardless!
I prefer engine parts myself.
Briggs and Stratton Cylinder Head 790169 24847086300 | eBay
I prefer engine parts myself.
Briggs and Stratton Cylinder Head 790169 24847086300 | eBay
Great idea to use engine parts. You mig also try surplus Dell all aluminum heatsinks.
Lot of 5 Dell RC651 Heatsink for Dell Dimension & Optiplex Tower Systems | eBay
Lot of 5 Dell RC651 Heatsink for Dell Dimension & Optiplex Tower Systems | eBay
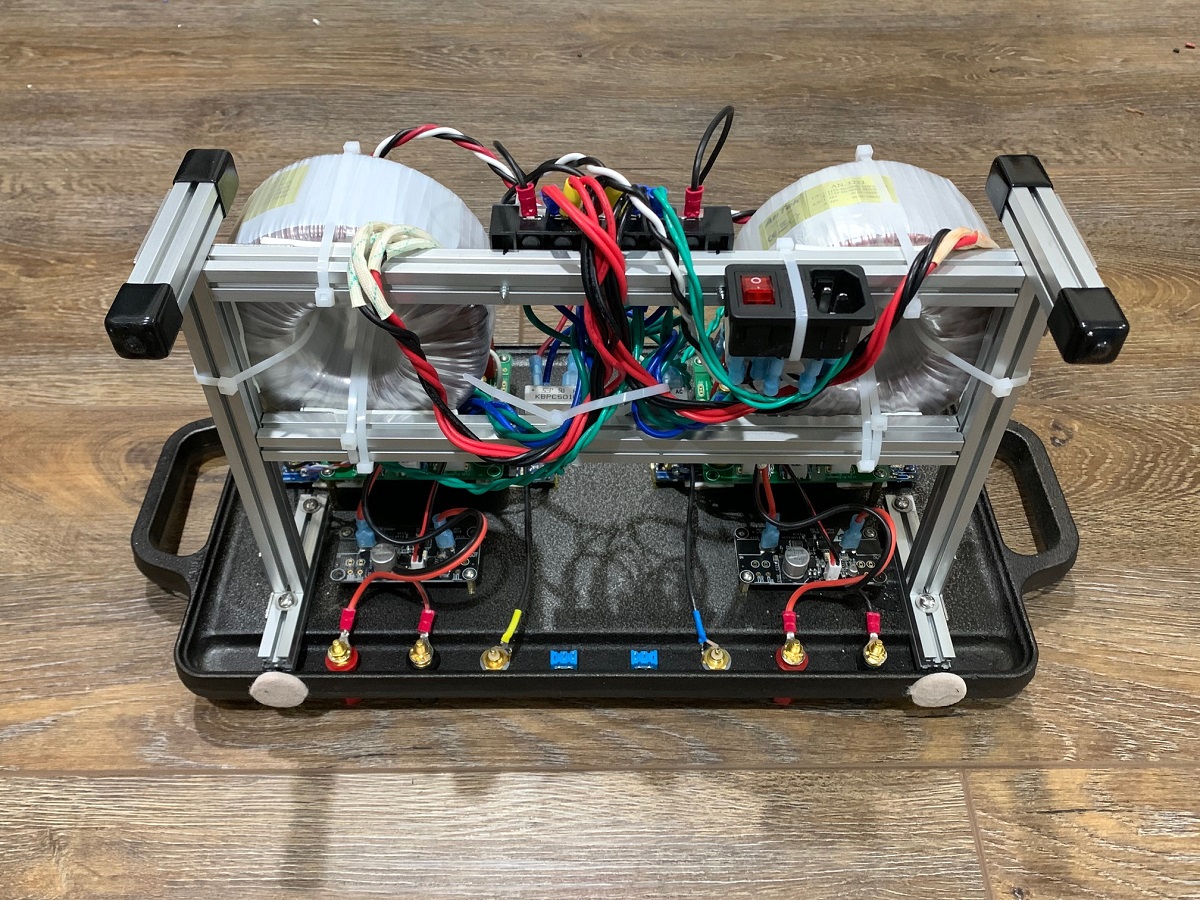
Some progress... MakerBeam XL framing for the rear support structure. All holes on griddle drilled and tapped. Holes for speaker output binding posts, RCA inputs, and some toggle swithes which I may use for a remotely enabled softstart or some sort of Arduino controller. Could be simple as shorting inputs to ground to enable pluggin/unplugging signal cables upstream.


Attachments

Last edited:
 Well done X. Some awesome creativity, as always. Maybe not the right amp to take with onboard the SpaceX Dragon, but I am certainly interested in building one. Looking forward to see more builds and sound impressions.
Look what Vunce found 19in x 10in cast aluminum griddle with a smooth back!
High Load | Bed Bath and Beyond
Only $30 - still a better price than regular heatsinks of this size.
High Load | Bed Bath and Beyond
Only $30 - still a better price than regular heatsinks of this size.
Last edited:
Very cool project you have there, I want to see the outcome.
I’ve actually used a short length of extrusion similar to what you are using on your frame as a transmission oil cooler for a car once. Used the table saw to cut kerfs into it to serve as cooling fins.
I’ve actually used a short length of extrusion similar to what you are using on your frame as a transmission oil cooler for a car once. Used the table saw to cut kerfs into it to serve as cooling fins.
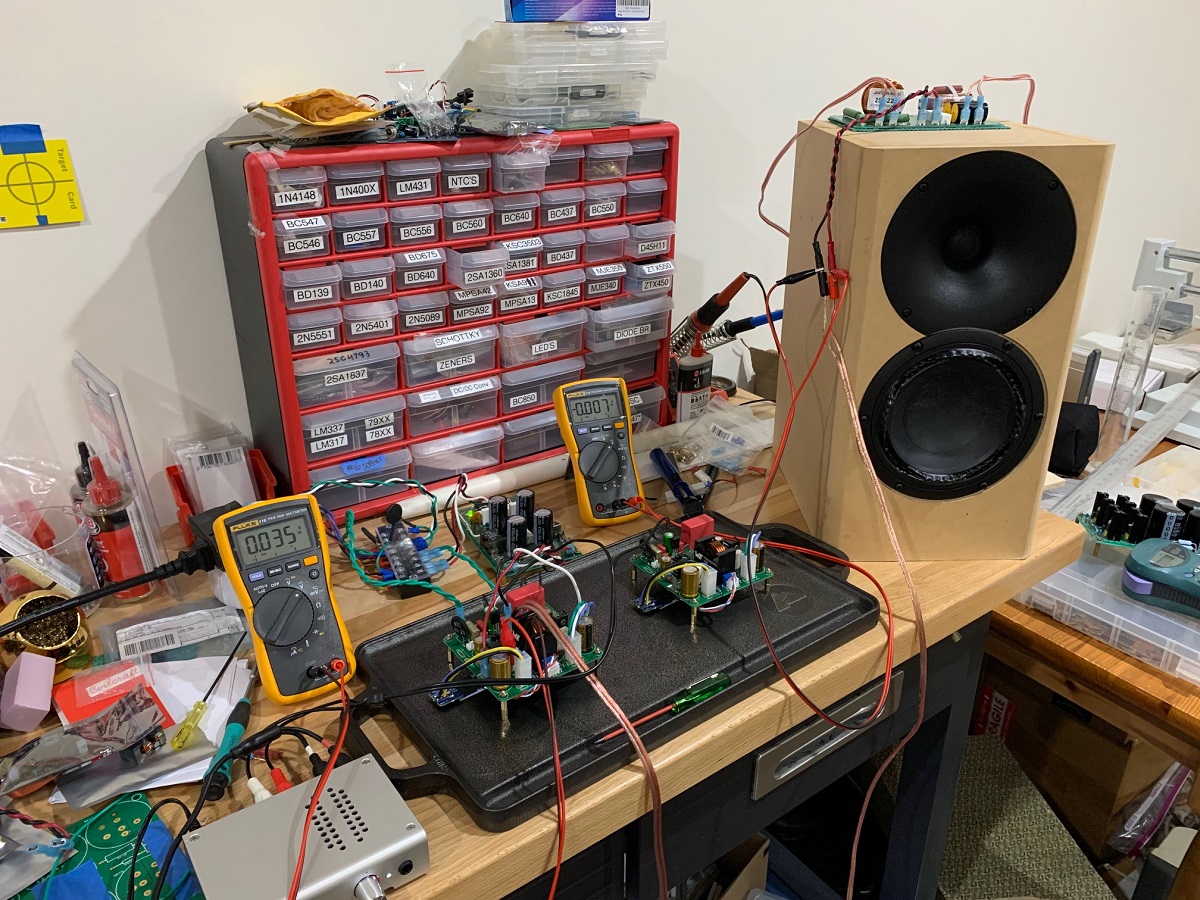
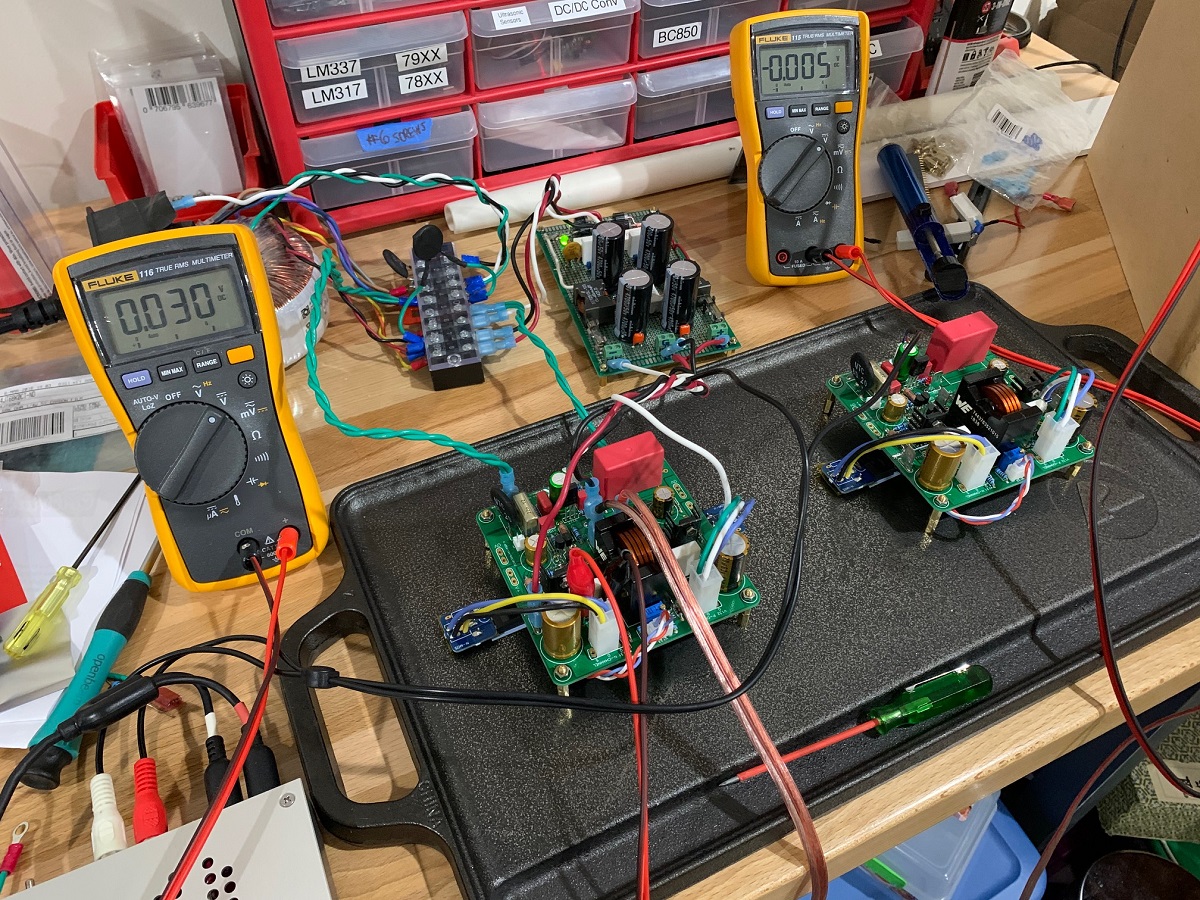
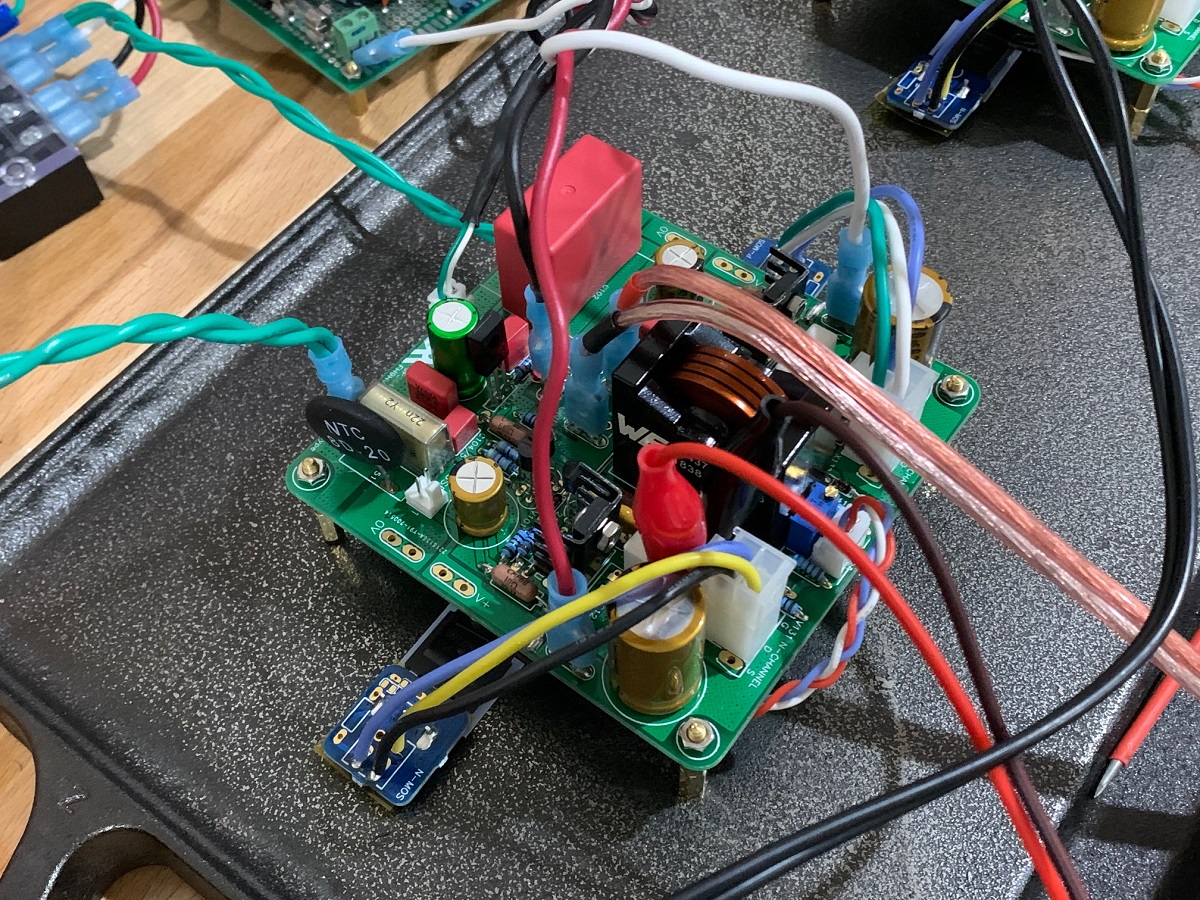
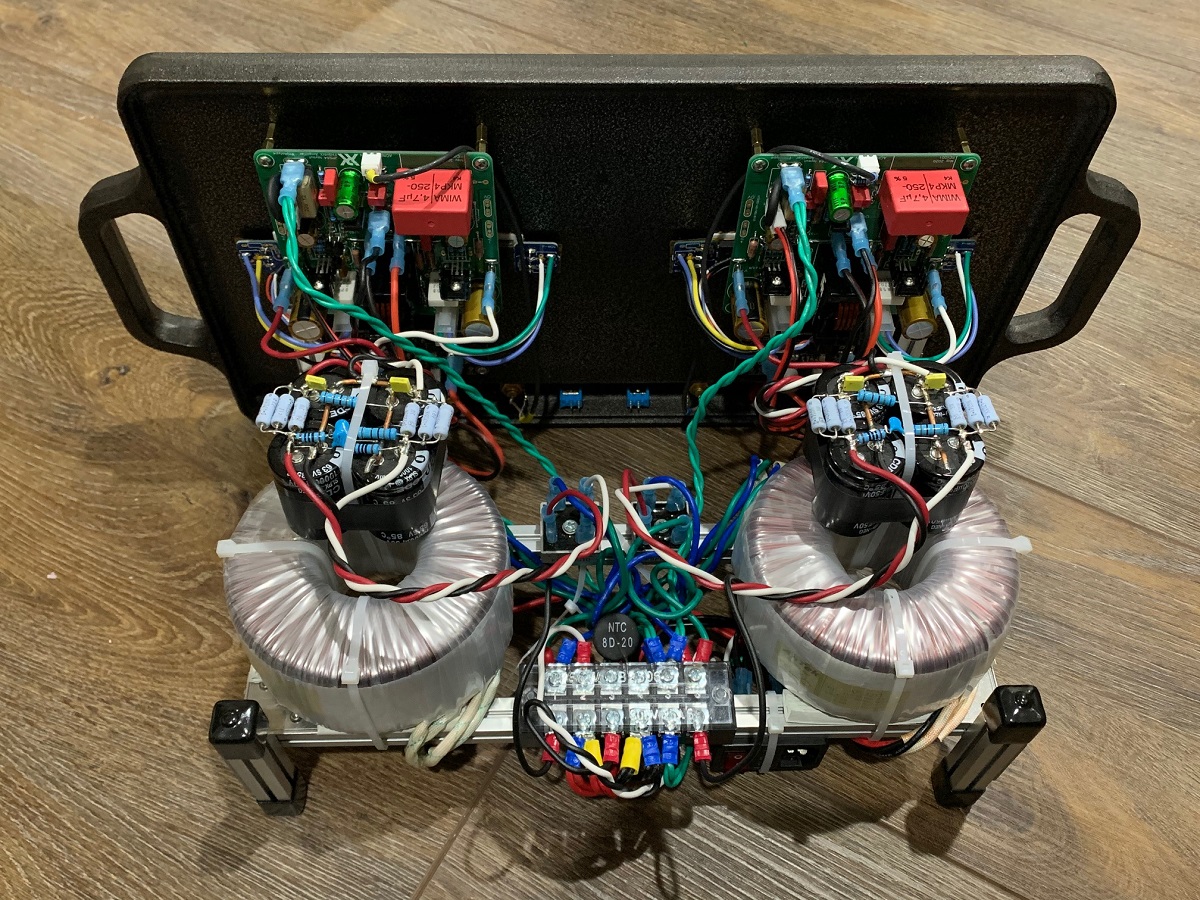
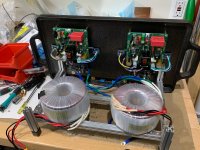
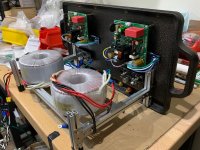
I finished the amp and listening to it now on my 10F/RS225 FAST TL speakers. What a great combination. Dual monoblock construction with two Antek AN-3232 trafos. PSU is 4x 10,000uF 50v caps in CRC with ~0.1ohm. I might jumper the R later to see if that helps the amp. I am getting +/-44v with quiescent bias current of 150mA.
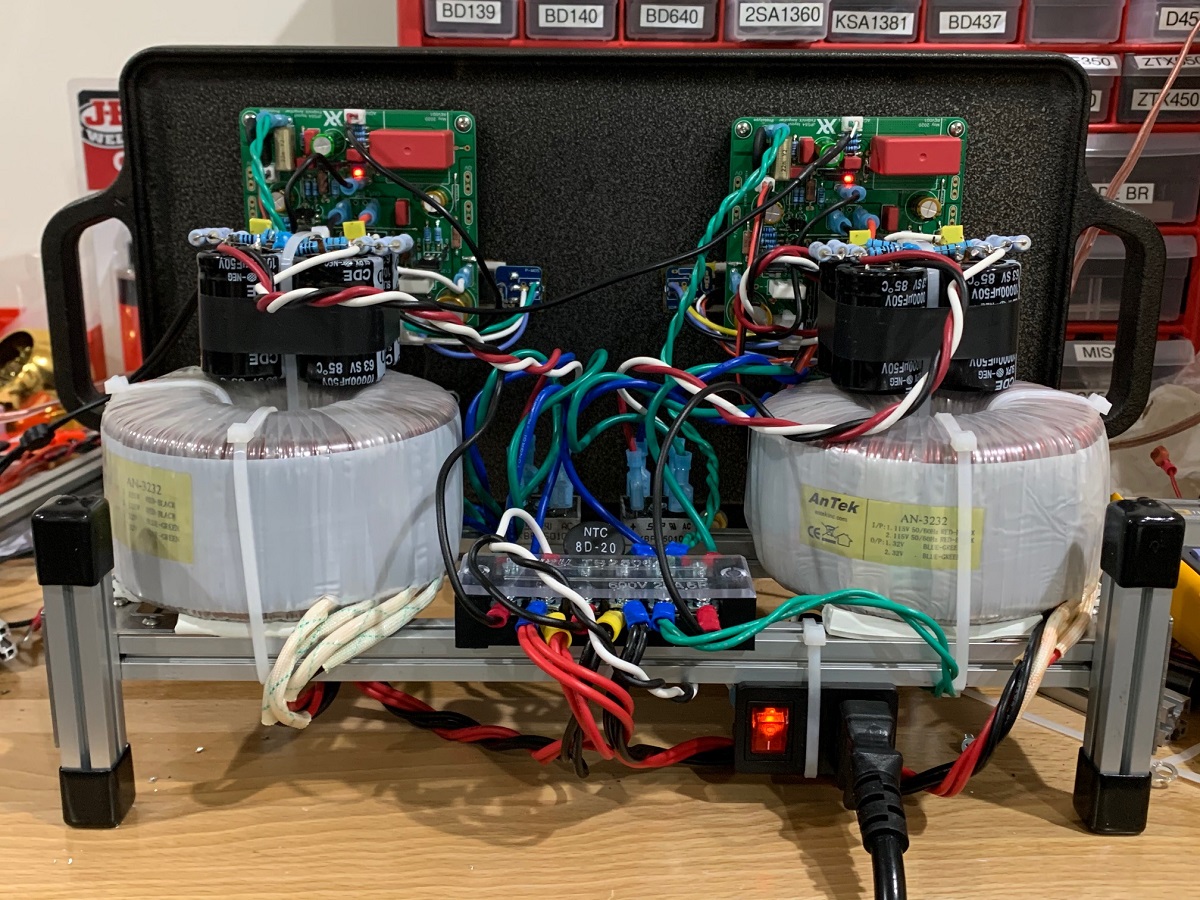


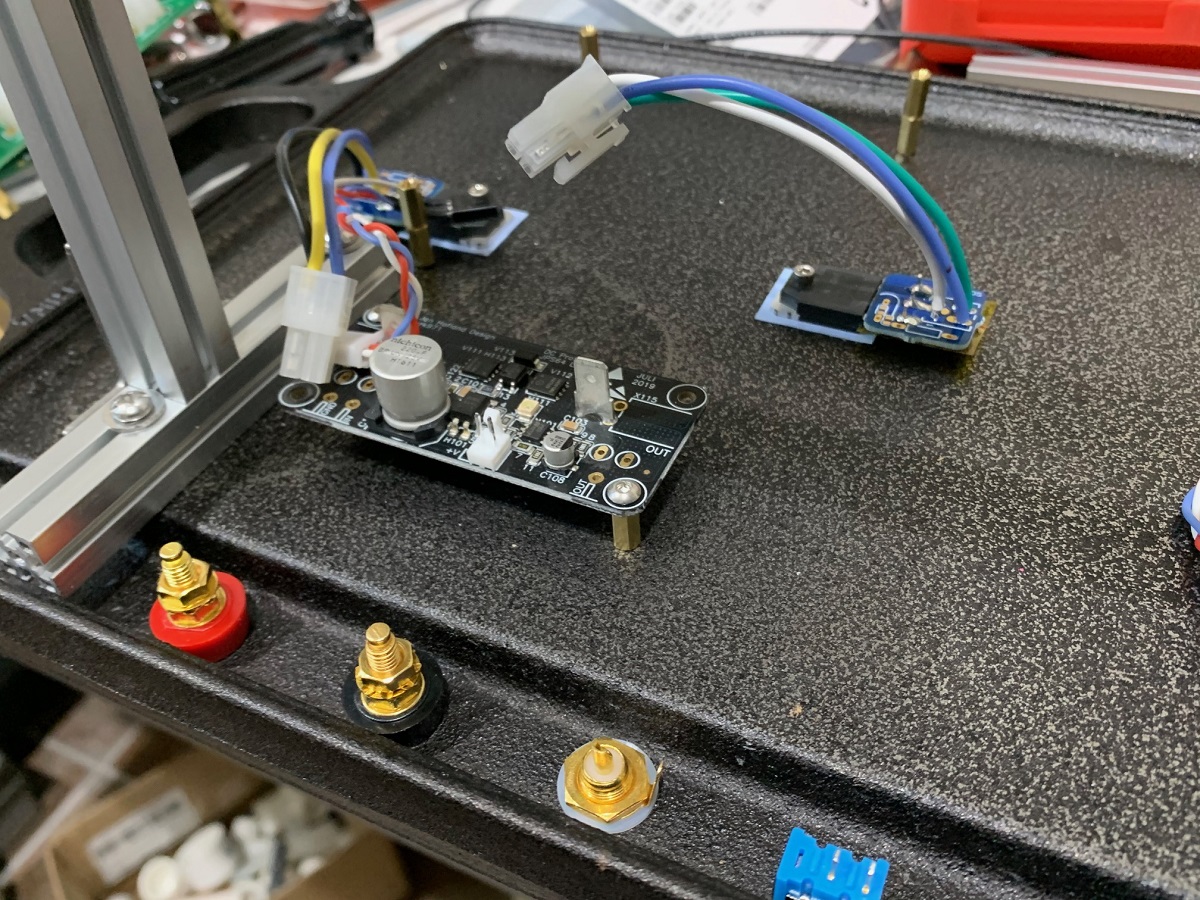
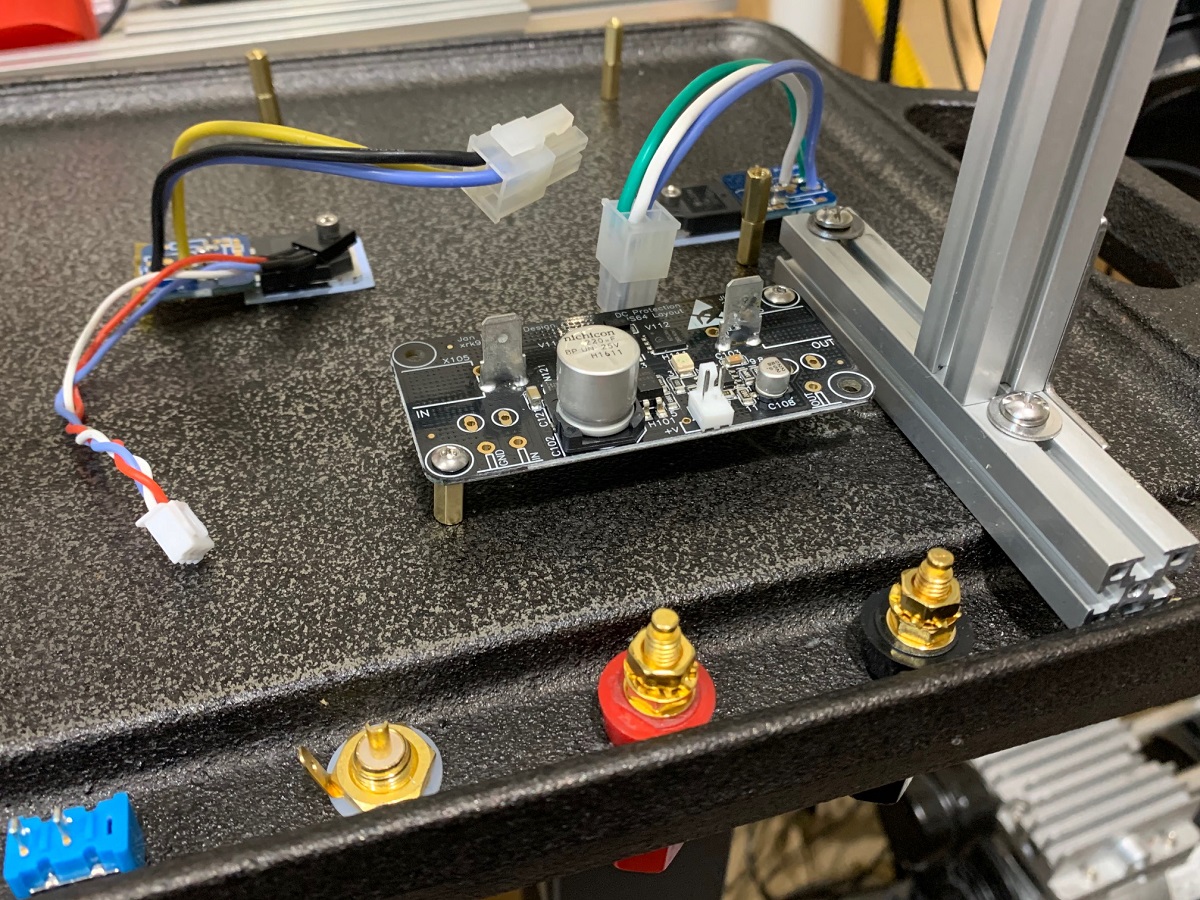
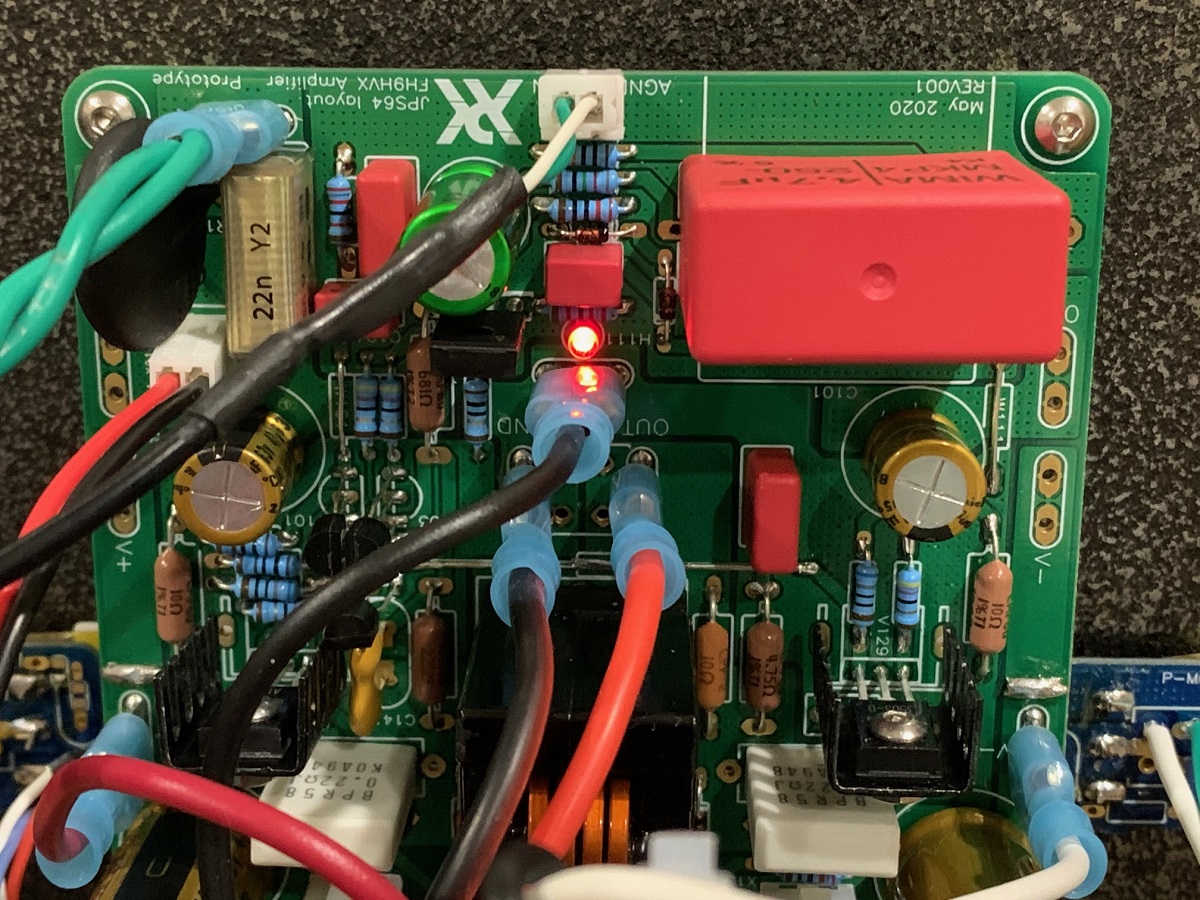
SSR speaker protection circuit is a must at therse voltages:


SSR speaker protection circuit is a must at therse voltages:
Attachments
-
 Griddle-Amp-Final-09.jpg286.8 KB · Views: 1,119
 -
 Griddle-Amp-Final-08.jpg304.2 KB · Views: 1,815
 -
 Griddle-Amp-Final-07.jpg467.1 KB · Views: 4,591
 -
 Griddle-Amp-Final-06.jpg477.6 KB · Views: 2,351
 -
 Griddle-Amp-Final-05.jpg421 KB · Views: 1,121
 -
 Griddle-Amp-Final-04.jpg455.3 KB · Views: 2,347
 -
 Griddle-Amp-Final-03.jpg500.2 KB · Views: 3,018
 -
 Griddle-Amp-Final-02.jpg528.5 KB · Views: 28,426
 -
 Griddle-Amp-Final-01.jpg425.1 KB · Views: 3,665
 -
 Griddle-Amp-Final-10.jpg299 KB · Views: 1,803
Last edited:
Thanks!
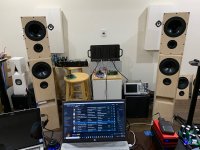
Got to play it loud today since it was finished in the wee hours of the night. It sounds fantastic with some unbelievable bass authority. Very smooth and clean amp. No fatigue - just the opposite. You want to listen more and more of your collection.
The FH9HVX with 100w on tap is a superb sounding amp at a budget price BOM wise. Now paired with a budget heatsink we can really make this amp accessible to everyone.
- Home
- Amplifiers
- Solid State
- The Cast Iron Griddle Amp - a Budget Conscious Heatsink Solution