DAC Boards
Hi,
you could email Pedja through his WWW site.
Also, the schema you showed above is a Nonos 1543 DAC - Pedja's DAC is a 1541A. Why not build both?
You can get a nice board (or kit) from Scott Nixon (DacKit) - I built one and it sounds very nice indeed through my TX102 volume control and mono amps.
The 1541A apparently sounds more "analogue" than the 1543 - I am looking forward to comparing the two! 😀
HTH
Jon
Jon,
I've built both Pedja's 1541a DAC and Scott Nixon's simple 1543 DAC and there is NO comparison. Pedja's DAC is in an entirely different league and is as good as any DAC I've heard. You should definitely get going and build it - you won't be disappointed.
---Gary
I've built both Pedja's 1541a DAC and Scott Nixon's simple 1543 DAC and there is NO comparison. Pedja's DAC is in an entirely different league and is as good as any DAC I've heard. You should definitely get going and build it - you won't be disappointed.
---Gary
Member
Joined 2002
Re: DAC Boards
What is Scott's Webpage ?
jonclancy said:Hi,
you could email Pedja through his WWW site.
Also, the schema you showed above is a Nonos 1543 DAC - Pedja's DAC is a 1541A. Why not build both?
You can get a nice board (or kit) from Scott Nixon (DacKit) - I built one and it sounds very nice indeed through my TX102 volume control and mono amps.
The 1541A apparently sounds more "analogue" than the 1543 - I am looking forward to comparing the two! 😀
HTH
Jon
What is Scott's Webpage ?
Hi Gary,
that is encouraging - I'll start looking at gathering the parts over the next few weeks. I'm looking forward to putting this one together!
Jon
that is encouraging - I'll start looking at gathering the parts over the next few weeks. I'm looking forward to putting this one together!
Jon
my 2 cents
I agree with the first sentence, the 1541A is way more musical than the 1543 (great for rock but less natural), but I think that with the reclocker it beats hands down most of the commercial DACs available.
Cheers
Andrea
GaryB said:Jon,
I've built both Pedja's 1541a DAC and Scott Nixon's simple 1543 DAC and there is NO comparison. Pedja's DAC is in an entirely different league and is as good as any DAC I've heard. You should definitely get going and build it - you won't be disappointed.
---Gary
I agree with the first sentence, the 1541A is way more musical than the 1543 (great for rock but less natural), but I think that with the reclocker it beats hands down most of the commercial DACs available.
Cheers
Andrea
Diode Substitutes???
Hello All,
I am unable to locate a BAT49 with legs. For those of you that have assembled this DAC, where did you source yours?
Regarding alternatives, some say that using anything but the BAT49 will negatively affect sound quality... has anyone tried different diodes that can suggest a worthy replacement?
Thanks,
Bryan
Re: Diode Substitutes???
Bryan,
Try looking in the parts wiki:
http://www.diyaudio.com/wiki/index.php?page=Parts+selction
and you will find the recommendation of the 11DQ10 diodes from IR as a good substitute.
---Gary
bryman79 said:I am unable to locate a BAT49 with legs. For those of you that have assembled this DAC, where did you source yours?
... has anyone tried different diodes that can suggest a worthy replacement?
Bryan,
Try looking in the parts wiki:
http://www.diyaudio.com/wiki/index.php?page=Parts+selction
and you will find the recommendation of the 11DQ10 diodes from IR as a good substitute.
---Gary
himura said:hi i have a problem how can i built an oscillator circuit,using ad844?
Oscillator circuit😕
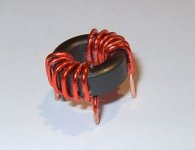
Reclocker Transformer
Gary (and all),
Given the sensitivity of Elso's reclocking circuit on Pedja's DAC to the transformer (i.e. reversing the primary and secondary polarities makes a noticeable difference), I was wondering if someone could suggest a suitable transformer make/model for this application? Has anyone tried one that performs better than another?
Thanks,
Bryan
How time flies......
Hi All,
Well, believe it or not, I finally have gathered and sorted all the parts for this DAC! Iron to be fired up next week.
Better late than never! 😀
Jon
Hi All,
Well, believe it or not, I finally have gathered and sorted all the parts for this DAC! Iron to be fired up next week.
Better late than never! 😀
Jon
......... and 18 weeks later........
It lives!!!!
Over 2 years into the project, I have finally got my DAC up and running. First time - and no smoke! 😀 😉
A big thanks to everyone who generously helped me along the way. I have learnt a load during this project, and I'm delighted with the results. 😎
I had a load of fun stuffing the high quality PCBs and Pedja's on line documentation was spot on, making the whole job a real pleasure.
Best I get this one fully finished and move on to the other (ton) of projects in the cupboard that need starting!
Jon 😀
There must be some of you waiting for this document. The AYA DAC Assembly Manual, and I mean the first AYA, which superseded the TDA1541A DAC rev1 in 2006, is now available online. It comprises all the project info, other than the layout. Two years later I think it is the time for public release. The boards for this version are anyhow sold long time ago.
http://www.pedjarogic.com/1541a/rev2.htm
http://www.pedjarogic.com/1541a/pdf/AYA_DAC_rev2.0c_a.pdf
Pedja
http://www.pedjarogic.com/1541a/rev2.htm
http://www.pedjarogic.com/1541a/pdf/AYA_DAC_rev2.0c_a.pdf
Pedja
Sorry to dredge up an old thread. I am finishing my Rev. 1.1b up and had a question regarding the PLL filter components. On the yahoo site, GaryB indicated that he had used SMT components to implemtent this:
Did anyone take pics of how they did this? I was going to use 0805 COG caps and an IRC tanfilm resistor (also 0805) to do this. One cap in between the pins (C104) and the resistor and other cap in series (R102 and C103), in parallel with the first cap.
Thanks,
Chris
I implemented the filter all with surface mount parts right at the
chip pins. I think I used parts that were slightly different from the
recommendation in the datasheet mainly because its what I had on hand
but it seems to work quite well. I used 1kohm in series with 33nf
(R102, C103) and then instead of the 3.3nf capacitor I used a 1nf
capacitor (C104).
Did anyone take pics of how they did this? I was going to use 0805 COG caps and an IRC tanfilm resistor (also 0805) to do this. One cap in between the pins (C104) and the resistor and other cap in series (R102 and C103), in parallel with the first cap.
Thanks,
Chris
I did a standard loopfilter on my 1.1b, but I'd also be interested to hear how this was done.
Good luck!
Good luck!
As long as I'm on a roll, I might as well toss this one out there as well:
sin(x)/x compensation:
The parts list I am using was sent to me by bryman79, who I had known from a different forum. In emails to me, he had sent me the inductor and cap values for both 1.21K and 1.5K I/V resistors, but indicated that he hadn't yet implemented this. Searching the Yahoo archive, I don't see anything either, but I could have missed the correct search term(s).
I can no longer access Pedja's article on this. From what I understand, the inductor goes in series between the I/V resistor and ground. The cap value either goes in parallel with the existing 1nf cap (IIRC) or replaces it. I'll need to check the values when I get home and can post them if anyone is interested.
Chris
EDIT: Jon: It appears that you were the one who created the parts wiki, which I can't find anymore?
Last edited:
Sorry to dredge up an old thread. I am finishing my Rev. 1.1b up and had a question regarding the PLL filter components. On the yahoo site, GaryB indicated that he had used SMT components to implement this:
I used 1kohm in series with 33nf (R102, C103) and then instead of the 3.3nf capacitor I used a 1nf capacitor (C104).
Did anyone take pics of how they did this? I was going to use 0805 COG caps and an IRC tanfilm resistor (also 0805) to do this. One cap in between the pins (C104) and the resistor and other cap in series (R102 and C103), in parallel with the first cap.
Thanks,
Chris
It's been a good long while since I built this. As I recall, the two components in series (1k ohm + 33nf) were soldered together so that they would stand on their edges and form a "V" shape. The angle of the "V" was adjusted so that it could go to the right pins. The other capacitor was soldered flat on the board with one side going directly to one of the pins. A short thin wire was used to connect the other side to the appropriate pin.
---Gary
- Status
- Not open for further replies.
- Home
- Group Buys
- TDA1541A non-o/s DAC PCB