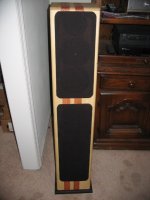
kestrel200 said:Front view
Thought some of you might like to see the finished project.
Front:
Attachments
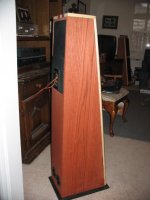


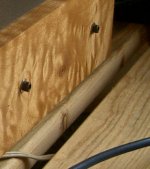
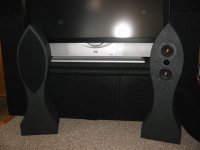
My system has been built for a while now, but I just put the wood end caps on my amp today. I figured, it's time to post pictures of my humble little system. I'm a college student, and my budget was limited, all told ~$350 for amp and speakers, the Sony D-2 was already in my possesion from my portable collection. The speakers are the Adire Bang! design, and the amp is a BrianGT gainclone kit (custom built chassis).
Attachments
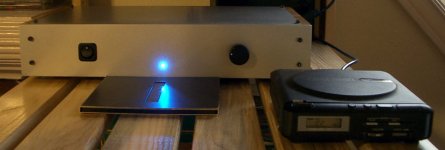
Nice case you have there on your GainClone!
Is it DIY or bought somewhere? Love the led also on the front panel.
Is it DIY or bought somewhere? Love the led also on the front panel.
logonwheeler said:Nice case you have there on your GainClone!
Is it DIY or bought somewhere? Love the led also on the front panel.
Thanks for the compliment. The case is DIY, I designed and built it myself. The LED is from the chipamp kit, I just popped a hole in the case for it.

polkymon those speakers look very, very classy- excellent work 🙂
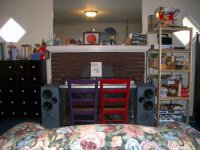
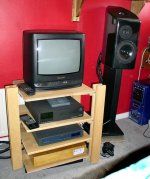
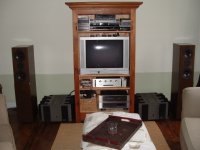
heres a pic of my system, consistiing of:
Linn Mimik 2 cd player (2nd hand, mint for £200)
Quad 77 integrated amplifier, 85 watts per channel, £220 2nd hand.
DIY speakers, vifa pl18 and xt25 in 17 liter box tuned to 45hz on top of atacama se24 stands (free from dad after he bought floorstanders 🙂). Crossovers housed in plywood box under amp. Total cost for speakers about £340.
DIY hifi rack, edges of the shelves still arn't quite all finished, but im pleased wioth how it came out.
Panasonic teletext TV bought off a mate for £10, Playstation 2 hiding round the side of the rack for DVD duties.
All cables are DIY, mainly made from Cat 5 network cable in various configurations. DIY mains cables made with Supra shielded cable. Really pleased with how its sounding at the mo, especially compared to other systems ive heard costing the same money 😉
Oh and I'm looking forward to the summer when i can decorate my bedroom and get rid of the ghastly red colour from the walls for a more "neutral" shade. 😎
Attachments
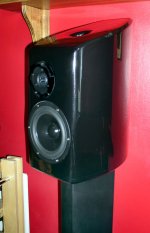
Thanks for the compliment.
Yours look terrific too. How did you get the curved sides? I used body filler on a couple of projects to get that shape.
Also, how did you like working with lacquer and would you do it again?
Yours look terrific too. How did you get the curved sides? I used body filler on a couple of projects to get that shape.
Also, how did you like working with lacquer and would you do it again?
thanks very much 🙂
I made the curved sides by laminating 5 layers of 4mm thick plwood over an internal skeleton/former, then trimmed the sides to size and fitted 18mm ply top and bottom layers. I thought this method was more elegant- and easier to finish- than the more commonly used "translam" method, and all the glue makes the cabinets very, very dead.
The laquer i used was automotive spray paint from a can, comes up really nice it just has to be left a few weeks before its hard enough to cut and polish properly. I love spray painting stuff, my current project will be painted using 2-part auto paint as I have access to a decent spraygun in the workshops at uni.
I'm guessing he did, you can see some stuff here:
http://www.diyaudio.com/forums/showthread.php?s=&threadid=77091
and here:
http://www.diyaudio.com/forums/showthread.php?s=&threadid=77302
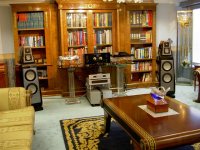
Here is Cal's latest. Two WR125's an a TB tweeter. Practice for a larger, more complicated set.
http://www.diyaudio.com/forums/showthread.php?s=&threadid=77091
and here:
http://www.diyaudio.com/forums/showthread.php?s=&threadid=77302
Here is Cal's latest. Two WR125's an a TB tweeter. Practice for a larger, more complicated set.
Attachments
- Home
- Loudspeakers
- Multi-Way
- System Pictures & Description