OK. it's not lost.Re your private email, yes when I get some time in the next few days.
Very warm applies to ±35Vdc PSU.Very warm is ok. Resistors run 'very warm' in millions of end products all over the world.
However, if you don't feel comfortable about very warm resistors, up the resistor to 12 or 15k.
TOO HOT applies to your clearly stated absolute limit of ±50Vdc.
I currently have ±49Vdc on long term heatsoak over night. Nothing to worry me this morning (after 14hours).
Very warm applies to ±35Vdc PSU.
TOO HOT applies to your clearly stated absolute limit of ±50Vdc.
I currently have ±49Vdc on long term heatsoak over night. Nothing to worry me this morning (after 14hours).
See post #864.
That post does warn that 2k7 was a problem for high dissipation.
Since then it has become 5k6. which just about suits the low voltage amplifier. But is still too low for a maximum voltage amplifier, which was being discussed in that post.
A note in the .PDF would help Builders in selecting suitable current limiting resistors for different voltage transformers.
Since then it has become 5k6. which just about suits the low voltage amplifier. But is still too low for a maximum voltage amplifier, which was being discussed in that post.
A note in the .PDF would help Builders in selecting suitable current limiting resistors for different voltage transformers.
Last edited:
Yesterday I did an Iprimary test on the 230:35+35Vac 300VA transformer I intended using.
Ipri . vs . Vpri, when unloaded is:
220Vac . 21.8mAac
230 . . . 25.2
240 . . . 29.5
250 . . . 35.8
253 . . . 37.5
Since a 34Vac transformer is specified by Bonzai, I intended reducing my transformer to meet that spec.
I could remove some Secondary windings, or add some Primary windings.
I added 20Turns of temporary winding to series connect to the primary and retested
253Vac . . 31.8mAac
This is a reduction in primary current of >15% for a secondary voltage reduction of ~4.3%
On this data I will add 30Turns of permanent Primary winding and insulate it even more carefully. This will better suit my normal mains voltage of 245Vac.
I have been posting a few times in the past couple of years about the advantages added primary turns when mains voltage is high or a poor quality transformer is showing signs of running too close to saturation.
This test proves the advantage.
BTW,
the transformer is an Amplino rated as 300VA.
It uses 3.6A/mm² for the primary and 3.8mA/mm² for the secondaries. It is somewhat over-rated based on the wire size it uses.
The core is not saturated at the maximum 253Vac. But on the basis of the wire size a truer power rating would be around 250VA.
Now that I have added primary turns it becomes a fairly good 34+34Vac 250VA transformer, rather than being a claimed, but poor 35+35VAC 300VA
As a good 250VA transformer it falls a tiny bit short of what I would normally use for a 100+110W amplifier. I'll see when I get around to full power testing.
Last edited:
SX amp
Some comments about the SX amp and manual. (Jims Audio pcbs)
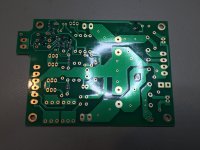
For the SX-psu , C4,C5, C7 and C8 are not in the BOM. These are of course mentioned in the manual at page 32.
I measure ca 6mm between the outer parts of the pads and 2mm across, so I guess 1uf mlcc in 1206 or 1806 package will fit?
And C1 in the BOM (Designation C1) I think is not marked on the pcb. I think it is the 2 pads on the back of the pcb (if I read the schematics correct.
C2 on the SX pcb is not mentioned in the BOM or in the manual.
There are 2 pads (for smd component) on the back of the sx-amps pcbs which I cannot find any reference for in the manual.
On page 35 in the manual it says:
Some comments about the SX amp and manual. (Jims Audio pcbs)
Downloaded and reading it. And of course this thread. Alot about the nx amp. Little about the sx but of course there are alot of similarities 🙂
I am unable to find these caps in the BOM for the psu boards. (therefore uncertain about the casing for these caps...)
Trying to make a decent BOM (.xls) file with components that are in stock.
For the SX-psu , C4,C5, C7 and C8 are not in the BOM. These are of course mentioned in the manual at page 32.
Whether they are necessary or not is not up to me to tell but I think it wont hurt 😉Referring to Fig 14, the transformer AC secondary’s are fed into a 25 A PCB mount rectifier D4.
C4, C5, C7, and C8 (1 uF 50 V MLCC types) provide local decoupling for the large electrolytic filter
capacitors C1 and C6.
I measure ca 6mm between the outer parts of the pads and 2mm across, so I guess 1uf mlcc in 1206 or 1806 package will fit?
And C1 in the BOM (Designation C1) I think is not marked on the pcb. I think it is the 2 pads on the back of the pcb (if I read the schematics correct.
C2 on the SX pcb is not mentioned in the BOM or in the manual.
There are 2 pads (for smd component) on the back of the sx-amps pcbs which I cannot find any reference for in the manual.
On page 35 in the manual it says:
I am unable to find more than 2 places where I can solder some smd components. There are no references to the 4.7 ohm base stoppers elsewhere in the manual. Nothing in the BOM or the schematics either.The sx-amplifier boards utilize some SMD components. I did this because they are convenient
and save a lot of space. Having said that, it’s the 4.7 Ω 1W base stoppers and two decoupling
capacitors that are SMD.
Hi Guys
Temperarure vs watts: Modern parts are smaller than older parts for the same power rating and this leads to them running at a higher temperature. The smaller surface area means the heat output is concentrated but the device is likely well within its ratings if you look at its data.
Our skin is at about 24C and we cannot hold our finger on a surface that is at 64C without risking a burn. That is just a 40C rise, which is standard for most PTs - 60C is the rationg for those little blue encapsulated toroids - and many resistors are rated up to 125C or higher. As an aside, if you operate those toroids at less than half their VA then temp and EMI are greatly reduced.
Personally I prefer lower temperature rises as it promotes longevity of the assembly. The larger 1W resistors that were 11-15mm long run cooler than the newer ones that are less than 9mm. The latter have issues with high-voltage leakage over their bodies - not a real concern in most of the solid-state amps here.
There is obviously a compromise in every PCB layout and AndrewC chose to have a tight board with short traces. This compacts the board and concentrates the heat. This will be problematic for the SM connections where through-hole parts would actually be more reliable. The TH forces wider spacing and the leads require larger solder connections which are more robust than small ones. Electron flow erodes solder connections, as does heat, so small connections go "cold" sooner than larger ones do. For these reasons and also just for practical purposes, I only use TH parts - that is small enough for my eyesight - and I use larger solder pads than I see many using here and in production.
E and D gain ranges: I've commented on this many times regarding the apparent idiocy of Fairchild only providing complementary components but in differing gain ranges. It turns out that they do manufacture the same-gain ranges but you hgave to order them in higher quantities. I got a thousand each of 2SC3503D and 2SA1381D because I wanted the circuit halves to be similar gains (and this prompted me to "think big" about a project I was working on). So is it the distributors who fall down here, or the manufacturer?
Others have said that you can run the sims of circuits with varying gains or other parameters for given devices to check for sensitivity to those parameters. That is all well and good but it is easier if the devices are closer to being the same to begin with. Andrew was lucky to find ANY devices of equal gain despite the statistical likelihood that he should.
Have fun
The small caps on the underside of the board are 1206 size multi-layer ceramic capacitors (MLCC). Mouser, RS, Digikey all carry them.
C1 on th sx-Amp decouples the offset adjust. It's not critical. It's a 10 uF device and 25 V should be just fine (1206 MLCC). There are no 4.7 ohm base stoppers on the sx-Amp - these are only used on the nx-Amp (1W 2512 IIRC ).
the NX 4r7 are certainly big and the pads evens bigger................. There are no 4.7 ohm base stoppers on the sx-Amp - these are only used on the nx-Amp (1W 2512 IIRC ).
Seems so wrong to call them SMD, but the "S" means surface and not small.
For two terminal sm devices, it is so much easier and faster to use two hot iron tips rather than hot air. i only use hot air for qfp's and the sorts.
I worked with solder paste. That really works very nice, clean and quick.
Some of these parts are too small for me to use my normal iron 🙂
The soldering paste is nice, I recommend it!
Some of these parts are too small for me to use my normal iron 🙂
The soldering paste is nice, I recommend it!
Use fine tipped tweezers and a fine tipped soldering iron - very easy!
I am soldering down TSSOP28 chips with no problem and on a new board I am working on, a 64pin LQFP64 device.( 0.5mm lead pitch)
I am soldering down TSSOP28 chips with no problem and on a new board I am working on, a 64pin LQFP64 device.( 0.5mm lead pitch)
I am the same as Andrew, I use the 15mil no clean glow core solder, lead of course, since it is easier to work with than no-lead. It is okay on my mind since my stuff will last or hopefully can be repaired forever and never see a land fill site 🙂
I was hand soldering a few DFNs, by hand, lots of fun to get aligned. The trick is to expand the solder mask area opening, so that you can get the solder iron tip on the land and then wick the solder up the trace to the pad contact area. This is where paste/screen/reflow can be of much help. Definitely need the hot air in order to remove a dfn.
I was hand soldering a few DFNs, by hand, lots of fun to get aligned. The trick is to expand the solder mask area opening, so that you can get the solder iron tip on the land and then wick the solder up the trace to the pad contact area. This is where paste/screen/reflow can be of much help. Definitely need the hot air in order to remove a dfn.
I find that positioning the small parts is easy with the soldering paste. Parts will stick to the pads nicely without having to fiddle around a lot 🙂 Apply hot air and presto! Nice and good soldering done!
I did watch an instruction video of SMD soldering with Reflow technique. That also works, but not for the very small parts, for me anyway. Maybe I will try soldering the SMD parts with the standard iron, but I must say that the hot air way does seem to work great and clean.
I did watch an instruction video of SMD soldering with Reflow technique. That also works, but not for the very small parts, for me anyway. Maybe I will try soldering the SMD parts with the standard iron, but I must say that the hot air way does seem to work great and clean.
Did you pre-heat in any way?I find that positioning the small parts is easy with the soldering paste. Parts will stick to the pads nicely without having to fiddle around a lot 🙂 Apply hot air and presto! Nice and good soldering done!
I did watch an instruction video of SMD soldering with Reflow technique. That also works, but not for the very small parts, for me anyway. Maybe I will try soldering the SMD parts with the standard iron, but I must say that the hot air way does seem to work great and clean.
- Home
- Amplifiers
- Solid State
- SX-Amp and NX-Amp