Hi,
Here's an update...
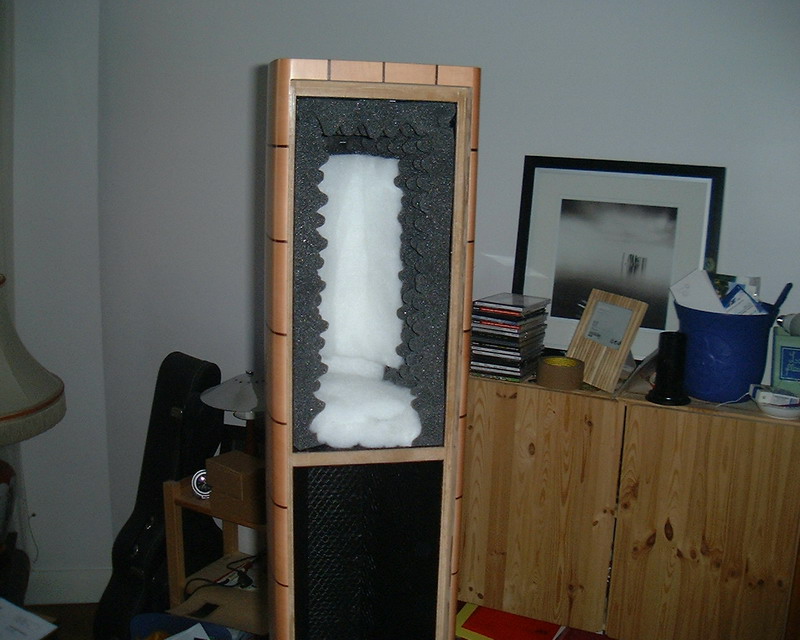
Someware along the line I lost the interest (read as FUNDS!!!) to build a sonus faber clone. However, in a recent article in audioXpress (about Zero impedance transformers) there was the picture of the bottom corner of a loverly curve-sided speaker with flat front and rear baffles. Since I still had some 6mm ply I decided to make some.
The method I used to bend the wood produced excellent results and fast. I got a fence post (of about 100mm diameter) and laminated 2 sets of two layers of 6mm ply. With these two sheets, I put one of either side of the post and clamped their sides together. After about four hours, I checked them again and had the perfect contour.
I'll trim them next weekend and start with the baffles.
Thanks for all your suggestions!
Gaz
Thanks for all your suggestions!
Here's an update...
Someware along the line I lost the interest (read as FUNDS!!!) to build a sonus faber clone. However, in a recent article in audioXpress (about Zero impedance transformers) there was the picture of the bottom corner of a loverly curve-sided speaker with flat front and rear baffles. Since I still had some 6mm ply I decided to make some.
The method I used to bend the wood produced excellent results and fast. I got a fence post (of about 100mm diameter) and laminated 2 sets of two layers of 6mm ply. With these two sheets, I put one of either side of the post and clamped their sides together. After about four hours, I checked them again and had the perfect contour.
I'll trim them next weekend and start with the baffles.
Thanks for all your suggestions!
Gaz
Thanks for all your suggestions!
I found these thin finish birch plywood while I am browsing. I haven't tried them but I thought they would be useful when you want curved surface by glueing multiple layer of them.
http://www.leevalley.com/wood/page.asp?SID=&ccurrency=1&page=32736&category=1,250,43217
http://www.leevalley.com/wood/page.asp?SID=&ccurrency=1&page=32736&category=1,250,43217
Rarkov,
I have used teh technique you have described. Since I posses the worst wood working skills of anyone on this forum i had to keep things very very simple.
1. build a simble frame for 1 side of teh speaker (the other side is a mirror image) I did this with a free hand drawing on paper of the cruve then followed that drawing to make the same curve on 3/4" ply. made 3 such plys. laid the 3 plys parallel to each other (24" apart) and lay a thin 4mm ply on top of the 3 3/4" cruved plys.
2. once this is done I took a 4'x8' sheet of 4mm ply and 1 4x8 sheet of 3mm MDF. cut each sheet into 6 pieces of 4'x16" (my speaker was 4' tall x16" deep)
now I had 12 sheets of ply and 12 sheets of MDF enough of one speaker. no wastage.
alternately lay one sheet of ply then MDF them ply then MDF etc... on the curved form created in "1".
3. I found 3 x 3mm MDF + 3 x 4mm ply to be strong enough
this makes 1 side.
since a 4' speaker is pretty tall and a tweeter or woofer at that height is not at ear level I sectioned the cabinet into 3 parts.
1. top 5" for crossover
2. middle 12" for 6" 2way woofer above tweeter
3. bottom 30" for 8" woofer used for difraction step.
Dave (planet 10) might have pics of cabinet without baffle so you can see details.
Love
Navin
Once upon a time..
a long time ago, I studied and worked as an A&P mechanic on aircraft. The skills and materials that are needed here are exactly the same, and thus, have years of testing and practical application. In fact, you had to demonstrate your knowledge in a practical test before you could get your License.. (I loved electronics, so I went into Avionics before doing a lot of A&P work).
But anyway, this could serve as source to get the practical knowledge tips since all the manuals are out there, and two, the materials are still out there since there are thousands of airplanes which are made from wood. For example, the glues are wonderful stuff - stronger than the wood, waterproof and can be machine worked. The birch and spruce woods are available, and if you can accept wood that does not meet the airworthiness spec, then the rejects are cheaper. Its great wood to work too. I built a set of speaker boxes that were very lightweight, but were strong enough to hold up a car! Building up really odd shapes is pretty easy. While nowdays folks build this stuff out of carbon fiber, good woodworkers did the same things with the sheets of ply.
a long time ago, I studied and worked as an A&P mechanic on aircraft. The skills and materials that are needed here are exactly the same, and thus, have years of testing and practical application. In fact, you had to demonstrate your knowledge in a practical test before you could get your License.. (I loved electronics, so I went into Avionics before doing a lot of A&P work).
But anyway, this could serve as source to get the practical knowledge tips since all the manuals are out there, and two, the materials are still out there since there are thousands of airplanes which are made from wood. For example, the glues are wonderful stuff - stronger than the wood, waterproof and can be machine worked. The birch and spruce woods are available, and if you can accept wood that does not meet the airworthiness spec, then the rejects are cheaper. Its great wood to work too. I built a set of speaker boxes that were very lightweight, but were strong enough to hold up a car!
Building up really odd shapes is pretty easy. While nowdays folks build this stuff out of carbon fiber, good woodworkers did the same things with the sheets of ply.still need soaking
The heated iron pipe mentioned earlier still requires soaking and then you rock the piece back and forth over the pipe to shape it. The water that soaked into the wood creates steam when the wood heats up against the pipe. This method allows more free form control. This is how most small production luthiers build intruments, it allows for a more precise fit because you can finesse the part with subtle bends
Now a question of my own.
Can the glue in plywood be loosened up by putting it in a steam box? Or are all plywood glues water proof. Thanks.
Dan
www.selectproducts.com has a product called Bendable plywood. Not the cheapest stuff around, but you can get it in 3\8" thickness.
To see it go to catagory a-z, then select bendable plywood.
To see it go to catagory a-z, then select bendable plywood.
Of some interest
You may find this interesting.
The link is from a previous post.
http://www.hifi4all.dk/forum/forum_posts.asp?TID=3729&PN=1

You may find this interesting.
The link is from a previous post.
http://www.hifi4all.dk/forum/forum_posts.asp?TID=3729&PN=1
Re: still need soaking
Thanks for the info! (Since I was the one that mentioned the technique origintally) I didn't remember everything, just that it was not quite as safe as the other methods.
No, all plywood glues are not waterproof, in fact, most are not! You're looking for marine grade plywood or at least external plywood to get something close to water resistant. I imagine steaming regular plywood would get you several pieces of wood, rather than a single piece that bends.
Topgun said:The heated iron pipe mentioned earlier still requires soaking and then you rock the piece back and forth over the pipe to shape it. The water that soaked into the wood creates steam when the wood heats up against the pipe. This method allows more free form control. This is how most small production luthiers build intruments, it allows for a more precise fit because you can finesse the part with subtle bends
Thanks for the info! (Since I was the one that mentioned the technique origintally) I didn't remember everything, just that it was not quite as safe as the other methods.
Now a question of my own.
Can the glue in plywood be loosened up by putting it in a steam box? Or are all plywood glues water proof. Thanks.
Dan
No, all plywood glues are not waterproof, in fact, most are not! You're looking for marine grade plywood or at least external plywood to get something close to water resistant. I imagine steaming regular plywood would get you several pieces of wood, rather than a single piece that bends.
There is a product called Bendy-MDF
Check out this link.
http://www.outwater.com/mdfboard.html
Good Luck and keep us posted
Check out this link.
http://www.outwater.com/mdfboard.html
Good Luck and keep us posted
rarya said:There is a product called Bendy-MDF
Check out this link.
http://www.outwater.com/mdfboard.html
Good Luck and keep us posted
That was a really good link!!
I hope the price of that stuff is reasonable.
If so, It really could be useful in building horns
_really big grin_
Thanks for positng it.
regards
Ken L
When wet bending wood there is always some springback after the clamping is removed. Not all plywoods can be bent to any significant degree. Some are constructed with water proof glues that just don't allow for good transfeer of heat or moisture, making the process difficult. Others have glue laminations that just don't take well to the process and degrade.
Pass Labs "Rushmore" has curved surfaces that are a hand lay-up of thin wood sheets. From experience I can attest that this can indeed be a diy process, with a bag press, several fixtures..... gallons of glue, heat.
Having a really good router and panel saw helps. Much depends on being able to accurately cut the rough formed panels.
Cyclotronguy
It's not so difficult, it's just a lot of work!

No steaming, no soaking, just layers of 4 mm birch glued over a matrix of MDF.
The first layer is additionally fastened by means of little bronze nails
No steaming, no soaking, just layers of 4 mm birch glued over a matrix of MDF.
The first layer is additionally fastened by means of little bronze nails
Thin layer work seems similar to making it out of Carbon Fiber ...
Or you could make them out of concrete
But wood does look very nice!
Petter
Or you could make them out of concrete
But wood does look very nice!
Petter
bending wood
I believe Taunton Press has a book called "Bending Wood". You can find it at www.taunton.com. The earliere post which referred to making vertical cuts is the most common way of bending plywood. It is very easy to do with a tablesaw and good fence. This method I believe is called "kerfing". One advantage to kerfing over the solid floorboards is not having to seal those cracks. You might want to make a set of "ribs", which will shape the speaker, and lay the plywood over the ribs, with a routed recessed areas for the ribs to fit. You can use biscuit joiner to attach the plywood to the ribs securely, one side. Then if you really want a stiff cabinet, maybe put the cabinet on floor, and work resin into the cracks. Make sure it doesnt swell on cureing!!! then ad other side, and repeat, little bit harder to put resin on this one. Maybe through speaker hole, I dont know. Well, hope this helps you.
I believe Taunton Press has a book called "Bending Wood". You can find it at www.taunton.com. The earliere post which referred to making vertical cuts is the most common way of bending plywood. It is very easy to do with a tablesaw and good fence. This method I believe is called "kerfing". One advantage to kerfing over the solid floorboards is not having to seal those cracks. You might want to make a set of "ribs", which will shape the speaker, and lay the plywood over the ribs, with a routed recessed areas for the ribs to fit. You can use biscuit joiner to attach the plywood to the ribs securely, one side. Then if you really want a stiff cabinet, maybe put the cabinet on floor, and work resin into the cracks. Make sure it doesnt swell on cureing!!! then ad other side, and repeat, little bit harder to put resin on this one. Maybe through speaker hole, I dont know. Well, hope this helps you.
There is also a web page devoted to curved sided loudspeaker construction.
curved speaker page
Colin
curved speaker page
Colin
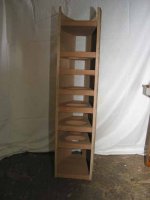
hello I carried out a perso project which regains the shape of the sonus faber crémona if that interests you 😉
here an example
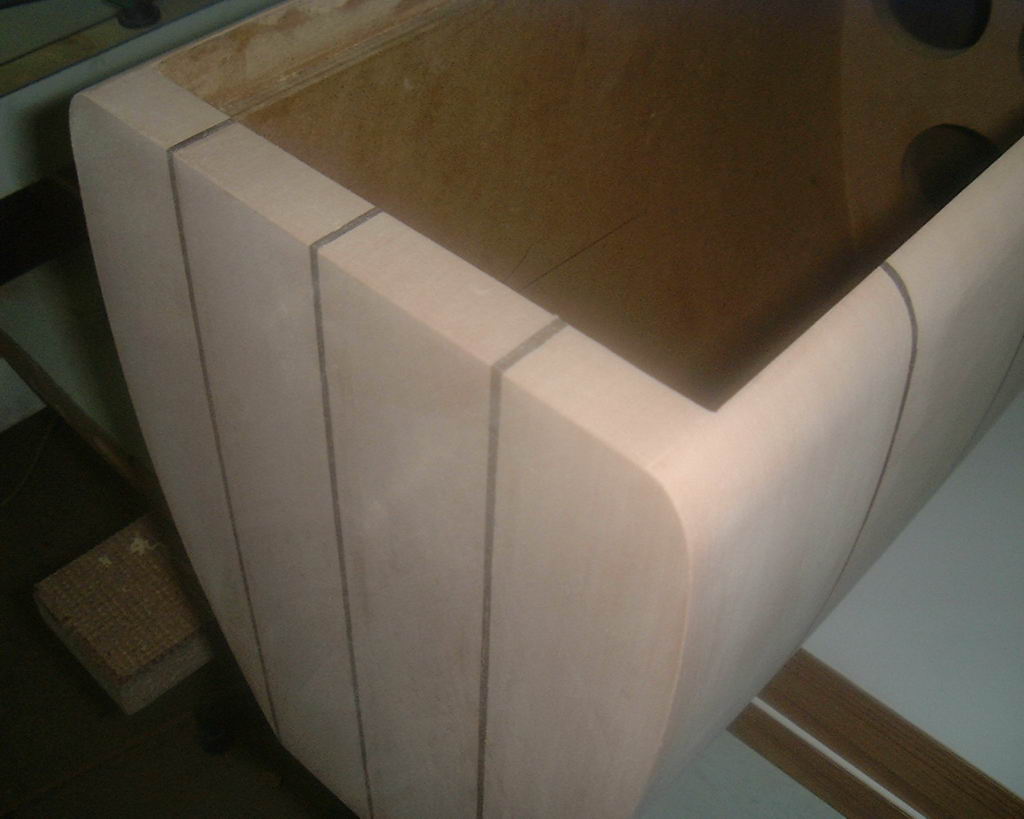
mezzo 😉
here an example
mezzo 😉
- Status
- Not open for further replies.
- Home
- Loudspeakers
- Multi-Way
- Sonus Faber Clone: Bending Sheet Ply Wood