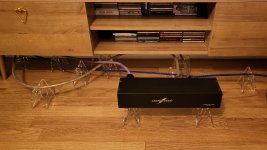
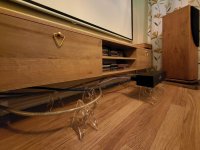
capacitors k73-11 6.8 mf, cable - central core from van den hul d300 mk2, resistors to ground 22 kΩ
I don't know. All I did was the usual bypass of the opamps and go straight from the dac to Russian poly coupling capacitors of 1uf then to the RCAs. I then used a buffer amp to boost it a bit.I also like the 5502, but I have problems with the bass. there is very little of it... Tell me, what mods affect the bass?
put electrolytics like 22uf.on 1001 with this mod, the bass is fine. but not here
Hellocapacitors k73-11 6.8 mf, cable - central core from van den hul d300 mk2, resistors to ground 22 kΩ
Please tell me how to connect in a little more detail
DAC 15.16 から WIMA MKS2B043301H00KS コンデンサ〜1W 22kΩ,.
SN3ADC 2202F〜RCA に接続する方法は間違っていないでしょうか? 詳しく教えてください。

SN3ADC 2202F〜RCA に接続する方法は間違っていないでしょうか? 詳しく教えてください。
I've found this video on youtube where they replaced the original PSU of the PSX with a linear PSU.
PSU
It starts about 26:42. Problems seems to be the monitor injecting noise through the RCA outputs. Can someone explain how this is possible and how it can be eliminated? Is the use of the AV port a better option?
PSU
It starts about 26:42. Problems seems to be the monitor injecting noise through the RCA outputs. Can someone explain how this is possible and how it can be eliminated? Is the use of the AV port a better option?
Hi all.
I started using PS1 more than 10 years ago, and even today it remains my main source.
Over all these years, I have conducted a lot of experiments, a lot... and I can probably tell you everything about how to qualitatively improve the sound of this CD player.
Although I had a long break from listening, by the will of fate I decided to return to it again.
Of course, this may not be the best investment in this CD player right now, since good equipment has become cheaper over the years, and you can already find an alternative within an adequate budget, but this CD player is still just as wonderful.
As the years go by, you can probably now find something good for around £500 or more on the aftermarket (I hope).
But 5 years ago, I was trying to find something better, and I realized that I would have to pay at least a £1K for something better than this CD player.
And of course, I’m talking now about prices on the aftermarket for vendors, the retail price of which was at least £2-3K at the time of the announcement.
So, is it worth doing now? It all depends on whether you have the desire to work with a soldering iron and enough time for this.
But still, I would not recommend you go this long way, but to use proven options. I spent at least 5 years upgrading this CD player, collecting dozens of different versions.
It’s difficult for me to judge or estimate now how much it’s worth investing in this CD player.
You can argue for a long time that a 14-bit DAC does not stand up to criticism and that it is garbage, but there is no arguing about tastes.
I don’t even know what to say, since there is not enough time to describe my long journey with this CD player. But I’ll probably still give some recommendations for those who want to try to get involved in all this.
This CD player is very simple and reliable, it is difficult to break, and even if you accidentally broke a couple of elements from the mainboard through carelessness, you will be surprised to learn that it did not affect anything.
It always amazes me that it is so poorly made that almost any improvement will have a positive effect on its sound. It seems like this is just a bottomless pit of improvements. You spend money into it, and it sounds better and better. You change the components to even more expensive ones, and it sounds better again. And it doesn't stop.
So, what about advice? Let's go from simple to complex. Overall, there's not much you can do with it, so let's stick to the basics.
The most important thing about it:
1. First mile
2. Last mile
3. Decoupling
1. Remember. The sound starts from the socket. And everything that you change and improve in terms of power supply at the input of the power supply will radically change everything. One capacitor, one centimetre of power wire can change everything (both for the worse and for the better). I'm not a fan of remote blocks. Any additional contact can kill the sound. Use the minimum reasonable power route, soldering, jumpers, remove ferrites, screens.
Do not thoughtlessly change components and wires. All this is a lottery and can either improve or worsen your build. Do not use inappropriate components unless you are confident in them.
A few examples: 3 centimetres of good power wire from the socket to the PSU board just raised the sound level to twice the cost (remember that each power wire has its own presentation). The use of very good oxygen-free copper wires for the power circuit from the power supply to the mainboard killed the sound (the wires purposed for the speakers). The use of expensive capacitors (Silmic, Cerafine) in the power filter circuit killed everything. They just didn't fit. I had to listen to more than 20 different models of capacitors to select the ones needed for the power circuit.
Bypassing the power capacitor at the power input. After the bypass, the entire player's feed began to sound like this capacitor. If you put a good film capacitor in parallel with the HW electrolytic capacitor, you will only hear it. I didn't use it because adding it radically changes the presentation, and I didn't have any good capacitor options to continue researching. I just wanted to say that this is a huge field of experimentation, and I will soon try to install good film capacitors at the input for the main power supply.
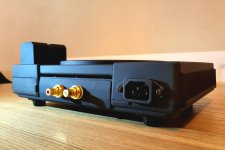
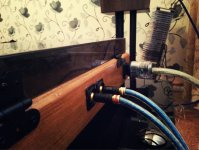
2. The last mile is the same. Don't do nonsense. Immediately make a direct output after the DAC. Capacitors, capacitors... Yes. Depend a lot on them. But that’s not about that now. And about how to install it. The fact is that you need a piece of wire from the mainboard to the capacitor, and from the capacitor to the RCA.... And no matter what capacitors you use, this piece of wire will change everything. Imagine it's just an additional interconnect cable (just a very short one). So this is what you will hear. I struggled with them for a long time and used very good pieces of their interconnect cables (sometimes more than £1.5K/m). It is a pain. Therefore, I have not found a better option to use the long leads of the capacitor directly to the DAC connectors. Yes. I managed to solder the leads of the capacitors on one side to the DAC, and the other directly to the RCA. So, I sorted it. In other cases, I would recommend using or cutting off part of the interconnect cable that you use as your main one. It all depends on whether you have such an opportunity. Very often, for example, someone buys two meters of interconnect to divide them into two by a meter. This is your chance to bite off the 5 centimetres you need from him.
Forget about stock RCA. They are soapy, dirty, and kill high freq. You will have to buy good RCA/XLR terminals (although any terminals will be better than the original ones).
3. Decoupling.... pain... Don't try! touch the original drive and somehow dampen it! Do not screw it. Anything you try to do to it will only make the situation worse. I'm seriously confident that the manufacturer has already done everything they can with this worthless drive. So your task is to decoupling the drive from the case as much as possible (or simply leave it in its place). The drive is very light, and when it rotates the disk, it has its own resonance, like as a separate system. Any change in resonance, according to my observations, worsens the sound (including clamps and weighting). Your task is not to reduce or increase its weight.
Regarding the rest of the system, everything is exactly the opposite. You need to maximize the weight of the rest of the system. I have verified that increasing the weight of the body has a very positive effect on quality. So, use only the original drive mounts. You can also buy an additional cable from the mainboard to the drive to move it outside the case. Do not change anything in the drive balance, do not fix it rigidly. This will all end badly. But try weighing down the rest of your body. By reducing resonance due to weight, you very seriously clean the tract. The CD player will play cleaner and more dynamically, micro and macro dynamics will improve. And yes. Forget about any kind of thorns. Just forget it.
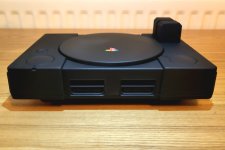
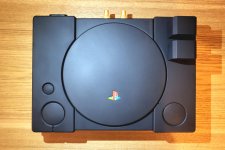
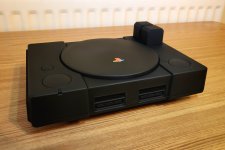
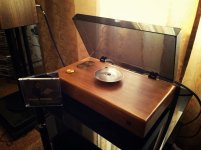
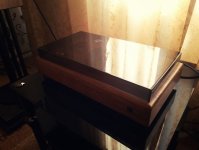
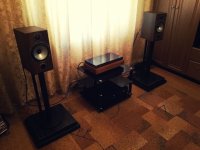
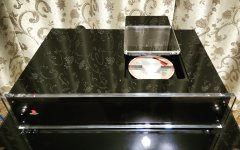
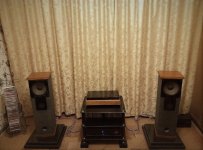
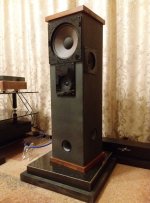
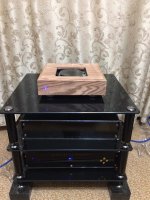
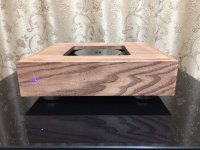
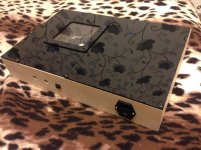
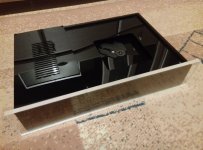
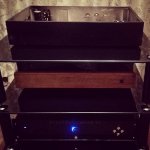
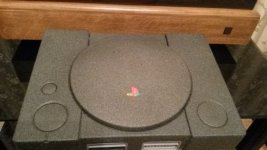
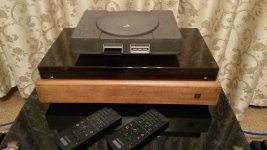
I don’t even know what to add. I'll just add a few pics (I didn't make them on purpose. I just found some completed and unfinished projects from the archives).
Sincerely.
Attachments
-
 01.jpg145.3 KB · Views: 257
 -
 02.jpg110 KB · Views: 246
 -
 03.jpg154.4 KB · Views: 237
 -
 05.jpg242.4 KB · Views: 239
 -
 04.jpg141 KB · Views: 241
 -
 06.jpg300.9 KB · Views: 237
 -
 07.jpg225.7 KB · Views: 245
 -
 08.jpg172.8 KB · Views: 241
 -
 09.JPG155.4 KB · Views: 238
 -
 10.JPG186.9 KB · Views: 244
 -
 11.JPG242.1 KB · Views: 240
 -
 12.jpg252.4 KB · Views: 231
 -
 13.jpg95.7 KB · Views: 234
 -
 14.jpg120.2 KB · Views: 250
 -
 15.jpg181.7 KB · Views: 287
Last edited:
From an aesthetic point of view, appearance, finish, implementation, I haven't seen anything better so far, well done !
When you use some expensive components, they usually have their own signature. In fact, there are very few truly good but neutral components.
So one more time. Everything has its own signature!
Think and think again about what you want to get by replacing this or that element. Try to use neutral components wherever possible, or exactly those that you like (if you like their signature). Or you know exactly what this or that element will add to the sound quality.
My personal list of preferences* (based on budget).
1. for inlet (gold is fat, warm and more analogue, rhodium/platinum is more dynamic and analytical)
*Furutech Power INLET(G)
2. It is better to use neutral copper solid core from inlet to power supply. Or your favourite power cord if you like its style.
*Silent Wire AC16 (I will try to switch to Duelund wire)
3. A good fuse, or wire jumper if you're intrepid.
*Padis fuse/wire jumper
4. Do not use anything more than 100-150uF (stock 47uF). it does not make sense. I tried something like 220-500uF or more, and the player played for another half a minute when I unplugged it.
*Nichicon KX (I will try to add extra Mundorf RXF Cap)
5. Capacitors in the power supply filter work completely differently. Any ELNA doesn't fit. I had a good results with Nichicon KA/KZ - most neutral. I recommend playing with FineGold- very fat and cheerful, but too soft on top. Muse - is difficult to convey, you need to hear it. V-shaped, in general.
*Nichicon KA
6. Do not try to replace the wires from the power supply to the board. I didn’t find any suitable options (but it’s better to get rid of the connector and solder the original ones directly)
*Stock wires (I will try to switch to Duelund wire) I don't like ferrites, try without them.
7. Capacitors... and wires...
A difficult story. Whatever you try will have consequences. The list of everything I tried would not fit on a couple of pages.
Try not to use extra wires. If you use wires, try not to use them AFTER the capacitor (before it - not so bad).
If everything is bad and you need wires, use the best one that suits your presentation.
*Mundorf Supreme+Clarity CAP MR (direct soldering from the DAC to the capacitor leads, clamp from the RCA side without soldering)
8. RCA - need to replace. I think any pair from £10 will be better (like CMC RCA or better)
*WBT-0208 crimping socket
Last edited:
Yes you are right. All cabinets is made of solid ash wood coated with oil wax (or painted). Ash is one of the best materials that gets along well with the resonances of sound frequencies (as well as birch, maple, alder, marble, granite)From an aesthetic point of view, appearance, finish, implementation, I haven't seen anything better so far, well done !
Last edited:
I am using this little one while I wait for the delivery of my main source (also PS1). At one time, I compared the PS1 with practically no improvements (just direct output on electrolytes) with the Rega (Planet/Apollo). I really love Rega, but PS1 absolutely beat them in that condition. I'm also temporarily using Cyrus One (which I completely recaped with nichicon because it asked for this). Although all this is still in the burning, but I want to admit that this is simply a stunning duet for the money!
Attachments
The color is awesome. Black satin finish? Do you have more info about that? Did you use a professional, like a car parts re-painter?I am using this little one while I wait for the delivery of my main source (also PS1). At one time, I compared the PS1 with practically no improvements (just direct output on electrolytes) with the Rega (Planet/Apollo). I really love Rega, but PS1 absolutely beat them in that condition. I'm also temporarily using Cyrus One (which I completely recaped with nichicon because it asked for this). Although all this is still in the burning, but I want to admit that this is simply a stunning duet for the money!
It’s fascinating how legends develop.
I was in my 20’s when PS1 was released. It soon became the cheapest way to acquire a decent CD player.
PlayStation 2 would later do the same thing for DVD.
I don’t think the hardware had magical properties, but today it’s a sought after vintage part.
I was in my 20’s when PS1 was released. It soon became the cheapest way to acquire a decent CD player.
PlayStation 2 would later do the same thing for DVD.
I don’t think the hardware had magical properties, but today it’s a sought after vintage part.
Many nights I played the original Tomb Raider and Tekken on it! I think I was around the same age.
BTW...I still own a PS3 for it's amazing Blu-Ray capabilities. 😎
I am doing this audio thing since I was 15 years old and maaan...that's a few moons ago! I got into vintage audio a while ago and now compare and combine a lot of modern stuff with vintage and than give it my own listening experience. Sometimes with very interesting results.
Simple player, SMD output stage, efficient decoder, everything you need for success, same for the Philips CD723s.
It must also be said that they were compared to "high-end" players which sounded like crap (and there were also many of them), it was the era that wanted that.
Look at the AMC Pacer, no one wanted it and yet today it's a super sleeper and a collector's item for lots of good reasons.
It must also be said that they were compared to "high-end" players which sounded like crap (and there were also many of them), it was the era that wanted that.
Look at the AMC Pacer, no one wanted it and yet today it's a super sleeper and a collector's item for lots of good reasons.
camouflage black ultra matte spray. 4-5 layers. painted it myselfThe color is awesome. Black satin finish? Do you have more info about that? Did you use a professional, like a car parts re-painter?
- Home
- Source & Line
- Digital Source
- Playstation as CD-player
