8" Pioneer, build, the Chang variant
Dave and Scott have been a tremendous inspiration for a novice like me to build these fantastic projects.
My constant pestering around here have actually resulted in the Chang spawn. Specifically designed with the Pioneer B20FU20-51FW, and of course with my name on it, I had to build it...
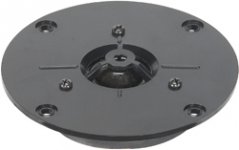
Lots of work to do yet, will be putting finishing touch on the brace, put on edge veneering, finishing with poyurethane without stain, and also will be reinforcing the driver frame with the epoxy.
I finally figured out how to upload pics from photobucket. Can I get by using the heavy carpet on the top/bottom of the main cabinet?, I have polyfil but is in the pillow and not layered, and find it ackward to use on the top...
Any help on the sound damping will be appreciated.
gychang
Dave and Scott have been a tremendous inspiration for a novice like me to build these fantastic projects.
My constant pestering around here have actually resulted in the Chang spawn. Specifically designed with the Pioneer B20FU20-51FW, and of course with my name on it, I had to build it...
Lots of work to do yet, will be putting finishing touch on the brace, put on edge veneering, finishing with poyurethane without stain, and also will be reinforcing the driver frame with the epoxy.
I finally figured out how to upload pics from photobucket. Can I get by using the heavy carpet on the top/bottom of the main cabinet?, I have polyfil but is in the pillow and not layered, and find it ackward to use on the top...
Any help on the sound damping will be appreciated.
gychang
An externally hosted image should be here but it was not working when we last tested it.
An externally hosted image should be here but it was not working when we last tested it.
An externally hosted image should be here but it was not working when we last tested it.
An externally hosted image should be here but it was not working when we last tested it.
one more.
latest as of sunday PM.
gychang
An externally hosted image should be here but it was not working when we last tested it.
latest as of sunday PM.
gychang
That looks SOOOO GREAT! And its not even that tall at around 63 inches. I may have to build it too! But let me ask a question: can i build it half height with only the opening at the bottom? I am not sure how these double horns work but wonder if building only half of the design would result in a well designed speaker... or does it have to have both horns top and bottom to sound best?
What will you be using for a tweetah? I always liked the cheap piezo with the B20 but i'm sure there are many other different flavors that will work well.
Godzilla
What will you be using for a tweetah? I always liked the cheap piezo with the B20 but i'm sure there are many other different flavors that will work well.
Godzilla
Godzilla said:That looks SOOOO GREAT! .. or does it have to have both horns top and bottom to sound best?
What will you be using for a tweetah? I always liked the cheap piezo with the B20 but i'm sure there are many other different flavors that will work well.
Godzilla
Godzilla: I am anticipating a great sound from the classic 8" Pioneer. Scott have designed double horn and not sure what effect it will have just with one horn.
I have been told by a reliable source, a tweeter from partsexpress
http://www.partsexpress.com/pe/pshowdetl.cfm?&Partnumber=270-045&CFID=3376432&CFTOKEN=83033797
will work well with 4uf capacitor on + side of the tweeter, that will result in crossing at 5KHz. when used with the Pioneer. No other crossover needed.
Is this correct?, I plan to try it later if I need more sparkle...
gychang
Attachments
Re: 8" Pioneer, build, the Chang variant
staple gun helps stick the polyfill in place. set it gentle so they only go halfway in.
gychang said:
Any help on the sound damping will be appreciated.
gychang
staple gun helps stick the polyfill in place. set it gentle so they only go halfway in.
Re: Re: 8" Pioneer, build, the Chang variant
thanks, will try it.
gychang
OzMikeH said:
staple gun helps stick the polyfill in place. set it gentle so they only go halfway in.
thanks, will try it.
gychang
I just noticed your back panel is 276 wide. Any particular reason you went this way instead of 240mm?
Are your sides 310 wide?
Are your sides 310 wide?
I would assume he used a full width back-panel with the side panels attached to the front face. Going to a width of 310mm with internal 276 would of course result in a completely different cabinet design. Lovely work BTW Greg.
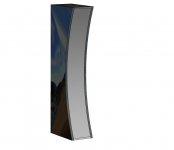
Jeff, yes, there's no reason why a version of this couldn't be done with a single flared vent rather than the doubled ones. The back-chamber would remain constant, it'd just need the vent retuning / sizing to work. I'll look into it when I get chance if you like. Greg is building to the v1.0 design. The v1.1 plans have a concave front designed for them by Ron, which loads the driver front & rear & provides an optimal wavefront -see attached render by Marce, (Marc, who only lives about 50 miles from where I'm based), who's planning on building a pair soon.
Jeff, yes, there's no reason why a version of this couldn't be done with a single flared vent rather than the doubled ones. The back-chamber would remain constant, it'd just need the vent retuning / sizing to work. I'll look into it when I get chance if you like. Greg is building to the v1.0 design. The v1.1 plans have a concave front designed for them by Ron, which loads the driver front & rear & provides an optimal wavefront -see attached render by Marce, (Marc, who only lives about 50 miles from where I'm based), who's planning on building a pair soon.
Attachments
I was talking about the sides being 310, I should have said deep not wide.
I'm building a pair too, I'll start in about 2 weeks. The curved front put the WAF through the roof so they beat the Bruce.
I'll make it with chopped corners - no voids. I will need a leg or something at the back to stand it up which will be a good place to conceal the wiring and connector. I might even lean them back a bit. I want to join the top, diagonals, back and bottom all with 22.5 degree cuts so the wood matches up nicely at the 45 degree intersections.
I need to figure out how to make the horn flare for the backmounted tweeter. It's looking like an unpleasant couple of days with the rasp and sandpaper at this stage.
I hope Greg doesn't mind me freeloading in his thread, this is his build after all.
It will be interesting to see where the Chang fits in the Frugal family tree. Calhoun's mutant half-brother the heart of a Pioneer and super powers from the gamma rays leaking out from under Ron's hat, able to leap tall wallets in a single bound... Man, I need more sleep.
The Spawn range is going to come in for a bit of reorganising over the next month or so. These boxes are the direction the BVRs are now going in, though the legacy types will probably continue for those who like the aesthetics. I'll work on it when I get time. I need to get the dimensions over to Dave & Ron later today actually for the smaller two boxes.
OzMikeH said:I was talking about the sides being 310, I should have said deep not wide.
I'm building a pair too, I'll start in about 2 weeks. The curved front put the WAF through the roof so they beat the Bruce.
It will be interesting to see where the Chang fits in the Frugal family tree. Calhoun's mutant half-brother the heart of a Pioneer and super powers from the gamma rays leaking out from under Ron's hat, able to leap tall wallets in a single bound... Man, I need more sleep.
I followed the dimensions put up by Scott and Dave on the original Chang plan, I used the sides at 310mm deep. Ron's idea of curve appeal is indeed an additional twist.
I am hopeful the Chang makes it into the family tree. Simplicity of the build is very attractive to start with.
gychang
Pioneer and super powers from the gamma rays leaking out from under Ron's hat
Gee, i hope not!
All the effect is simply a focused array with a single driver at a given BW.
ron
Gee, i hope not!
All the effect is simply a focused array with a single driver at a given BW.
ron
gychang said:
I am hopeful the Chang makes it into the family tree. Simplicity of the build is very attractive to start with.
gychang
A weary attempt at humour Ron, You have to admint it does more than it appears to at first glance.
I was all psyched up for complicated cuts in the Bruce, then this comes along with such a simple, smart design. Fortunately it's very flexible so I can still make life hard for myself.
Someone used the work synergistic for one of the earlier variants - this is even more so with the mouth integration.
Stuffing Matereial
Not sure if you will be able to find it, but, there is a new type off stuffing I ran into. It is rolled furnace filter. Generally used in industrial or building maintenance. The roll found is about 1" thick. This stuffing looks like it would breath better than acoustistuff, or foam, and would layer more evenly than polyfill. Not sure where to start looking for it, but would try the hardware store first. It may be expensive, but so far, minor testing, it works well. The material reminds me of a cross between the fiberglass blankets and sponge-ish cotton.
Beautifull box by the way
Re: Stuffing Matereial
brand name by any chance?
gychang
zayne742 said:It is rolled furnace filter. Generally used in industrial or building maintenance. The roll found is about 1" thick.
brand name by any chance?
gychang
Will find out, but in the meantime.
http://www.filtersusa.com/results.cfm?categoryid=22
http://www.unclejoes.com/furnace_filters_cut_to_fit.htm
It is just plain cut to fit filter. The style given to me has a tacky blue side to it, hepa for hospital use. But, it seems to work great. What is nice, not only is it consistent, but you can cut panels the same size to match cabinets, and if making a MLTL, easily weighed to attain the correct lbs. per sq. in.
zayne742 said:Will find out, but in the meantime.
http://www.filtersusa.com/results.cfm?categoryid=22
http://www.unclejoes.com/furnace_filters_cut_to_fit.htm
It is just plain cut to fit filter. The style given to me has a tacky blue side to it, hepa for hospital use. But, it seems to work great. What is nice, not only is it consistent, but you can cut panels the same size to match cabinets, and if making a MLTL, easily weighed to attain the correct lbs. per sq. in.
great, thanks.
gychang
I doubt it'd go straight in, but there's no reason why one couldn't be designed for it. I'm snowed under with work at present, but I'll do my best to look into it in the near future.
Hi Gychang!
I am curious how you feel about the sound of the B20 in this new cabinet. As for the tweeter, the one you reference is probably fine. I may need to buy a pair to test with my current setup so we can compare notes on the overall sound of these cheap but cheerful projects. I like the B20 running full out with the piezo on top, but cutting a little deeper down into the B20s response may not be such a bad idea. This may be the best way to take classic components and bring them up to modern standards. The cabinet can be key and the way it enhances the sound will need description in loving detail when you get a chance.
Thanks,
Godzilla
PS, I do feel you will want a tweeter with the B20.
- Status
- Not open for further replies.
- Home
- Loudspeakers
- Full Range
- Pioneer 8" build, the Chang variant