Tubelab SE with 45's and a 5U4. Output transformers are electra-print and power transformer is an Edcor XPWR131-120.
Where did you get the case? I am in SoCal as well. Thanks!
Abe
Last edited:
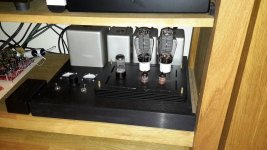
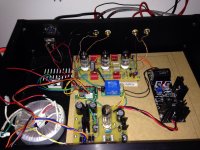
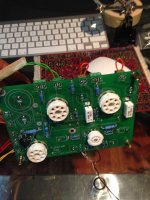
This thread has been kind of quiet lately, so I thought I'd post some pictures of my Tubelab SE (From the inside!)
I changed my 300B output tubes from Valve Art to Sovtek and liked the difference. However, I monitor the temperature of the filament regulator heatsink (it was always undersized) and the Sovteks must draw more current. The temperature after the tube change was much higher. After about an hour, the heatsink with the Valve Arts would be about 120F. With the Sovteks the temperature would go as high as 135F~140F. The regulator would shut down without an external cooling fan (I already have internal fans).
So, I needed to upgrade my heatsink. Here is a photo of the heatsink before the upgrade. It was a small heatsink scavenged from a PC motherboard Southbridge chip that was bolted on with the original heatsinks from the BOM. My PCB is reverse populated and mounted flush to the top of my case, hence the tight space. This was not enough cooling for any tubes, so shortly after this photo I added another internal fan blowing directly on this heatsink (zip tied in blowing across instead of blowing down onto the fins).

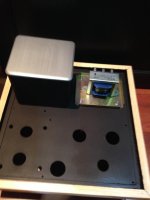
Here are the two devices that need cooling. I have removed both heatsinks, and bent the leads as far as I dared.

This is the new heatsink (also scavenged from an old PC). This one has much better and larger fins. I had to remove the lower left fin to allow clearance for the nearby capacitor.

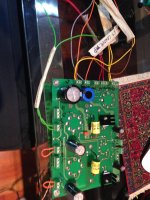
Heatsink is now mounted. I removed more fins to allow the bolts and nuts room.

This is the tiny fan (which is also extremely quiet). It is made by Noctua. I was able to fit it directly to the heatsink and bolt it down with self-tapping screws. It is touching the capacitor here b/c I haven't screwed it down yet. In real life it's got about 1/8" clearance.

I also changed the rubber feet the amp rests on, which allowed more airflow to my bottom mounted fan. The previous setup only lifted the amp up enough to barely be able to pick it up with fingertips. I added Sorbothene isolation feet which gave an extra 1/2" clearance.
After running for about an hour with the Sovtek tubes, the new heatsinks temperature was around 85~86F! This was a huge improvement, and will hopefully extend the life of the amp.
I changed my 300B output tubes from Valve Art to Sovtek and liked the difference. However, I monitor the temperature of the filament regulator heatsink (it was always undersized) and the Sovteks must draw more current. The temperature after the tube change was much higher. After about an hour, the heatsink with the Valve Arts would be about 120F. With the Sovteks the temperature would go as high as 135F~140F. The regulator would shut down without an external cooling fan (I already have internal fans).
So, I needed to upgrade my heatsink. Here is a photo of the heatsink before the upgrade. It was a small heatsink scavenged from a PC motherboard Southbridge chip that was bolted on with the original heatsinks from the BOM. My PCB is reverse populated and mounted flush to the top of my case, hence the tight space. This was not enough cooling for any tubes, so shortly after this photo I added another internal fan blowing directly on this heatsink (zip tied in blowing across instead of blowing down onto the fins).
Here are the two devices that need cooling. I have removed both heatsinks, and bent the leads as far as I dared.
This is the new heatsink (also scavenged from an old PC). This one has much better and larger fins. I had to remove the lower left fin to allow clearance for the nearby capacitor.
Heatsink is now mounted. I removed more fins to allow the bolts and nuts room.
This is the tiny fan (which is also extremely quiet). It is made by Noctua. I was able to fit it directly to the heatsink and bolt it down with self-tapping screws. It is touching the capacitor here b/c I haven't screwed it down yet. In real life it's got about 1/8" clearance.
I also changed the rubber feet the amp rests on, which allowed more airflow to my bottom mounted fan. The previous setup only lifted the amp up enough to barely be able to pick it up with fingertips. I added Sorbothene isolation feet which gave an extra 1/2" clearance.
After running for about an hour with the Sovtek tubes, the new heatsinks temperature was around 85~86F! This was a huge improvement, and will hopefully extend the life of the amp.

Why not just use a bigger heatsink?
I should have taken an overview shot. That is physically the biggest heastink I could fit. It's inside my case, which is about 3" tall.
My SE build.
Looks good! I really like the 2 knobs, are they built or bought?
They're bought but used from my SSE. I've got a couple of new thinner knurled items for this one which are more fitting for their position.

After almost a year and a half I finsihed my TSE.
Very satisfied with the result 😀
A lot of thanks to George that gave us the TSE, boywonder that help me all the way till the finished product and all other members here 🙂
Very satisfied with the result 😀
A lot of thanks to George that gave us the TSE, boywonder that help me all the way till the finished product and all other members here 🙂
An externally hosted image should be here but it was not working when we last tested it.
Ranhaber,
Nice looking build!
Looks like you have done your power supply like Boywonder - that is in a separate chassis.
The OPTs are also same - James... should be good. 🙂
Let me see if I can guess the other components w/o going back to your build thread:
- Sovtek 5AR4 rectifier
- Raytheon 5842
- Psvane 300B
I am slowly collecting the parts for a TSE build... but some projects take longer than expected (even starting). 🙂
Correct on all guesses!
As I said, I loved boywonder amp so I decided to build a similar one. 🙂
As I said, I loved boywonder amp so I decided to build a similar one. 🙂
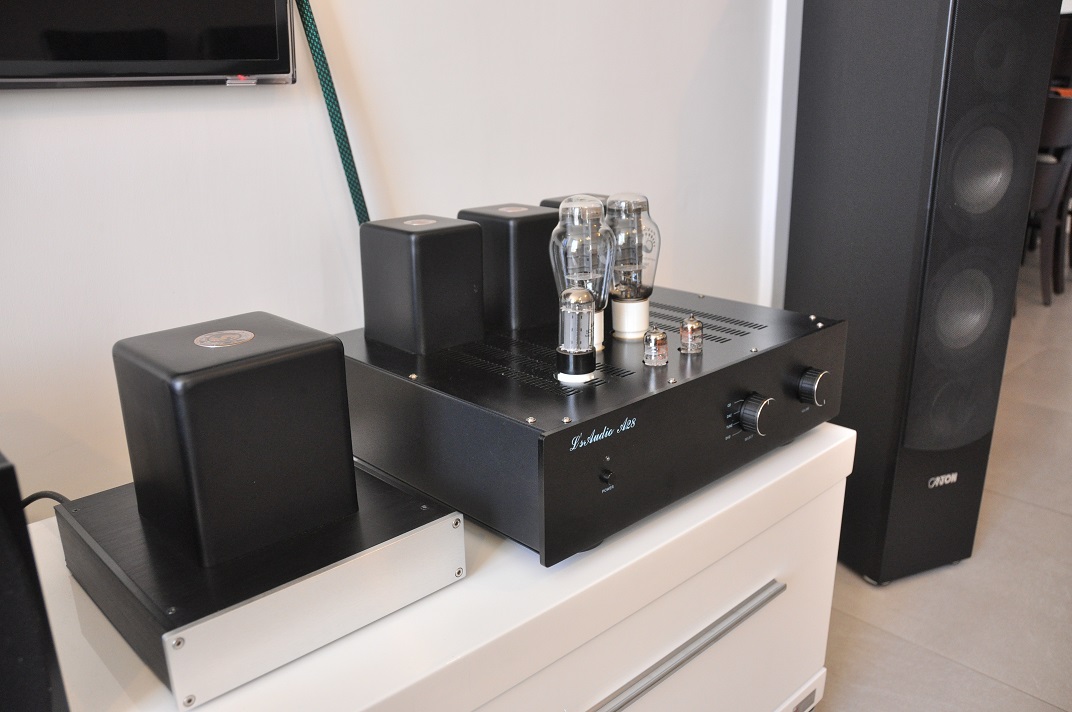
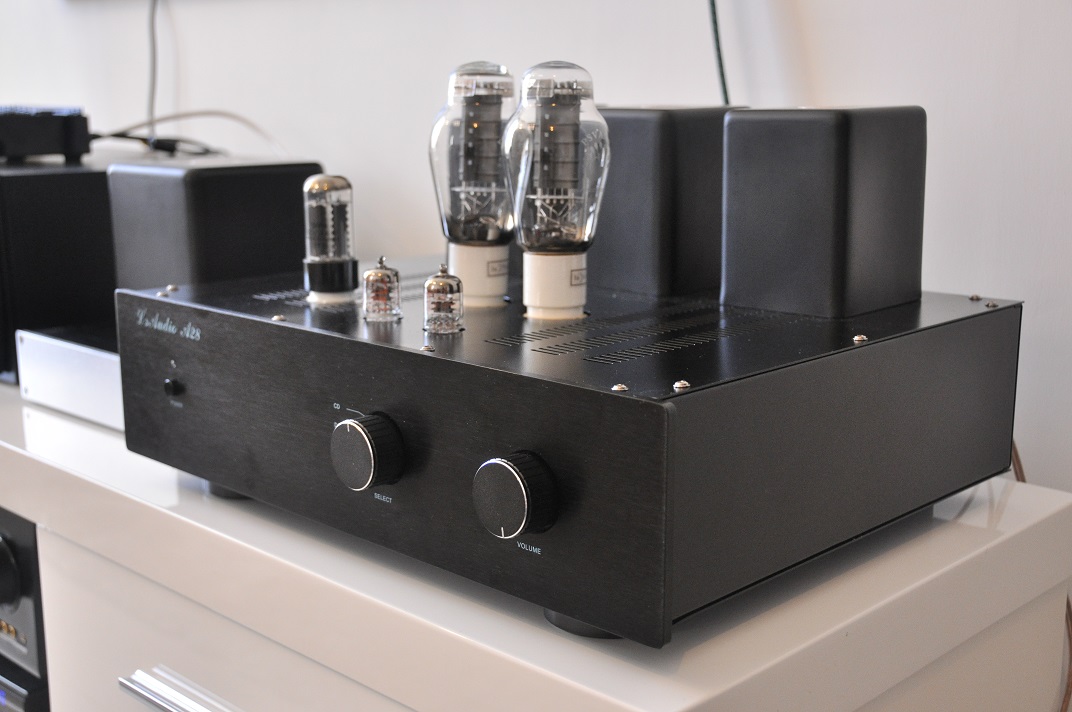
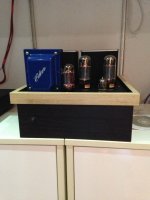
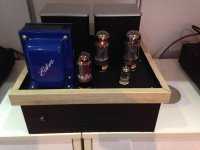
Finally posting picture of my TSE running 380V 68 mA on 5k primaries.
It is basically finished - glass shield for tubes is not ordered yet, text that should accompany switches is missing as well 🙂
There will be some internal changes in future, as I will probably switch my output tubes to EML 300bxls in future biasing them at 450V 80-90 mA, so B+ supply capacitors will have to be upgraded from 450V to 500V parts.
Attachments
Finally posting picture of my TSE running 380V 68 mA on 5k primaries.
It is basically finished - glass shield for tubes is not ordered yet, text that should accompany switches is missing as well 🙂
There will be some internal changes in future, as I will probably switch my output tubes to EML 300bxls in future biasing them at 450V 80-90 mA, so B+ supply capacitors will have to be upgraded from 450V to 500V parts.
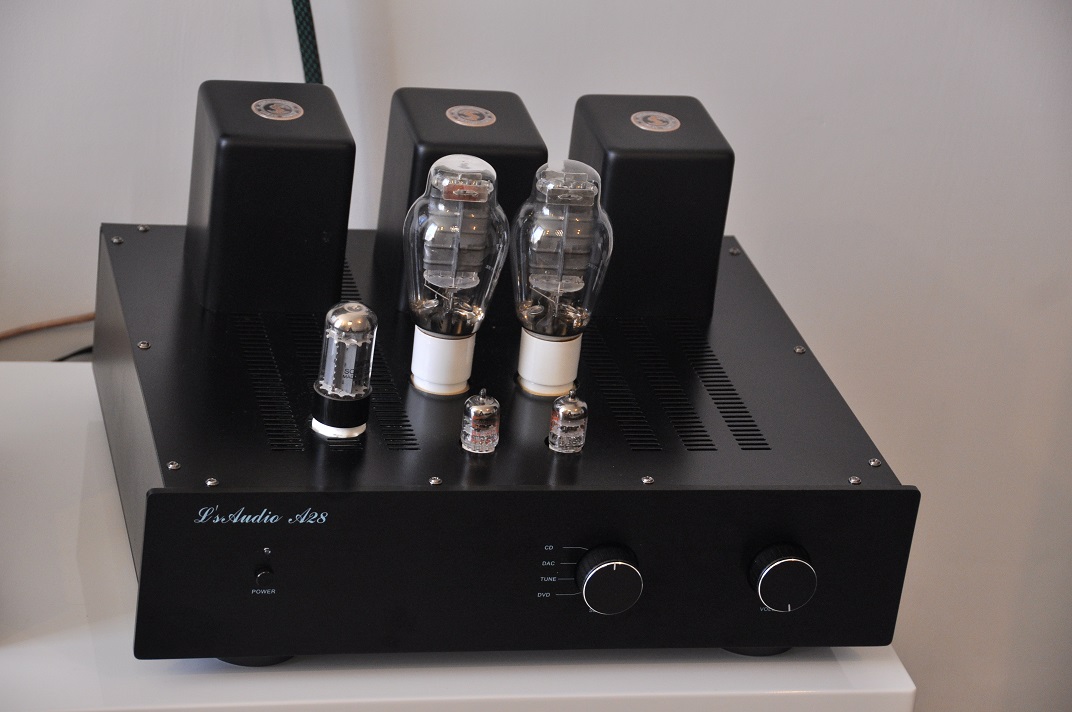
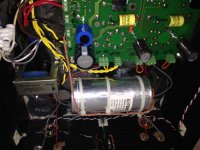
Nice! Tell us about the chassis construction, specifically the finned stuff under the tubes........
It is rather simple construction - I wanted slim chassis and good passive ventilation for board, so I bought chassis from Modushop, model 1NSLA01350, 435x350x40mm.
I milled out top side so that I could mount TSE board 10mm above chassis with sufficient air flow around it and all holes that were necessary to mount James iron and other hardware.
Finned part is radiator/cover, made of 2mm thick anodized aluminium plates, mounted on M4 bolts with nuts as spacers between them. Top plate is milled with holes for tube sockets, 300B bias regulation and ventilation - it is easy to remove it and connect meters to board if necessary. Plates below it are just frame with four holes to be mounted on M4 bolts. They are covering board and ensuring flow of air.
There is not much to write about wiring mess inside chassis - everything is pretty basic - 2x30uF additional PSU caps, 10K TOCOS Cosmos RV24 potentiometer, two bias meters (chinese 100mV voltmeters with shunts), APEM 631 H/2 SPST on/off switch and APEM 646 H/2 DPDT on/on selector switch for digital/analogue inputs.
Amp is dead silent at max volume. 😀
Last edited:
Good stuff zxx222. The finned part is a clever bit of construction to get better airflow.
Your use of the phrase reminded me of "Dead Silence" - a song by Obituary. 🙂
Amp is dead silent at max volume. 😀
Your use of the phrase reminded me of "Dead Silence" - a song by Obituary. 🙂
This is my SSE....
Hi all,
This is my Tubelab SSE, strictly suggested parts. Triode mode no feedback. 6L6GC at the output stage and 12AT7 driver. Edcor transformers XSE 8-15-5K and XPWR059 for power delivering 375-375 volts AC. Only tube rectified. Really awesome power amp. PRAT and rich soundstage. I sometimes feel it is a solid state amp...😕 because it has plenty of power, or gets really loud. My actual preamp is a clone based Erno Boberly design class A with matched 2SK170 and 2SJ74 with plenty of gain. The combo is definitely outstanding. The phono preamp is a kit from Roy Mottram, the PH14 a perfect match for Denon DL110. The digital side is based in a Naim Unitiqute and a DAC based in Oliver Red Baron 4 and TDA1541A, 6N2P tube output stage an Ian Canada I2S to PCM. Everything with all bells in form of shunt regulated PSU everywhere needed, low voltages and even B+.
Just my 2 cents..
Jorge
Attachments
-
 IMG_3492.jpg659.6 KB · Views: 489
 -
 IMG_3481.jpg324.9 KB · Views: 437
 -
 IMG_3478.jpg489.7 KB · Views: 448
 -
 IMG_3477.jpg484.6 KB · Views: 546
 -
 IMG_3476.jpg617 KB · Views: 521
 -
 IMG_3443.jpg546.8 KB · Views: 405
 -
 IMG_3442.jpg616.6 KB · Views: 448
 -
 IMG_3441.jpg372.1 KB · Views: 760
 -
 IMG_3493.jpg682.5 KB · Views: 520
- Home
- More Vendors...
- Tubelab
- Pictures of your Tubelab amp