Argghhh!
I just typed out the longest and most influential post in DIYA history 🙄 and I accidental shut the Firefox tab whilst clearing unused windows - what an idiot!
I'll try and build up the strength to redo it.
I just typed out the longest and most influential post in DIYA history 🙄 and I accidental shut the Firefox tab whilst clearing unused windows - what an idiot!
I'll try and build up the strength to redo it.
Read up the last couple pages, it's coming along real nice 😉
Pls do motivate us(me) by finishing up this project b4 summer, I want to get a little project of my own starting too.
Pls do motivate us(me) by finishing up this project b4 summer, I want to get a little project of my own starting too.
sqlkev said:Read up the last couple pages, it's coming along real nice 😉
Pls do motivate us(me) by finishing up this project b4 summer, I want to get a little project of my own starting too.
Thanks.
But motive you?
Its me that needs the kick up the backside, everyone else has done 2 or 3 projects in the time I've been 'playing' and it still isn't finished 🙂
Never ever again am I doing anything like this again, all you'll see from me after this is 2-way bookshelfs

Think of it this way, after dragging those hug cabs in and out of the garage and sanding, at least you'll be more fit than some of us. 😉
I don't mind my beer belly so much, so I'll stick to doing dipoles and smaller bookshelves
😱
I don't mind my beer belly so much, so I'll stick to doing dipoles and smaller bookshelves
😱
ShinOBIWAN said:
Thanks.
But motive you?
Its me that needs the kick up the backside, everyone else has done 2 or 3 projects in the time I've been 'playing' and it still isn't finished 🙂
Never ever again am I doing anything like this again, all you'll see from me after this is 2-way bookshelfs
Naw.. There may be some people that have, but I'd bet most of us have something approaching a perpetual work-in-progress. Heck, I've done precious little beyond cutting some holes in a "baffle" (if you can call it that), and mounting some drivers (..well recently anyway). Most of my DIY time is stuck constructing a matress (of all things), and I don't have much time for that. Instead my time is directed at writing a prof. book or sitting on my @ss watching TV 🙄 (me thinks I'm turning into a vidiot.)
BTW, the new dayton drivers seem like a really good choice.
I decided to try and attempt spraying one of the sat's just to see what how the colours blended - it was a mistake as the frosty weather and damp air has caused the finish to cloud. No big deal but I'll have to sand it back a little and redo. Anyway here's what the rather rough finish looks like:
I like it and I don't. I'm pretty sure once its all laquered up and polish to a high gloss finish it will look much better. But at the moment I'm a little underwhelmed, although that's probably a good thing after the last 'over the top' pearlescent finish which looked great but proved difficult to live with. This ones definitely more subtle but I think it will grow on me once I lay down some decent coats in the right conditions.
An externally hosted image should be here but it was not working when we last tested it.
An externally hosted image should be here but it was not working when we last tested it.
An externally hosted image should be here but it was not working when we last tested it.
I like it and I don't. I'm pretty sure once its all laquered up and polish to a high gloss finish it will look much better. But at the moment I'm a little underwhelmed, although that's probably a good thing after the last 'over the top' pearlescent finish which looked great but proved difficult to live with. This ones definitely more subtle but I think it will grow on me once I lay down some decent coats in the right conditions.
m0tion said:Pictures don't work?
The server that I host the images on is currently going through a move to new hardware. The server will be back up later today.
I've fixed up the damage caused by moisture getting trapped in the paint layers and also applied the rough gloss coats but it still needs flatting back and polishing out to a mirror finish. You can still see that the gloss retention is very high with 2pack acrylic clearcoats, its the first time I've used this particular brand I'm happy with results even if the orange peel effect seems rather more prominant (I may have not had my gun setup properly and layed the coats on too thick) but as I've said, this will be sorted out after the coats have had a day or so to harden.
An externally hosted image should be here but it was not working when we last tested it.
An externally hosted image should be here but it was not working when we last tested it.
Black laquer is a "bi-atch" to get right. If its an oil-based laquer then I'd give at least a week for hardening. (..can't even begin to describe the pile of dung I had after not letting the laquer harden on one project.)
I'm not sure I like the silver and black look, but then I'm not sure I don't like it either.
I think the thing thats "throwing" me the most is the lack of a crisp edge for the silver part of the baffle. That attribute seems fine with the black, but doesn't seem quite right for the silver. (..ehh, what do I know? I'm probably just psycho-sympathetically inhaling your laquer fumes. )
sorry if I missed it, but what did you coat before spraying?
and are you using automotive paint?
looks nice so far
and are you using automotive paint?
looks nice so far
ScottG said:Black laquer is a "bi-atch" to get right. If its an oil-based laquer then I'd give at least a week for hardening. (..can't even begin to describe the pile of dung I had after not letting the laquer harden on one project.)
Hi Scott
The finish is an Acrylic with hardener/activator type, more commonly know as 2 pack in the automotive trade. Compared to the cellulose laquer I used with the old Perceives this one dries much faster and offers a higher 'wet' look. Its about 24 hours after spraying until you can handle it and around 7 days before its completely hardened. The instructions on the tin suggest that you begin working the finish flat no later than 2 days after spraying for best results.
The black will look pretty stunning once its completely finished. Something like this but with more contrast intensity to the reflections thanks to the darker colour:
An externally hosted image should be here but it was not working when we last tested it.
I'll sympathise with you on the 'paint jobs gone bad' thing. I wrecked some of my previous work from carelessness:
An externally hosted image should be here but it was not working when we last tested it.
I'm not sure I like the silver and black look, but then I'm not sure I don't like it either.
I think the thing thats "throwing" me the most is the lack of a crisp edge for the silver part of the baffle. That attribute seems fine with the black, but doesn't seem quite right for the silver. (..ehh, what do I know? I'm probably just psycho-sympathetically inhaling your laquer fumes. )
Same feelings here. Now that I've sprayed up the black section of the cabinet I definitely like that but the silver front looks a little cheap when combined with the black. The silver could look better once some laquer has been applied but I'm not so sure... hmmm. I'll be keeping the black but as for the silver - I may change that one.
Don't like that particular silver. Looks cheapish, but I think that's because of the speckled look. I certainly liked the conceptual design with the black/grey synergy.
A lavenderish/silver would look way cool perhaps: http://www.vikash.info/fto/gallery/images/side03_1280.jpg
A lavenderish/silver would look way cool perhaps: http://www.vikash.info/fto/gallery/images/side03_1280.jpg
looking good 🙂
nooo dont use the lilac/grey colour- thats what i want to spray my speakers in- although maybe something more bluey like the colour you can get new ferraris in http://www.swisscarsightings.com/ferrari/Ferrari 430 204.jpg
how about a gunmetal metallic grey? i sprayed some stuff up last year with a colour called rover stone grey metallic (http://www-student.lboro.ac.uk/~cdmw2/percieve.htm)>good name 😉 hehe> which would look really nice with the black rear section instead of the silver IMO
Vikash said:Don't like that particular silver. Looks cheapish, but I think that's because of the speckled look. I certainly liked the conceptual design with the black/grey synergy.
A lavenderish/silver would look way cool perhaps: http://www.vikash.info/fto/gallery/images/side03_1280.jpg
It does look rather poor. I might fall back on the pearl finish for sections where the silver was intended. If I use the black groundcoat for the entire enclosure and than combine the pearl in the the sections intended for the silver it would make for a chameleon look where for some angles the enclosures look entirely black and from others you see the definite paint lines between the two finished.
Here's a few shots the black ground coat with pearl finish to highlight the colour shifts, all photo's are of the same finish but the paint shifts through a number of colours:
An externally hosted image should be here but it was not working when we last tested it.
An externally hosted image should be here but it was not working when we last tested it.
An externally hosted image should be here but it was not working when we last tested it.
I'm getting to the point now where I'm ready to just listen to them. Swapping the colours around is great but very time consuming and it risks permanantly damaging the enclosures as there's only so many coats you can lay down before the finish never dries completely (I found that out the hard way before).
I think that I'm going to give the silver a miss and probably go back to the pearl. Hell, that paint cost me the best part of £300 so I'd better use right? 🙂
Shin, haven't you heard- Black is the new Black this season. 😉
Forget the fancy colours, black is perfect for those boxes. You have so many edges and planes, you'll get really nice highlights and reflections. Why ruin the sculptural effect with a garish boy racer colour scheme?
YMMV...😀
Forget the fancy colours, black is perfect for those boxes. You have so many edges and planes, you'll get really nice highlights and reflections. Why ruin the sculptural effect with a garish boy racer colour scheme?
YMMV...😀
pinkmouse said:Shin, haven't you heard- Black is the new Black this season. 😉
Forget the fancy colours, black is perfect for those boxes. You have so many edges and planes, you'll get really nice highlights and reflections. Why ruin the sculptural effect with a garish boy racer colour scheme?
YMMV...😀
Your forgetting that I'm 27 though Al. I'm at that point where I've almost got some taste but not quite there yet.
All black seems a little monolithic. I think it needs a 2 tone to break up the size the thing. I made them as small as I could but they're still large speakers and especially the depth.
Maybe I should have veneered afterall
Vikash said:A lavenderish/silver would look way cool perhaps: http://www.vikash.info/fto/gallery/images/side03_1280.jpg
lufbramatt said:looking good 🙂
nooo dont use the lilac/grey colour- thats what i want to spray my speakers in- although maybe something more bluey like the colour you can get new ferraris in http://www.swisscarsightings.com/ferrari/Ferrari 430 204.jpg
how about a gunmetal metallic grey? i sprayed some stuff up last year with a colour called rover stone grey metallic (http://www-student.lboro.ac.uk/~cdmw2/percieve.htm)>good name 😉 hehe> which would look really nice with the black rear section instead of the silver IMO
I much prefer the look of those to the silver that I have now. I particularly like Matts' gunmetal grey. Might have to check out a those two colours before deciding.
The Ferrari one looks disgusting IMO. Gorgeous car though - do you only drive it at weekends Matt? 😀
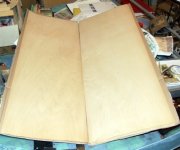
pinkmouse said:Well, I've got 16 sheets of some nice maple looking for a good project... 😉
Looks nice Al. Definitely veneering on my next project.
- Status
- Not open for further replies.
- Home
- Loudspeakers
- Multi-Way
- 'Perceive v2.0' Construction Diary